Smoked pulled beef sandwiches use a 3-5 lb beef chuck roast seasoned generously on all sides with steak seasoning (SPG-style works perfectly), smoked at 275°F until internal temperature reaches 165°F and exterior develops good bark and color, approximately 2.5-3.5 hours depending on size. Transfer to foil pan with 2 sliced sweet onions, 2 sprigs fresh rosemary, 3 sprigs fresh thyme, 1-1.5 cups beef stock, and 2 tablespoons butter. Cover tightly with foil and return to 275°F smoker, continuing to cook until beef reaches 205-210°F internal temperature and is probe tender, approximately 2-3 additional hours. Rest covered for 30 minutes, remove herb sprigs, then shred beef and mix thoroughly with caramelized onions and pan juices. Pile shredded beef and onions onto hoagie rolls, top with provolone cheese (hot beef melts it), and serve with au jus from the pan for dipping. These pulled beef sandwiches with au jus deliver smoky bark on tender, fall-apart beef with sweet caramelized onions and rich dipping sauce that rivals any French dip while offering deeper smoke flavor and more complex taste.
The whole process takes about 6-7 hours from start to finish. Spend 15 minutes seasoning the roast while the smoker preheats. Smoke for 2.5-3.5 hours to 165°F. Transfer to pan, add braising ingredients, cover, and cook another 2-3 hours to 210°F. Rest for 30 minutes covered. Shred and assemble sandwiches. The two-stage method ensures you get both smoke flavor from the initial smoke and tender, shreddable texture from the braise. The beef stock, butter, and aromatics create au jus that’s miles better than plain beef drippings.
Why Use Chuck Roast for Pulled Beef Sandwiches?
Chuck roast comes from the shoulder area of the cow, a heavily exercised muscle group that contains significant connective tissue and marbling. This tough cut requires long, slow cooking to break down collagen into gelatin, but the reward is incredibly tender, flavorful beef. The marbling throughout keeps the meat juicy during extended cooking while the collagen breakdown creates luxurious texture perfect for shredding.
The connective tissue in chuck roast is what makes it ideal for pulling. As the roast cooks past 200°F, the collagen melts completely, transforming tough, chewy meat into tender strands that pull apart easily. Leaner cuts like sirloin or round roasts don’t have enough connective tissue to create proper pulled texture. They become dry and stringy rather than moist and tender.
Chuck roast also has robust, beefy flavor that stands up to smoke and strong seasonings without being overpowered. More delicate cuts would taste only of smoke. The chuck’s deep beef flavor shines through the smoke ring, providing satisfying meatiness in every bite. The fat marbling bastes the meat from within during cooking, adding richness.
The size and shape of chuck roast work perfectly for this application. Most chuck roasts are 3-5 lbs, creating enough pulled beef for 6-8 substantial sandwiches. The relatively uniform thickness allows even cooking. Round roasts can be oddly shaped with thin and thick sections that cook unevenly. Chuck’s consistent shape makes temperature monitoring and timing more predictable.
What Temperature Should You Smoke Chuck Roast To?
Smoke chuck roast to 165°F internal temperature during the first stage for optimal bark development and smoke penetration. At 165°F, the exterior has spent enough time exposed to smoke to develop deep mahogany color and crusty bark. The meat has absorbed maximum smoke flavor during this phase. Going beyond 165°F before braising would continue drying the exterior without adding more smoke flavor since the meat stops absorbing smoke around 140-150°F.
The 165°F mark also represents when the roast is ready for braising. At this temperature, the collagen hasn’t broken down yet and the meat is still quite firm. This is perfect timing to introduce moisture through the beef stock braise. If you smoked all the way to 210°F without braising, the exterior would become overly dry and crusty while the interior might not reach proper tenderness evenly.
The second stage braises from 165°F to 205-210°F for probe tenderness. This 40-45 degree temperature range is where all the magic happens with tough cuts. Between 190-210°F, collagen breaks down into gelatin rapidly. The covered braise in beef stock provides moisture that prevents drying while the temperature climbs. The 210°F final target ensures complete collagen breakdown throughout the roast.
Probe tenderness matters as much as temperature. At 205-210°F, insert a probe or skewer into the thickest part – it should slide in and out like probing room temperature butter. If you feel significant resistance, continue cooking even if temperature reads 210°F. Some roasts need 215°F depending on connective tissue content. The combination of temperature plus probe tenderness indicates perfect doneness.
Why Braise Chuck Roast Instead of Smoking the Entire Time?
Braising from 165°F to 210°F in covered foil pan with liquid provides moisture and creates au jus that pure smoking can’t achieve. The covered environment traps steam and prevents the exterior from drying out during the final 40-45 degrees of cooking. If you continued smoking uncovered to 210°F, the exterior would become overly crusty and dried out before the interior reached proper tenderness.
The beef stock, butter, and aromatics in the braising liquid infuse the meat with additional flavor while creating the foundation for au jus. The onions caramelize in the beef fat and stock, developing sweet depth. The rosemary and thyme release essential oils into the liquid. The butter adds richness. All of these flavors penetrate the meat and concentrate in the pan juices, creating complex au jus that’s infinitely better than plain beef drippings.
The braising stage also cooks more efficiently than extended smoking. Covered braising transfers heat to the meat more effectively than open-air smoking. The 2-3 hour braise accomplishes what might take 4-5 hours of uncovered smoking. The moisture-rich environment allows the roast to reach 210°F without the exterior becoming inedible bark. You get tender, juicy interior with the smoked bark exterior intact.
Braising also ensures even cooking throughout the roast. Sometimes when smoking large roasts entirely uncovered, the exterior overcooks before the center near the bone reaches proper temperature. The covered braise creates even heat distribution, cooking the roast uniformly. Every part of the meat reaches 210°F probe tender, not just the exterior.
Should You Rest Beef 30 Minutes Before Shredding?
Resting the braised beef covered for 30 minutes allows juices to redistribute throughout the meat, making it moister and easier to shred. During cooking, heat drives juices toward the center. Cutting or shredding immediately causes significant juice loss as these concentrated juices flow out. The rest period lets juices flow back toward the edges through natural equilibration.
The 30-minute rest also allows the meat to cool slightly from its 210°F temperature. Trying to shred beef that’s 210°F is difficult and dangerous – the meat is too hot to handle comfortably and the texture is almost too tender, falling apart into mush rather than shredding into nice strands. After resting, the beef cools to around 180-190°F, a temperature that’s much safer to handle and shreds into better texture.
Keeping the pan covered during rest maintains temperature and prevents moisture loss. If you uncovered the roast, evaporative cooling would chill it faster and dry out the exposed surfaces. The covered rest creates a steamy environment that keeps everything hot and moist. The beef continues to tenderize slightly during rest as residual heat continues breaking down any remaining connective tissue.
The rest also allows the au jus to settle and separate slightly in the pan. The fat rises to the top while heavier liquid settles at the bottom. If you want to skim excess fat before serving, this separation makes it easier. However, many people leave all the fat since it carries flavor. The rest gives you options for adjusting the au jus consistency and richness.
Pulled Beef Sandwiches
Smoked chuck roast with caramelized onions & au jus
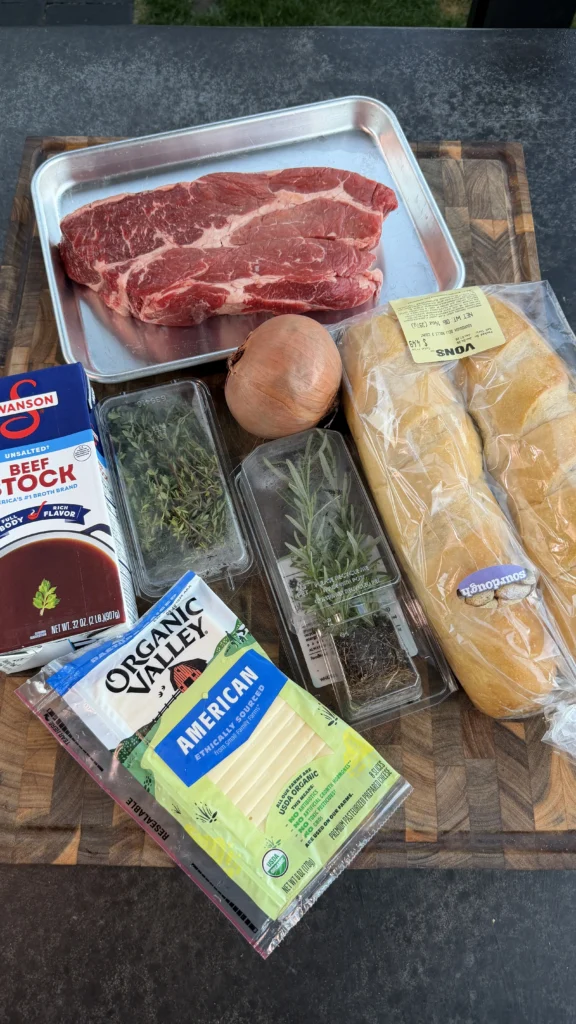
Ingredients
Beef
- 3-5 lb beef chuck roast
- Favorite steak seasoning (SPG-style works perfectly)
Braising Ingredients
- 2 sweet onions, sliced
- 2 sprigs fresh rosemary
- 3 sprigs fresh thyme
- 1-1½ cups beef stock
- 2 tablespoons butter
For Serving
- Hoagie rolls
- Provolone cheese (or cheese of choice)
The two-stage cooking method is essential for pulled beef sandwiches. Smoking to 165°F develops bark and smoke flavor without drying out the meat. Braising from 165°F to 210°F in beef stock with aromatics tenderizes the tough chuck roast while creating rich au jus. The covered braise retains all moisture and flavors that would evaporate during extended smoking.
Step-by-Step Instructions
Step 1: Season the Chuck Roast
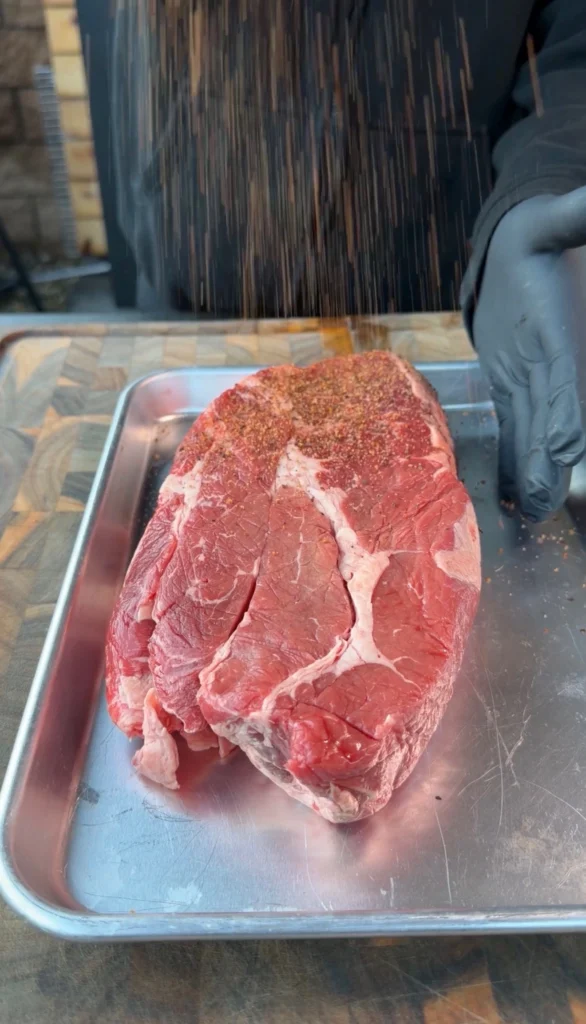
Remove a 3-5 lb beef chuck roast from refrigeration and packaging. Pat it completely dry on all surfaces using paper towels. Surface moisture prevents seasoning from adhering and creates steam during initial smoking rather than developing bark. The roast should feel dry to the touch on all sides.
Place the dried roast on a cutting board or large plate. Apply your favorite steak seasoning generously to all surfaces. SPG-style seasoning (salt, pepper, garlic) works perfectly since it enhances beef without competing with the smoke flavor and au jus. Cover the top, bottom, sides, and any exposed fat cap. Press the seasoning into the meat so it adheres firmly.
Use approximately 2-3 tablespoons total seasoning for a 4 lb roast, adjusting based on size. The beef should have visible coating of seasoning on all surfaces. Don’t skimp – the roast is large and needs heavy seasoning. No binder like oil or mustard is necessary. The meat’s natural moisture holds dry rub effectively.
Let the seasoned roast sit at room temperature for 20-30 minutes while the smoker preheats. This removes the refrigerator chill, promoting more even cooking. Cold roasts develop cold spots near the center that take longer to cook. Room temperature roasts cook more uniformly from exterior to interior.
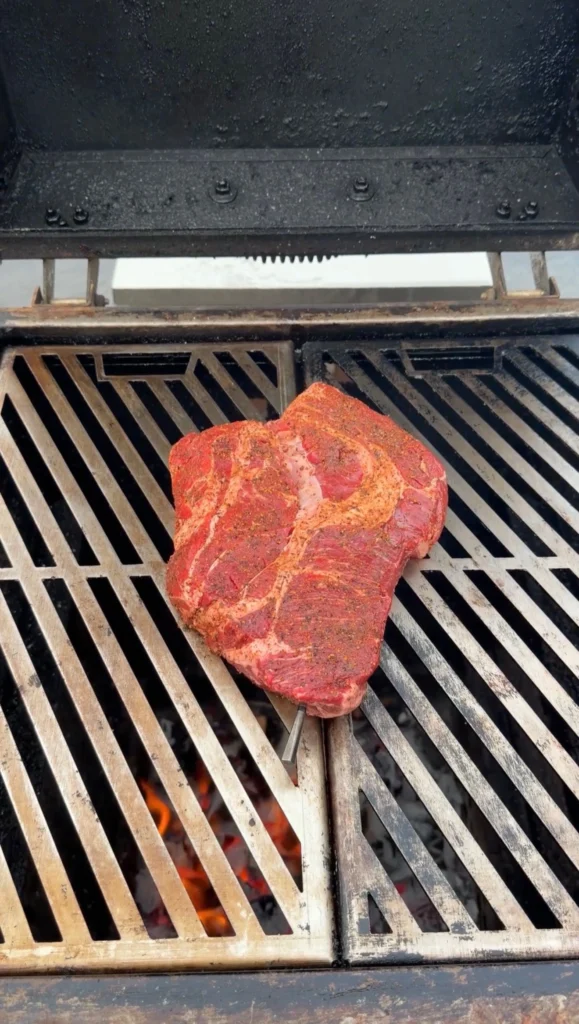
Step 2: Smoke to 165°F
Preheat your smoker to 275°F. This moderate temperature provides good balance between smoke absorption and reasonable cook time. Lower temps like 225°F would take much longer without significantly improving results. Higher temps would rush the smoke phase before proper bark develops. Add wood chunks – oak, hickory, or cherry all work excellently with beef.
Place the seasoned chuck roast directly on the smoker grates. Position it fat-side up if there’s a significant fat cap. The fat will render and baste the roast as it cooks. If there’s no fat cap or it’s minimal, positioning doesn’t matter much. Close the lid and smoke undisturbed for the first 90 minutes.
After 90 minutes, check the internal temperature. Insert an instant-read thermometer into the thickest part of the roast, avoiding any fat pockets. You’re looking for 165°F, but timing varies significantly based on roast size and thickness. A 3 lb roast might reach 165°F in 2.5 hours while a 5 lb roast could take 3.5 hours.
Continue smoking, checking temperature every 30 minutes once you pass the 2-hour mark. Pull the roast when it reaches 165°F internal temperature AND the exterior has developed good mahogany color with visible bark. The bark should be crusty and deeply colored. If you hit 165°F but bark looks pale, continue smoking another 15-30 minutes until color develops properly.
Step 3: Set Up the Braise
While the roast smokes toward 165°F, prepare the braising ingredients. Peel and slice 2 sweet onions. Cut them into thick slices about 1/4 inch – you want substantial pieces that will caramelize during braising, not thin slices that dissolve. Vidalia, Walla Walla, or any sweet onion variety works perfectly. Regular yellow onions work too but are slightly more pungent.
Get a disposable aluminum foil pan or deep roasting pan that will fit the roast with some room around the edges for the braising ingredients. The pan should be at least 2-3 inches deep to hold the liquid without spilling. Have 1-1.5 cups beef stock ready – use good quality beef stock or bone broth for best flavor. Low-sodium is preferred so you control salt levels.
Have 2 tablespoons butter, 2 sprigs fresh rosemary, and 3 sprigs fresh thyme ready. Fresh herbs are strongly preferred over dried since they need to infuse flavor over 2-3 hours of braising. Dried herbs would become muddy and bitter. The fresh herbs release essential oils slowly, providing clean herb flavor throughout the long braise.
When the roast reaches 165°F, remove it from the smoker using heavy gloves or tongs. The roast will be very hot. Carefully transfer it to the prepared foil pan. The bark may be delicate, so handle gently to avoid knocking off the crust you worked to develop.
Step 4: Add Braising Ingredients and Cover
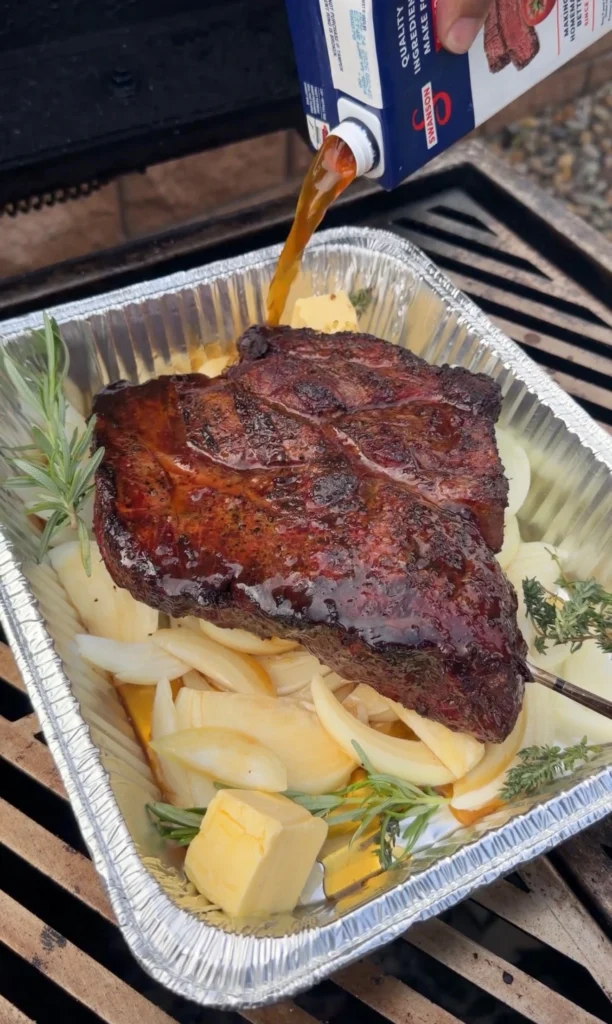
Arrange the sliced sweet onions around and under the beef in the pan. They should mostly be on the bottom and sides since they need contact with the liquid to caramelize properly. Some onions on top of the roast are fine – they’ll flavor the meat and the juices. Use all the onions, packing them into the pan around the beef.
Place the rosemary sprigs and thyme sprigs into the pan, tucking them between the beef and onions. You want the herbs in the liquid where they’ll steep like tea, releasing their aromatic oils into the au jus. Don’t put them on top of the roast where they might burn or dry out.
Pour 1-1.5 cups of beef stock into the pan. Pour it around the beef, not directly on top which would wash away the bark seasoning. The liquid should come about 1/3 to 1/2 of the way up the sides of the roast. You don’t want to submerge it – this is a braise, not a boil. The liquid creates steam in the covered environment while the exposed portions continue getting heat.
Add 2 tablespoons butter by placing pats on top of the roast or dropping them into the liquid. The butter will melt and blend into the au jus, adding richness. Cover the entire pan tightly with heavy-duty aluminum foil. Press the foil edges firmly against the pan rim to create a tight seal. This traps steam and moisture.
Step 5: Braise to 210°F Probe Tender
Return the covered pan to the 275°F smoker. The smoker acts as an oven at this point since the covered pan prevents additional smoke penetration. You could also transfer to a 275°F oven if preferred – results will be identical. The key is maintaining steady 275°F temperature for even, efficient braising.
Close the smoker lid and braise undisturbed for 1.5 hours. Don’t open the foil to check – you’ll release accumulated steam and extend cooking time. The roast needs uninterrupted moist heat to break down collagen properly. After 1.5 hours, carefully lift a corner of the foil and check internal temperature.
Insert a thermometer probe into the thickest part. You’re targeting 205-210°F. If the roast is at 190-195°F after 1.5 hours, re-cover and continue cooking. Check every 30 minutes from this point. Total braising time is typically 2-3 hours depending on roast size and how much connective tissue it contains.
When temperature reaches 205-210°F, do the probe tenderness test. Insert a probe or thin skewer into the thickest part. It should slide in and out smoothly with minimal resistance, like probing soft butter. If you feel any toughness or resistance, continue cooking even if temperature reads 210°F. Some roasts need 215°F. Probe tenderness is the final indicator of doneness.
Step 6: Rest, Shred, and Assemble Sandwiches
When the beef reaches 210°F and is probe tender, carefully remove the pan from the smoker. It will be extremely hot and full of liquid, so use oven mitts and move slowly. Place on a heat-safe surface. Keep the foil cover on and let rest for 30 minutes. The beef will stay hot and continue tenderizing during rest.
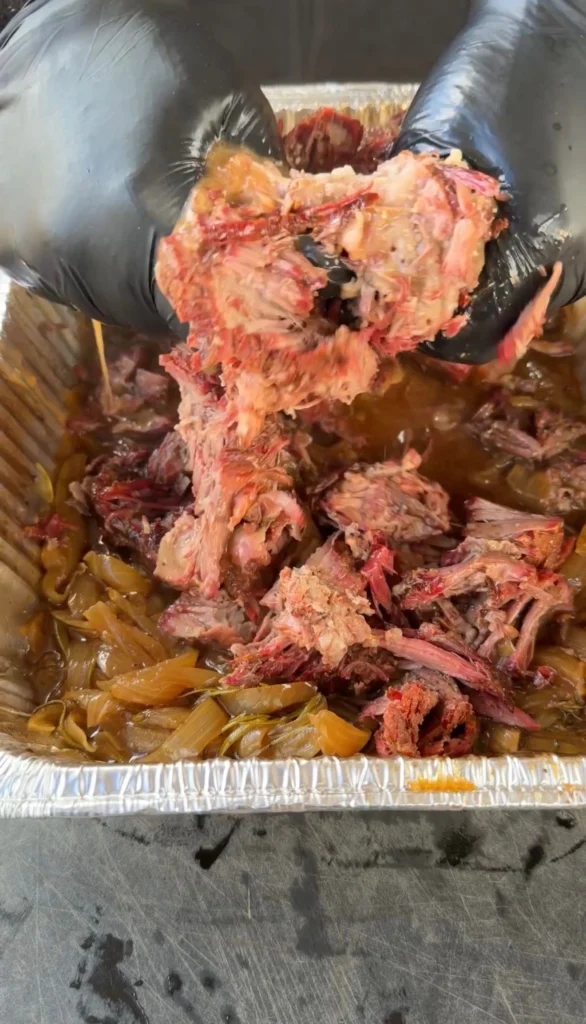
After 30 minutes, remove the foil cover. Carefully remove and discard the rosemary and thyme sprigs – they’ve released their flavor and are no longer needed. The onions should be deeply caramelized and falling apart. Using two forks or meat claws, shred the beef directly in the pan, pulling it into chunks and strands.
Mix the shredded beef thoroughly with the caramelized onions and all the pan juices. This coats every strand of beef with au jus and distributes the onions throughout. The beef should look moist and glossy, not dry. If the liquid seems thin, you can simmer it on a stovetop burner briefly to reduce and concentrate it.
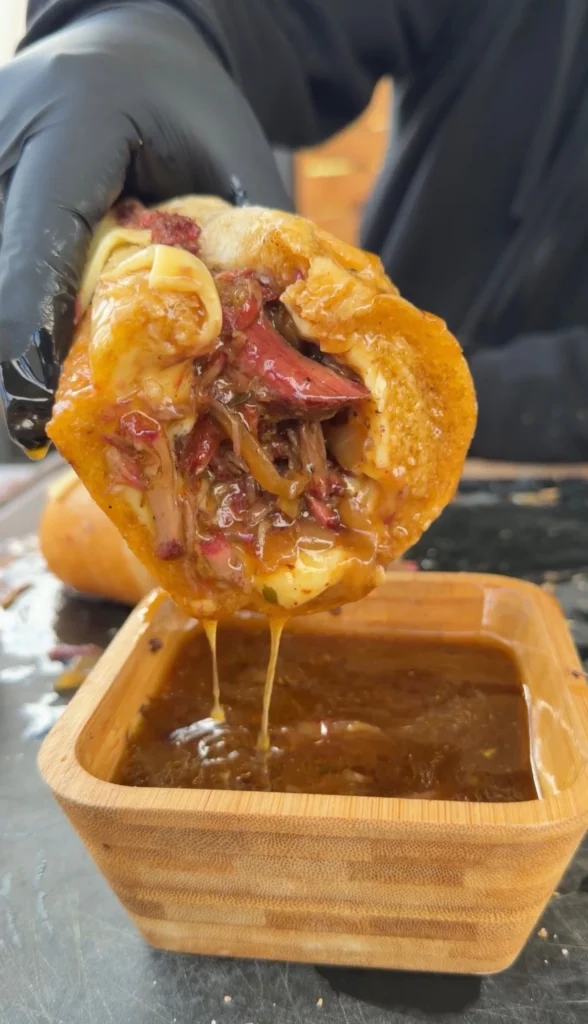
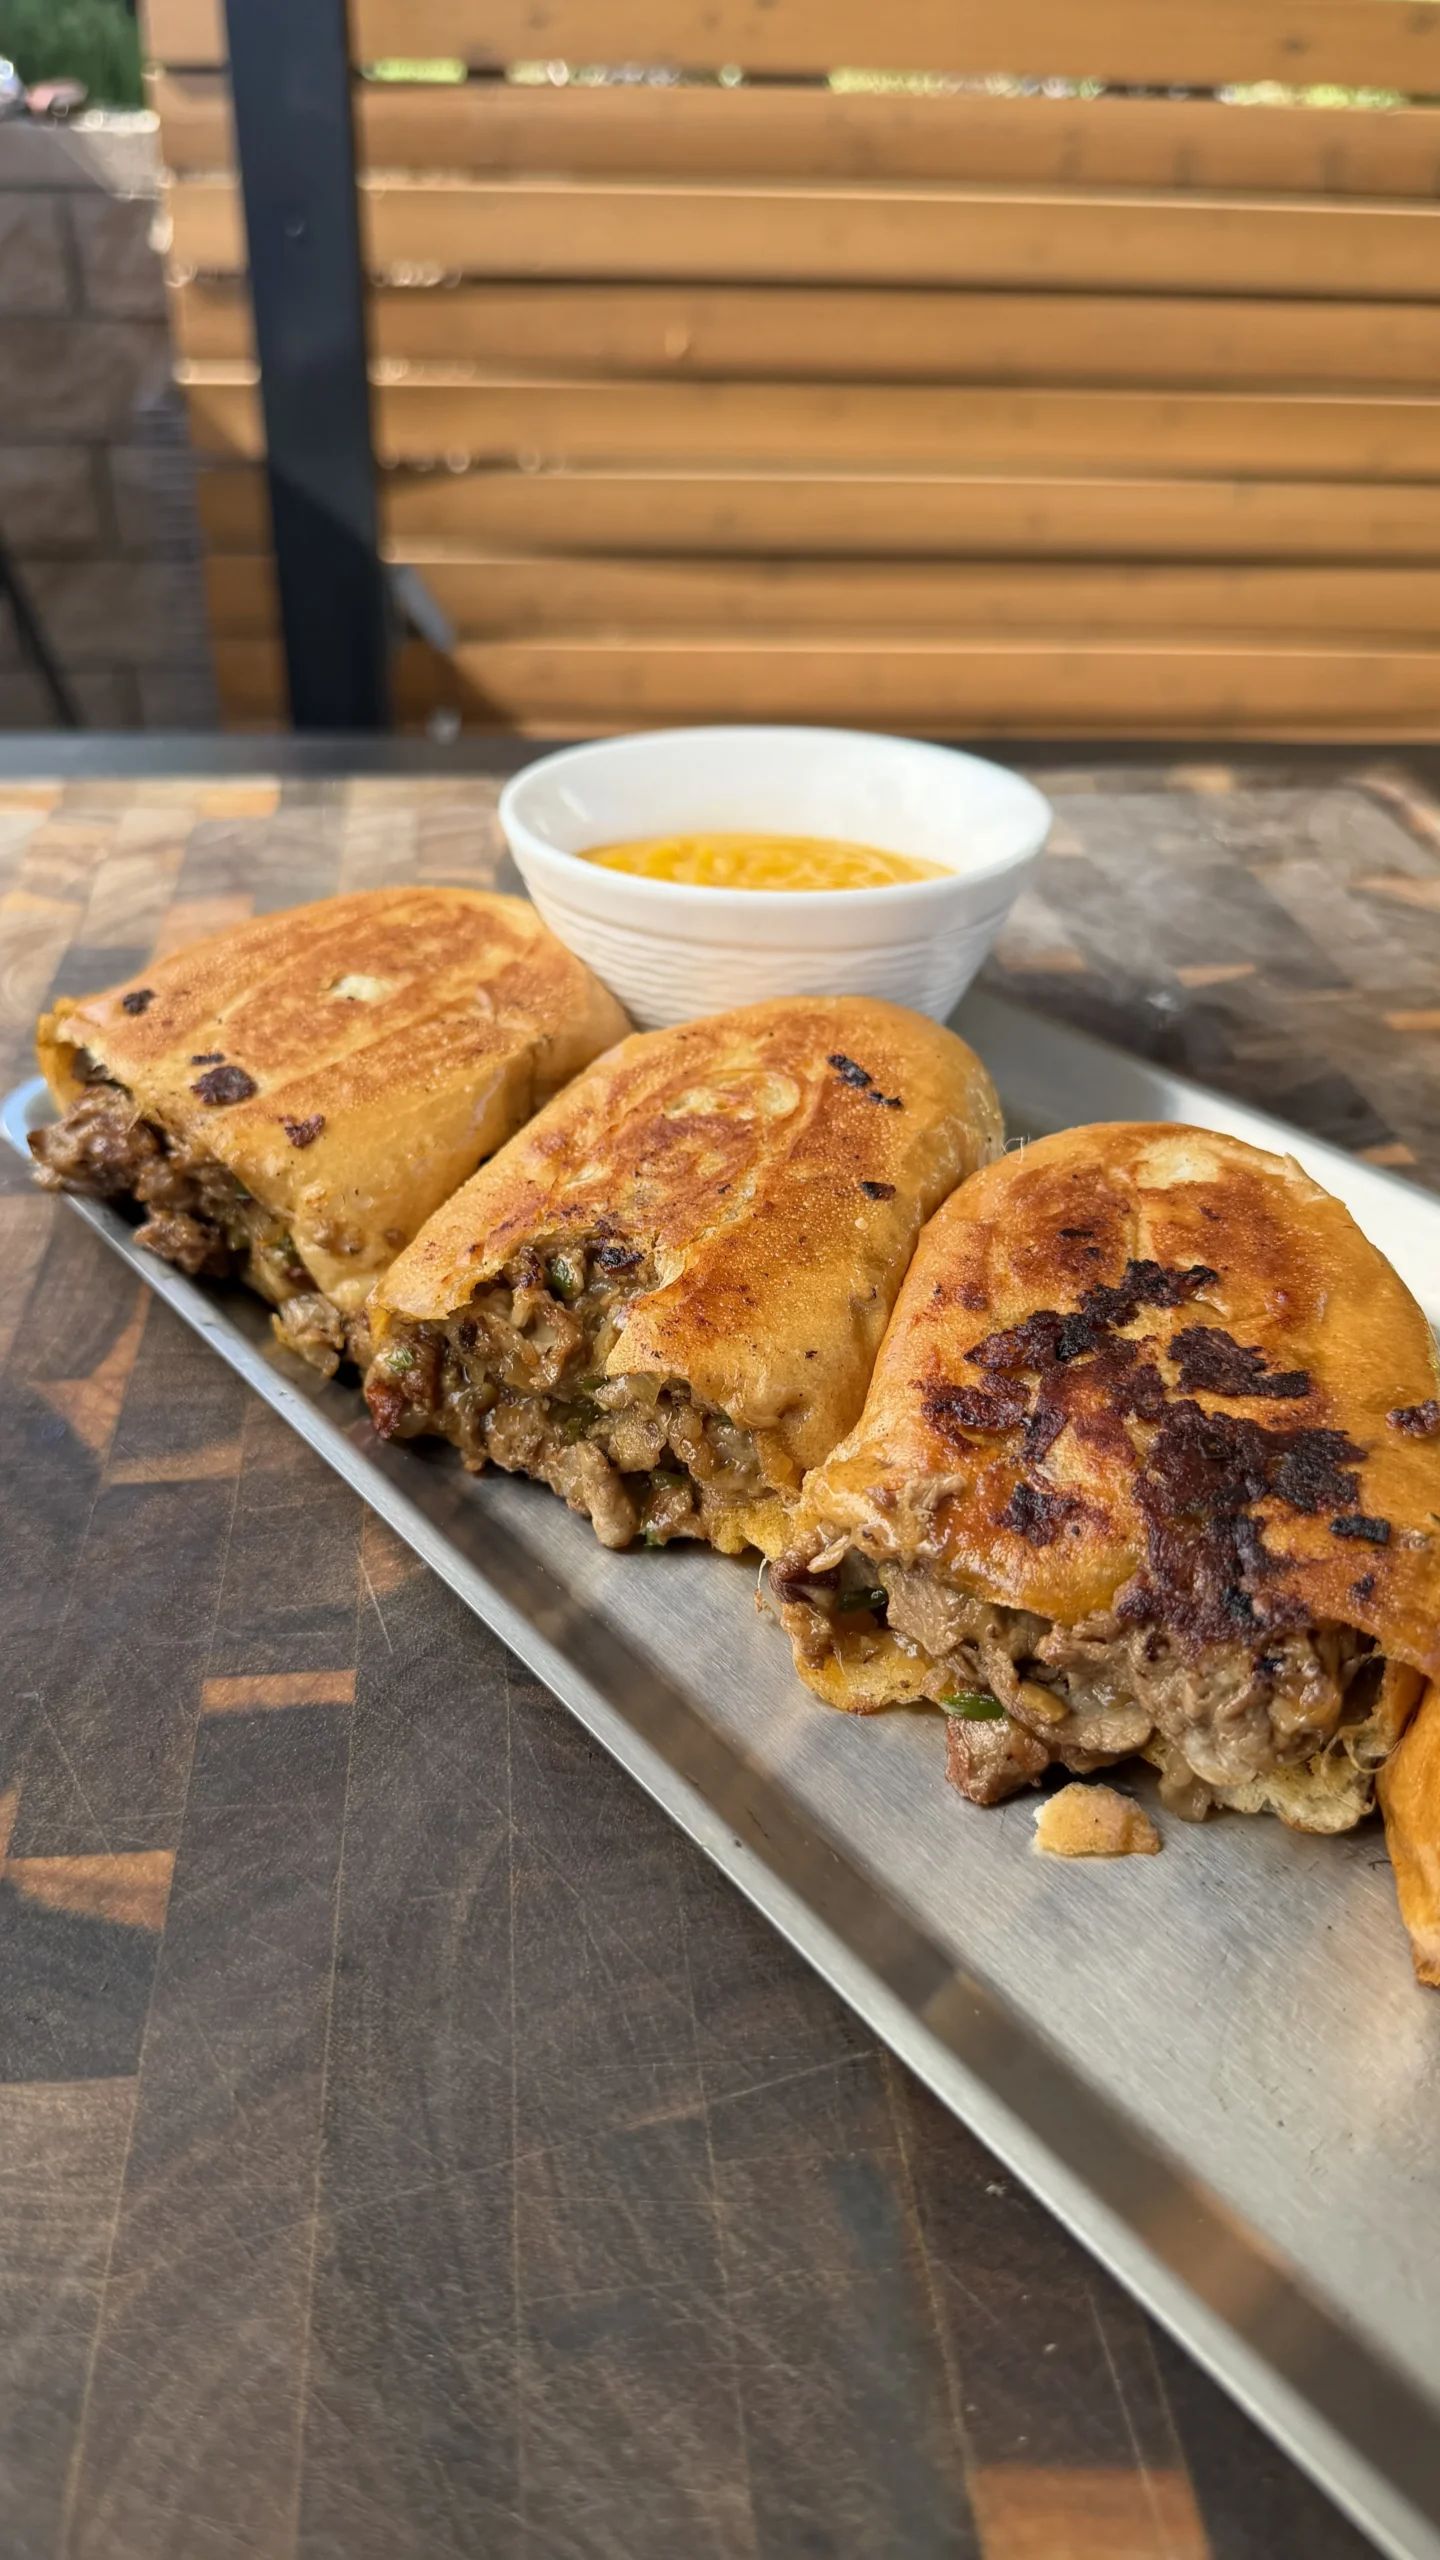
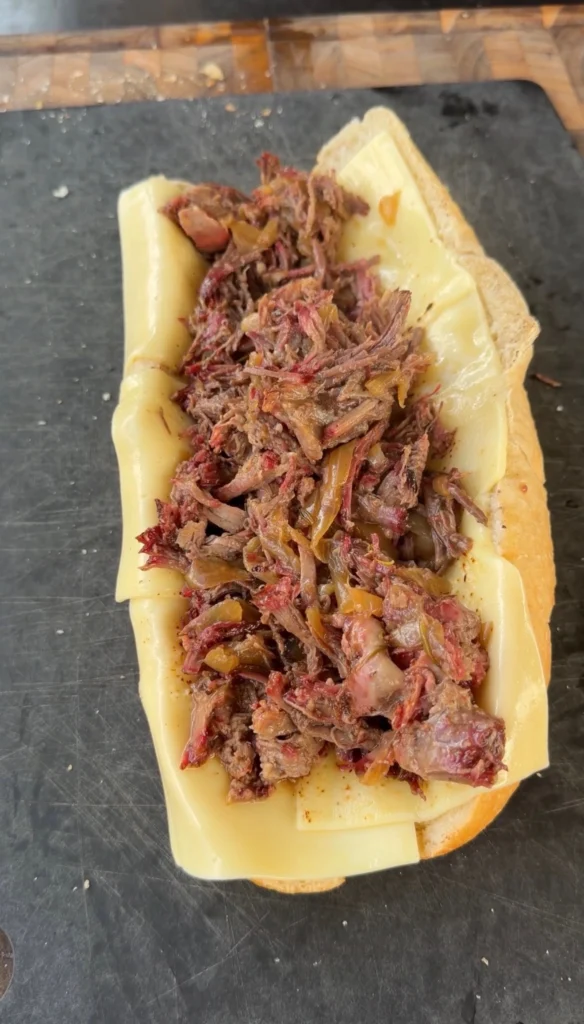
To build sandwiches, pile generous portions of the shredded beef and onions onto hoagie rolls. The beef should be heaping – these are substantial sandwiches. Top with sliced provolone cheese. The hot beef will melt the cheese without additional heating, creating gooey, melted topping. Alternatively, you can broil the assembled sandwiches briefly to melt cheese fully.
Serve the sandwiches immediately while hot with small bowls of the au jus on the side for dipping. Each bite of sandwich should be dunked into the rich au jus. The combination of smoky pulled beef, sweet caramelized onions, melted provolone, and savory au jus creates the ultimate beef sandwich experience.

Smoked Pulled Beef Sandwiches with Au Jus
Ingredients
Method
- Pat 3-5 lb chuck roast dry. Season generously on all sides with steak seasoning. No binder needed. Let sit at room temperature 20-30 minutes.
- Preheat smoker to 275°F. Add oak, hickory, or cherry wood. Place beef directly on grates and smoke until internal temperature reaches 165°F and exterior has good bark and color, about 2.5-3.5 hours depending on size.
- Transfer beef to foil pan. Add sliced sweet onions, rosemary sprigs, thyme sprigs, beef stock, and butter around beef. Cover pan tightly with foil.
- Return covered pan to 275°F smoker. Continue cooking until beef reaches 205-210°F internal and is probe tender (slides in like soft butter), about 2-3 more hours.
- Remove from smoker and rest covered 30 minutes. Remove and discard herb sprigs. Shred beef and mix thoroughly with caramelized onions and pan juices.
- Pile shredded beef and onions onto hoagie rolls. Top with provolone cheese (hot beef melts it). Serve with au jus from pan for dipping.
Notes
Tried this recipe?
Let us know how it was!Frequently Asked Questions
Can I use a different cut of beef instead of chuck roast?
Beef brisket flat or beef short ribs work as alternatives to chuck roast, though cooking times will vary. Brisket needs 8-10 hours total at 275°F to reach proper tenderness. Short ribs need 6-7 hours. Both cuts have sufficient connective tissue and marbling for pulled beef texture.
Avoid lean cuts like sirloin or round roasts. These don’t have enough connective tissue to create proper pulled texture and become dry and stringy rather than tender and shreddable. Chuck roast offers the best balance of availability, price, and results.
What if I don’t have a smoker?
Oven-roast the seasoned chuck at 275°F uncovered for 2.5-3.5 hours to 165°F, then braise covered to 210°F following the same method. You’ll miss the smoke flavor but can add 1 teaspoon liquid smoke to the beef stock for similar effect.
Alternatively, use a covered grill with indirect heat setup. Place roast on cool side, maintain 275°F, and follow the same timing. You can add wood chunks for smoke flavor even on a gas grill using a smoker box.
How do I know when chuck roast is done?
Chuck roast is done when it reaches 205-210°F internal temperature AND passes the probe tenderness test. Insert a probe or skewer into the thickest part – it should slide in and out with no resistance, like probing soft butter.
Temperature alone isn’t enough. Some roasts need 215°F depending on connective tissue content. Always use probe tenderness as the final indicator. When properly done, the beef will shred easily into tender strands.
Can I make pulled beef ahead of time?
Yes, pulled beef actually improves when made ahead. Cook completely, shred, and store mixed with the au jus in an airtight container refrigerated for up to 3 days. Reheat gently in a covered pan over medium-low heat, stirring occasionally until hot throughout.
The flavors blend and deepen overnight. The beef absorbs more au jus during storage. Some people prefer day-old pulled beef for this reason. Add a splash of beef stock when reheating if it seems dry.
What’s the best cheese for pulled beef sandwiches?
Provolone is classic for its mild, creamy flavor that doesn’t overpower the beef. Sharp cheddar adds tangy punch. Swiss provides nutty sweetness. Pepper jack adds spicy kick. Mozzarella creates stretchy, melty texture.
Any good melting cheese works based on preference. The key is letting the hot beef melt the cheese naturally rather than adding cold cheese that doesn’t melt. Place cheese on the hot beef immediately after assembling for best results.
Ready to Take Your Cooking to the Next Level?
This is where I keep all my most-used products, gear, and favorite cooking tools — check it out:
🔥 View My Cooking Gear & ToolsRecipe Categories
If you loved this recipe, you’ll find more to savor across our diverse categories. From beef to pork, chicken to turkey, seafood to appetizers, there’s a wealth of flavors waiting for you. Explore them all at CWFeats.