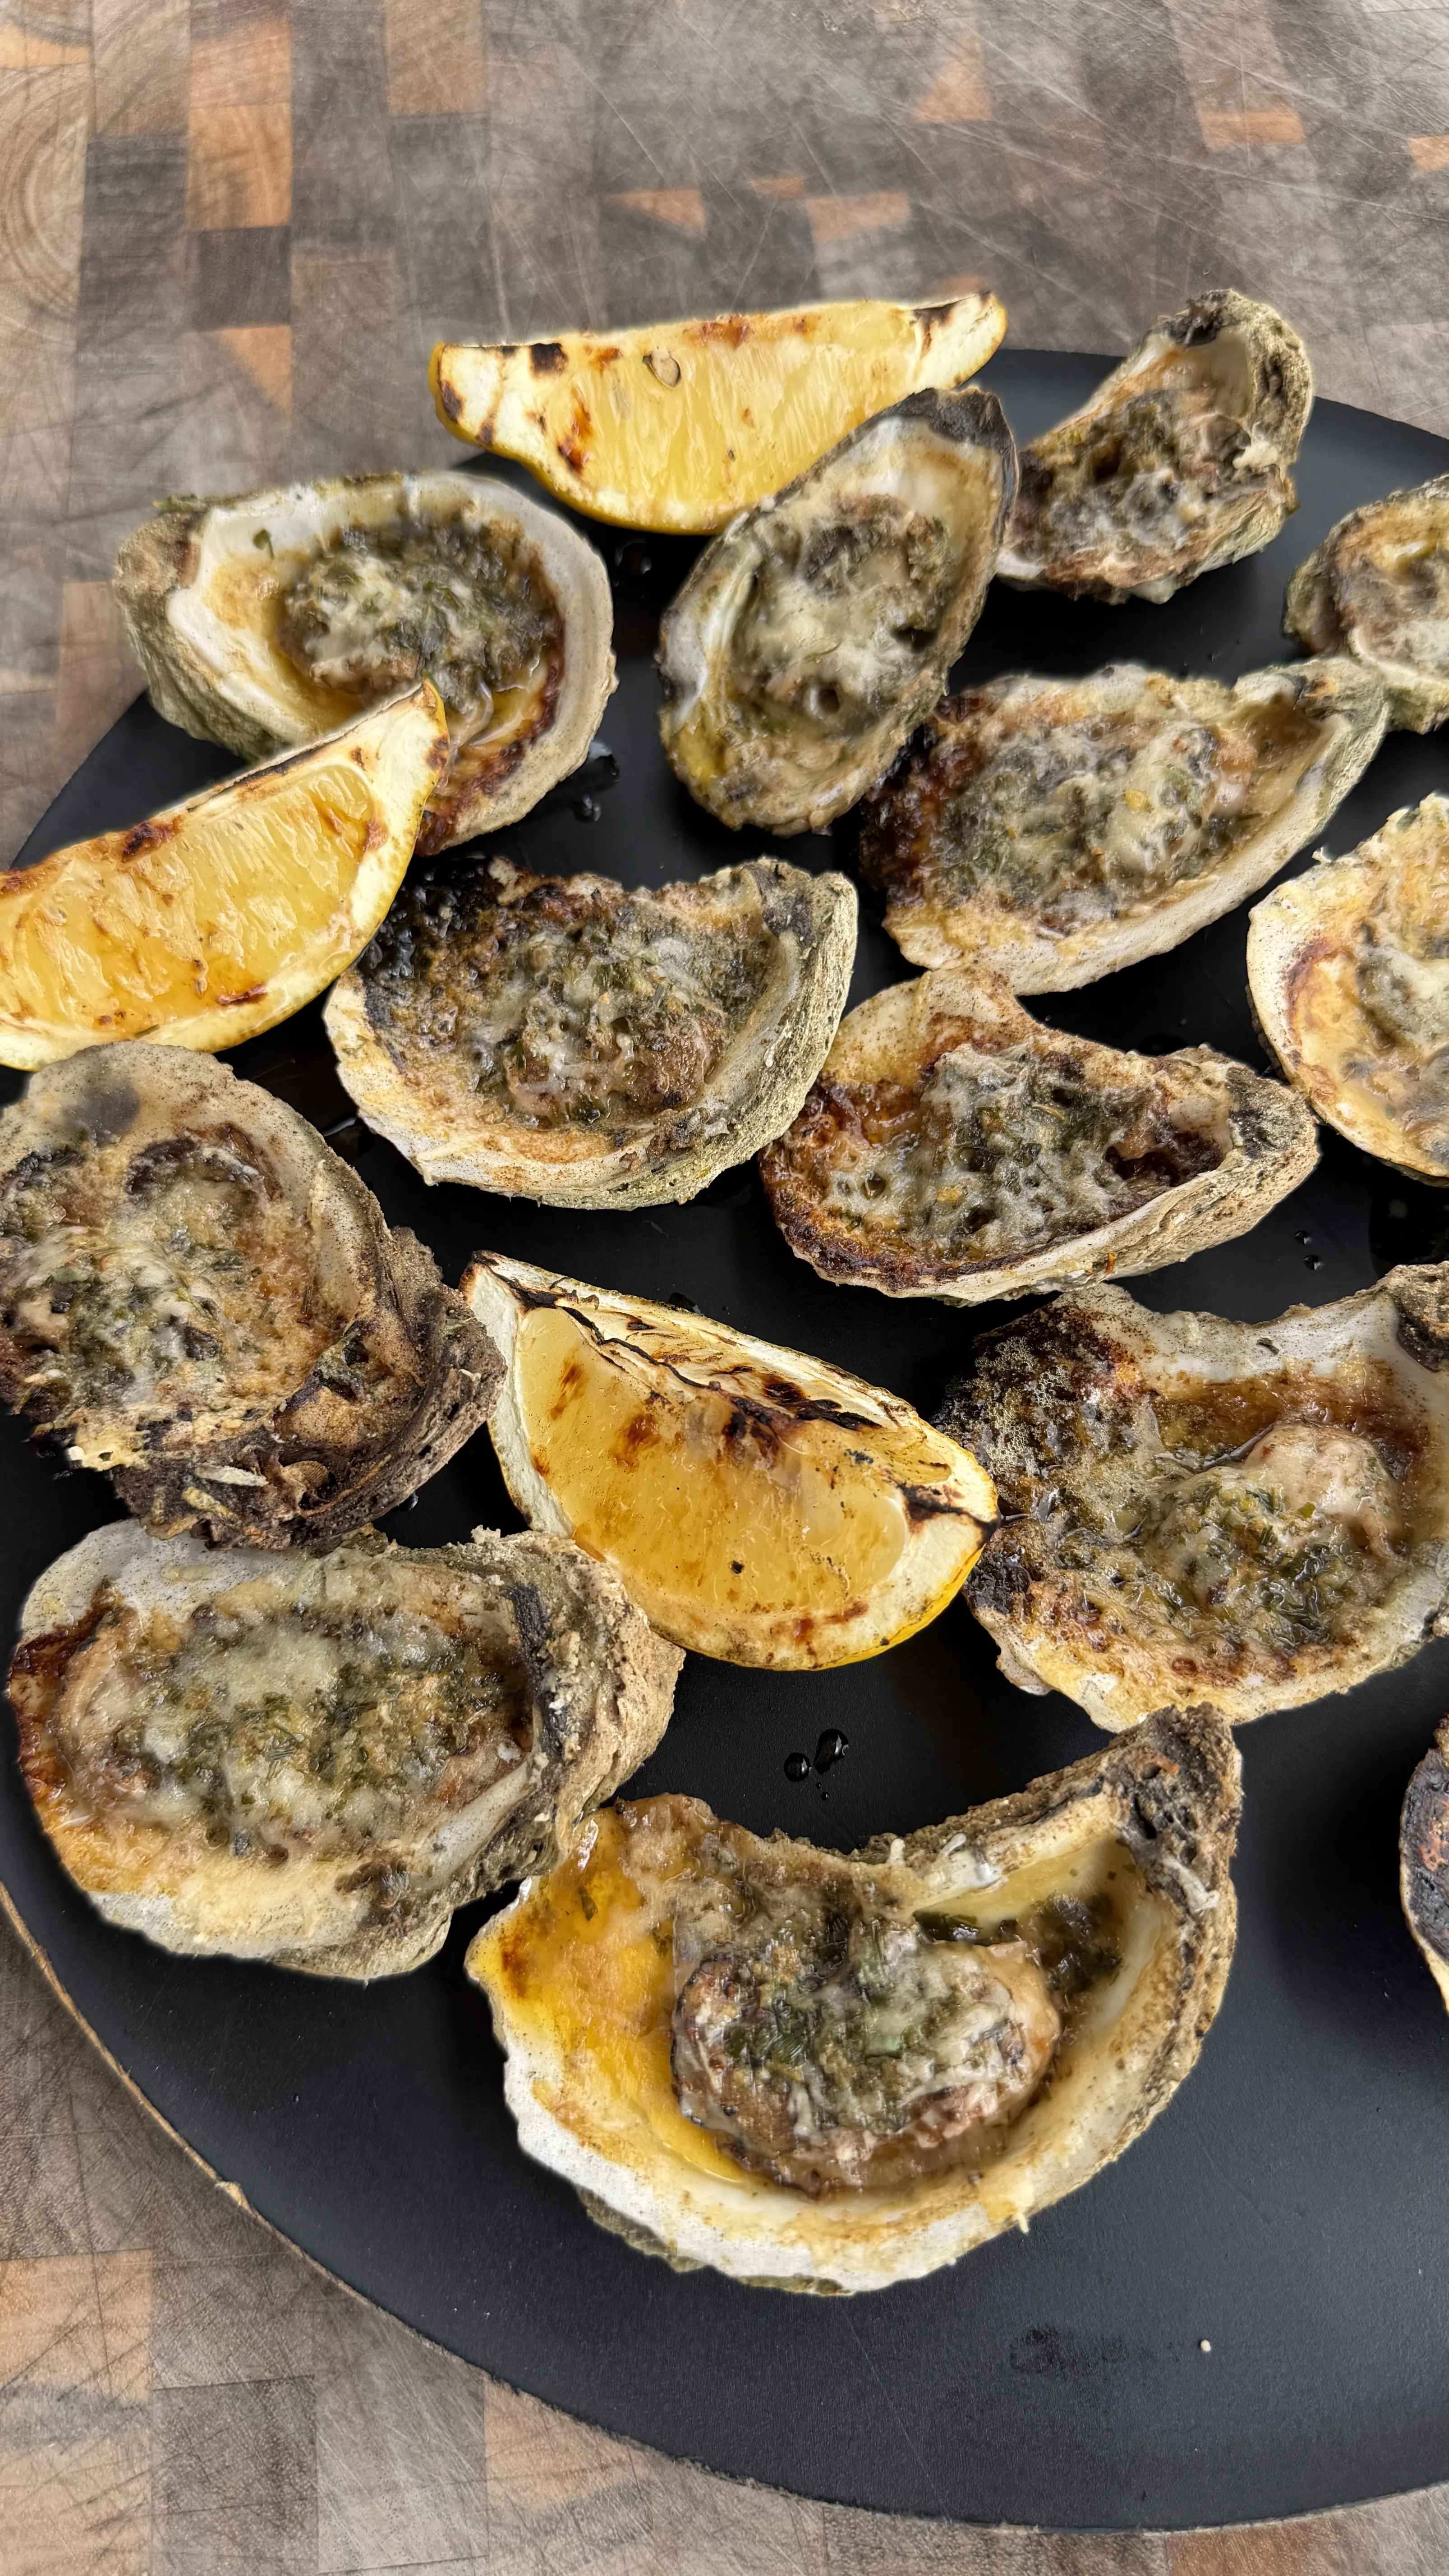
See How It’s Done:
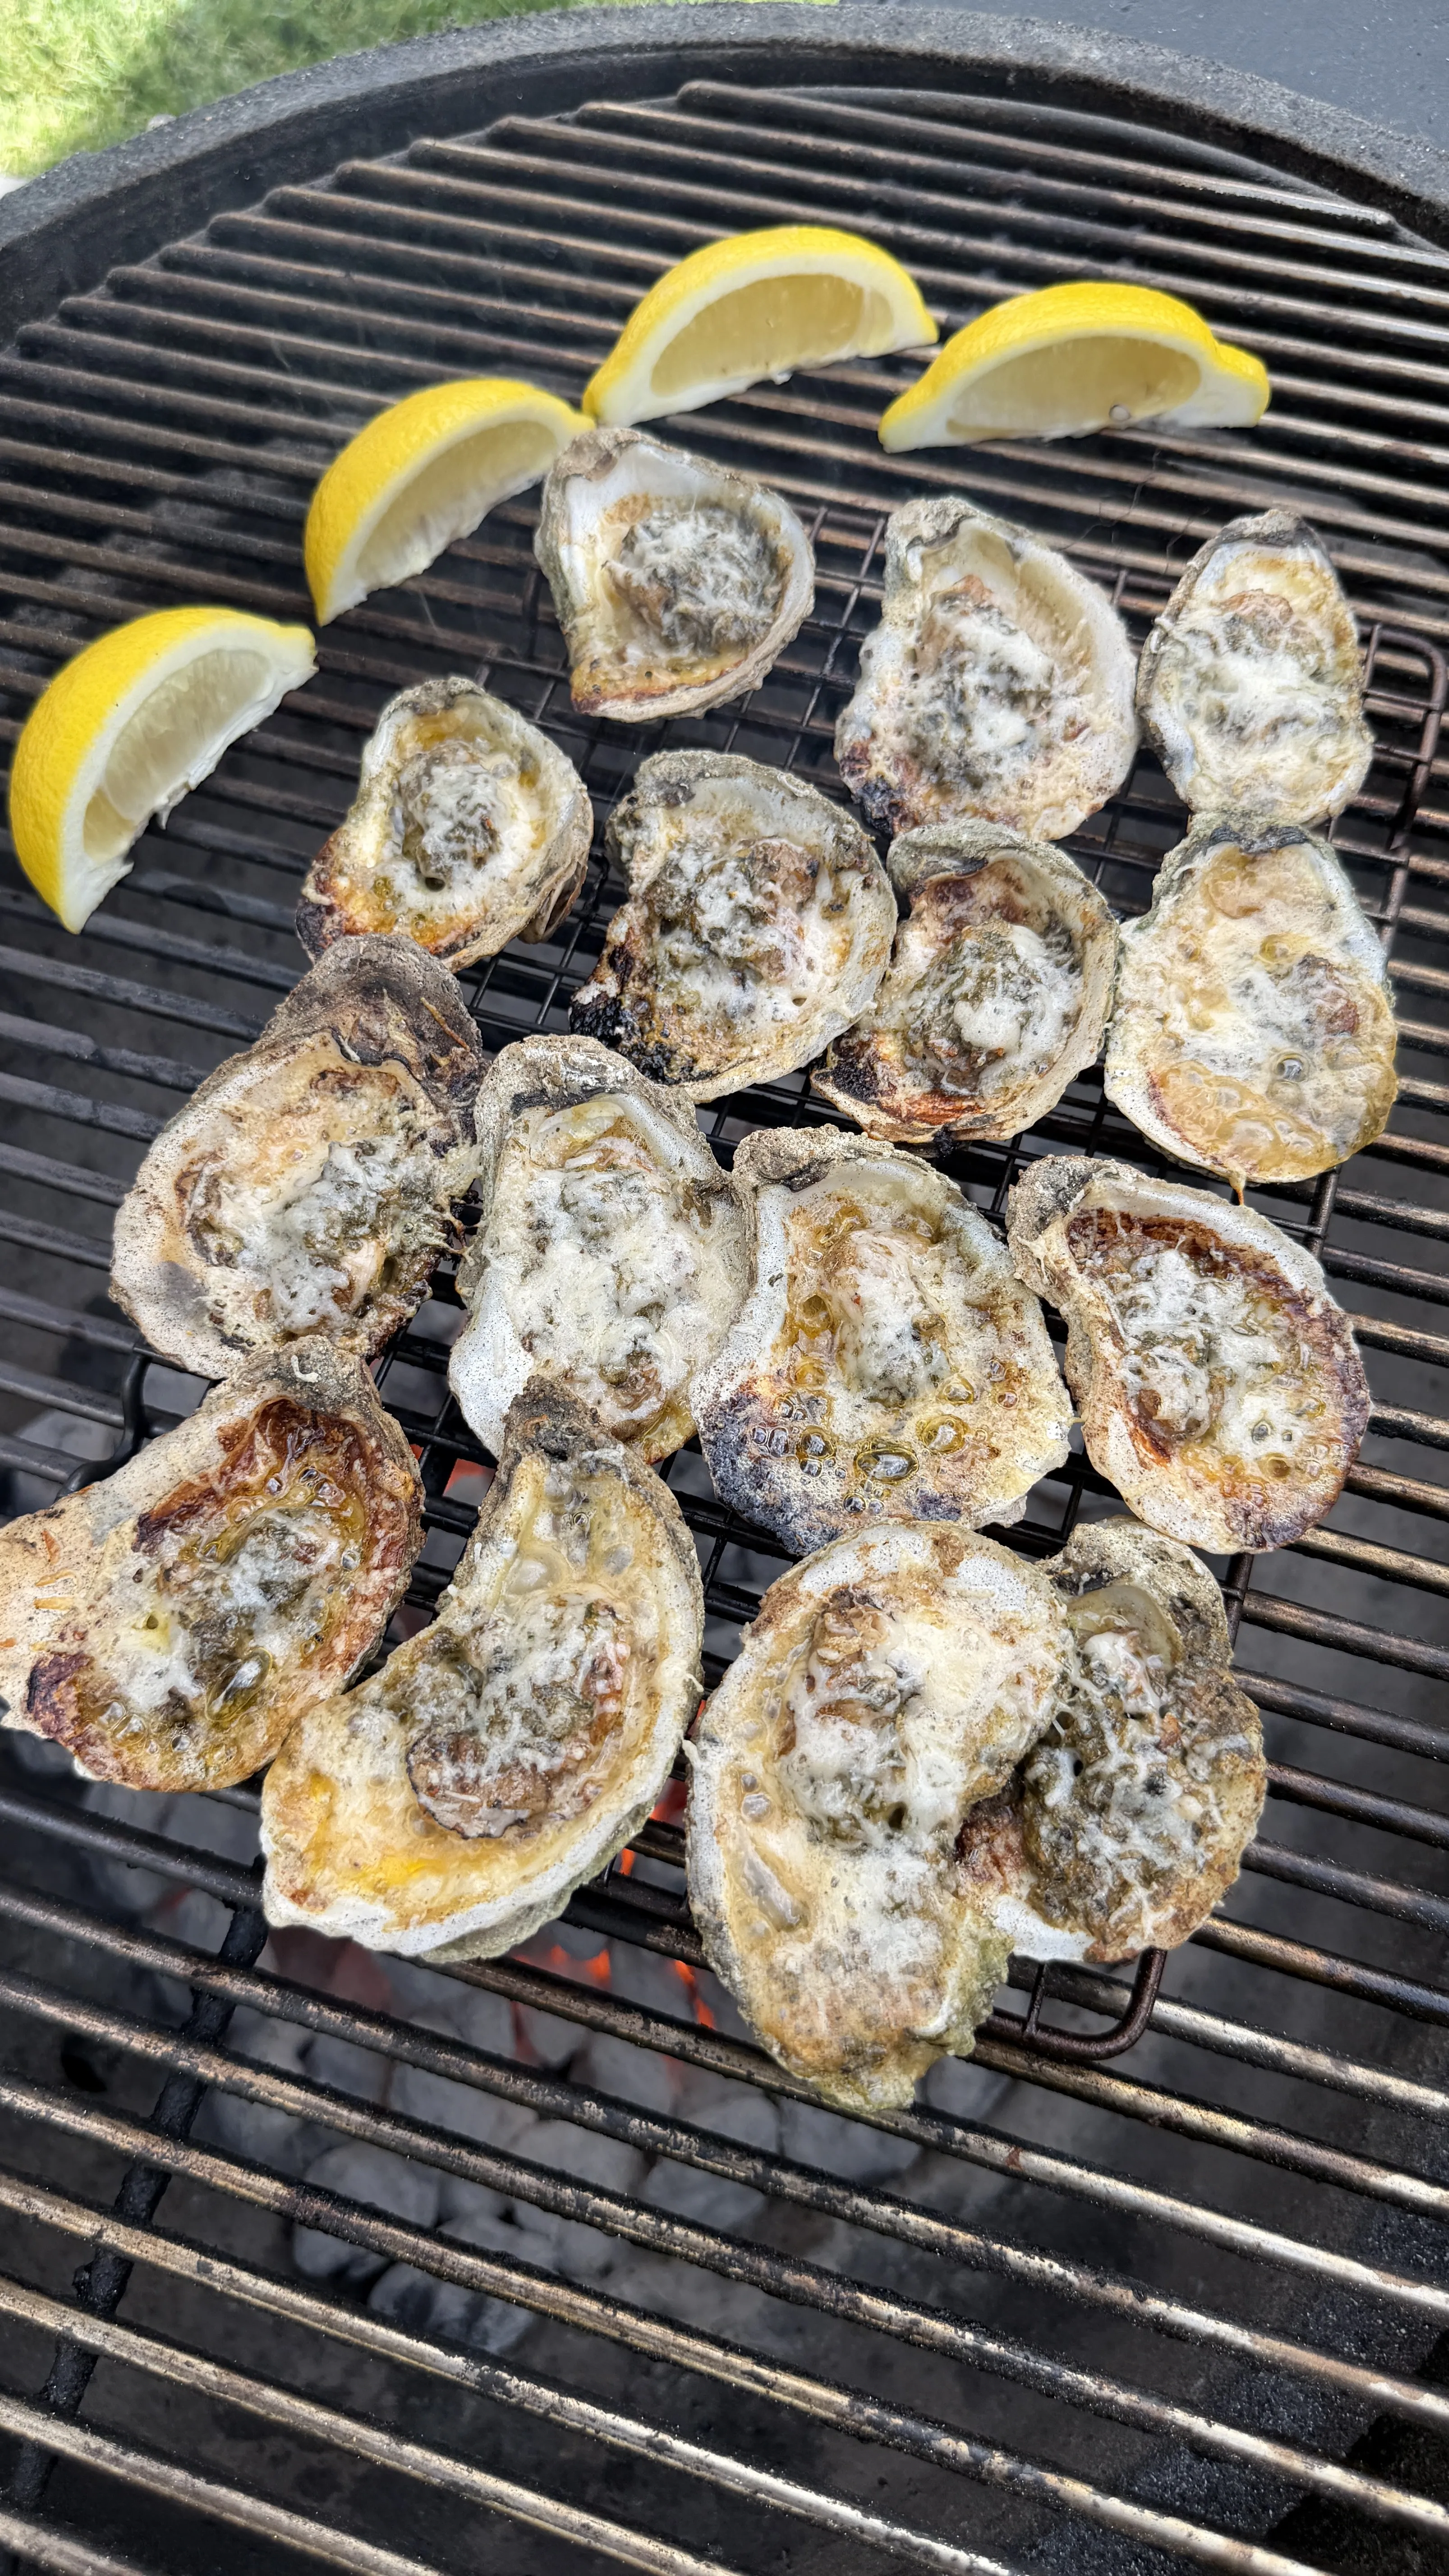
These grilled oysters get topped with a fresh garlic herb butter loaded with parsley, chives, thyme, and lemon paste, then finished with grated parmesan and a squeeze of charred lemon. The oysters sit on the half shell over a 400°F grill for 6 minutes, then get a cheese topping and another 1 to 2 minutes with the lid closed until the parmesan melts and bubbles. Total cook runs about 8 minutes after the prep, and the recipe yields 12 oysters as an appetizer for 4 to 6 people.
Why Grilled Oysters Beat Raw or Baked Every Time
Direct Heat Concentrates the Brine and Adds Char
Raw oysters deliver clean ocean flavor and a cold slurp, but the experience is one-note. Baking softens them but leaves the texture flat. Grilling at 400°F over direct heat does two things at once: the natural brine in the shell reduces and concentrates as it simmers, intensifying the briny flavor, and the rim of the oyster develops light char that contrasts the soft interior. Consequently, every bite has the original ocean character plus depth that raw oysters cannot deliver.
Cheese and Butter Get a Place to Caramelize
The half shell becomes a tiny saucepan on the grill. Garlic herb butter melts and bubbles around the oyster, parmesan browns into a crispy edge against the shell, and lemon brightens the finish without diluting anything. Furthermore, the trapped heat inside the shell cooks the oyster from below while the cheese caramelizes from above, which gives you two distinct textures in one bite.
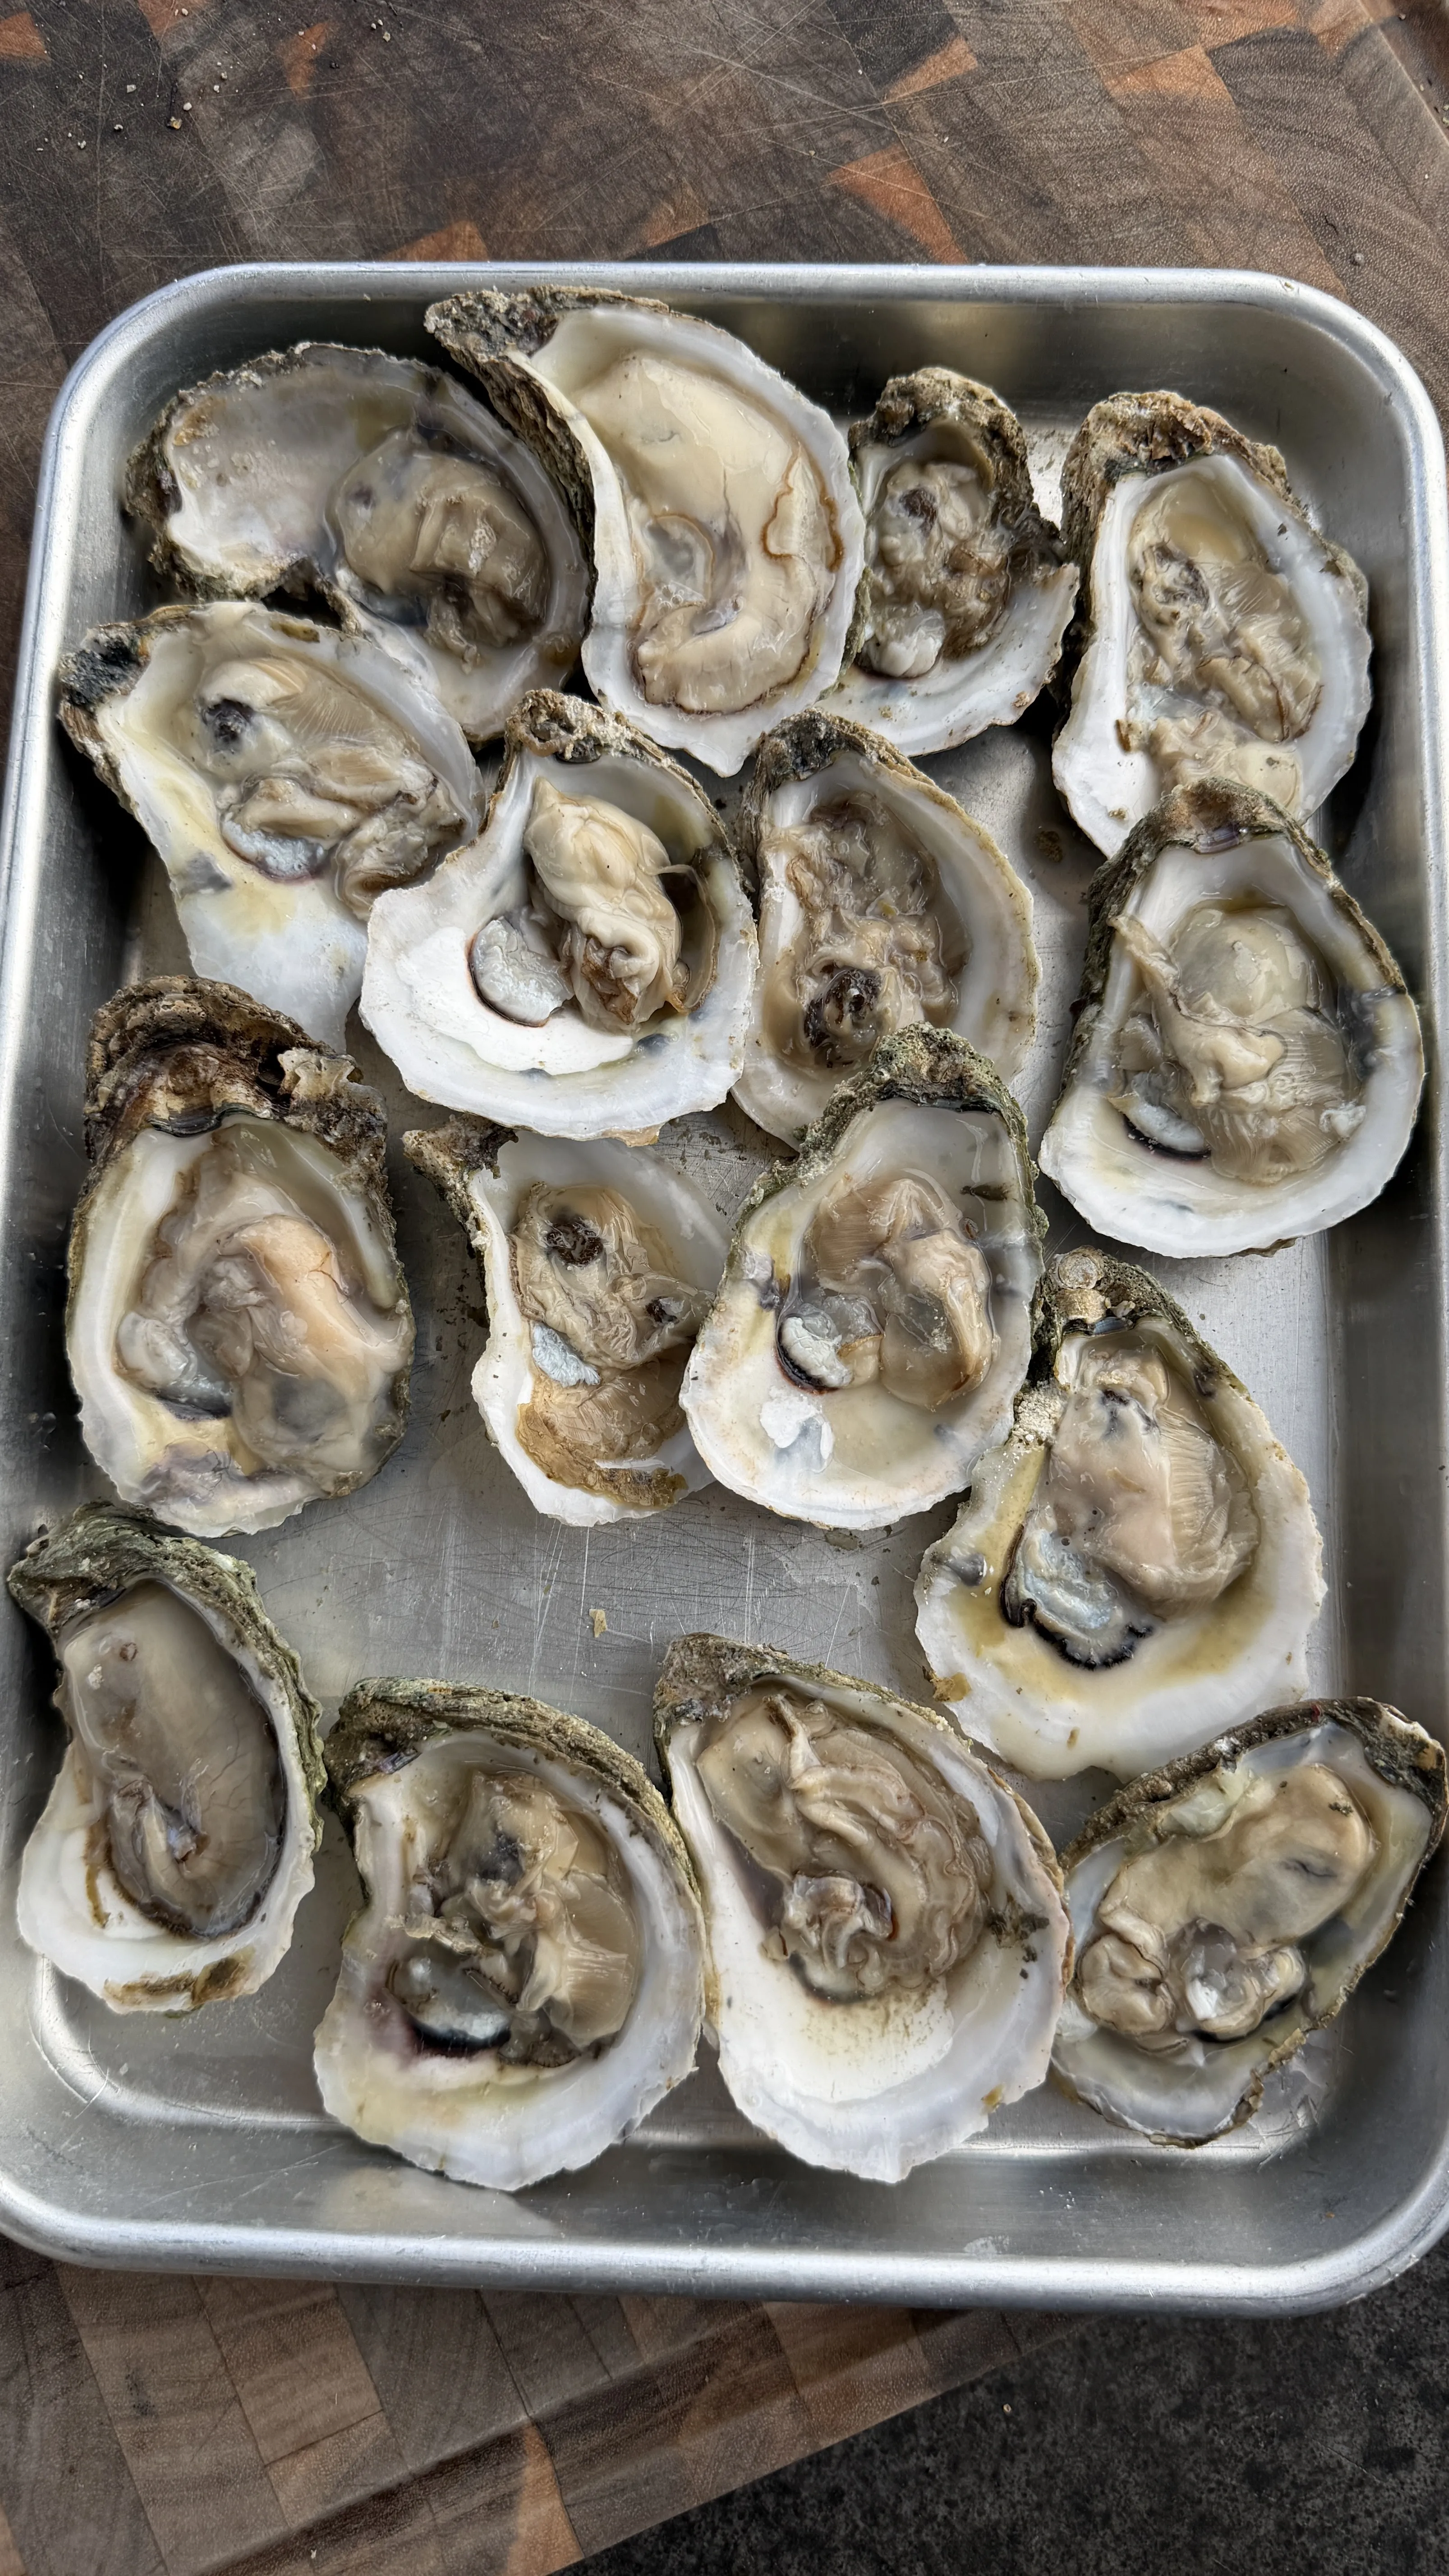
Buying and Shucking Fresh Oysters for the Grill
How to Tell If Oysters Are Fresh at the Counter
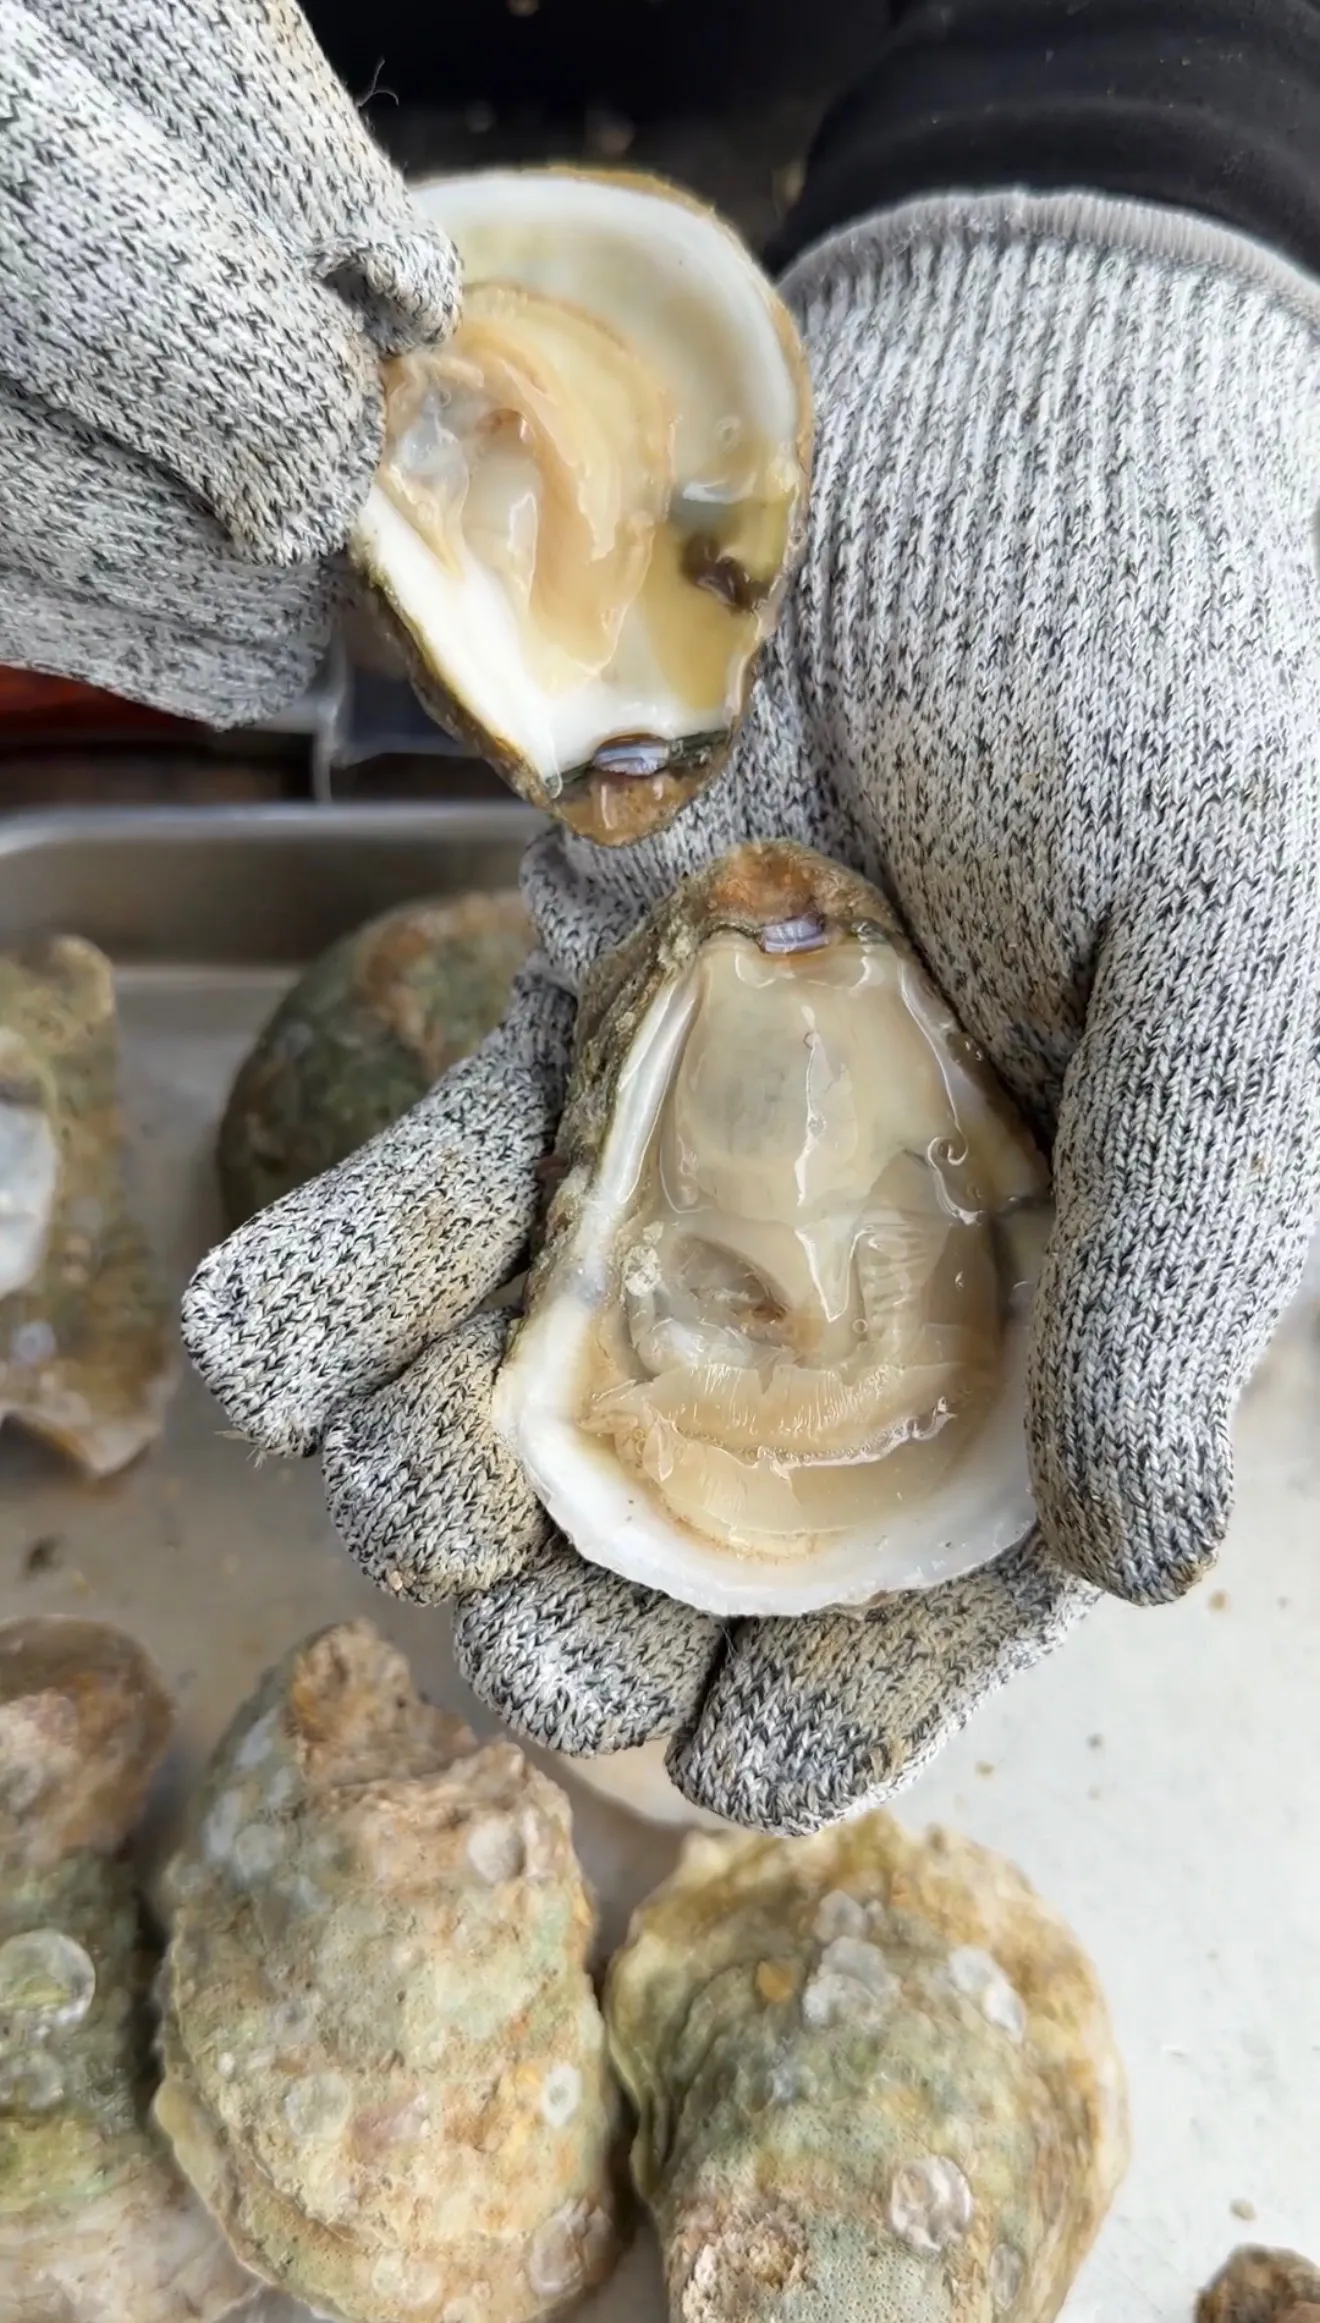
Fresh oysters have tightly closed shells. If a shell is open and does not close when tapped, the oyster is dead and unsafe to eat. Additionally, the shells should feel heavy for their size, which means they still contain their natural brine. Lift a couple and compare weights before buying. Lightweight oysters have lost their liquor and the meat will be dry by the time it hits the grill.
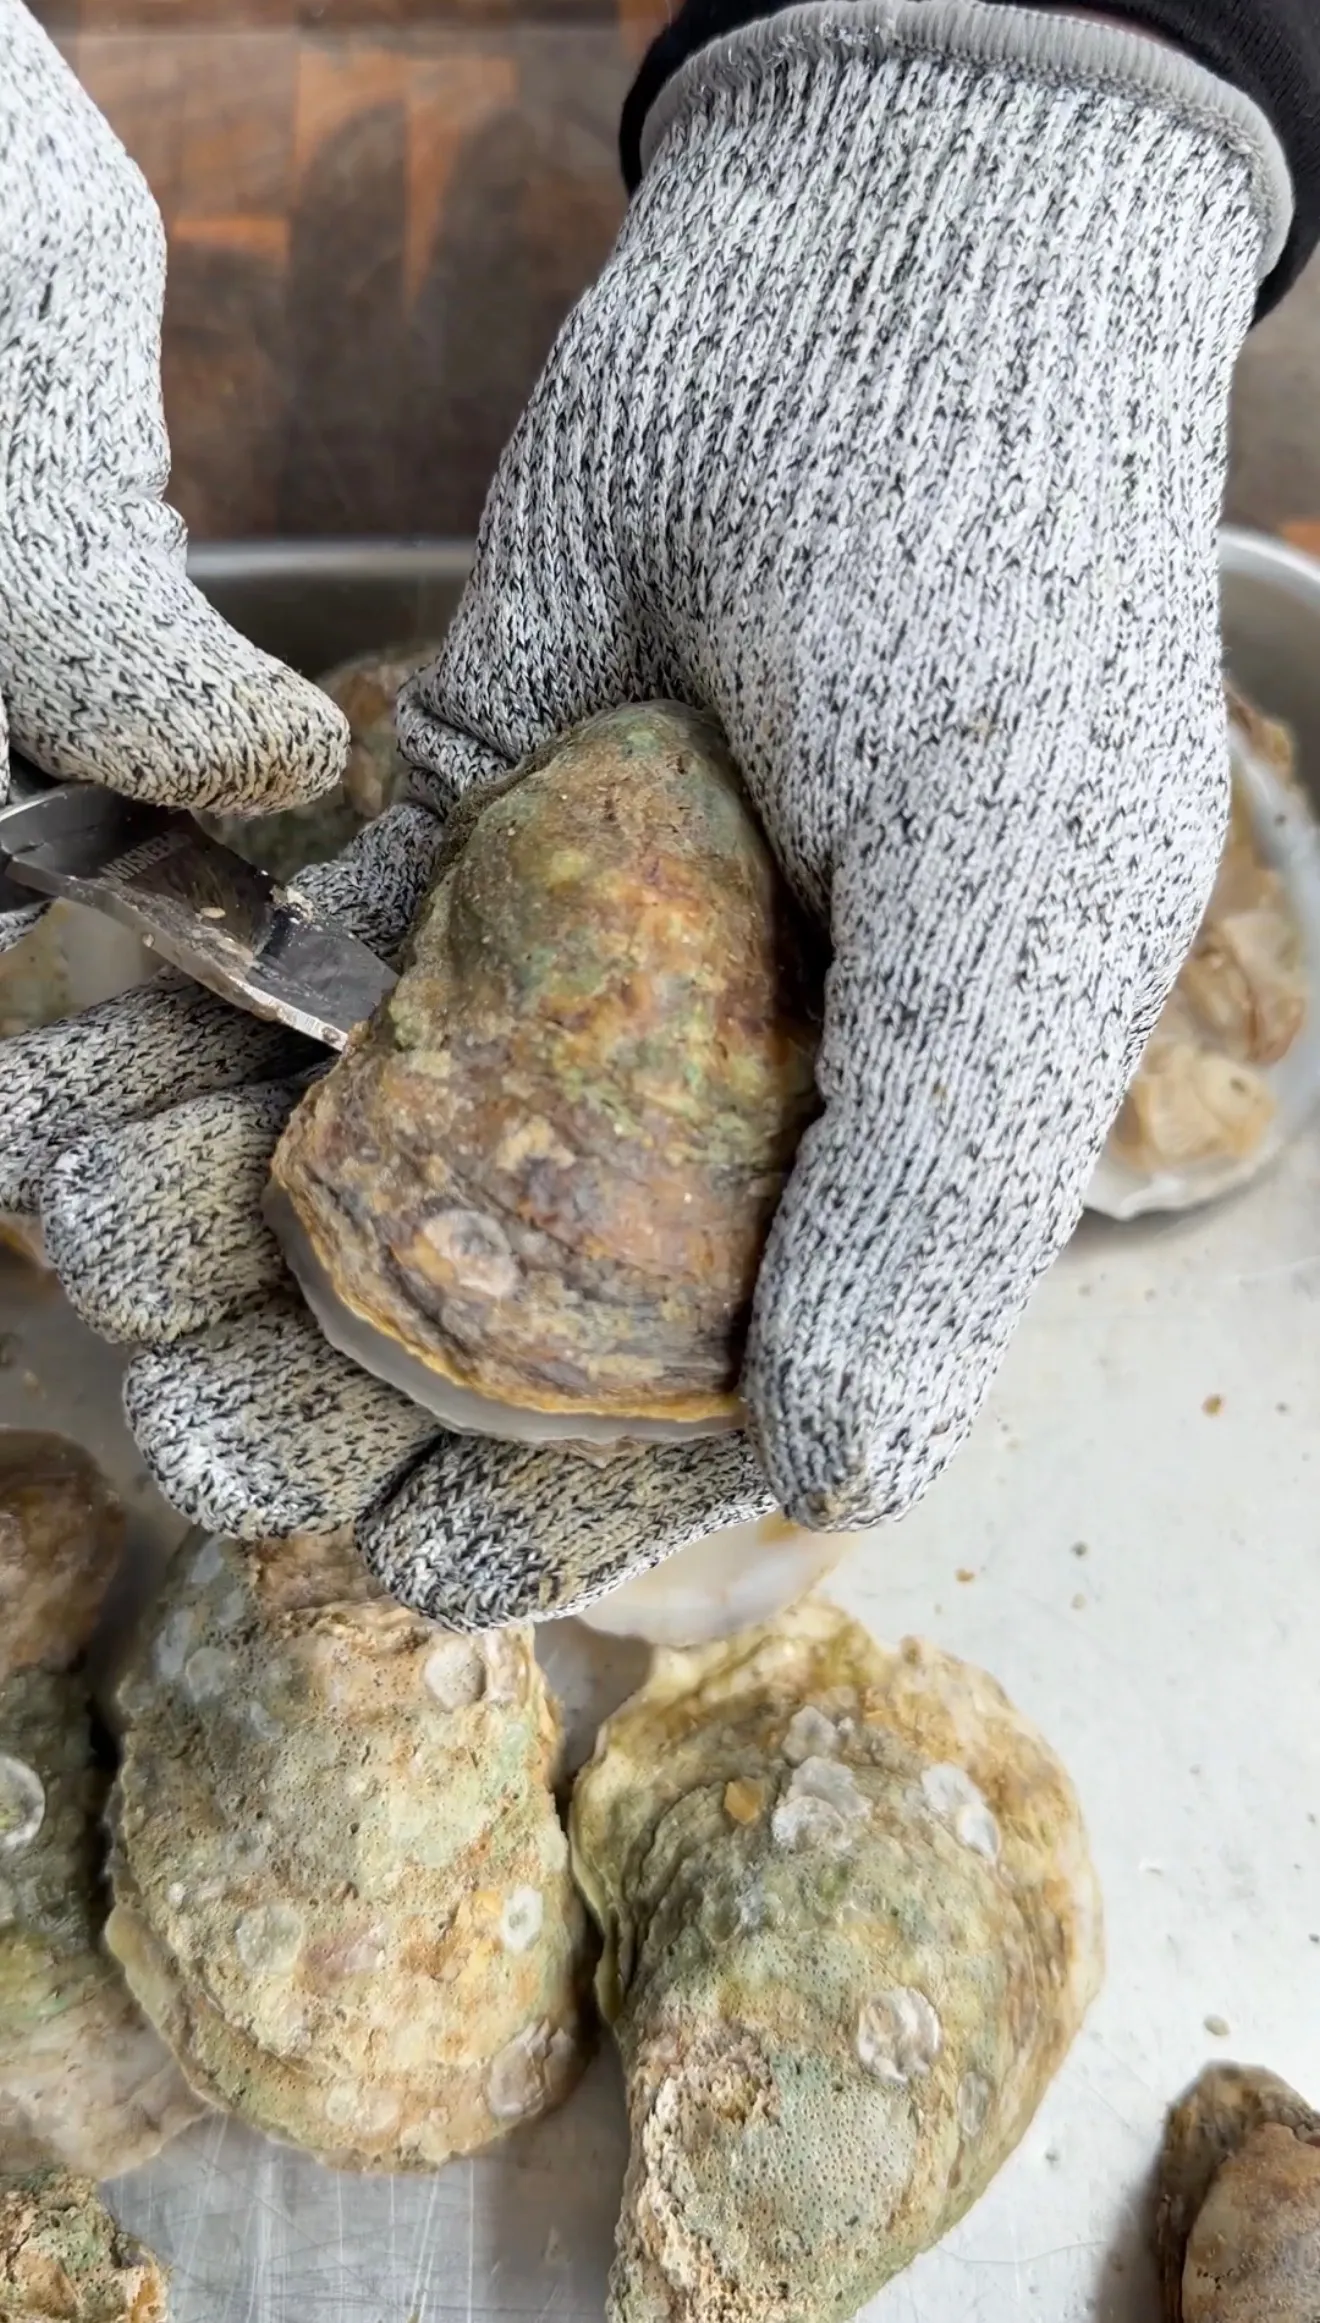
The Safe Shucking Method With Less Risk to Your Hand
Fold a kitchen towel into a thick square and place the oyster cup-side down on top with the hinge facing you. Cover the top with the other end of the towel to protect your hand. Insert an oyster shucking knife into the hinge and twist firmly until you feel the shell pop. Then slide the knife along the top shell to separate, and underneath to release the oyster from the bottom shell. Moreover, leaving the oyster on the half shell with its natural brine intact is essential for grilling.
The Garlic Herb Butter Build for Grilled Oysters
Why Five Cloves Is the Right Amount for 12 Oysters
Five cloves of garlic minced fine gives you roughly half a teaspoon of garlic per oyster, which is enough to taste in every bite without overwhelming the briny oyster flavor. Less than that and the garlic disappears under the cheese. More than that and the garlic dominates and burns under direct heat. As a result, the 5-clove count is the sweet spot for a dozen oysters and a full stick of butter.
Lemon Paste vs Lemon Juice in the Butter
Lemon paste, made from lemon zest and oil, adds concentrated citrus flavor without introducing water into the butter. In contrast, fresh lemon juice thins the butter and can cause it to break or separate when it hits the grill heat. Therefore, lemon paste is the better choice for grilled oyster butter since it carries the citrus oils that pair with garlic and parmesan, but keeps the butter emulsion stable through the cook.
Grilling Technique at 400°F With Parmesan Timing
6 Minutes Direct Heat Before the Cheese Goes On
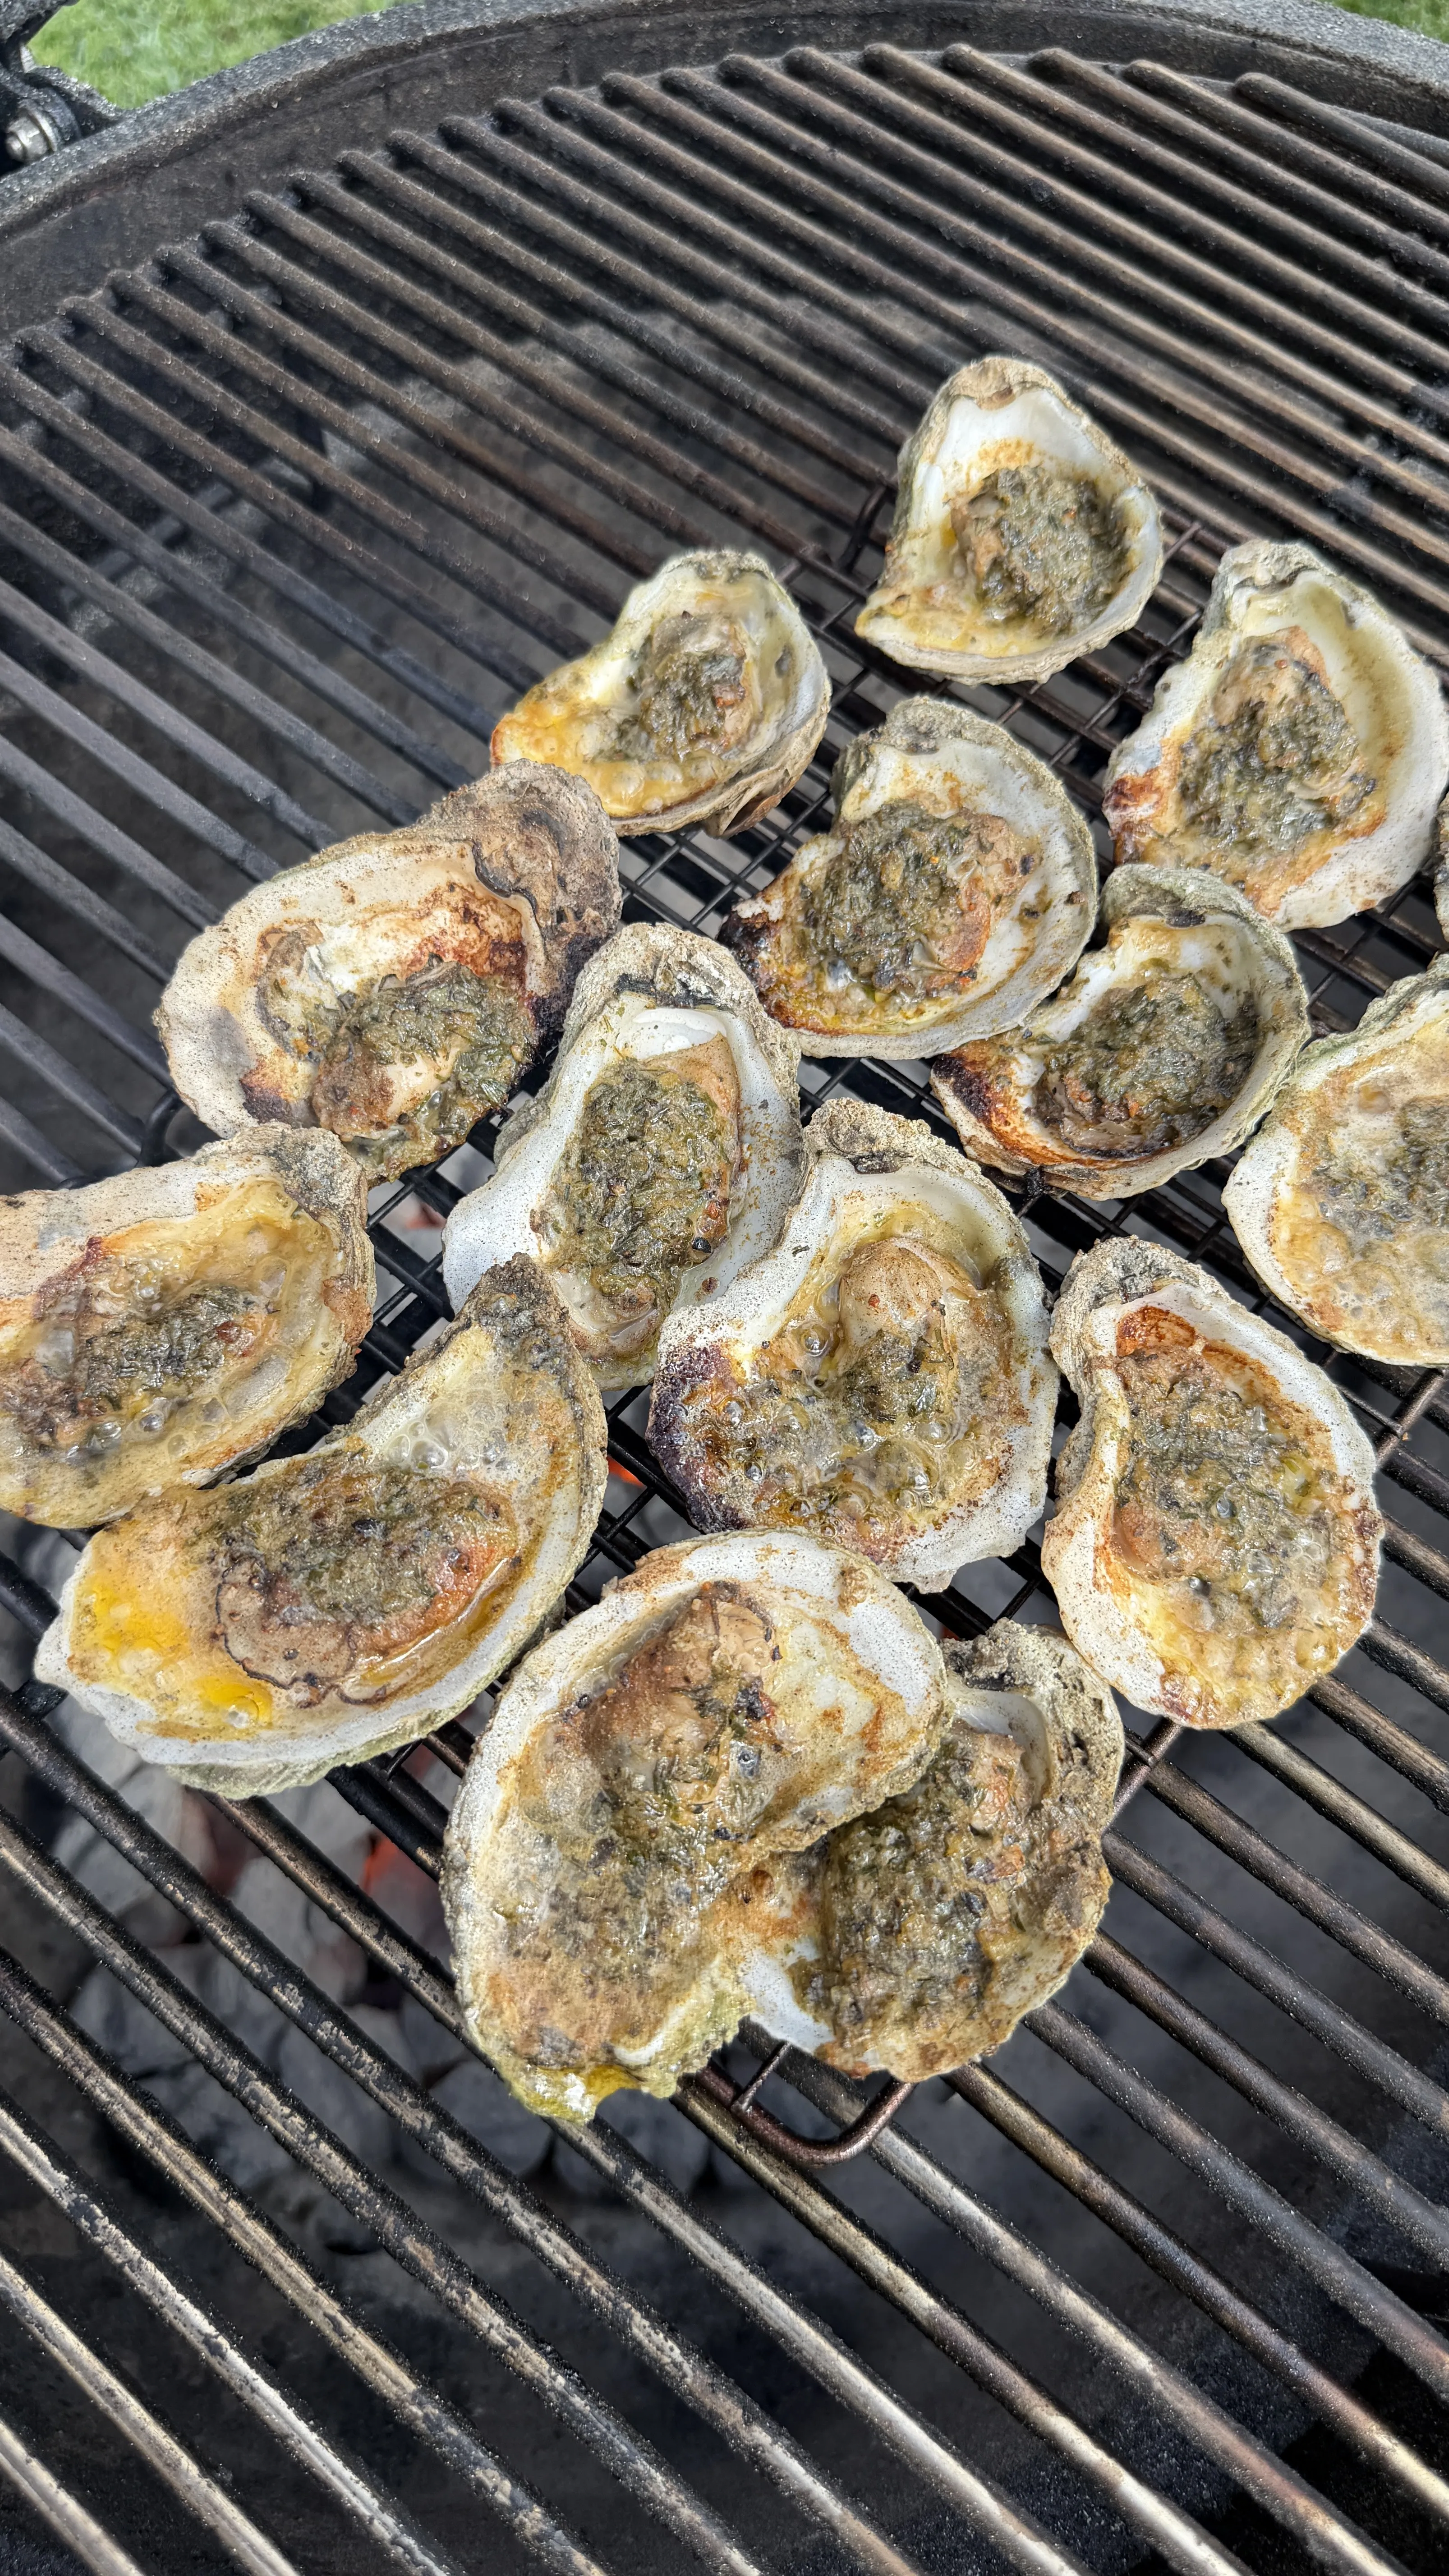
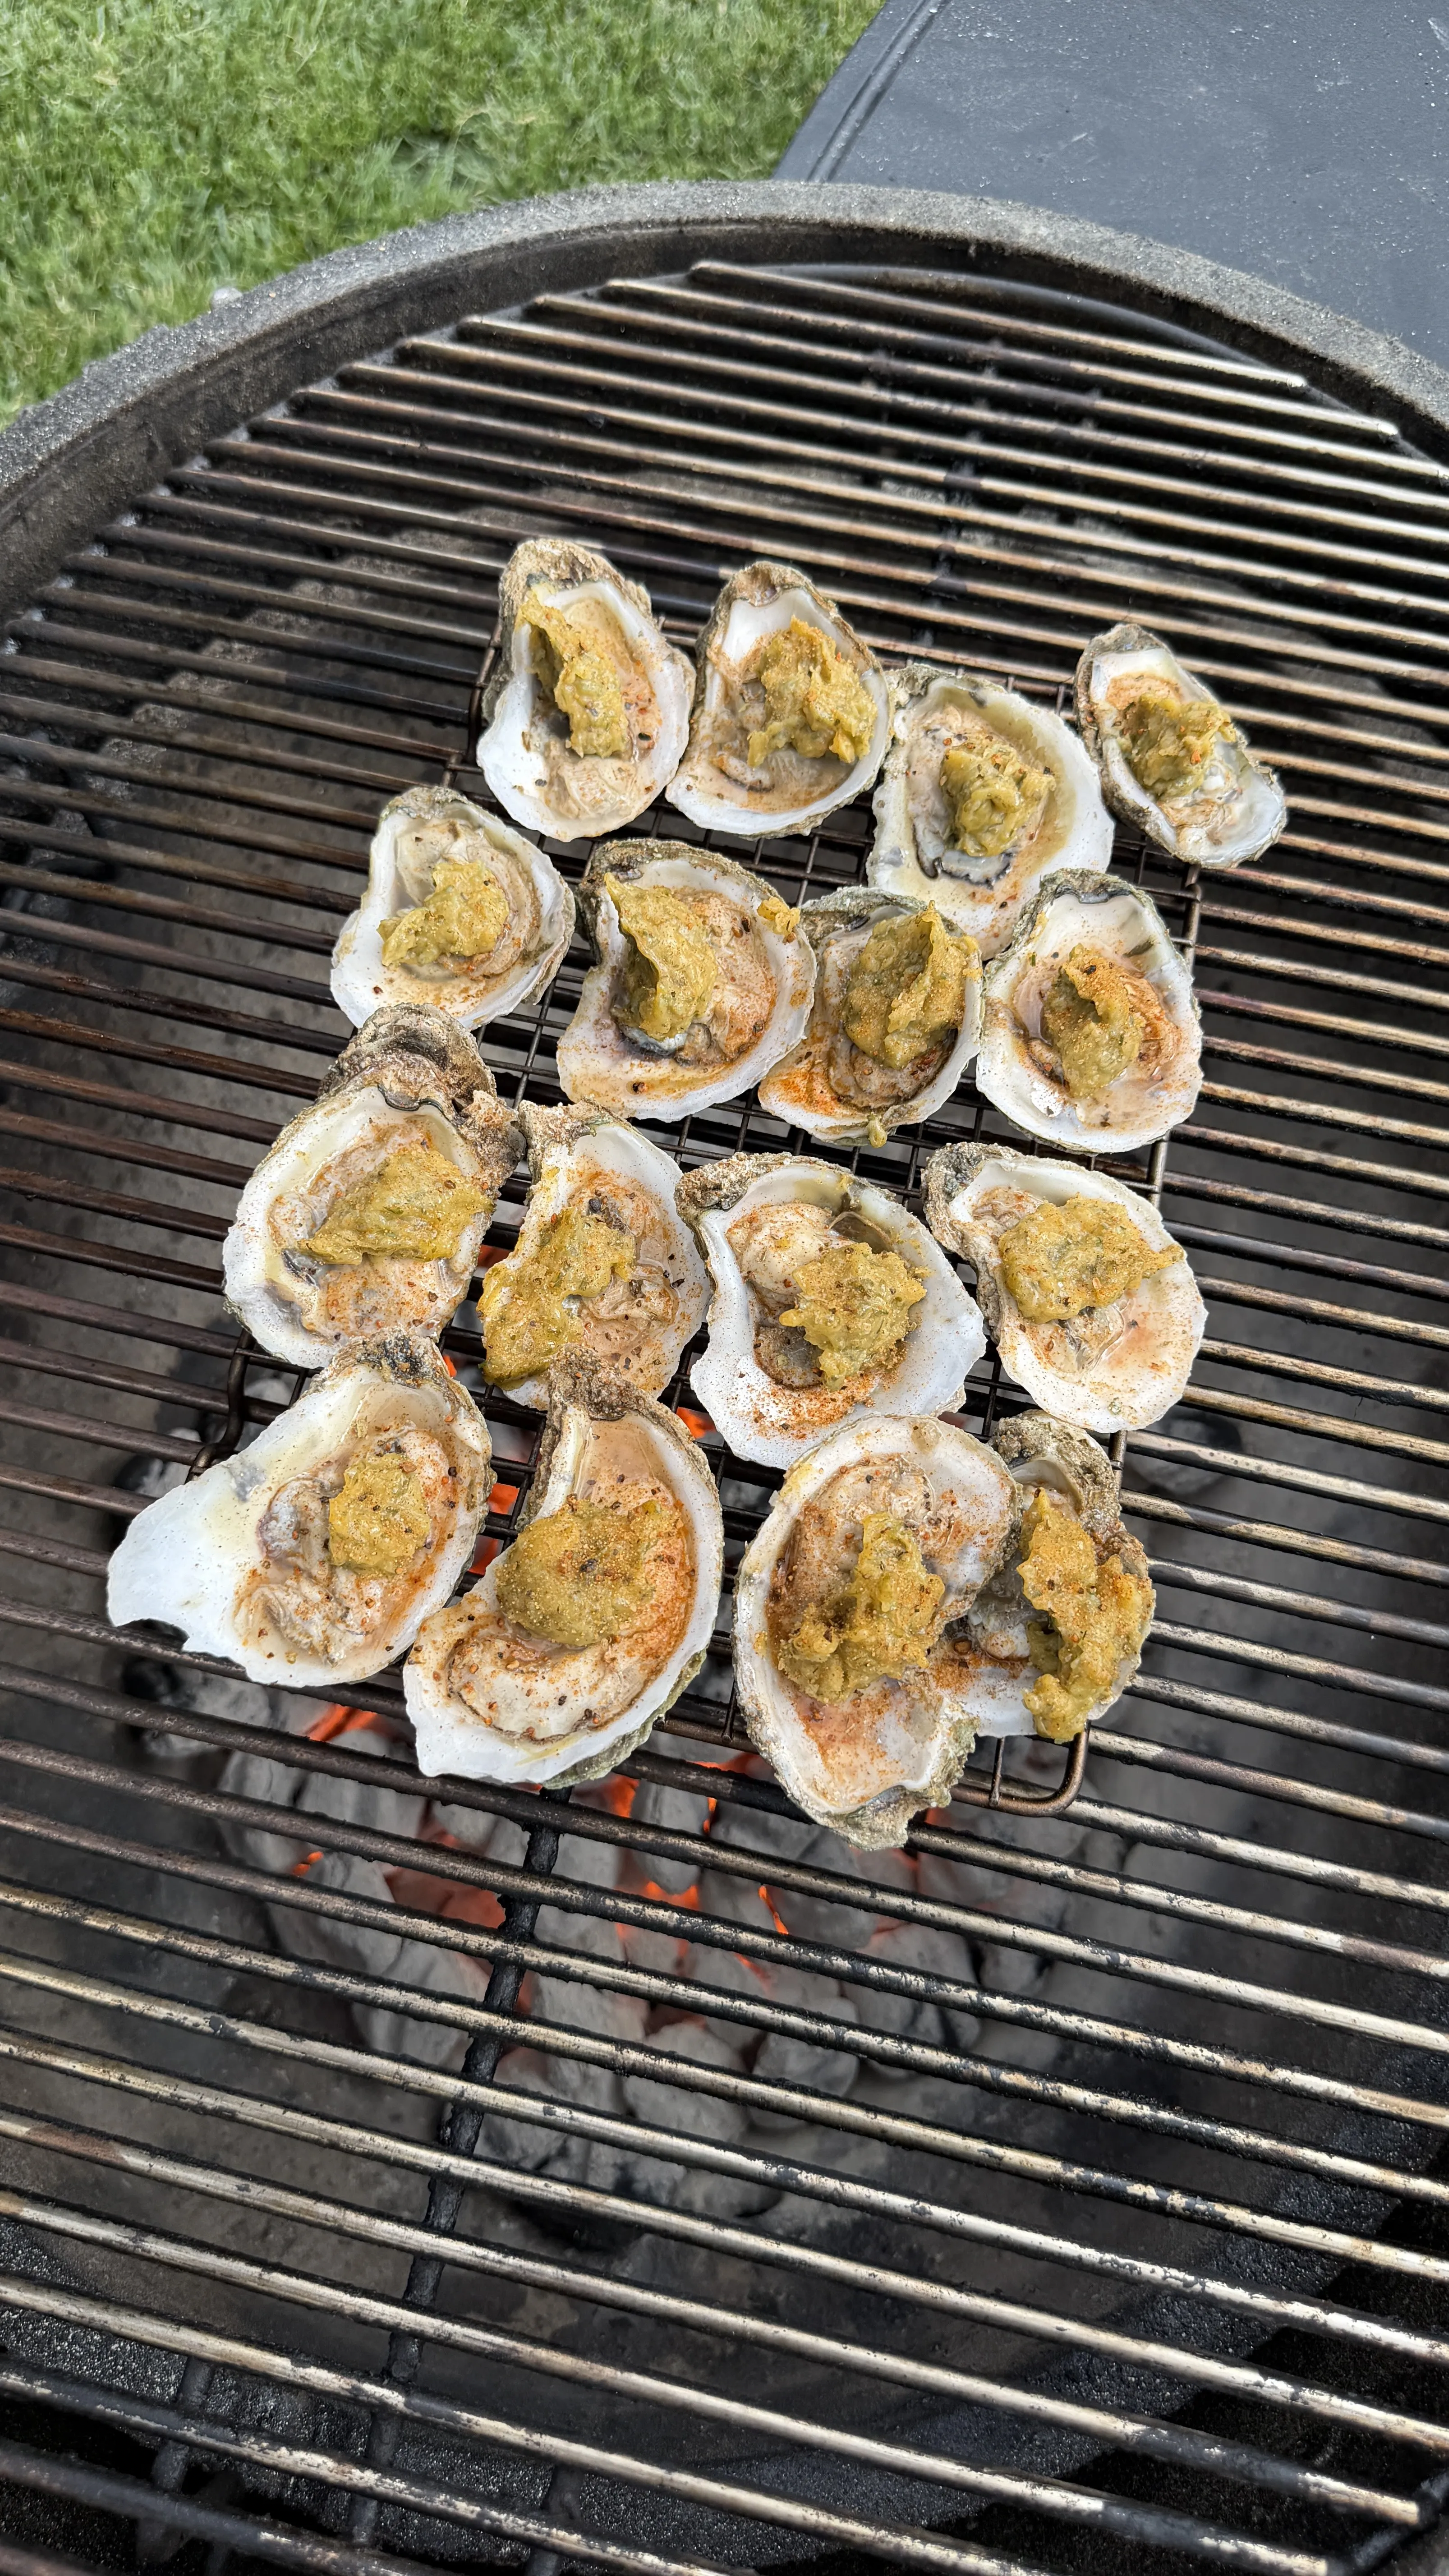
Place the buttered, seasoned oysters directly on the hot grates with the cup side down so the brine and butter stay inside the shell. Cook 6 minutes uncovered. During this time, the natural oyster liquor simmers in the shell, the garlic butter melts and infuses the oyster, and the edges of the meat start to firm up. Specifically, do not move or disturb the shells during this stage. Stability protects the butter pool inside.
1 to 2 Minutes Lid Closed to Melt the Parmesan
After the 6 minute open phase, top each oyster with about a teaspoon of freshly grated parmesan and close the grill lid. The trapped heat melts the cheese in 1 to 2 minutes without overcooking the oyster. Therefore, the closed lid is essential here. Cooking the parmesan with the lid open requires another 4 to 5 minutes, which overcooks the oyster meat and makes it rubbery.
The Charred Lemon Finish
Why Charred Lemon Tastes Different Than Raw
Charring caramelizes the natural sugars in the lemon flesh and rind, transforming raw lemon’s sharp acid into a sweeter, smokier citrus profile with more complexity. The heat also breaks down some of the cell walls, releasing more juice when squeezed. As a result, a charred lemon wedge over hot grilled oysters delivers brightness without the harsh acidic bite that raw lemon brings.
How to Char Lemons Without Burning Them
Cut lemons in half or in thick wedges and place them cut side down on the grill 5 minutes before the oysters go on. Leave them undisturbed until the cut side has deep brown char marks but is not blackened. This takes about 4 to 6 minutes depending on grill temperature. Moreover, do not flip them. Charring only one side keeps the lemon juicy on the uncharred side so the squeeze releases more liquid.

Step-by-Step: How to Make These Grilled Oysters
Step 1: Preheat the Grill and Shuck the Oysters
Preheat the grill to around 400°F. While the grill heats, shuck all 12 oysters using an oyster shucking knife. Fold a thick kitchen towel over the oyster to protect your hand, insert the knife into the hinge, and twist firmly until you feel the shell pop. Separate the top shell and release the oyster from the bottom shell, leaving each one on the half shell with its natural brine intact.
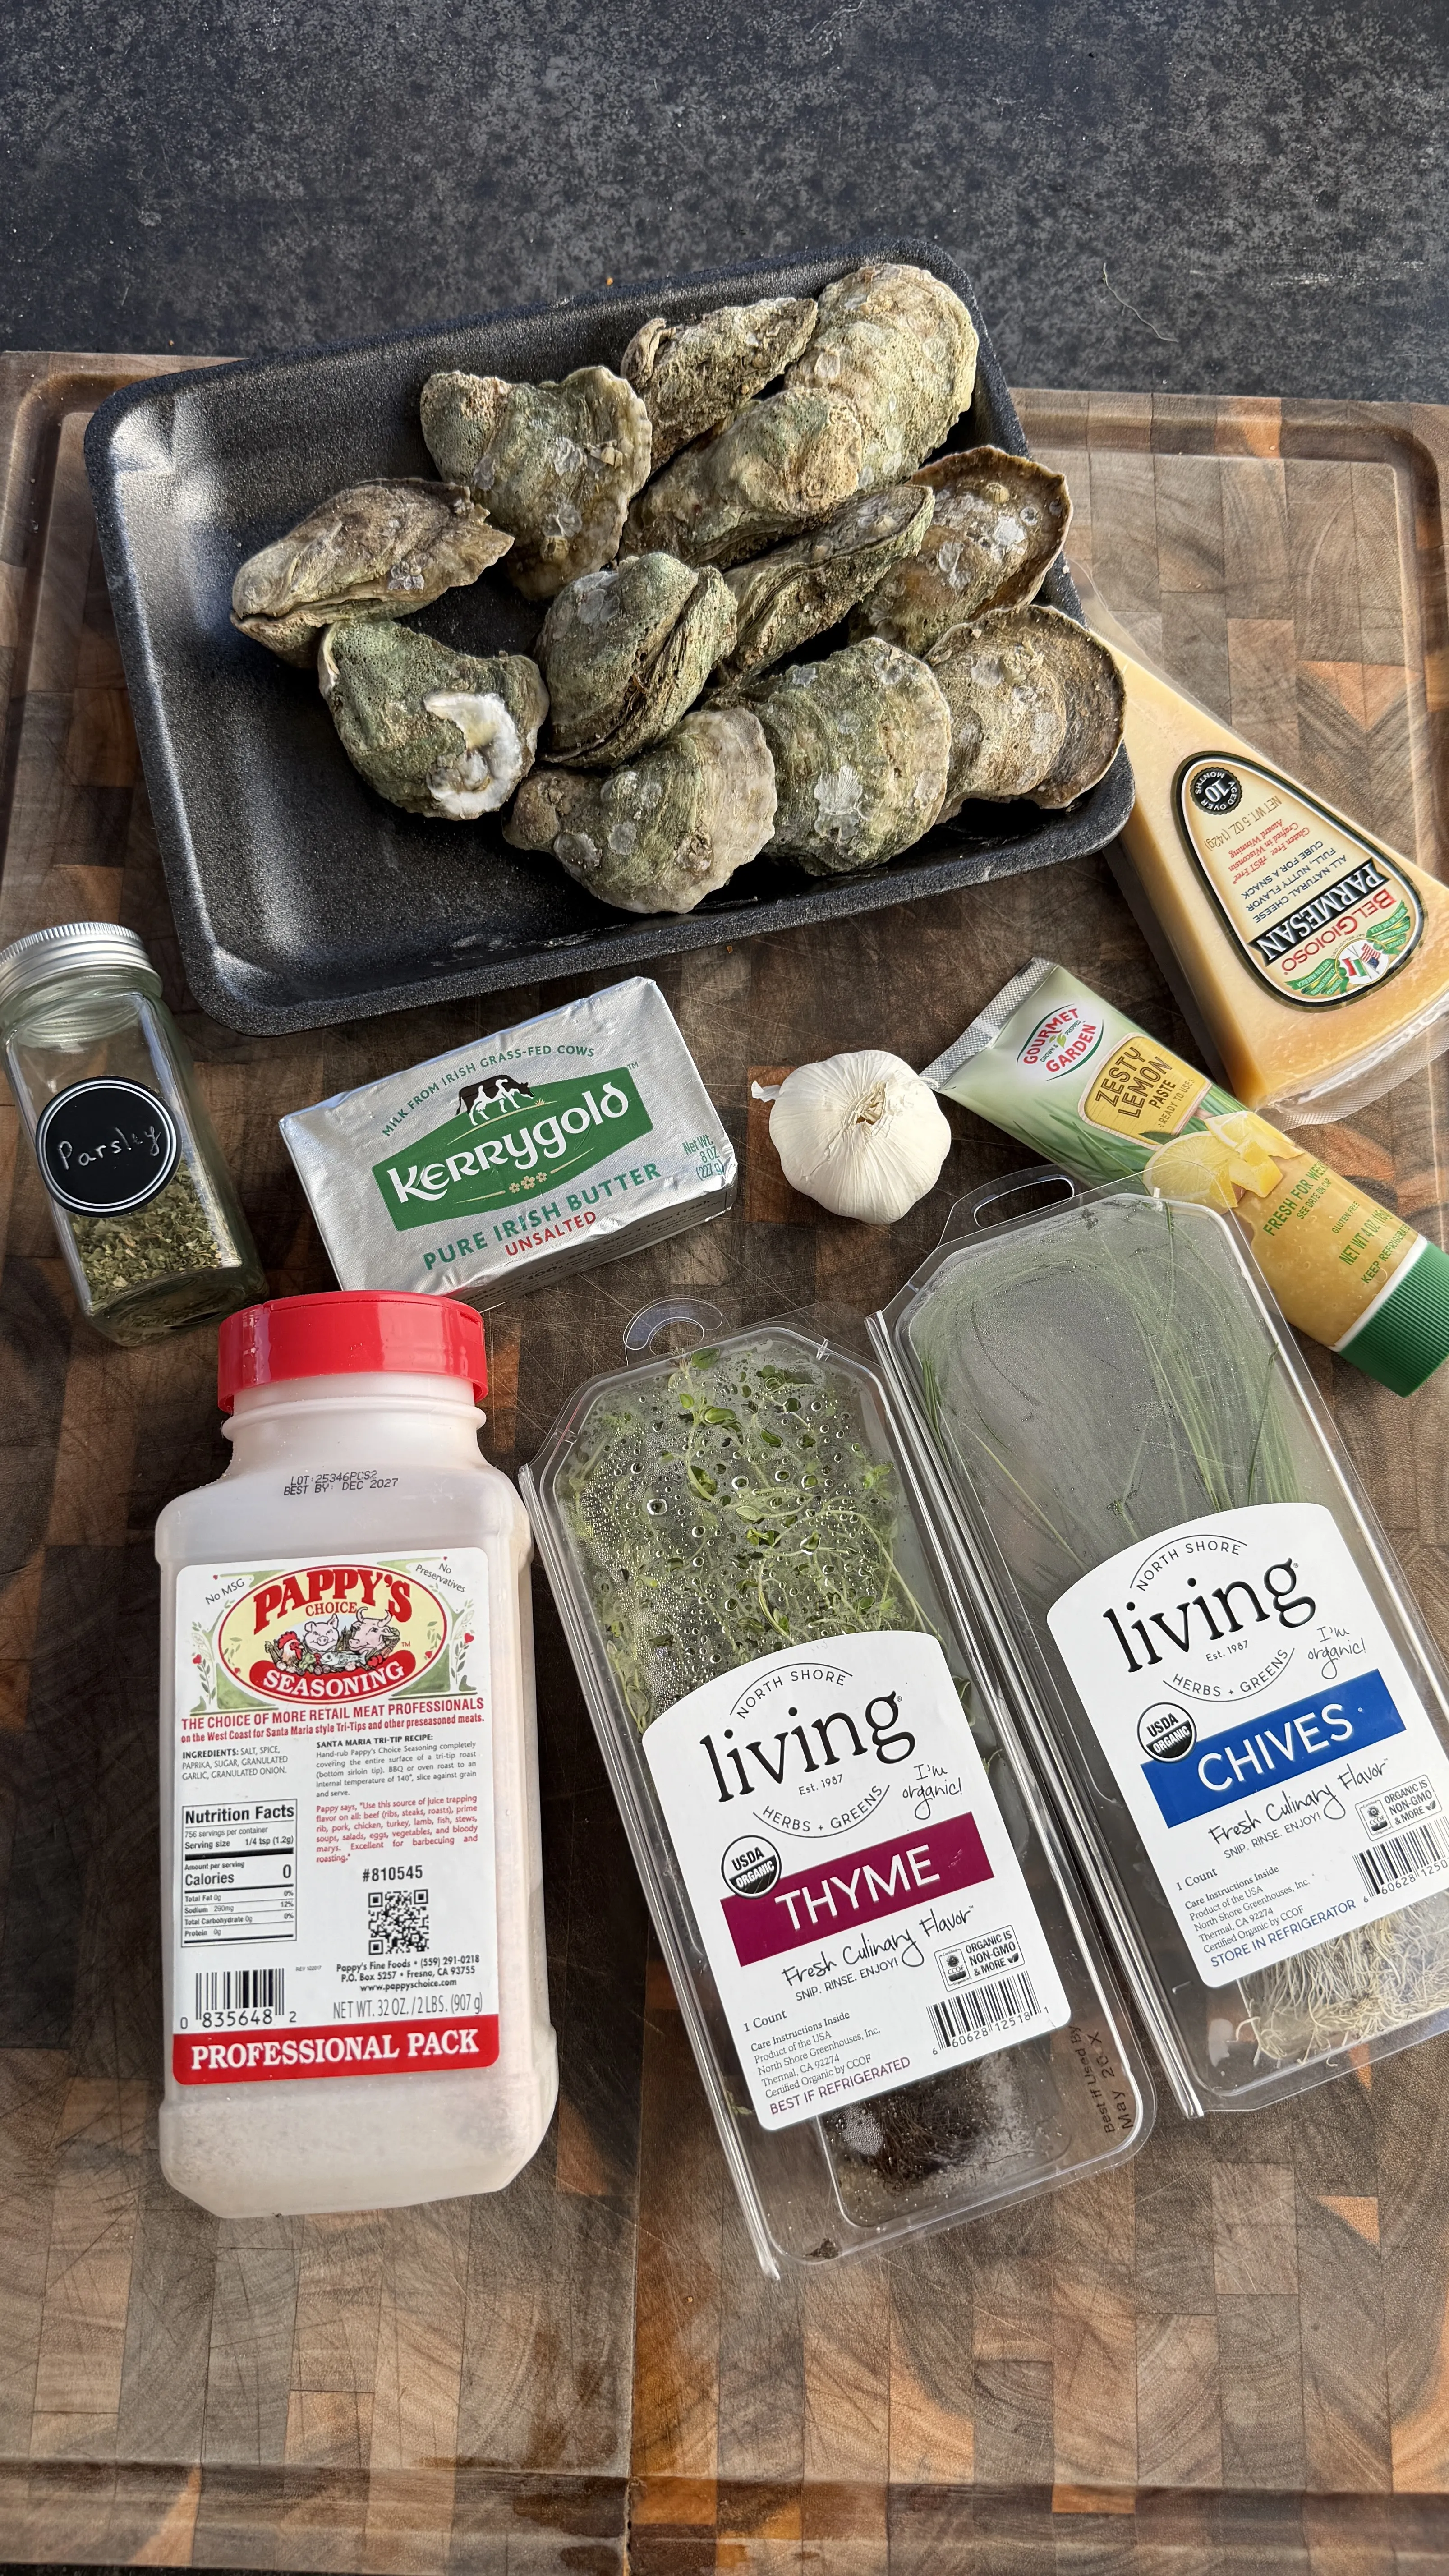
Step 2: Make the Garlic Herb Butter
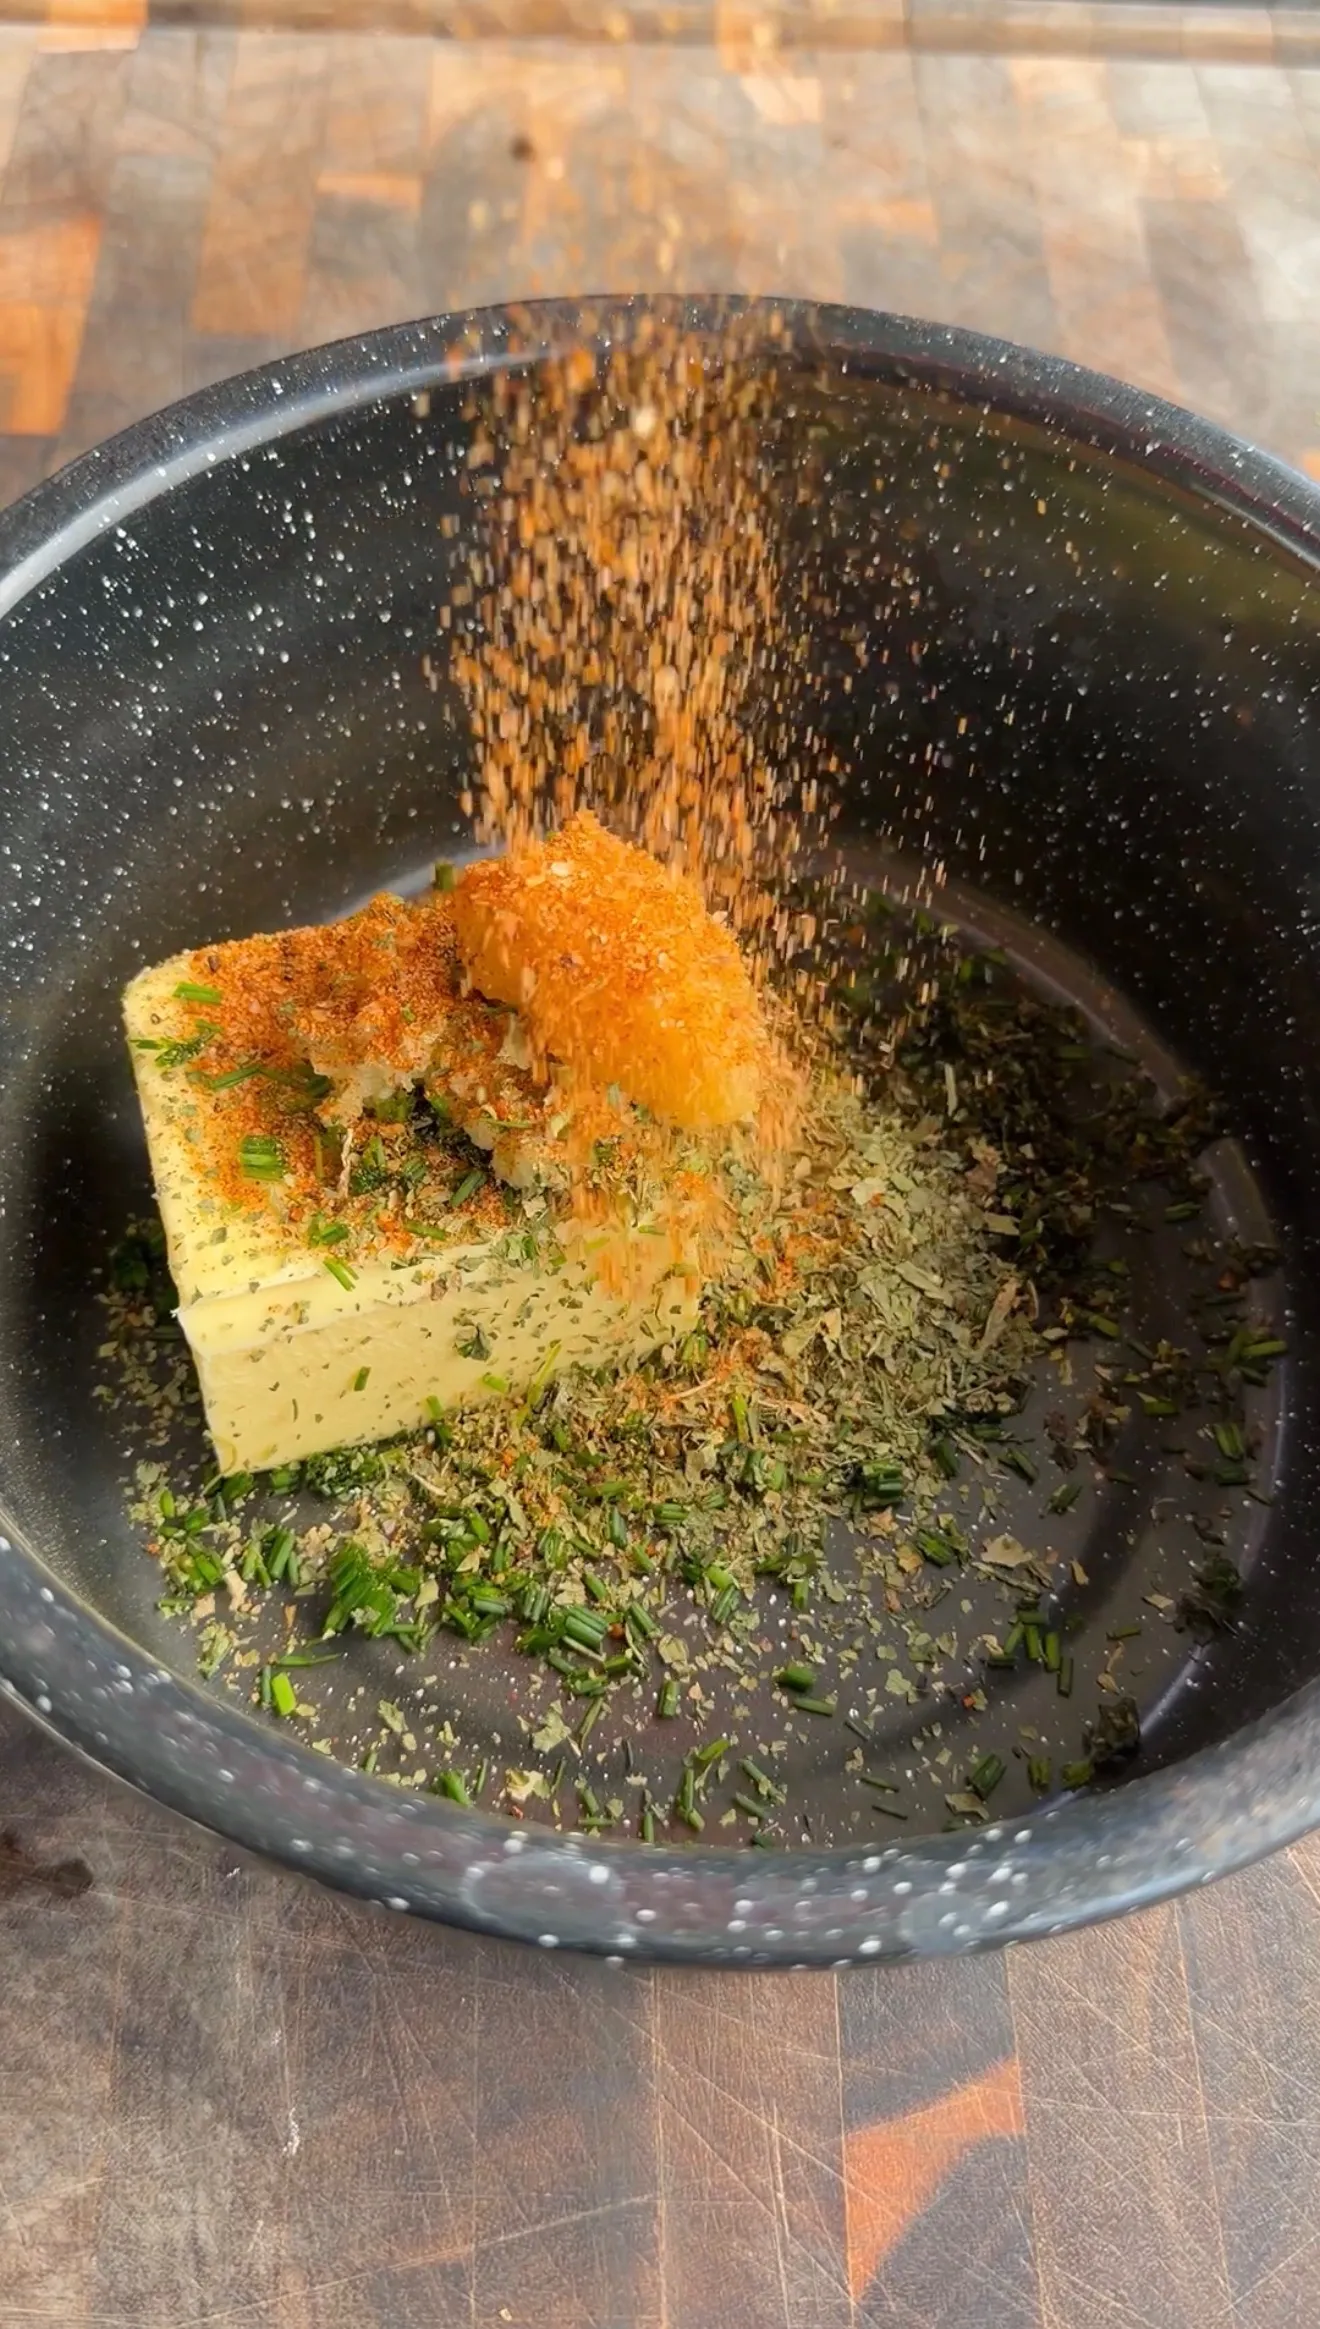
In a small bowl, combine the melted butter, minced garlic, chopped parsley, chopped chives, fresh thyme, lemon paste, salt, and black pepper. Stir until the herbs and garlic are evenly distributed through the butter.
Step 3: Top the Oysters With Butter and Season
Arrange the shucked oysters cup-side down on a sheet pan or tray for stability. Spoon a generous amount of the garlic herb butter onto each oyster, making sure the herbs and garlic land directly on the meat. Then season each oyster lightly with your favorite seafood seasoning.
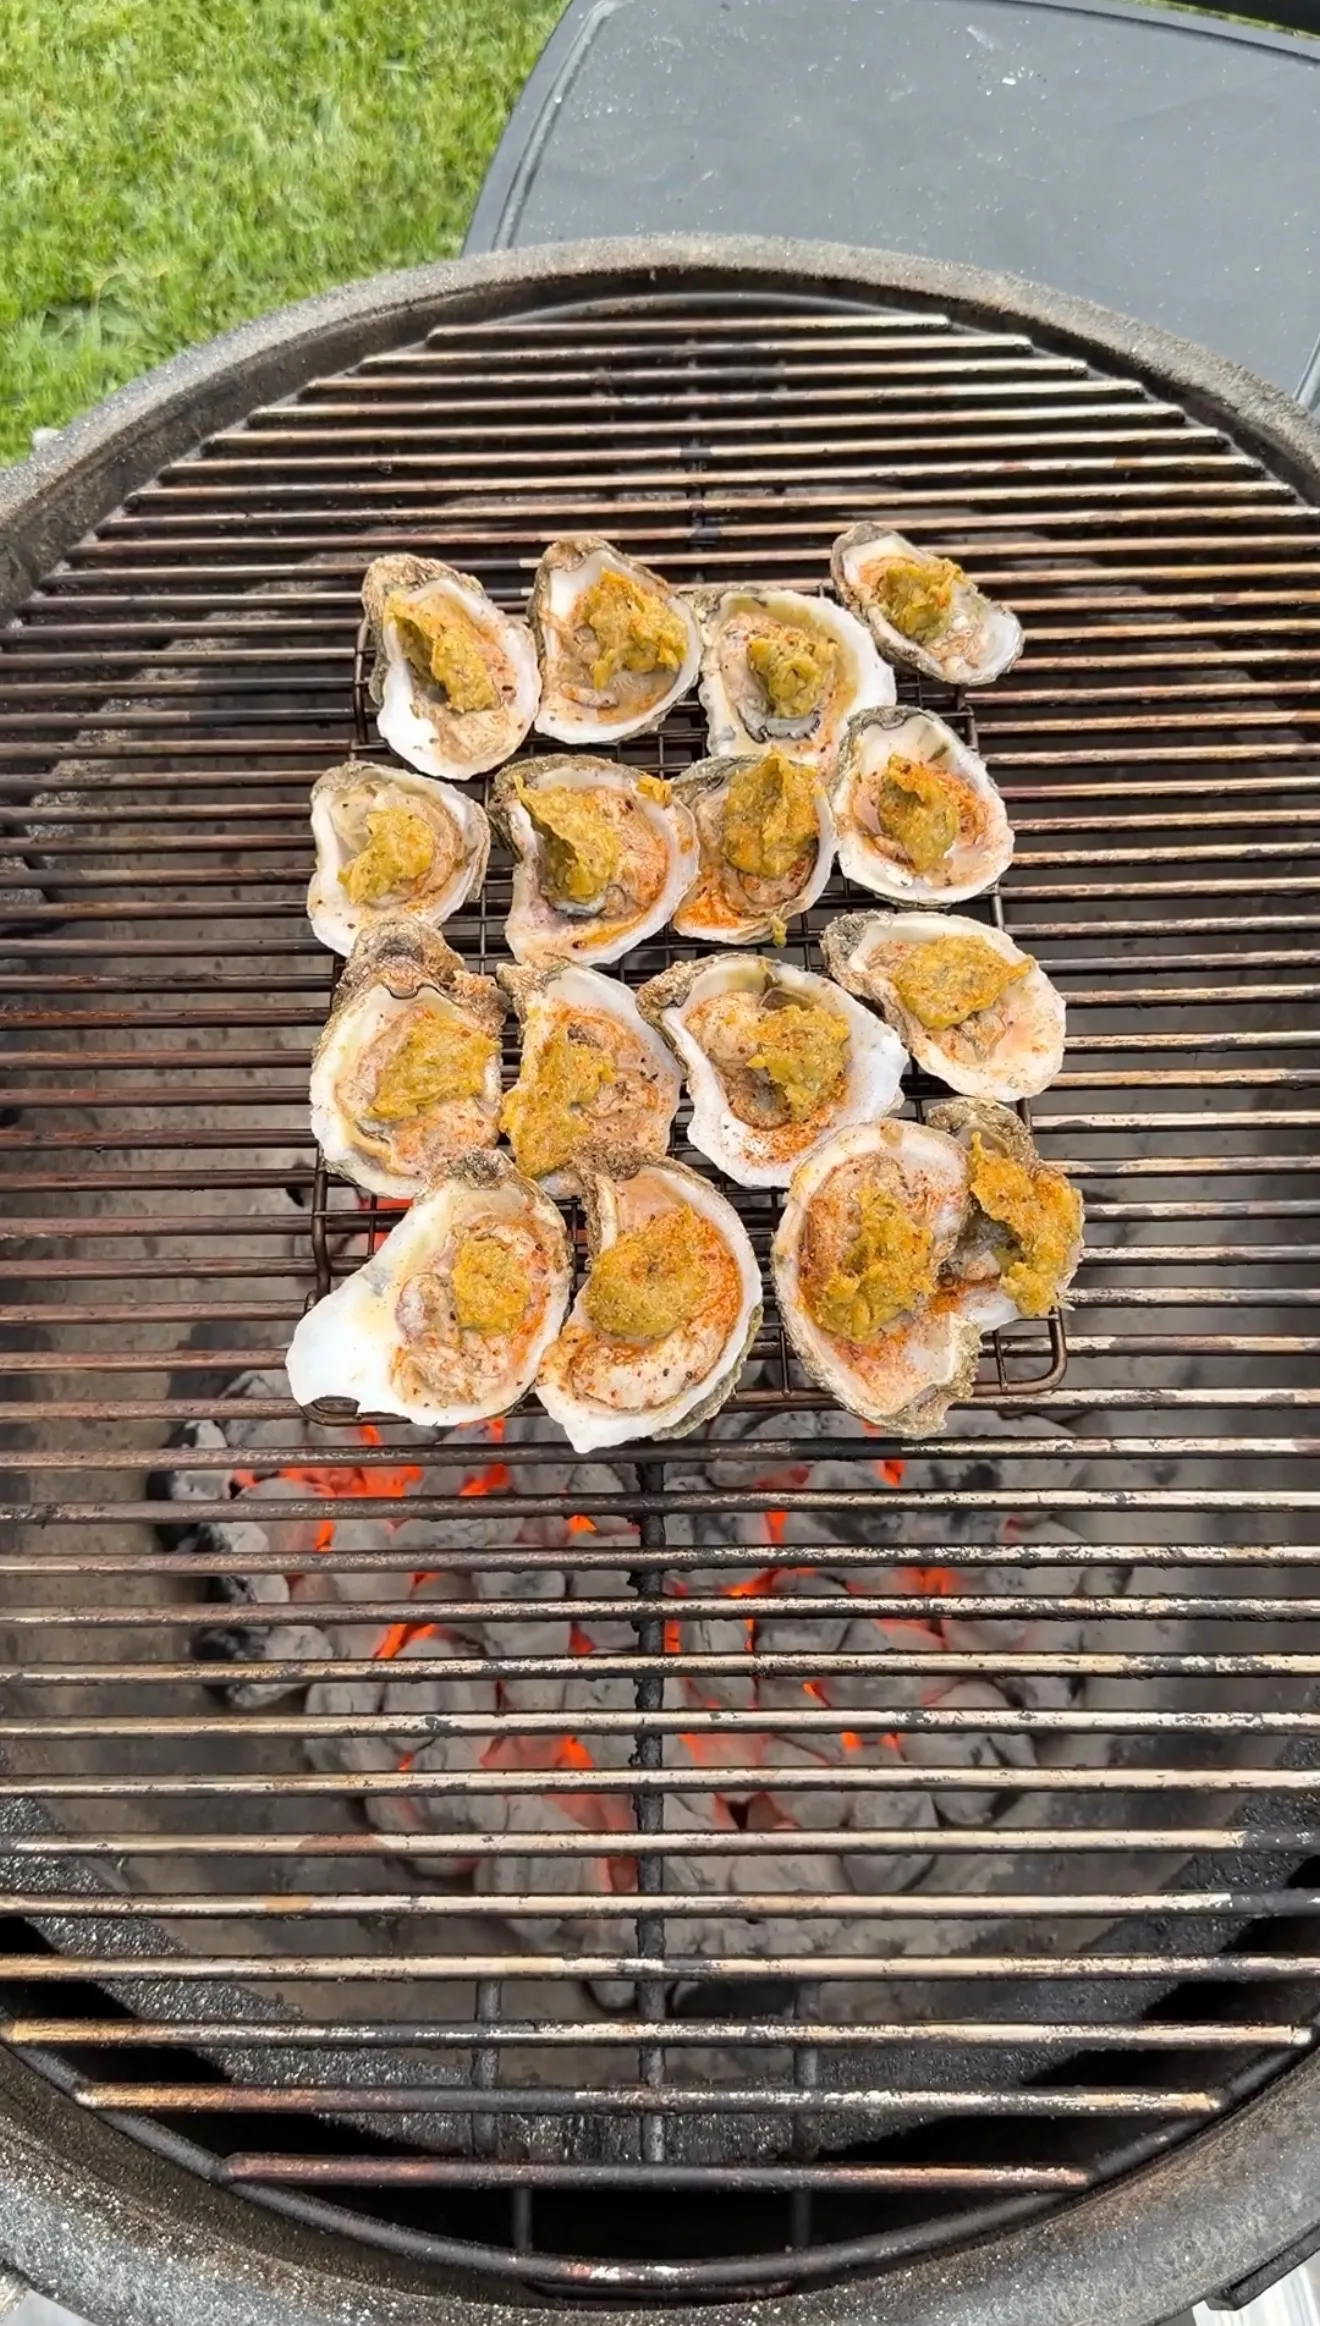
Step 4: Grill 6 Minutes Direct Heat
Place the buttered oysters directly onto the hot grill grates, cup side down so the brine and butter stay inside the shells. Cook for about 6 minutes uncovered without disturbing them. The butter will bubble, the brine will simmer, and the edges of the oyster meat will start to firm up.
Step 5: Add Parmesan and Close Lid 1-2 Minutes
Top each oyster with about 1 teaspoon of freshly grated parmesan cheese. Close the grill lid and cook another 1 to 2 minutes until the cheese is fully melted and bubbling. The closed lid traps the heat for quick melting without overcooking the oyster meat below.
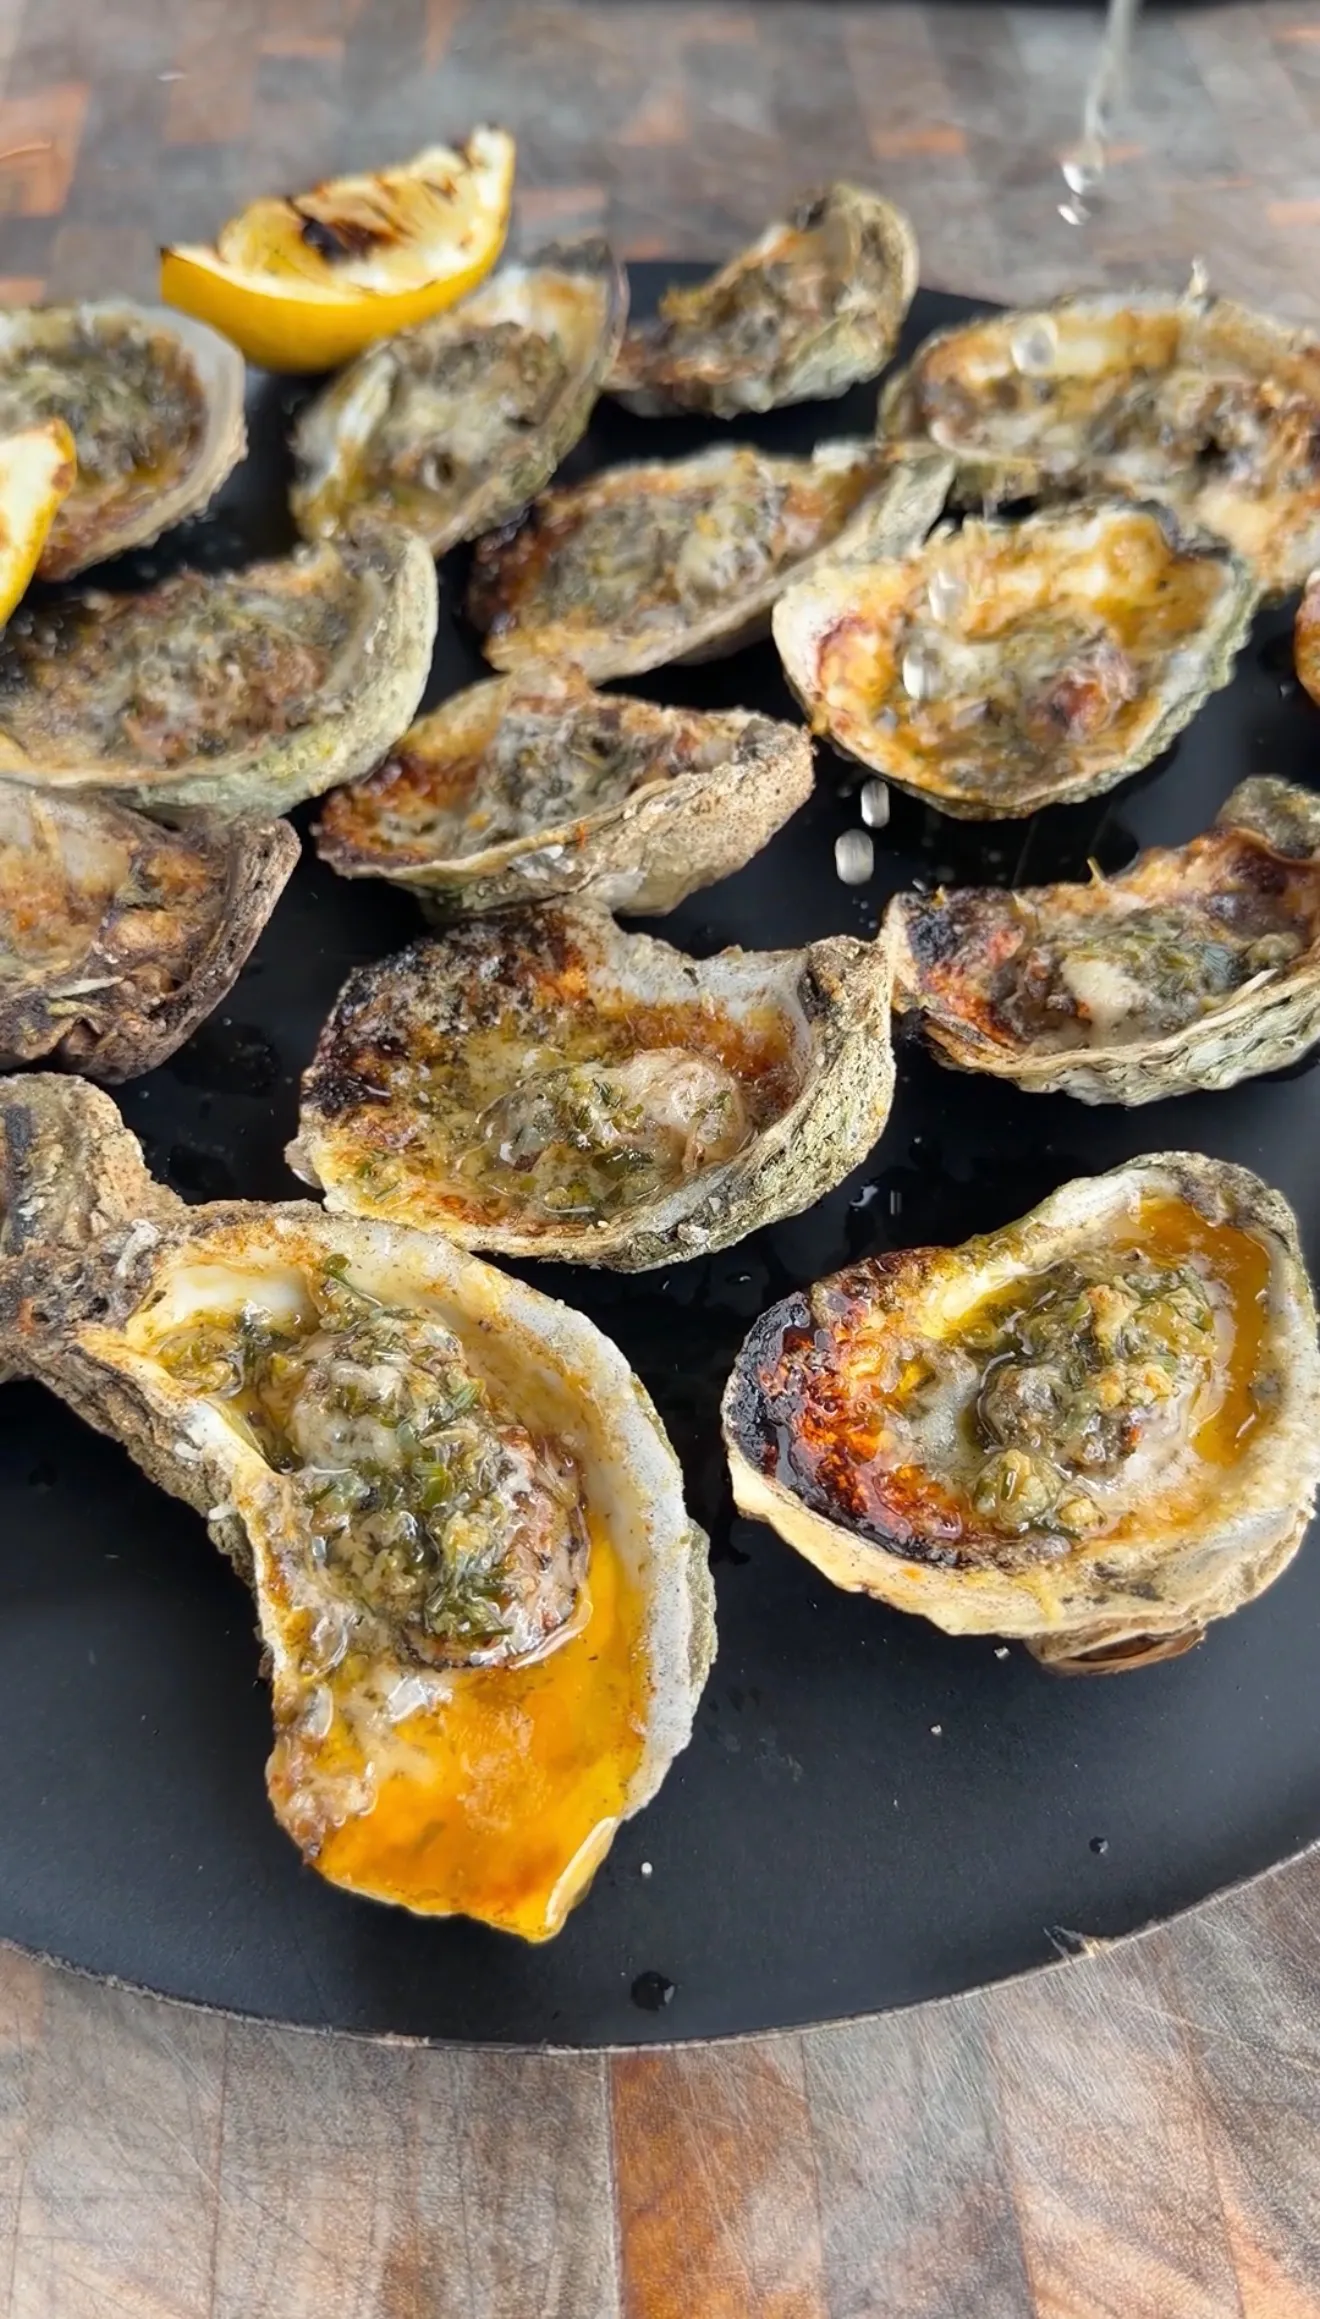
Step 6: Finish With Charred Lemon and Serve
Remove the oysters from the grill and transfer to a serving platter. Squeeze juice from the charred lemon wedges over the top of each oyster. Serve immediately while hot and bubbly.
Garlic Herb Parmesan Grilled Oysters
Ingredients
Equipment
Method
- Preheat the grill to around 400°F. Using an oyster shucking knife and a folded kitchen towel to protect your hand, shuck and fully open all 12 oysters. Leave the oysters on the half shell with their natural brine intact.
- In a small bowl, combine the melted butter, minced garlic, chopped parsley, chopped chives, fresh thyme, lemon paste, salt, and black pepper. Stir until evenly distributed.
- Spoon a generous amount of the garlic herb butter onto each oyster, making sure the herbs land on the meat. Season each oyster lightly with your favorite seafood seasoning.
- Place the oysters directly onto the hot grill grates, cup side down so the brine and butter stay in the shells. Cook for about 6 minutes uncovered without disturbing them.
- Top each oyster with about 1 teaspoon of freshly grated parmesan cheese. Close the grill lid and cook another 1 to 2 minutes until the cheese is melted and bubbling.
- Remove the oysters from the grill and finish with juice from charred lemon wedges (grill the lemon wedges cut-side down for 4-6 minutes before the oysters go on). Serve immediately while hot and bubbly.
Notes
Tried this recipe?
Let us know how it was!Garlic Herb Parmesan Oysters — FAQ
Everything you need to nail the shuck, the butter, and the grill timing.
Setup & Basics
Larger Gulf or East Coast oysters work best on the grill because they have deeper cup shells that hold more butter and brine during the cook. Look for medium to large Blue Point, Wellfleet, or any Gulf oyster variety. Avoid tiny Kumamoto or thin-shelled oysters, which dry out quickly under direct heat and lose their liquor too fast.
Three checks. First, shells should be tightly closed. If a shell is open, tap it firmly. If it does not close, the oyster is dead and unsafe. Second, the shell should feel heavy for its size, meaning it still holds its natural brine. Third, the smell after shucking should be clean ocean. Any sour, ammonia, or fishy odor means discard. Store oysters in the fridge cup side down with a damp towel over them and use within 1 to 2 days of purchase.
Lemon paste is concentrated lemon zest blended with oil, sold in tubes or jars in the spice or condiment aisle. The best substitute is 1.5 teaspoons of fresh lemon zest plus 1 teaspoon of olive oil, which delivers the same citrus oils without adding water. Skip fresh lemon juice in the butter mix since it thins the emulsion and can cause the butter to break on the grill. Save the fresh juice for the charred lemon wedges at the end.
For food safety, oysters should be cooked until the meat is opaque and the edges firm up, which happens around the 6 to 7 minute mark in this recipe. The natural brine simmers in the shell and the oyster meat plumps. The FDA recommends an internal temperature of 145°F for shellfish. With the butter and parmesan topping, the timing in this recipe lands at or above that threshold while keeping the texture tender.
Technique & Troubleshooting
Two options. First, place each oyster on the grates with the cup side down and the flat side up, which gives the deepest shell the most contact with the grate. Second, for unevenly shaped oysters, use a bed of crumpled foil or rock salt on a sheet pan placed on the grates. The foil cradles each shell and stops them from tipping when the butter starts to bubble. Rock salt holds heat well and adds visual presentation for plating later.
Yes. Preheat the oven to 450°F with a rack in the upper third. Arrange the buttered oysters on a sheet pan lined with crumpled foil or rock salt for stability. Bake for 6 minutes, top with parmesan, then switch to broil for 1 to 2 minutes until the cheese is melted and lightly browned. You lose the live-fire char and smoke, but the garlic herb butter and parmesan still deliver. Char the lemons under the broiler or in a hot cast iron pan before serving.
Ready to Level Up?
Take your backyard cooking from good to legendary.
This is where I keep all my most-used smokers, knives, and favorite cooking tools.
Shop My Gear CollectionExplore More Recipes
Find more diverse flavors at CWFeats.com