Hot Dog Burnt Ends
Bacon-wrapped hot dog burnt ends use 1 pack of 1/4-lb hot dogs (8 count) sliced into 1/4-inch thick pieces (approximately 4 pieces per hot dog for 32 total bites), each wrapped with half a slice of thick-cut bacon that’s been lightly seasoned with sweet BBQ seasoning before wrapping. Place on wire mesh rack and smoke at 250°F until bacon is fully cooked and crispy, approximately 60-90 minutes. Transfer to foil tray and toss with 1/2 cup BBQ sauce, 4 tablespoons cubed butter, and 1/2 cup brown sugar. Return to smoker for 30 minutes until sauce thickens and caramelizes into sticky glaze. Rest for 5-10 minutes before serving. These hot dog burnt ends deliver crispy bacon exterior, juicy hot dog center, and sticky sweet-savory BBQ glaze that creates addictive party appetizer or game day snack combining all the best flavors of BBQ burnt ends in convenient bite-sized form.
The whole process takes about 2-2.5 hours from start to finish. Spend 20 minutes slicing hot dogs, cutting bacon, and wrapping each piece. Smoke for 60-90 minutes until bacon crisps completely. Toss in glaze and smoke for 30 more minutes. Rest for 5-10 minutes before serving. The 250°F smoking temperature renders bacon fat slowly without burning while allowing smoke penetration. The two-stage cooking ensures crispy bacon before adding the sweet glaze that would prevent proper crisping if applied too early. One pack of hot dogs makes approximately 32 bites, perfect for parties or as an appetizer before the main BBQ.
Why Are These Called “Burnt Ends”?
The name “burnt ends” originally refers to the flavorful, caramelized pieces cut from the point end of smoked brisket. Traditional burnt ends are cubed, sauced, and returned to the smoker until the sauce caramelizes into a sticky, almost candy-like coating. They’re called “burnt” ends because of the deeply caramelized, nearly charred exterior that develops from extended smoking with sugar-based sauces.
Hot dog burnt ends borrow this technique and apply it to bacon-wrapped hot dog bites. Like traditional burnt ends, these are small pieces that get smoked until crispy, then tossed in sweet sauce and returned to heat until the glaze caramelizes. The final product has that characteristic sticky, caramelized exterior that defines burnt ends. The bacon provides the “burnt” crusty exterior while the glaze creates sticky sweetness.
The appeal is similar to brisket burnt ends: maximum surface area for bark and glaze, convenient bite-sized portions, and intensely concentrated flavor. Every piece is all crust and no interior, since the small size means everything is exterior. This creates higher ratio of caramelized surface to meat compared to full-sized items. The bacon wrapping ensures every hot dog piece has that crispy, smoky coating.
Hot dog burnt ends have become popular BBQ party food because they’re easier and faster than brisket burnt ends (2 hours vs 12+ hours), use inexpensive ingredients, and deliver similar sticky, sweet, smoky satisfaction. They’re essentially deconstructed pigs in a blanket elevated with smoke and BBQ glaze, creating adult version of childhood favorite.
Why Use 1/4-lb Hot Dogs Instead of Regular?

Quarter-pound hot dogs (sometimes called “jumbo” or “premium” hot dogs) are significantly thicker than standard hot dogs, measuring about 1 inch in diameter versus 3/4 inch for regular dogs. When sliced into 1/4-inch thick pieces, the larger diameter creates substantial rounds that hold up better during smoking and provide satisfying bite size. Regular hot dogs would create small, thin discs that dry out quickly.
The extra thickness also provides better ratio of hot dog to bacon. With 1/4-lb hot dogs cut into thick rounds, the bacon wraps around creating roughly equal proportions of bacon and hot dog in each bite. Regular thin hot dogs wrapped in bacon become overly bacon-forward with barely any hot dog flavor. The substantial hot dog center balances the strong bacon flavor.
Quarter-pound hot dogs also have better texture and quality than economy dogs. They’re usually all-beef or premium pork blends with better snap and less filler. This quality difference matters during extended smoking. Cheap hot dogs can become mushy or split during the 90-minute smoke. Premium 1/4-lb dogs maintain structural integrity and develop better texture.
The larger size also makes wrapping easier. The bigger surface area gives you more room to secure the bacon without it falling off. Tiny regular hot dog slices are fiddly to wrap and the bacon doesn’t adhere as well. The 1-inch diameter of 1/4-lb hot dogs provides ideal canvas for bacon wrapping.
Why Smoke at 250°F Instead of Higher or Lower?
Smoking at 250°F provides optimal temperature for rendering bacon fat without burning while still cooking in reasonable time. This moderate heat allows the bacon to crisp properly over 60-90 minutes. Lower temperatures like 225°F would take 2+ hours and risk never fully crisping the bacon. Higher temperatures like 300°F would crisp the bacon in 45 minutes but could burn the exterior before rendering fat completely.
The 250°F temperature also provides good smoke absorption without overcooking the hot dogs. Hot dogs are pre-cooked and only need heating through, but they benefit from extended smoke exposure to develop flavor. At 250°F over 90 minutes, they absorb significant smoke while staying juicy. Higher temps would dry them out before adequate smoke penetration.
Bacon rendering is the critical factor at this temperature. Bacon contains substantial fat that needs time to melt away. The slow render at 250°F melts fat gradually, allowing it to drip off rather than staying in the bacon and making it chewy. The rendered fat bastes the hot dogs while dripping into the drip pan. This self-basting keeps hot dogs moist while the bacon crisps.
The temperature also works perfectly for the glazing phase. After adding BBQ sauce, butter, and brown sugar, 30 minutes at 250°F caramelizes the sugars without burning. The moderate heat allows the glaze to reduce and thicken into sticky coating. Higher temps would burn the sugar black. Lower temps wouldn’t caramelize properly, leaving wet glaze instead of candy-like exterior.
How Do You Keep Bacon from Unraveling During Smoking?
Keeping bacon wrapped tightly around hot dog pieces requires proper wrapping technique and optional securing methods. Wrap each piece while the bacon is cold from the refrigerator. Cold bacon is firmer and easier to handle. As it warms and renders during smoking, it shrinks and tightens around the hot dog naturally. Starting cold gives the best initial wrap.
Overlap the bacon ends rather than trying to have them just meet. One end of the bacon should overlay the other by at least 1/2 inch. This overlap prevents gaps from opening as bacon shrinks. The overlapping section essentially glues itself together as fat renders, creating self-sealing wrap. Minimal overlap means the bacon can pull apart during cooking.
The wire mesh rack placement is important. Place the wrapped hot dogs with the bacon seam-side down on the rack. Gravity and the weight of the hot dog hold the overlap closed during the initial phase of smoking. By the time you need to move them, the bacon has rendered enough to hold its shape. Starting seam-down prevents unraveling during the critical first 30-45 minutes.
Toothpicks are optional but can help with particularly thick bacon or if you’re worried about unraveling. Insert a toothpick through the bacon overlap and into the hot dog to secure it. Remove toothpicks before glazing if used, or warn guests they’re present. Most people find toothpicks unnecessary if the wrapping technique and cold bacon start are executed properly.
Hot Dog Burnt Ends
Bacon-wrapped, smoked, sticky BBQ glaze
Ingredients
Hot Dog Bites
- 1 pack ¼-lb hot dogs (8 count)
- 1 pack thick-cut bacon
- Sweet BBQ seasoning (for light dusting)
Sticky Glaze
- ½ cup BBQ sauce
- 4 tablespoons unsalted butter, cubed
- ½ cup brown sugar
Season the bacon lightly, not the hot dogs. The bacon needs flavor since it’s bland on its own, but the hot dogs are already heavily seasoned and salted. Over-seasoning creates overly salty bites. The light dusting on the bacon before wrapping provides perfect seasoning balance while the BBQ glaze adds sweetness during the final 30 minutes.
Step-by-Step Instructions
Step 1: Prep Hot Dogs and Bacon
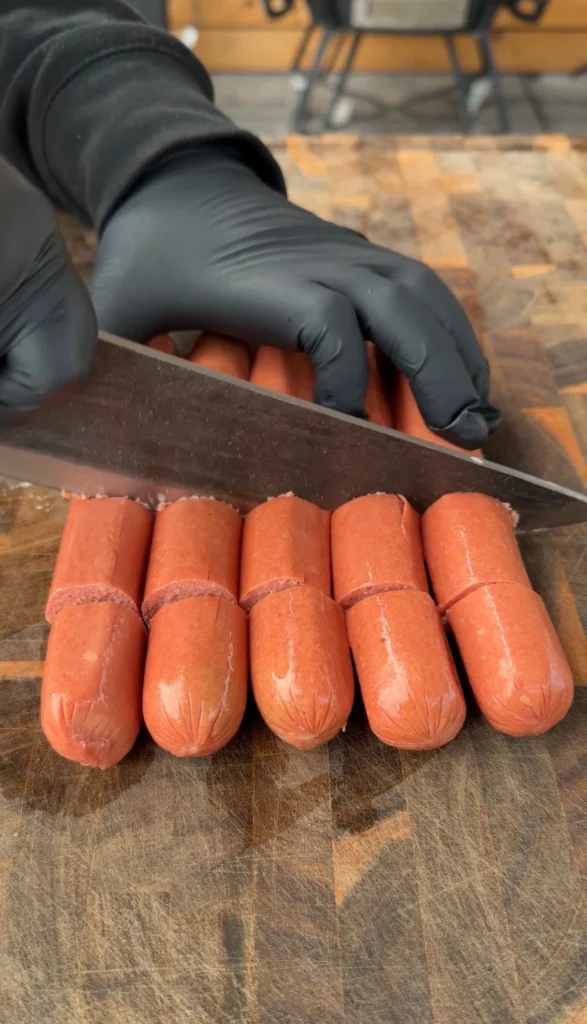
Remove 1 pack of 1/4-lb hot dogs (typically 8 hot dogs) from packaging and place on a cutting board. Using a sharp knife, slice each hot dog into rounds approximately 1/4 inch thick. You should get 4 pieces per hot dog if sliced evenly, creating 32 total pieces. Try to keep slices uniform in thickness so they cook evenly.
Remove 1 pack of thick-cut bacon from packaging. Count the hot dog pieces (should be around 32) and determine how many bacon slices you need. Each hot dog piece needs half a bacon slice. For 32 pieces, you’ll need 16 full bacon slices. Cut each bacon slice in half crosswise (the short way). You now have bacon half-slices ready for wrapping.
Get your sweet BBQ seasoning ready. You’ll be lightly seasoning the bacon before wrapping, not the hot dogs. The hot dogs are already heavily seasoned and salted from the curing process. Adding more seasoning to them would make the final bites too salty. The bacon, however, is relatively bland and needs flavor.
Lay the bacon half-slices out on a clean work surface or cutting board. Lightly sprinkle sweet BBQ seasoning over the bacon. Use a light hand – just a pinch per piece. The bacon should have visible specks of seasoning but not be heavily coated. The BBQ glaze coming later provides most of the sweet BBQ flavor, so the initial seasoning is just supplemental.
Step 2: Wrap and Rack
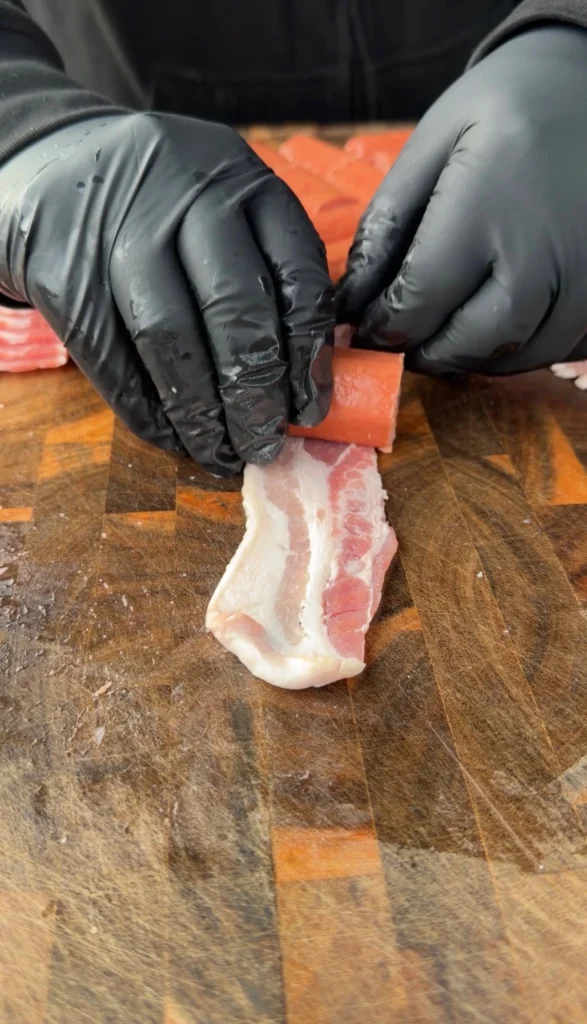
Take one half slice of seasoned bacon and one hot dog round. Place the hot dog at one end of the bacon half-slice. Wrap the bacon around the circumference of the hot dog round, creating a ring of bacon around the flat disc. The bacon should overlap itself on one side by about 1/2 inch.
Press the overlapping bacon ends together firmly. The cold bacon fat will help them stick slightly. Position the hot dog so the bacon seam is on the bottom when you place it down. This uses gravity to help keep the wrap closed during the initial smoking phase. The bacon will shrink and tighten around the hot dog as it cooks.
Repeat the wrapping process with all remaining hot dog pieces and bacon half-slices. Work efficiently while the bacon is still cold from the refrigerator. Warm bacon becomes floppy and harder to wrap. If the bacon warms too much while working, place the unwrapped slices back in the refrigerator for 10 minutes to firm up.
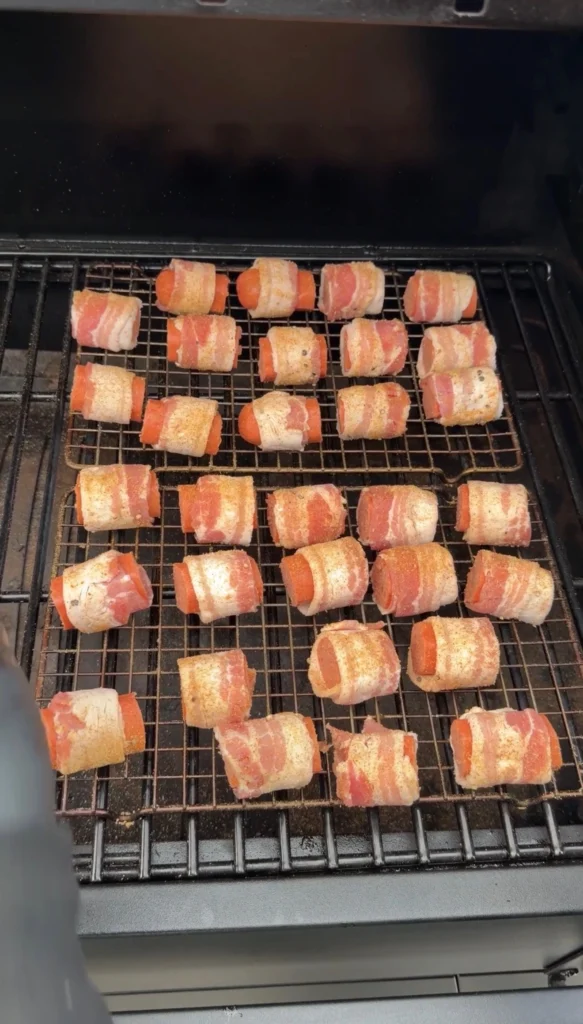
Place all wrapped hot dog pieces on a wire mesh rack in a single layer, seam-side down. The wire mesh rack makes transport easier and allows smoke to circulate around all sides. Space the pieces so they’re not touching – they need air circulation for even smoking and crisping. If they’re touching, the sides won’t render or crisp properly.
Step 3: Smoke Until Bacon Is Crispy
Preheat your smoker to 250°F. Add wood chunks – apple, cherry, or hickory all work well. Apple and cherry provide mild, slightly sweet smoke that complements the BBQ glaze. Hickory gives stronger, more traditional BBQ smoke. Avoid mesquite which can be too intense for these bite-sized pieces.
Place the wire mesh rack with bacon-wrapped hot dogs into the preheated smoker. Position the rack where smoke circulates freely. Close the lid and smoke undisturbed for the first 45 minutes. Don’t open the smoker frequently or you’ll extend cooking time and create uneven temperature. The bacon needs steady heat to render properly.
After 45 minutes, check the bacon. It should be starting to render fat and firm up noticeably. The bacon won’t be fully crispy yet but should look cooked rather than raw. Continue smoking with the lid closed. Check every 15 minutes from this point to monitor doneness.
You’re looking for bacon that’s fully rendered with crispy edges. The bacon should be golden-brown and firm to the touch, not soft or flabby. Any visible fat should be rendered to crispy bits. The hot dogs will have slight char marks from the grate and have absorbed smoke color. Total smoking time is typically 60-90 minutes depending on bacon thickness and how crispy you like it.
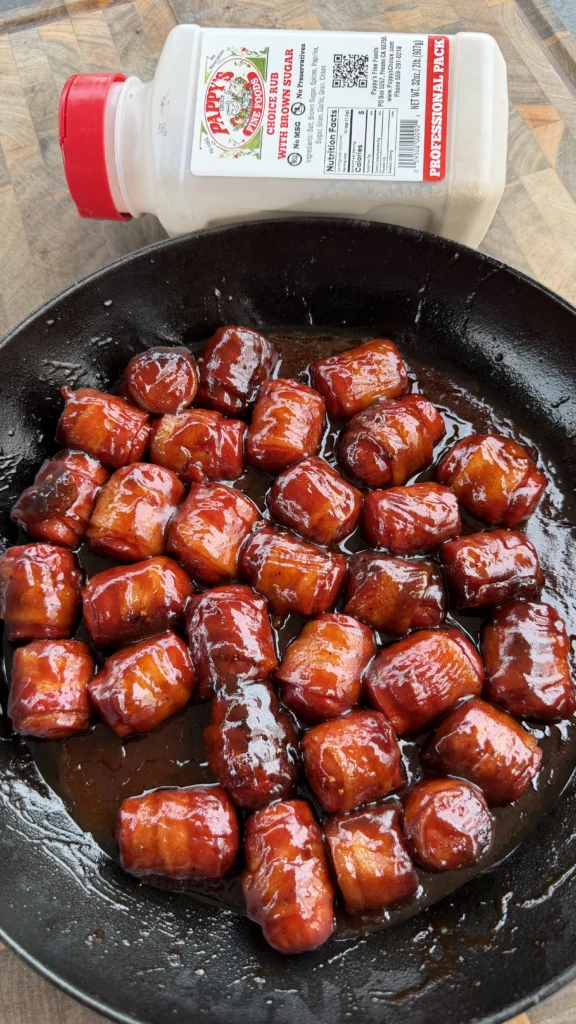
Step 4: Add Glaze and Finish
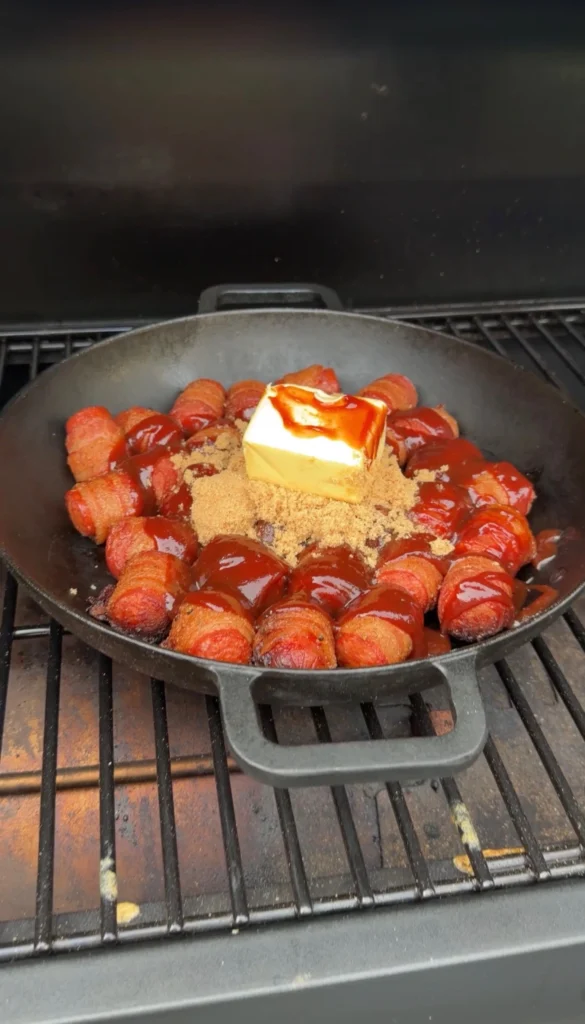
When bacon is fully cooked and crispy, carefully remove the wire mesh rack from the smoker. The hot dog bites will be very hot. Transfer them from the rack into a disposable aluminum foil tray. You want a tray with sides at least 1-2 inches tall to hold the glaze without spilling.
Add 1/2 cup BBQ sauce, 4 tablespoons cubed butter, and 1/2 cup brown sugar to the tray with the hot dog bites. Use your favorite BBQ sauce – sweet Kansas City-style sauce works excellently, or use sweet-and-tangy style. The brown sugar can be light or dark – dark brown sugar provides deeper molasses flavor.
Gently toss the hot dog bites in the glaze mixture using a spoon or by shaking the tray. Every piece should be coated with BBQ sauce, and the butter and sugar should be distributed throughout. Don’t stir too aggressively or you might knock the bacon loose from some pieces. Gentle folding motion works best.
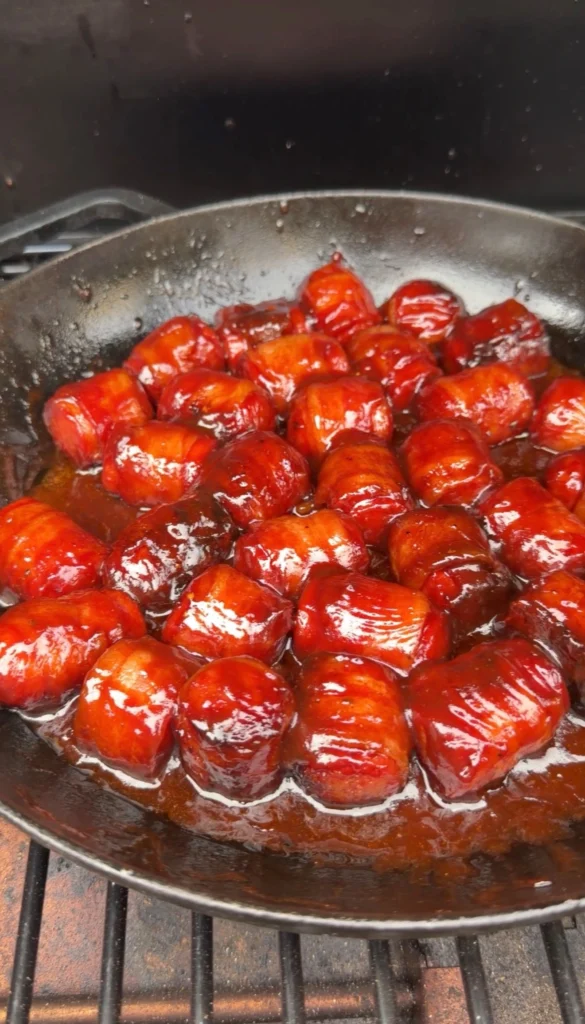
Return the glazed hot dog bites in the tray to the 250°F smoker. Leave uncovered so the glaze can reduce and caramelize. Cook for 30 minutes, stirring gently every 10 minutes to redistribute the glaze. The sauce will bubble, thicken, and become glossy. The sugar will caramelize, creating sticky coating. The butter will melt and blend everything together.
Step 5: Rest and Serve
After 30 minutes, check the glaze. It should be thick and syrupy, coating the hot dog bites with glossy, sticky layer. The bacon should be deeply caramelized and nearly candy-like on the exterior. The glaze should have reduced enough that there’s minimal loose liquid in the tray – most should be clinging to the bites.
Carefully remove the tray from the smoker. The contents will be extremely hot – nearly 250°F – with sugar that can cause serious burns. Handle with heavy oven mitts and place on a heat-safe surface. Let the hot dog burnt ends rest in the tray for 5-10 minutes.
During rest, the glaze will set slightly as it cools, transforming from sticky syrup to more firm coating. The bacon will remain crispy despite the glaze. The hot dogs will cool to safe eating temperature. Don’t skip the rest or you’ll burn your mouth on molten sugar glaze.
After resting, transfer the hot dog burnt ends to a serving platter or bowl using a spoon or tongs. They should come out of the tray as individual pieces, though some may stick together from the glaze – just pull them apart gently. Serve hot while the glaze is still soft and sticky. Provide toothpicks or small forks for easy serving at parties.

Bacon-Wrapped Hot Dog Burnt Ends
Ingredients
Equipment
Method
- Slice each hot dog into 1/4-inch thick rounds (about 4 pieces per hot dog for 32 total). Cut bacon slices in half crosswise. Lightly sprinkle sweet BBQ seasoning on bacon half-slices only, not hot dogs.
- Wrap each hot dog piece with seasoned bacon half-slice, overlapping ends by 1/2 inch. Place seam-side down on wire mesh rack, spacing so pieces don’t touch.
- Preheat smoker to 250°F. Add apple, cherry, or hickory wood. Place rack in smoker and smoke until bacon is fully cooked and crispy, 60-90 minutes.
- Transfer bacon-wrapped hot dogs to foil tray. Add 1/2 cup BBQ sauce, 4 tbsp cubed butter, and 1/2 cup brown sugar. Gently toss to coat all pieces.
- Return uncovered tray to 250°F smoker. Cook 30 minutes, stirring gently every 10 minutes, until glaze thickens and caramelizes.
- Remove from smoker and rest 5-10 minutes. Transfer to serving platter and serve hot with toothpicks.
Nutrition
Notes
Tried this recipe?
Let us know how it was!Frequently Asked Questions
Can I use regular hot dogs instead of 1/4-lb?
Regular hot dogs work but create smaller, thinner bites that dry out faster during smoking. The thin profile also creates poor hot dog-to-bacon ratio where bacon dominates. If using regular hot dogs, cut them into thicker 1/2-inch pieces instead of 1/4-inch to create more substantial bites and reduce drying risk.
The 1/4-lb hot dogs are worth seeking out for this recipe since their larger diameter creates ideal proportion and texture. They’re available at most grocery stores, sometimes labeled “jumbo” or “premium” hot dogs.
What if I don’t have a smoker?
Bake bacon-wrapped hot dogs on a wire rack over a baking sheet at 375°F for 35-45 minutes until bacon is crispy. Transfer to foil tray, add glaze ingredients, and bake another 15-20 minutes until caramelized. You’ll miss smoke flavor but can add 1/2 teaspoon liquid smoke to the BBQ sauce.
Alternatively, use a covered grill with indirect heat setup at 250°F and follow the same smoking timing. Add wood chunks in a smoker box for smoke flavor even on gas grills.
How do I prevent the glaze from burning?
Apply glaze only after bacon is fully cooked and crispy, not before. Sugar in the glaze burns quickly if applied too early. The two-stage cooking (smoke until crispy, then glaze) prevents burning. During the 30-minute glaze phase, stir every 10 minutes to redistribute the sauce and prevent hot spots.
If glaze starts smoking or turning black rather than glossy brown, remove immediately. The goal is caramelization, not burning. The 250°F temperature provides enough heat to caramelize without scorching.
Can I make these ahead of time?
Hot dog burnt ends are best served fresh while bacon is crispy and glaze is warm. However, you can smoke the bacon-wrapped hot dogs up to 4 hours ahead, then add glaze and finish just before serving. Store unglazed smoked bites covered at room temperature.
Don’t glaze and hold for extended time – the bacon softens and loses crispiness as it sits in sauce. If you must prep fully ahead, reheat gently in a 275°F oven for 10 minutes before serving to re-crisp slightly.
What other glazes work on hot dog burnt ends?
Hot honey glaze (honey, butter, sriracha), maple bourbon glaze (maple syrup, bourbon, butter), or teriyaki glaze (teriyaki sauce, brown sugar, butter) all work excellently. Apply any glaze during the final 30 minutes following the same method – toss and return to smoker uncovered.
