Hot honey marinated tri-tip takes the concept of long marination to an extreme by submerging beef in pure raw honey mixed with red chili flakes for five full days. This unconventional technique creates tender, flavorful tri-tip with complex sweet-spicy character that can’t be achieved through shorter marinades or dry rubs. The raw honey acts as both tenderizer and flavor vehicle, with its natural enzymes breaking down the meat’s proteins while the chili flakes infuse gentle heat throughout. The extended marination period allows these flavors to penetrate deep into the dense tri-tip muscle, creating seasoning from the interior rather than just on the surface.
What makes this honey marinated tri-tip special is how the honey caramelizes during high-heat searing to create a lacquered, slightly crispy exterior while the interior remains tender and juicy. The sugars in the honey undergo Maillard reaction and caramelization when they hit the hot grill, developing hundreds of new flavor compounds that taste roasted, nutty, and complex. The chili flakes provide background heat that builds gradually rather than hitting aggressively, creating balanced spice that complements rather than overwhelms the beef’s natural flavor. This spicy honey beef delivers restaurant-quality results that seem far more complicated than the simple three-ingredient marinade would suggest.
Hot Honey Marinated Tri-Tip
Two whole tri-tips submerged in one gallon raw honey mixed with red chili flakes, marinated for five days with daily turning, then scraped clean, salted, and seared over high heat until medium-rare with caramelized honey crust
Ingredients
For the Marinade:
- 2 whole tri-tips (2½-3 lbs each), silver skin removed
- 1 gallon raw honey
- 1 cup red chili flakes
- Kosher salt (for seasoning before cooking)
Why Raw Honey Works for Long Marination
Raw honey possesses unique properties that make it ideal for extended marination periods that would turn meat mushy with acidic marinades. Unlike vinegar or citrus-based marinades that aggressively denature proteins and can over-tenderize meat into unpleasant mush, honey works gently through enzymatic action. Raw honey contains natural enzymes including diastase, invertase, and glucose oxidase that slowly break down proteins without the harsh effects of strong acids. These enzymes work gradually over days rather than hours, creating tender texture without compromising the meat’s structural integrity.
The viscosity and sugar content of honey also affect how it penetrates meat. Honey’s thick consistency means it moves into meat tissue very slowly through osmosis, requiring the extended five-day period for adequate penetration. The high sugar concentration creates osmotic pressure that draws moisture to the meat’s surface initially, then gradually works its way inward. This is why daily turning is essential – it ensures all surfaces get equal exposure to the honey and prevents any areas from drying out. The natural antimicrobial properties of honey also make extended marination safe – honey’s low water activity and acidic pH create an environment where harmful bacteria can’t multiply, allowing you to marinate safely for five days without food safety concerns that would exist with other marinades.
Understanding Tri-Tip and Proper Trimming

Tri-tip is a triangular cut from the bottom sirloin that offers excellent beef flavor at a more affordable price than premium steaks. The cut gets its name from its distinctive triangle shape and contains two different grain directions that meet in the middle, which is crucial to understand for proper slicing after cooking. Tri-tip has moderate marbling throughout with a fat cap on one side and typically weighs two and a half to three pounds per piece. The muscle is relatively lean compared to ribeye or brisket but still contains enough intramuscular fat to stay moist during cooking when not overcooked.
Proper trimming before marination is essential for both texture and flavor penetration. The silver skin – that thin, silvery membrane on the exterior – must be removed completely because it’s tough, chewy, and prevents marinade penetration. Use a sharp boning knife to slide under the silver skin at one end, angling the blade slightly upward, then pull the membrane taut with your other hand while cutting it away from the meat beneath. Work in long, smooth strokes to remove the silver skin in large pieces rather than leaving behind small bits. Any excess fat thicker than a quarter inch should also be trimmed, though leave a thin fat cap if present as it will render during cooking and add flavor.
The Science of Chili Heat Distribution
Red chili flakes in the honey marinade contribute heat that builds gradually and evenly rather than creating intense surface burn. The capsaicin compounds responsible for chili peppers’ heat are fat-soluble rather than water-soluble, which means they dissolve into the beef’s intramuscular fat during the extended marination. This creates heat distributed throughout the meat rather than concentrated on the surface. The honey helps suspend and distribute the chili flakes evenly, preventing them from settling at the bottom and creating inconsistent spice levels.
The five-day marination period allows capsaicin plenty of time to migrate from the chili flakes into the honey and then into the meat. Initially, the heat will be concentrated in the honey surrounding the meat, but over days it gradually penetrates inward. This is why daily turning is crucial – it exposes all surfaces to the chili-infused honey and ensures even heat distribution. The amount of chili flakes – one cup per gallon of honey – provides noticeable heat without being overwhelming. This ratio can be adjusted based on preference, but stay within a half cup to one and a half cups per gallon. Less than half a cup produces barely perceptible heat, while more than one and a half cups can overpower the honey’s sweetness and beef’s natural flavor.
The Role of Daily Turning During Marination
Daily turning during the five-day marination period ensures even flavor distribution and prevents any surfaces from drying out or developing off flavors. When meat sits in one position for extended periods, the bottom surfaces stay in constant contact with the marinade while top surfaces may be partially exposed to air. This creates uneven flavor penetration where some areas taste intensely of honey and chili while others remain relatively bland. Turning redistributes the marinade and ensures all surfaces get equal exposure time.
The turning process also helps redistribute the chili flakes which tend to settle toward the bottom of the container due to gravity. When you turn the tri-tips, you’re also stirring the marinade slightly, keeping the chili flakes suspended throughout rather than accumulating at the bottom. Use clean hands or tongs to flip the tri-tips completely – what was on top should now be on bottom and vice versa. Take this opportunity to check that the meat remains fully submerged and add more honey if needed to keep everything covered. The entire turning process takes less than two minutes per day but makes a significant difference in the final results.
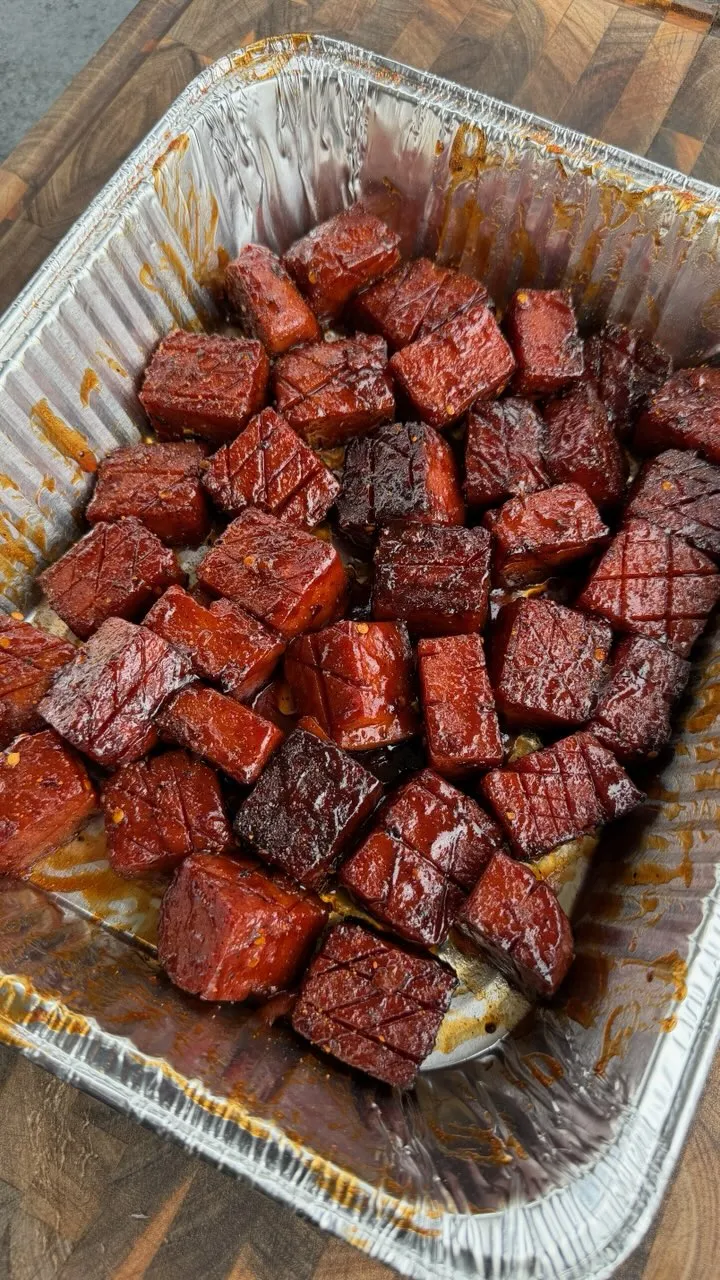
High Heat Searing for Caramelization
After five days in honey marinade, the tri-tips require high heat searing to develop proper crust and caramelize the residual honey coating. The scraped tri-tips will still have a thin layer of honey on their surface despite removing excess – this remaining honey contains enough sugar to caramelize beautifully when exposed to 450-500 degree heat. The high temperature causes rapid Maillard reaction between the honey’s sugars and the meat’s proteins, creating complex roasted, nutty, slightly bitter notes that balance the honey’s sweetness. This caramelization also creates textural contrast – crispy, lacquered exterior against tender, juicy interior.
The two-stage cooking method – initial high-heat sear followed by indirect heat finishing – prevents the honey coating from burning while ensuring the interior reaches proper doneness. If you tried to cook the entire tri-tip over high direct heat, the exterior would char and burn before the interior cooked through. The initial sear develops crust and color in just two to three minutes per side, then moving to indirect heat allows gentle cooking to the desired internal temperature without further darkening the exterior. This technique works on any grill – gas, charcoal, or pellet – as long as you can create distinct hot and cool zones.
Ingredients
For the Marinade:
- 2 whole tri-tips (2½-3 lbs each), silver skin removed
- 1 gallon raw honey
- 1 cup red chili flakes
- Kosher salt (for seasoning before cooking)
Step-by-Step Instructions
Trim and Prepare the Tri-Tips
Start with two whole tri-tips weighing two and a half to three pounds each. Place the first tri-tip on a cutting board with the fat cap facing up. Locate the silver skin – the thin, silvery membrane that covers portions of the meat’s surface. Insert a sharp boning knife or fillet knife under one edge of the silver skin, angling the blade slightly upward to avoid cutting into the meat beneath. Use your other hand to pull the silver skin taut while you slice it away from the meat in long, smooth strokes.
Work methodically around the entire tri-tip, removing all silver skin completely. Even small patches left behind will create chewy, unpleasant texture in the finished dish and prevent marinade penetration in those areas. Trim any excess fat thicker than a quarter inch, though a thin fat cap can remain as it will render during cooking and add flavor. Inspect the meat for any remaining bits of silver skin or thick connective tissue and remove them. Repeat the trimming process with the second tri-tip. The cleaned tri-tips should have smooth, even surfaces with no shiny membrane visible. Pat both tri-tips dry with paper towels to remove any moisture or small trimmed bits.
Create the Hot Honey Marinade
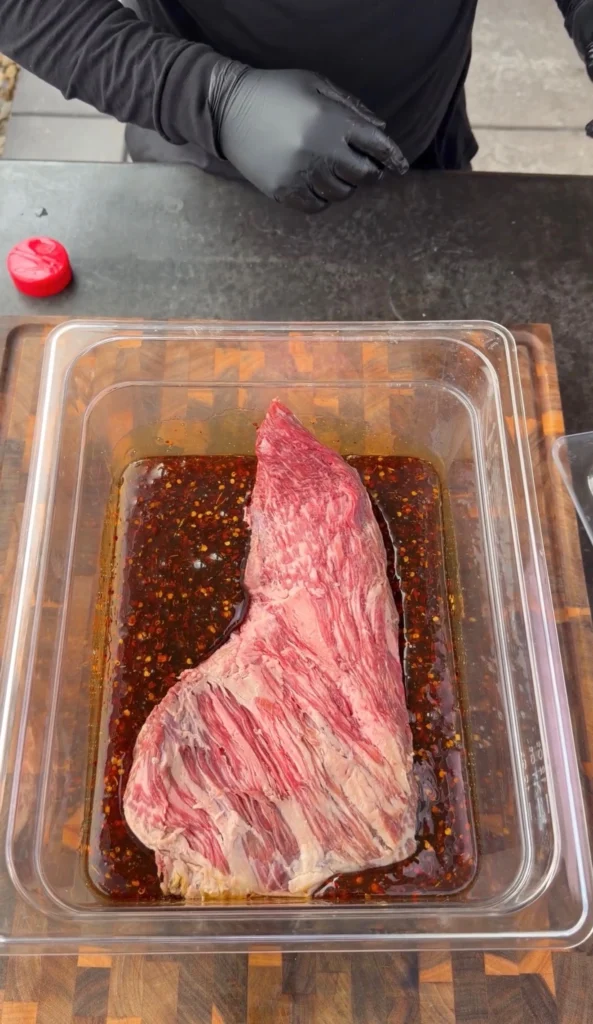
Select a food-safe container large enough to hold both tri-tips fully submerged – a large stockpot, food-grade bucket, or extra-large zip-top bag will work. Pour one gallon of raw honey into the container. Raw honey is crucial rather than processed honey because it retains the natural enzymes that contribute to tenderization. Raw honey will be thicker and cloudier than processed honey and may contain small bits of wax or pollen, which is fine and actually desirable.
Add one cup of red chili flakes directly to the honey. Use standard crushed red pepper flakes found in the spice aisle – the type typically used on pizza or in Italian cooking. Don’t use whole dried chilies or ground cayenne pepper as these won’t distribute properly or provide the right heat level. Stir the honey and chili flakes together thoroughly using a long spoon or your clean hand. The honey’s thickness makes stirring somewhat difficult, but work at it until the chili flakes are distributed relatively evenly throughout rather than clumped at the bottom. The mixture will look like honey studded with red flakes.
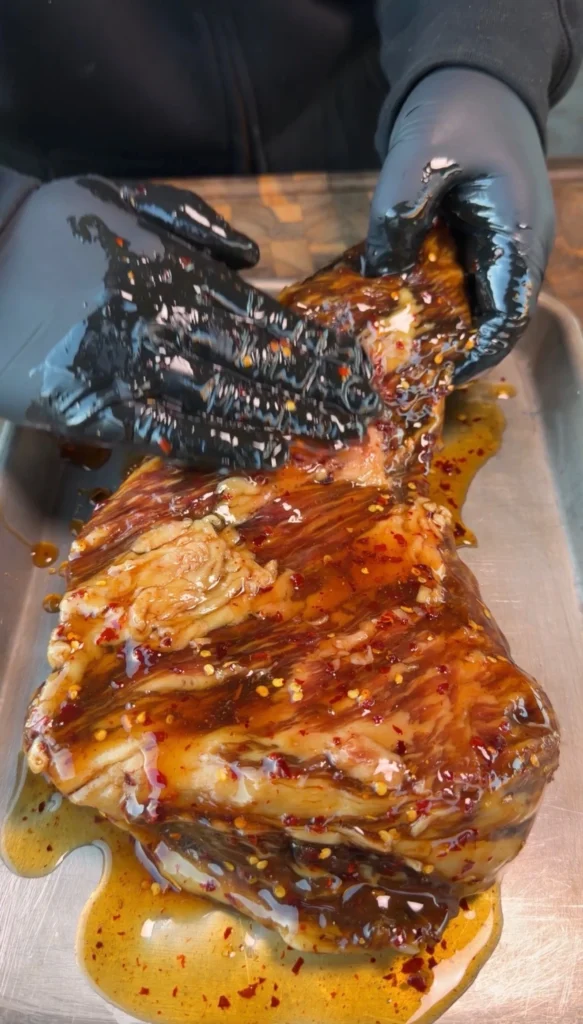
Submerge and Marinate the Tri-Tips
Lower both trimmed tri-tips into the honey-chili mixture, nestling them into the container. Use your hands or a spoon to ensure the honey completely covers all surfaces of both tri-tips – there should be at least an inch of honey above the top surface of the meat. If your tri-tips are large or your container is wide, you may need additional honey to achieve full coverage. The meat will want to float initially due to air pockets, so press it down until the honey fully coats all surfaces.
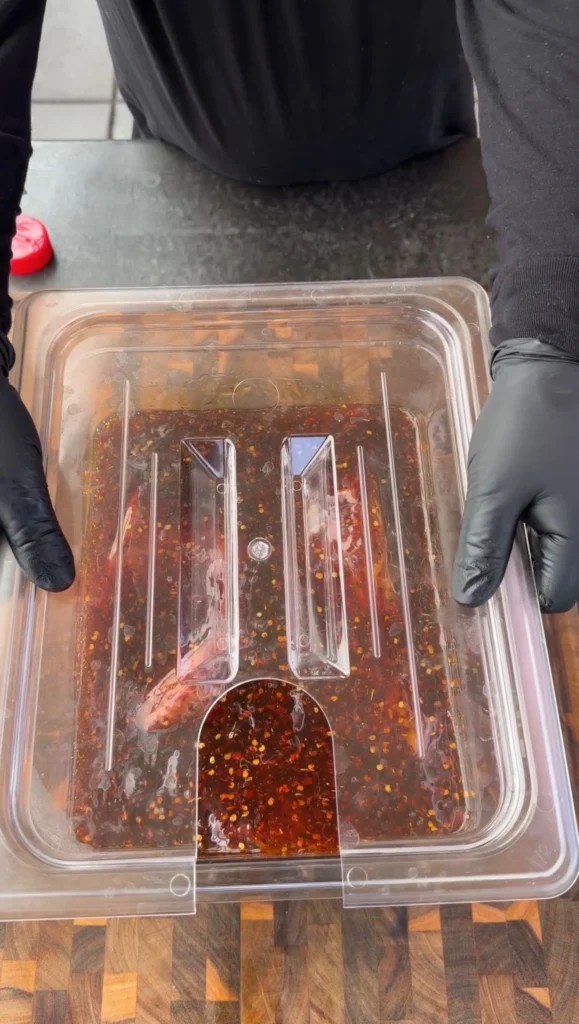
If any portion of the tri-tips remains above the honey line, either add more honey to cover them or place a small plate or lid on top of the meat to weigh it down and keep everything submerged. Cover the container tightly with its lid, plastic wrap, or by sealing the zip-top bag with minimal air inside. Place the container in the refrigerator on a shelf where it can remain undisturbed for five days. Set a reminder to turn the meat daily. The honey will remain liquid at refrigerator temperature, though it may thicken slightly – this is normal and doesn’t affect the marination process.
Turn Daily for Five Days
Each day for five consecutive days, remove the container from the refrigerator and uncover it. Use clean hands or tongs to lift the tri-tips out of the honey, flip them completely – top becomes bottom and vice versa – and return them to the marinade. This turning ensures even flavor distribution and prevents any surfaces from drying out. As you turn them, check that they remain fully submerged in honey and add more if the level has dropped.
The honey may darken slightly over the five days as compounds from the meat dissolve into it, and you may notice the chili flakes redistributing or settling. This is completely normal and indicates the marination is working properly. After turning, re-cover the container tightly and return it to the refrigerator for another twenty-four hours. On day five, the tri-tips are ready to cook. The meat will have darkened to deep reddish-brown color and will feel slightly firmer to the touch than raw tri-tip due to the protein changes from enzymatic action.
Remove from Marinade and Season
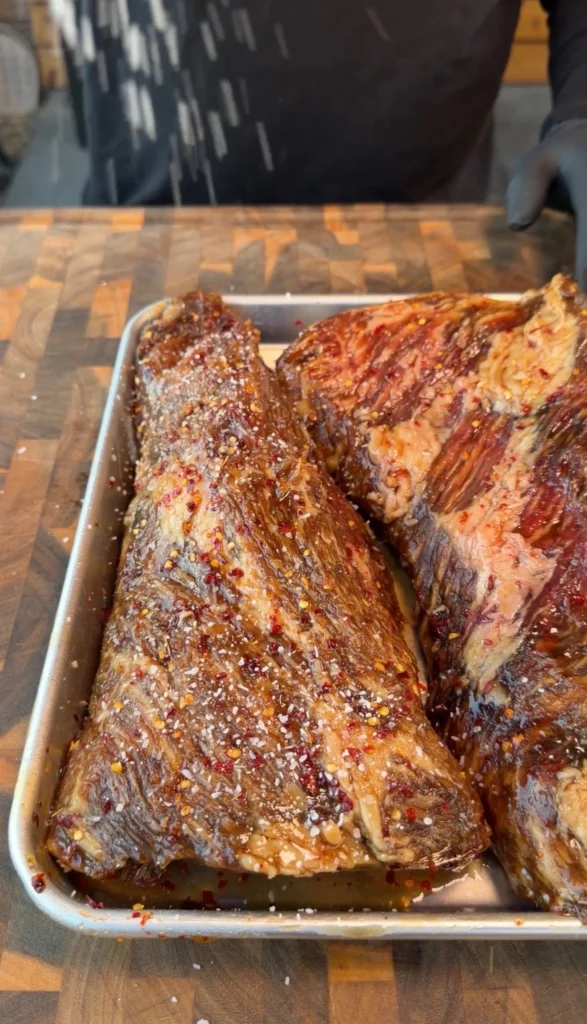
After five full days of marination, remove both tri-tips from the honey. Let excess honey drip back into the container for a minute, then place the tri-tips on a clean cutting board or wire rack set over a sheet pan. Use your hands or a bench scraper to gently scrape away the majority of the honey from all surfaces. You want to remove most of it but not all – a thin, sticky glaze should remain on the meat. This residual honey will caramelize during searing to create the characteristic crust.
Don’t rinse the tri-tips with water as this would wash away all the honey and the flavor it contains. The goal is to reduce the honey coating from thick and dripping to thin and tacky. Pat the surfaces gently with paper towels if needed to remove any pooling honey, but leave that sticky coating intact. Once the excess honey is removed, season all surfaces of both tri-tips generously with kosher salt. Use more salt than you think you need – the honey’s sweetness requires substantial salt for balance. The salt will help form a crust during searing and seasons the exterior to complement the honey-infused interior. Let the salted tri-tips rest at room temperature for fifteen to thirty minutes while you preheat the grill.
Preheat Grill for High Heat Searing
Prepare your grill for two-zone cooking with one side set to high direct heat and the other to indirect heat. For a gas grill, turn all burners to high and close the lid, letting it preheat for fifteen minutes until the temperature reaches 450-500 degrees Fahrenheit. Once hot, turn off the burners on one side completely while leaving the other side on high – this creates your hot and cool zones. For a charcoal grill, build a large pile of hot coals on one half of the grill, leaving the other half empty.
The direct heat side should be intensely hot – hot enough that you can only hold your hand five inches above the grate for two to three seconds before needing to pull away. This high heat is essential for quickly caramelizing the honey coating without burning it. The indirect side should have no direct flames or coals underneath but will still be warm from ambient heat with the lid closed. This setup allows you to sear over high heat then move to gentle indirect heat for finishing. Clean the grill grates thoroughly with a wire brush and oil them lightly using a paper towel dipped in oil and held with tongs to prevent sticking.
Sear the Honey-Coated Tri-Tips
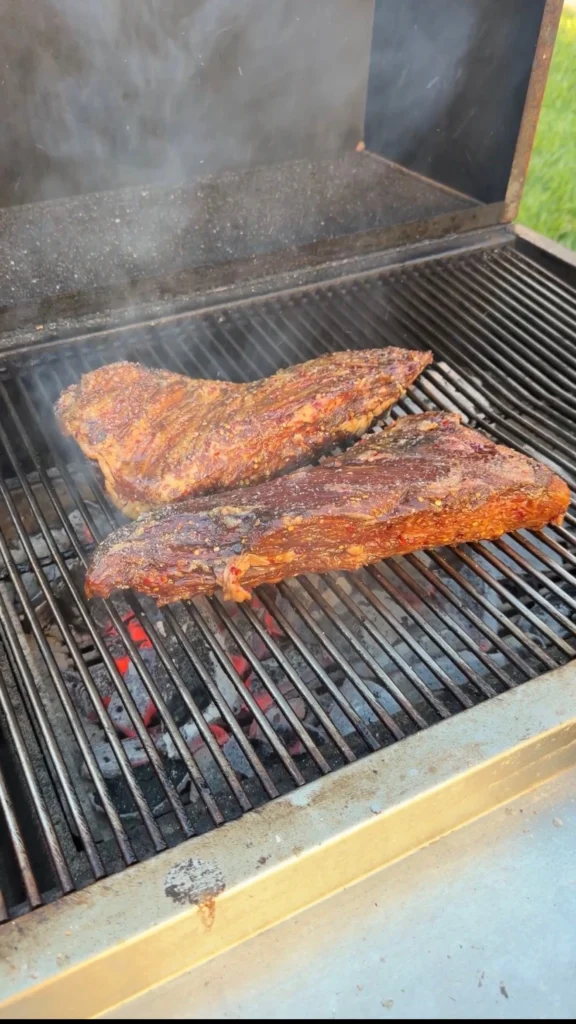
Place both seasoned tri-tips directly over the hottest part of the grill grates. You should hear an immediate, aggressive sizzle when the meat hits the hot metal. Close the lid and sear for two to three minutes without moving the tri-tips. Resist the urge to flip or move them during this time – they need uninterrupted contact with the hot grates to develop proper crust and grill marks. The honey coating will caramelize quickly, darkening from amber to deep mahogany brown.
After two to three minutes, open the lid and use tongs to flip each tri-tip to the next side. You should see well-developed crust with slightly charred edges where the honey caramelized most intensely. Close the lid and sear this side for another two to three minutes. Continue rotating the tri-tips to sear all surfaces – including the ends – until every side has developed dark, caramelized crust. The total searing time should be eight to twelve minutes depending on how many sides you need to hit. Watch carefully during searing because the honey can go from beautifully caramelized to burnt in thirty seconds. If you see black, actively smoking areas rather than deep brown caramelization, move the tri-tips to indirect heat immediately.
Finish Over Indirect Heat
Once all surfaces are properly seared, move both tri-tips to the indirect heat side of the grill – the area with no direct flames or coals underneath. Close the lid and let them cook gently, monitoring the internal temperature with an instant-read thermometer inserted into the thickest part of each tri-tip. For medium-rare, remove at 135 degrees Fahrenheit internal temperature. For medium, remove at 140-145 degrees.
The indirect cooking time will vary based on the tri-tips’ thickness and your grill’s ambient temperature, but expect fifteen to twenty-five minutes of additional cooking after searing. Check the temperature every five minutes once you’re past ten minutes of indirect cooking. The tri-tips will continue cooking through carryover heat after removal, potentially rising another five degrees, so pull them slightly before your target temperature. When they reach the desired doneness, transfer both tri-tips to a cutting board and tent loosely with aluminum foil.
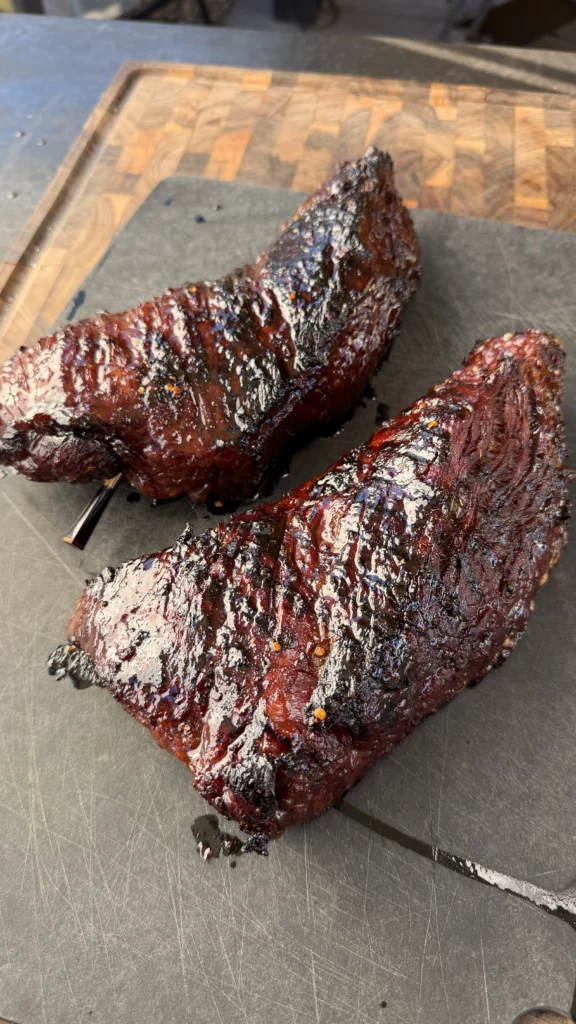
Rest and Slice Against the Grain

Let the tri-tips rest for ten to fifteen minutes before slicing. This rest period allows the juices that were driven toward the center during cooking to redistribute throughout the meat. Cutting immediately would cause these juices to run out onto the cutting board rather than staying in the meat. The tri-tips will also firm up slightly as they cool from cooking temperature, making them easier to slice cleanly.
After resting, identify the grain direction – the lines running through the meat that indicate muscle fiber direction. Tri-tip has two different grain directions that meet roughly in the middle, so you’ll need to adjust your slicing angle partway through. Start by cutting perpendicular to the grain in thin slices approximately quarter-inch thick. Use a sharp slicing knife or chef’s knife and cut in smooth, confident strokes rather than sawing back and forth. When you reach the point where the grain changes direction, rotate your cutting angle to continue slicing perpendicular to the new grain direction. Properly sliced tri-tip should be tender enough to pull apart easily – if you’re fighting to chew through it, you’re likely slicing with the grain instead of across it.

Hot Honey Marinated Tri-Tip
Ingredients
Method
- Trim all silver skin and excess fat from both tri-tips using sharp knife. Pat dry with paper towels.
- In large container, combine 1 gallon raw honey with 1 cup red chili flakes. Stir thoroughly to distribute flakes evenly throughout honey.
- Submerge both tri-tips completely in honey mixture, ensuring they’re fully covered. Weigh down if needed to keep submerged. Cover container tightly and refrigerate.
- Turn tri-tips once daily for 5 consecutive days, checking that they remain fully submerged. Add more honey if level drops.
- After 5 days, remove tri-tips from honey. Scrape off excess honey, leaving thin sticky coating. Season generously with kosher salt. Rest 15-30 minutes at room temperature.
- Preheat grill to 450-500°F for high direct heat on one side, indirect heat on other side. Clean and oil grates.
- Sear tri-tips over high direct heat 2-3 minutes per side on all surfaces until honey caramelizes into dark crust. Watch carefully to prevent burning.
- Move tri-tips to indirect heat side. Close lid and cook until internal temperature reaches 135°F for medium-rare or 140-145°F for medium, about 15-25 minutes.
- Remove from grill and rest 10-15 minutes tented with foil. Slice against the grain in quarter-inch slices, adjusting cutting angle when grain direction changes.
Notes
Don’t rinse tri-tips after marinating – scrape only
The honey coating burns easily, so watch carefully during searing
Tri-tip has two grain directions – rotate slicing angle partway through
Leftover marinade honey can be strained and used for glazing other meats
For more heat, increase chili flakes to 1½ cups
For less heat, reduce to ½ cup chili flakes
Can marinate 4-6 days but not longer or meat becomes too soft
Tried this recipe?
Let us know how it was!FAQ
Can I marinate for less than 5 days?
While five days is optimal for full flavor penetration and tenderization, you can marinate for a minimum of three days with acceptable results. Less than three days doesn’t allow adequate time for the honey’s enzymes to work and the chili heat to penetrate throughout the meat. If marinating less than five days, the tri-tip will still be good but won’t have the same depth of flavor and tenderness. Don’t extend beyond six days as the enzymatic action can make the texture too soft and almost mealy. The sweet spot is four to six days with five being ideal.
What if I don’t have raw honey?
Raw honey is strongly preferred because it contains natural enzymes that help tenderize the meat during extended marination. Regular processed honey has been heated and filtered, which destroys most of these enzymes. If you can only find processed honey, the recipe will still work but you won’t get the same tenderizing effect – the tri-tip will absorb flavor but remain slightly tougher. Consider reducing marination time to three to four days with processed honey. Look for raw honey at health food stores, farmers markets, or online – it’s worth seeking out for this recipe.
Can I reuse the honey marinade?
While you technically could reuse the honey after straining out the chili flakes, it’s not recommended for safety reasons. The honey has been in contact with raw meat for five days and may contain bacteria despite honey’s antimicrobial properties. However, you can use the strained honey for glazing vegetables or other meats that will be cooked to safe temperatures. Some people reduce the used honey in a saucepan, boiling it for ten minutes to kill any bacteria, then use it as a spicy honey drizzle for finished dishes. Just never use it again for raw meat marination.
Why do I need to scrape off the excess honey?
Leaving too much honey on the surface would cause excessive burning and charring during high-heat searing. While a thin coating caramelizes beautifully into a lacquered crust, thick honey burns quickly and creates bitter, acrid flavors. The thin sticky layer that remains after scraping contains enough sugar to caramelize properly while the bulk of the excess would just burn. Think of it like the difference between a light glaze and a thick syrup – the glaze caramelizes while the syrup burns. You want just enough honey left to create crust without overwhelming the grill with dripping, burning sugar.
My tri-tip is burning on the outside before cooking through – what’s wrong?
Burning before the interior cooks through means your grill is too hot or you’re searing for too long. The ideal searing temperature is 450-500°F – hotter than this burns the honey too quickly. If your tri-tips are charring black within the first minute, your grill is too hot. Reduce heat slightly or create better distance between the meat and heat source. Also ensure you’re moving to indirect heat after searing rather than trying to cook the entire tri-tip over direct flames. The two-stage method is essential for preventing exterior burning while achieving proper interior doneness.
Can I smoke these tri-tips instead of grilling?
Smoking works but requires adjusting the technique since low smoking temperatures won’t caramelize the honey properly. If you want smoke flavor, consider reverse searing: smoke the honey-coated tri-tips at 225-250°F until they reach 115-120°F internal temperature (about sixty to ninety minutes), then finish with a hard sear over high direct heat to caramelize the honey and finish cooking to your target temperature. This gives you smoke flavor with proper honey caramelization. Alternatively, smoke them first before marinating in honey – smoke plain seasoned tri-tips, cool completely, then honey marinate for flavor infusion.
How spicy will these be with 1 cup of chili flakes?
One cup of chili flakes per gallon of honey creates noticeable heat that builds gradually but isn’t aggressively spicy. Most people would describe it as medium heat – present and warming but not painful or sweat-inducing. The honey’s sweetness balances the chili heat, preventing it from being overwhelming. If you’re very heat-sensitive, start with half a cup. If you love spicy food, you can increase to one and a half cups. Remember the heat is distributed throughout the meat rather than concentrated on the surface, so it’s more subtle than you might expect from a full cup of chili flakes.
What should I do if my tri-tips are different sizes?
If your two tri-tips vary significantly in size or thickness, they’ll need different cooking times to reach the same doneness. The solution is to monitor them separately with an instant-read thermometer and remove each one when it reaches your target temperature. The smaller or thinner tri-tip will finish faster than the larger one. During indirect cooking, position the thinner tri-tip farther from the heat source and the thicker one closer. This helps even out cooking times somewhat, but you’ll still likely need to remove them at different times. There’s no problem with one resting longer than the other.
Can I use this marinade method for other cuts of beef?
Yes, this honey-chili marinade works beautifully with other beef cuts. Sirloin roasts, top round, and even thick ribeyes can be marinated this way with excellent results. Adjust marination time based on thickness – thinner cuts need less time (three to four days) while thick roasts can go the full five to six days. Very fatty cuts like ribeye may not benefit as much from the tenderizing since they’re already tender. This method really shines on leaner, moderately tough cuts that benefit from both tenderization and flavor infusion. Avoid using on ground beef or thin steaks which would become too soft.
How do I know when the honey is properly caramelized?
Properly caramelized honey on the tri-tip surface should be deep mahogany brown to almost black at the edges, with a glossy, lacquered appearance. It should look similar to a glazed ham or teriyaki-coated meat – dark, shiny, and slightly crispy in spots. The smell should be sweet and caramelized, not acrid or burnt. If you see gray ash forming or smell bitter smoke rather than sweet caramelization, you’ve gone too far into burning. The crust should have slight crunch when you press it with tongs but shouldn’t be hard or charred. When sliced, you should see a thin dark crust transitioning to the pink interior without a thick burned layer.
Ready to Take Your Cooking to the Next Level?
This is where I keep all my most-used products, gear, and favorite cooking tools — check it out:
🔥 View My Cooking Gear & ToolsRecipe Categories
If you loved this recipe, you’ll find more to savor across our diverse categories. From beef to pork, chicken to turkey, seafood to appetizers, there’s a wealth of flavors waiting for you. Explore them all at CWFeats.