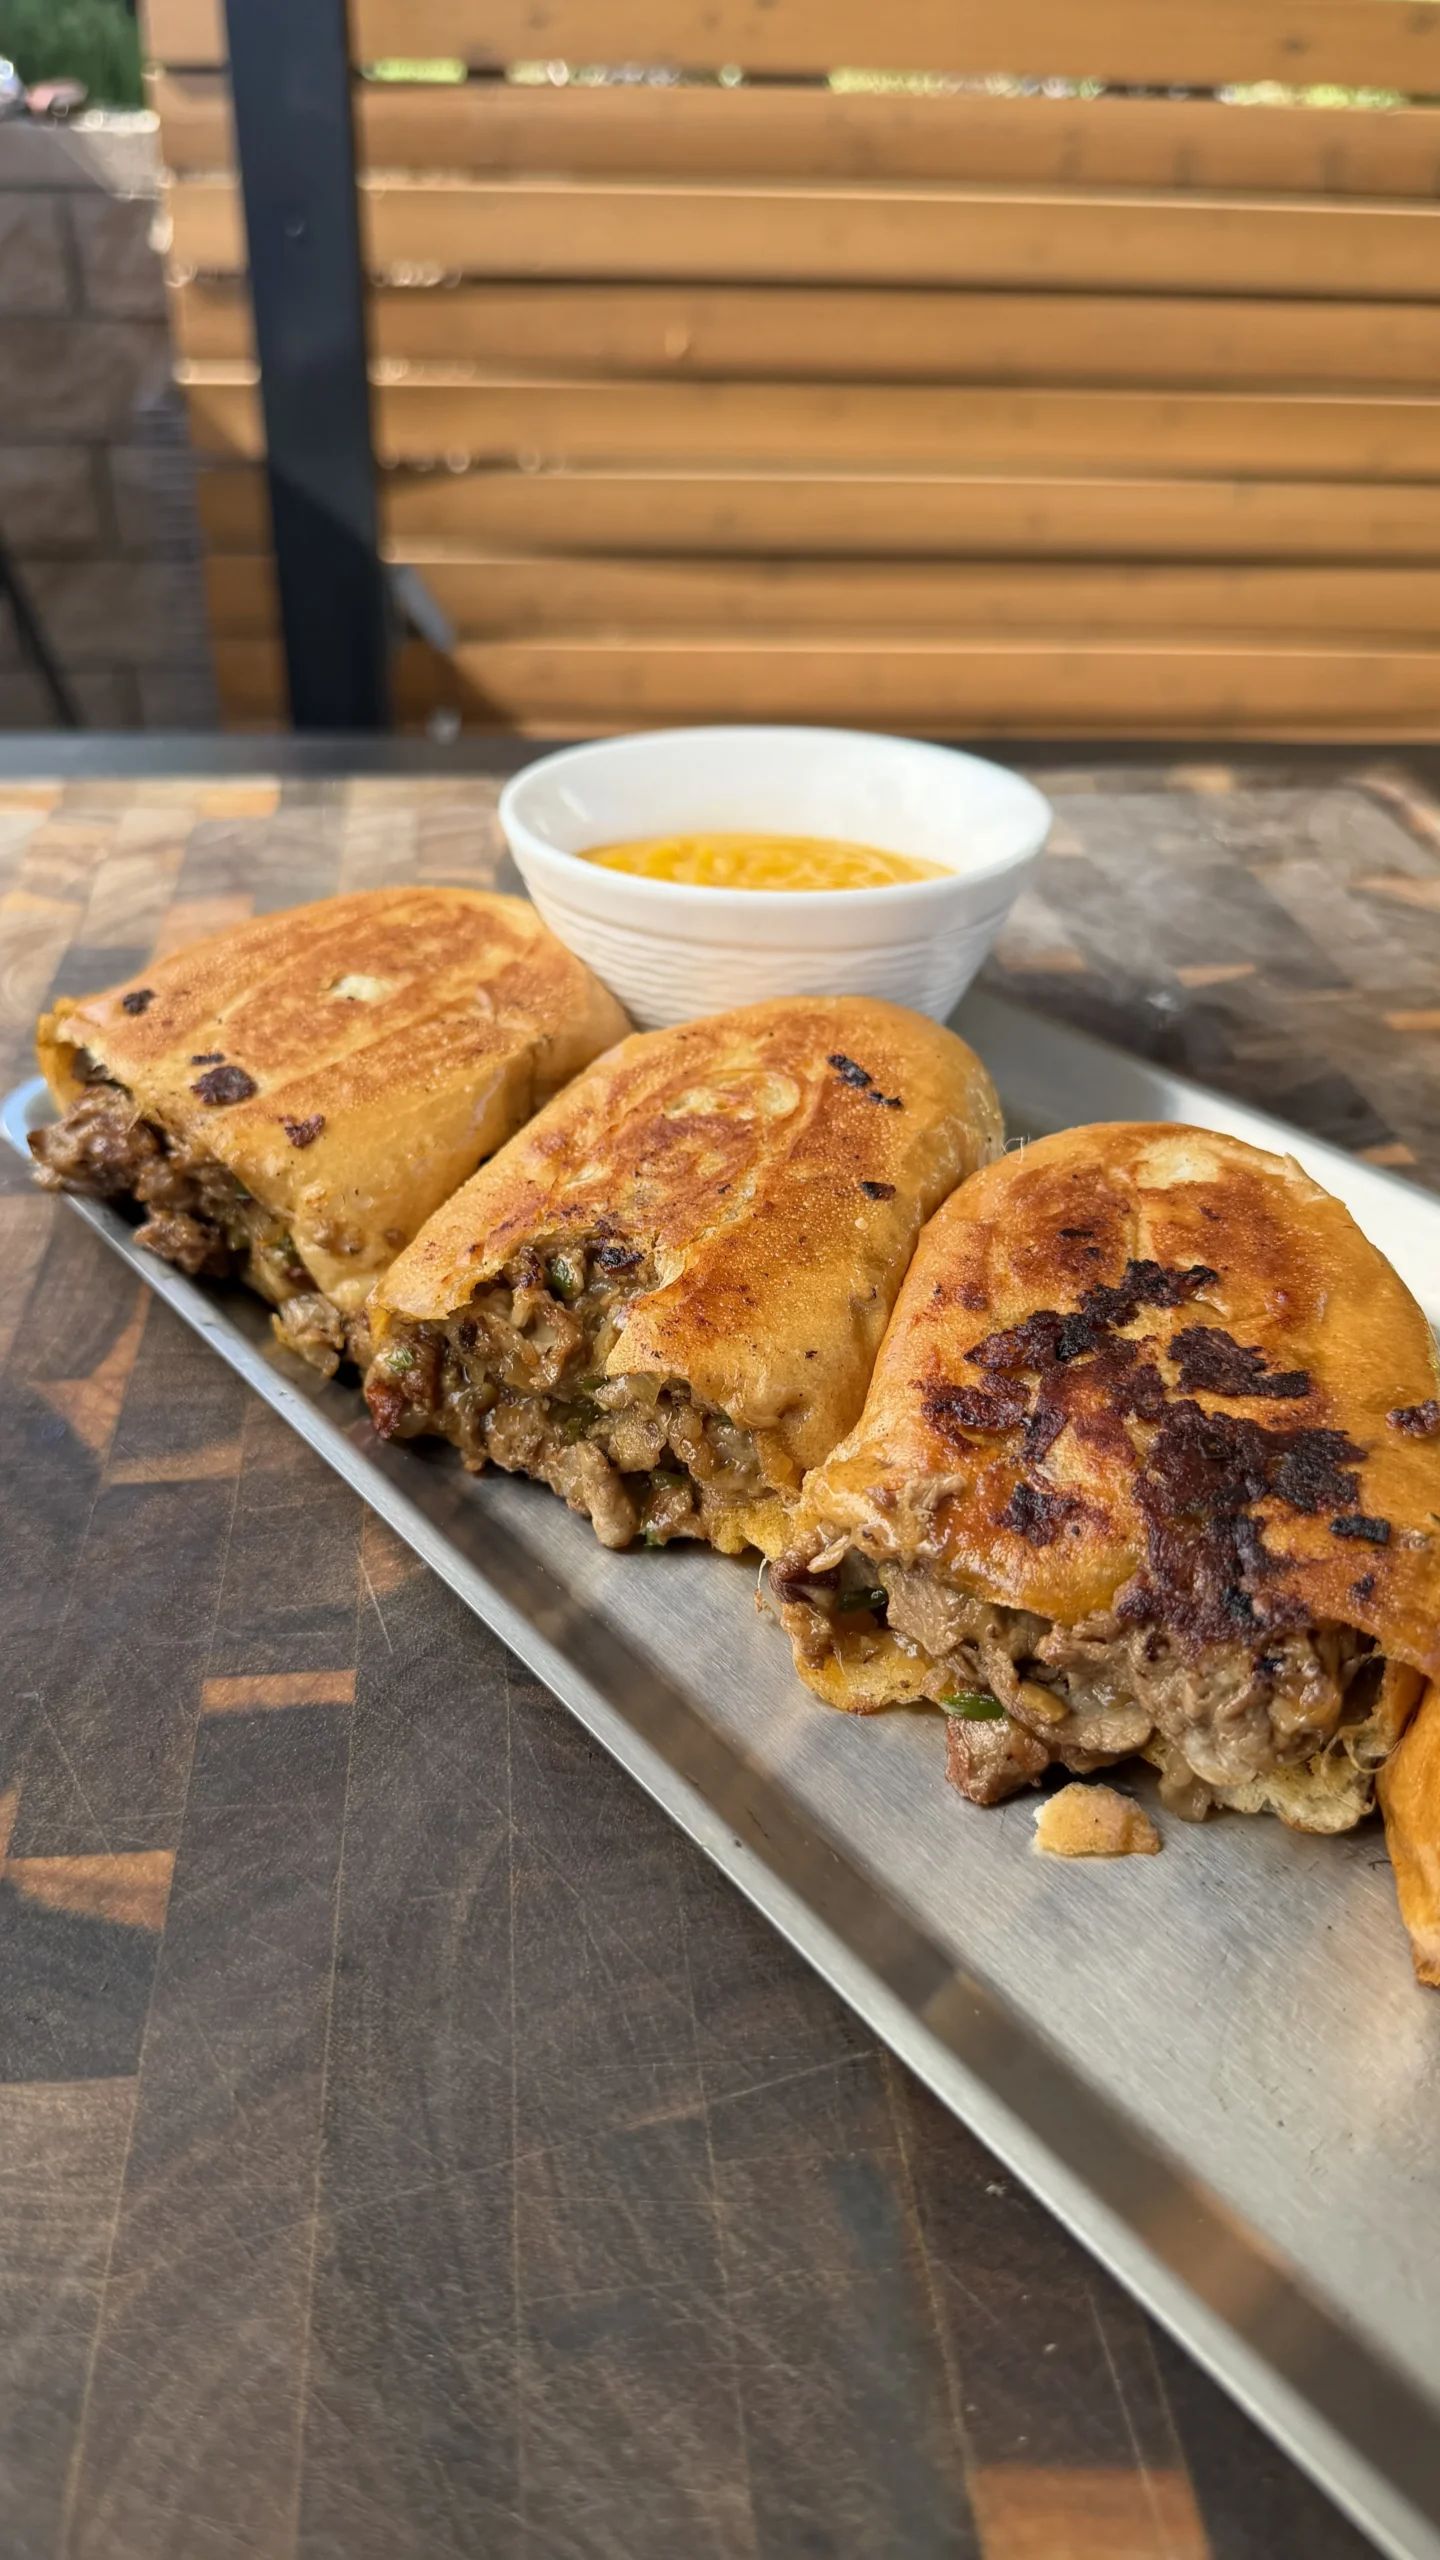
Smoked pulled beef sliders are tender, juicy chuck roast smoked uncovered at 225°F for 7-9 hours until it reaches 200-205°F internal temperature and probes with little resistance, then shredded and piled on toasted slider buns with creamy homemade cheddar cheese sauce, pickles, or caramelized onions. The low and slow smoking process breaks down the chuck roast’s abundant connective tissue and marbling into fall-apart tender strands of beef with a deep smoky flavor and crusty bark on the exterior. Unlike brisket which requires careful wrapping and monitoring, chuck roast stays moist throughout the smoke thanks to its heavy fat content, making it a more forgiving option for beginners while still delivering impressive results. This pulled beef recipe creates restaurant-quality sliders perfect for parties, game day spreads, or weekend BBQ gatherings.
The whole process takes 7-9 hours for smoking, plus 15 minutes of prep and 20-30 minutes of resting time. You season the chuck roast generously, place it directly on the smoker without wrapping, and let it cook undisturbed until tenderness rather than temperature tells you it’s done. While the beef smokes, you make the cheddar cheese sauce in about 10 minutes on the stovetop, then assemble the sliders once the meat has rested and been shredded. These smoked beef sliders feed a crowd easily, with one 3-4 pound chuck roast yielding 10-12 generously filled sliders.
Why Chuck Roast Is Perfect for Pulled Beef
Chuck roast transforms into exceptional pulled beef because of its heavy marbling and abundant connective tissue that melts into gelatin during low and slow smoking. The chuck comes from the cow’s shoulder area, which is a heavily worked muscle group that develops tough collagen fibers and intramuscular fat. When you smoke it at 225°F for several hours, that collagen breaks down into rich, unctuous gelatin that bastes the meat from within, creating tender, juicy strands that pull apart effortlessly.
The fat content in chuck roast runs between 15-20%, which is significantly higher than leaner cuts like sirloin or round roast. This marbling means the meat stays moist throughout the extended smoking time without drying out or requiring constant spritzing and babysitting. You can set it on the smoker at 225°F and walk away for hours, confident that the internal fat will keep everything juicy even as the exterior develops a deep, crusty bark.
Chuck roast also costs considerably less than brisket while delivering similar texture and flavor for pulled beef applications. A 3-4 pound chuck roast typically costs $15-25 depending on your location, while a whole packer brisket runs $50-80 or more. Since you’re shredding the meat anyway, you don’t need the pristine presentation of sliced brisket, making chuck roast the smarter economic choice for feeding crowds with pulled beef sandwiches.
The irregular shape of chuck roast, with its varying thicknesses and pockets of fat, actually works in your favor for pulled beef. Those thicker sections stay juicy while thinner areas get more bark development, giving you textural variety in the finished shredded meat. When you pull it all together, you get a mix of crusty, smoky exterior pieces and tender, juicy interior strands that create complex flavor and texture in every bite.
What Makes Smoked Pulled Beef Different from Brisket
Smoked pulled beef made from chuck roast cooks faster and more forgivingly than brisket while still delivering rich, smoky, tender results perfect for sliders and sandwiches. A 3-4 pound chuck roast reaches fall-apart tenderness in 7-9 hours at 225°F, while a full packer brisket requires 12-16 hours or more. The shorter cook time makes chuck roast more practical for same-day meals or when you don’t want to commit to an overnight smoke.
Brisket demands precise temperature management, careful monitoring of the stall, strategic wrapping decisions, and specific slicing techniques to achieve tender results. One small mistake can leave you with dry, tough meat after 14 hours of work. Chuck roast is much more forgiving because the heavy marbling and connective tissue distribution means the meat stays moist even if you overcook it slightly or don’t wrap it at the perfect moment (or never wrap it at all).
The texture of pulled chuck roast differs from sliced brisket in that you’re intentionally shredding the meat into strands rather than trying to maintain intact slices. This shredded texture works perfectly for sliders, tacos, nachos, or sandwiches where you want meat that mixes well with sauces and toppings. Brisket is traditionally sliced to showcase the smoke ring and bark, but when you’re making pulled beef for sliders, shredding chuck roast gives you ideal texture without requiring perfect slicing skills.
Flavor-wise, chuck roast has a beefier, more robust taste than brisket’s relatively mild flavor. The higher fat content carries more of the smoke flavor throughout the meat, and the shoulder muscles develop deeper savory notes during cooking. When shredded and mixed with cheese sauce or BBQ sauce, pulled chuck roast delivers bold beef flavor that stands up to rich toppings without getting lost.
Why You Don’t Need to Wrap Chuck Roast
Chuck roast maintains moisture throughout the entire smoke without wrapping because of its exceptional fat content and connective tissue distribution. Unlike brisket’s lean flat that can dry out during the stall, chuck roast has marbling running throughout every section of the meat. As this fat renders during the 7-9 hour smoke, it continuously bastes the meat from within, preventing the dryness that wrapping is designed to combat in leaner cuts.
Leaving chuck roast unwrapped for the entire smoke allows maximum bark development on all surfaces of the meat. The exterior stays exposed to smoke and heat, forming a dark, crusty, flavorful bark loaded with concentrated seasoning and smoke flavor. When you wrap meat in foil or butcher paper, you’re essentially steaming it, which softens the bark and prevents further crust formation. For pulled beef where you’re shredding everything together, that crusty bark mixed into the tender interior creates incredible texture and flavor contrast.
The stall that occurs around 150-170°F internal temperature happens with chuck roast just like it does with brisket, but you don’t need to fight through it with wrapping. The stall is caused by evaporative cooling as moisture leaves the meat’s surface, and it can add 2-4 hours to your cook time. However, chuck roast’s fat content means this extended time at moderate temperatures renders more collagen and tenderizes the meat further rather than drying it out like it would with a lean cut.
If you’re used to wrapping brisket at 165°F or when the bark looks set, you’ll need to resist that urge with chuck roast for pulled beef. The unwrapped method lets you develop a deeper, more pronounced bark that adds visual appeal and concentrated flavor when mixed into the shredded meat. The only time you might consider wrapping chuck roast is if you’re in a severe time crunch and need to power through the stall faster, but you’ll sacrifice bark quality for speed.
How to Know When Pulled Beef Is Done
Pulled beef is done when it probes like butter with an instant-read thermometer or meat probe, offering almost no resistance when you insert it into the thickest part of the roast. This tenderness test is more reliable than hitting a specific temperature, though the meat will typically be at 200-205°F internal when it reaches this texture. You should be able to slide the probe in and out with the same ease as pushing it into room-temperature butter.
The “probe tender” test works because it indicates that collagen has fully converted to gelatin throughout the meat. When chuck roast first goes on the smoker, probing feels like pushing through dense, resistant tissue. As it cooks and the connective tissue breaks down, you’ll notice the probe sliding in more easily. When it reaches that butter-like consistency with zero resistance, the meat is ready to pull off the smoker and rest before shredding.
Visual cues also help determine doneness for pulled beef. The exterior should have a dark, almost black bark with visible seasoning crust, and the meat should have shrunk noticeably from its original size as moisture evaporates and fat renders. When you grab the roast with tongs, it should feel jiggly and soft rather than firm, and you might see cracks forming in the bark where the meat is pulling apart on its own.
Temperature alone is an unreliable indicator for pulled beef because different roasts reach tenderness at slightly different temperatures depending on their fat content, connective tissue distribution, and how the cow was raised and aged. One chuck roast might be perfectly tender at 198°F while another needs 207°F to achieve the same fall-apart texture. Always use the probe test as your primary doneness indicator and temperature as a secondary confirmation that you’re in the right ballpark.
Why Homemade Cheese Sauce Beats Pre-Made
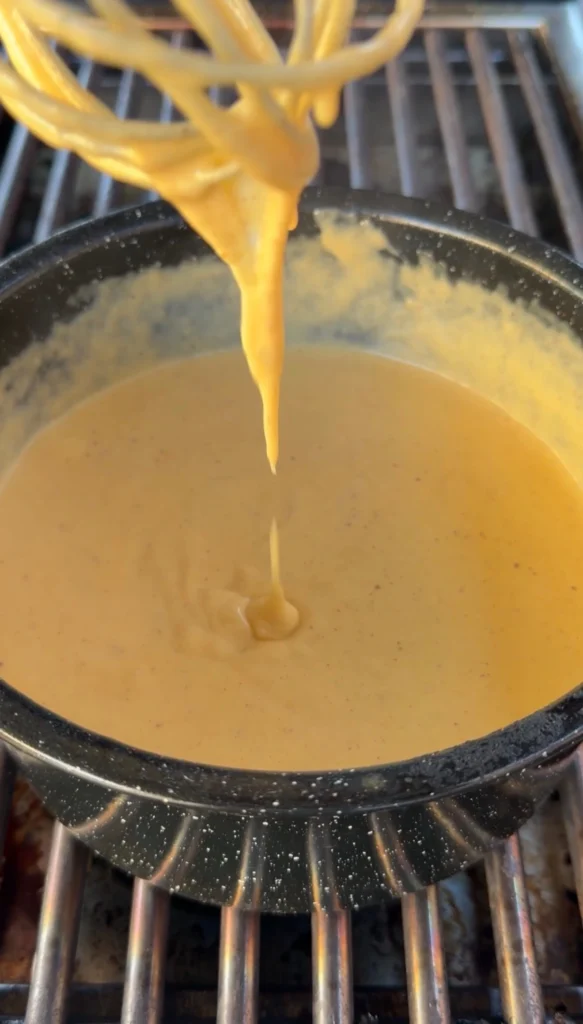
Homemade cheddar cheese sauce made from a simple roux with real cheese creates a creamy, smooth texture that clings perfectly to shredded beef without the grainy, artificial flavor of jarred cheese sauce. The base of butter and flour cooked together forms a stable emulsion that prevents the cheese from breaking or becoming greasy when melted. Store-bought cheese sauces often contain stabilizers, emulsifiers, and preservatives that give them unnaturally thick, gloppy texture and chemical aftertaste.
Freshly shredded sharp cheddar melts into the milk-thickened base to create rich, tangy cheese flavor that complements smoky beef without overwhelming it. Pre-shredded cheese from bags contains anti-caking agents like cellulose that prevent the shreds from sticking together in the package, but these same additives interfere with smooth melting and can create grainy, separated sauce. Spending 2 minutes shredding a block of cheese makes a dramatic difference in the final sauce quality.
Making cheese sauce from scratch takes only 10 minutes of active time and uses ingredients you likely already have in your kitchen. You melt butter, whisk in flour to create a roux, gradually add milk while whisking to prevent lumps, then stir in cheese until melted and season to taste. The process is straightforward and forgiving, and the result tastes exponentially better than anything from a jar while costing less per serving.
Homemade cheese sauce also lets you control the consistency, flavor intensity, and richness to match your preferences and the specific application. For sliders, you want sauce that’s thick enough to stay on the meat rather than soaking into the bun, but pourable enough to drizzle evenly. You can achieve this by adjusting the milk quantity or cooking time, something you can’t do with pre-made products that have fixed, often inappropriate textures for specific uses.
Step-by-Step Instructions
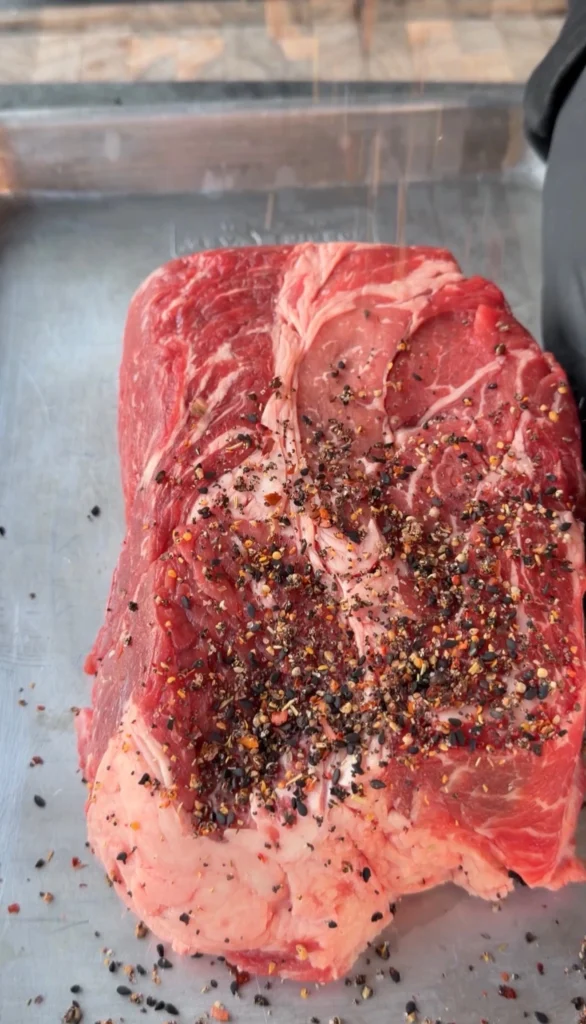
Step 1: Prepare and Season the Chuck Roast
Remove the chuck roast from refrigeration and let it sit at room temperature for 20-30 minutes while you prepare your smoker. Pat the roast completely dry on all surfaces with paper towels, removing any excess moisture that would prevent the seasoning from adhering and interfere with bark formation. Look for any large sections of exterior fat thicker than ¼ inch and trim them down, but leave thinner fat caps and all internal marbling intact.
Coat the entire roast with a thin layer of olive oil or beef tallow, using your hands to rub it evenly over every surface. The fat acts as a binder that helps the seasoning stick to the meat and promotes bark development during smoking. You don’t need a thick coating, just enough to make the surface slightly tacky and glistening.
Apply your favorite beef or BBQ seasoning generously on all sides of the roast, using approximately 2-3 tablespoons total depending on the size of your chuck roast and how heavily seasoned you prefer your meat. Press the seasoning into the surface with your hands to ensure it adheres well rather than falling off when you move the roast. Don’t be shy with seasoning since you’re coating a large piece of meat that will be smoked for hours; the exterior needs aggressive seasoning to flavor the bark properly.
Let the seasoned roast sit while you preheat the smoker. This 10-15 minute rest allows the salt in the seasoning to begin penetrating the meat’s surface and helps the binder and spices meld together into a cohesive coating that will form the bark foundation.
Step 2: Smoke the Chuck Roast Low and Slow
Preheat your smoker to a steady 225°F, adding your preferred smoking wood (oak, hickory, mesquite, or a blend work well with beef). Let the smoker come to temperature and stabilize before adding the meat, which takes about 15-20 minutes for most smokers. You want clean, thin blue smoke rather than thick white billowing smoke when you put the chuck roast on.
Place the chuck roast directly on the smoker grate fat-cap up if there’s a clear fat cap, or with the thickest part positioned away from the hottest zone of your smoker. Insert a remote thermometer probe into the thickest part of the meat, avoiding fat pockets, so you can monitor internal temperature without opening the smoker constantly. Close the lid and resist the urge to peek for at least 2-3 hours.
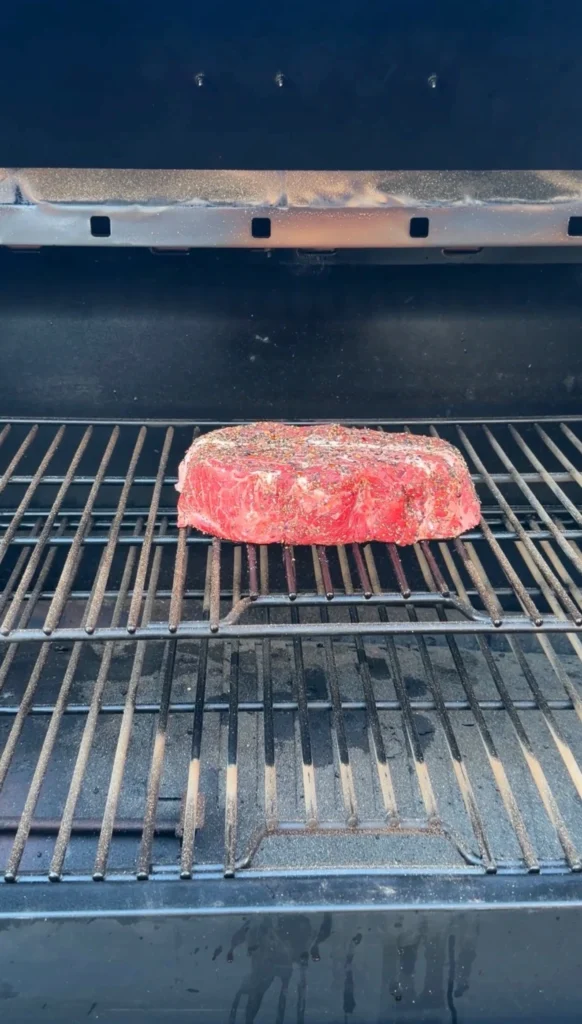
Maintain a consistent 225°F smoker temperature throughout the cook, making minor adjustments as needed but avoiding large temperature swings. You don’t need to spritz, mop, or baste chuck roast during the smoke because the internal fat keeps everything moist. Leave it completely undisturbed except for occasional temperature checks.
Smoke the chuck roast for 7-9 hours total, though exact time depends on the size of your roast, your smoker’s characteristics, and outdoor temperature. A 3-pound roast might be done in 7 hours, while a 4-pound roast could take the full 9 hours or slightly longer. Start checking for doneness around the 6-hour mark by probing with an instant-read thermometer.
Step 3: Test for Doneness and Rest the Meat
Beginning around hour 6 or when the internal temperature reaches 195°F, start testing the chuck roast for tenderness using the probe test. Insert an instant-read thermometer or dedicated meat probe into the thickest part of the roast from several different angles. The probe should slide in and out with almost no resistance, feeling like you’re pushing through soft butter rather than meeting any dense or springy resistance.
If the probe still meets resistance, let the roast continue smoking and test again every 30 minutes. The meat is ready when the probe slides in effortlessly from any angle you test, which typically occurs at 200-205°F internal temperature but can vary slightly. Don’t pull the roast early just because it hits 200°F if it still feels firm when probed; tenderness is the true indicator of doneness.
When the chuck roast passes the probe test, carefully remove it from the smoker and transfer it to a large cutting board or aluminum pan. Tent it loosely with aluminum foil and let it rest for 20-30 minutes before shredding. This rest period allows the meat’s internal juices to redistribute throughout the roast rather than running out when you start pulling it apart, and it also lets the meat cool slightly so it’s easier to handle.
If you’re concerned about the meat cooling too much or drying out during the rest, you can add a splash (¼ to ½ cup) of beef broth to the pan before tenting with foil. The steam from the broth will keep the meat moist and add a bit of extra flavor, though properly smoked chuck roast with adequate fat content shouldn’t need this.
Step 4: Make the Cheddar Cheese Sauce
While the beef rests, make the cheddar cheese sauce. Melt 2 tablespoons butter in a medium saucepan over medium heat until it’s completely liquified and just beginning to foam. Add 2 tablespoons all-purpose flour and whisk constantly for 1-2 minutes to cook the raw flour taste out and create a roux. The mixture should be smooth, thick, and pale golden.
Slowly pour in 1½ cups whole milk while whisking constantly to prevent lumps from forming. Add the milk in a steady stream rather than all at once, whisking vigorously as you pour. The mixture will thicken as the milk incorporates into the roux. Once all the milk is added, continue cooking and whisking for 2-3 minutes until the sauce thickens to a consistency slightly thinner than you want the final product, since adding cheese will thicken it further.
Reduce the heat to low and add 2 cups freshly shredded sharp cheddar cheese in three additions, stirring constantly with a wooden spoon or silicone spatula between additions until each batch melts completely before adding more. Avoid high heat at this stage because too much heat can cause the cheese to break and become grainy or greasy instead of smooth and creamy.
Once all the cheese has melted into a smooth sauce, stir in ½ teaspoon garlic powder and salt to taste (start with ¼ teaspoon and adjust). The sauce should be thick enough to coat the back of a spoon but still pourable. If it’s too thick, thin it with a tablespoon or two of milk; if too thin, let it simmer on low heat for another minute or two. Keep the sauce warm over very low heat until you’re ready to assemble sliders.
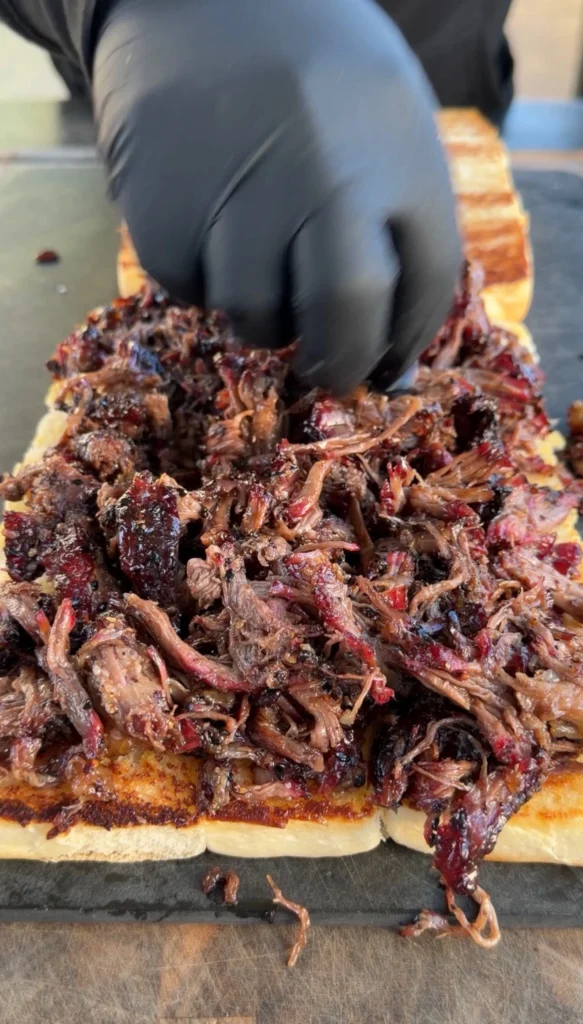
Step 5: Shred the Beef and Assemble Sliders
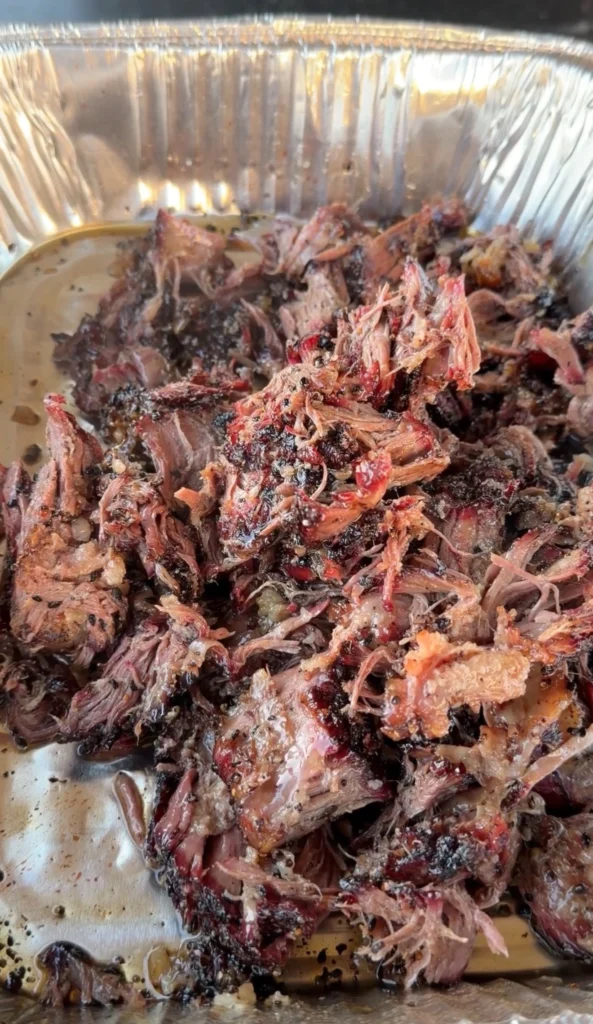
After the chuck roast has rested for 20-30 minutes, use two forks, meat claws, or your hands (if it’s cool enough) to pull the meat apart into shreds. The beef should fall apart easily with minimal effort, separating along the muscle fibers into tender strands. Discard any large pieces of unrendered fat or gristle you encounter, though there should be very little waste with properly cooked chuck roast.
Mix the shredded beef in the pan or bowl to combine the crusty exterior bark pieces with the more tender interior strands. If the meat seems dry, add a few tablespoons of beef broth and toss to incorporate. The beef should be juicy and moist but not swimming in liquid. Taste a piece and adjust seasoning with additional salt or BBQ seasoning if needed.
Toast the slider buns or Hawaiian rolls by placing them cut-side down on a griddle, in a skillet over medium heat, or under the broiler for 1-2 minutes until lightly golden. Toasting prevents the buns from getting soggy from the meat juices and cheese sauce while adding a slight crunch and buttery flavor.
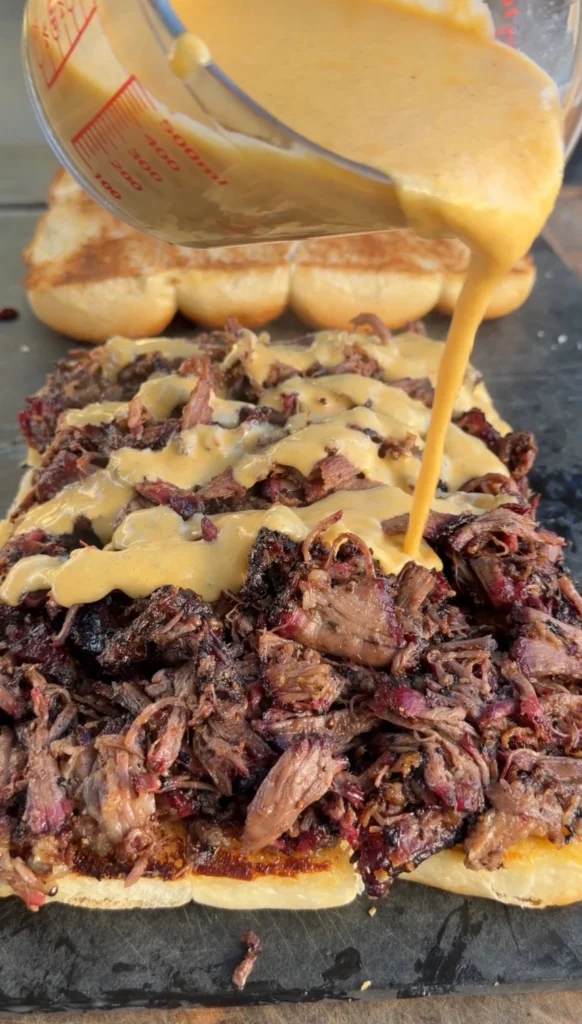
Load each toasted bottom bun with a generous portion of pulled beef (about ¼ to ⅓ cup depending on bun size). Drizzle or spoon warm cheddar cheese sauce over the beef, making sure to get sauce on every slider. Add pickles or caramelized onions if using, then top with the other half of the bun. Serve immediately while the cheese sauce is warm and the buns are still slightly crispy from toasting.

Smoked Pulled Beef Sliders with Cheddar Cheese Sauce
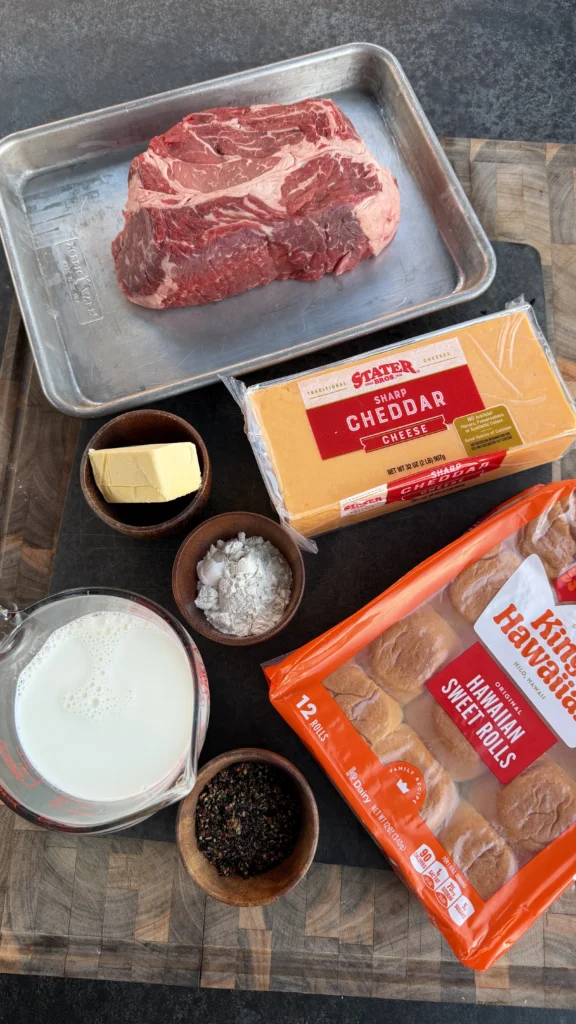
Ingredients
Equipment
Method
- Pat chuck roast dry and coat with olive oil or beef tallow. Season generously on all sides with beef or BBQ seasoning, pressing it into the surface. Let rest while smoker preheats.
- Preheat smoker to 225°F with your preferred smoking wood. Place chuck roast directly on the smoker grate, insert a thermometer probe, and smoke uncovered for 7-9 hours until internal temperature reaches 200-205°F and the meat probes like butter with no resistance.
- Remove from smoker when probe-tender and rest for 20-30 minutes tented with foil. Add a splash of beef broth if desired to keep moist.
- While beef rests, make cheese sauce. Melt butter over medium heat, whisk in flour and cook 1-2 minutes. Slowly whisk in milk until smooth and thickened. Reduce heat to low, stir in cheddar cheese until melted, then season with garlic powder and salt. Keep warm.
- Shred the rested beef with forks or meat claws, discarding any large fat pieces. Toast slider buns cut-side down until lightly golden. Load buns with pulled beef, drizzle with warm cheese sauce, add pickles or onions if using, and top with bun. Serve immediately.
Nutrition
Notes
Tried this recipe?
Let us know how it was!Frequently Asked Questions
Can You Use a Different Cut of Beef for Pulled Beef Sliders?
You can use other beef cuts for pulled beef sliders, though chuck roast remains the best choice for the combination of flavor, tenderness, and affordability. Beef brisket works excellently and creates slightly leaner pulled beef with outstanding smoke flavor, but requires longer cooking time (12-16 hours) and costs significantly more per pound. The flat portion of brisket is particularly good if you prefer less fat in your pulled beef.
Beef short ribs make incredible pulled beef with rich, beefy flavor and luxurious texture, though they’re expensive and yield less meat per pound due to the bone content. You’d need 6-8 pounds of short ribs to get the same amount of pulled meat as a 3-4 pound chuck roast. They cook in roughly the same time as chuck roast (7-9 hours at 225°F) and produce exceptionally flavorful results if your budget allows.
Bottom round or rump roast can work for pulled beef if you’re looking for a leaner option, but these cuts have less marbling and connective tissue than chuck, making them more prone to drying out during the long smoke. If using these cuts, consider wrapping at 165°F internal temperature and adding beef broth to keep them moist. The flavor won’t be quite as rich as chuck roast, but you’ll get acceptable pulled beef that’s lower in fat.
Avoid lean cuts like sirloin, eye of round, or tenderloin for pulled beef applications. These cuts lack the fat and connective tissue needed to stay moist and tender during low and slow cooking, and they’ll turn dry and stringy no matter how carefully you monitor them. Save these cuts for grilling or roasting where their leanness is an advantage.
How Do You Keep Pulled Beef Moist for Parties?
The best way to keep pulled beef moist for parties is holding it in a slow cooker on the warm or low setting with a small amount of beef broth to maintain moisture without continuing to cook the meat. After shredding the smoked chuck roast, transfer it to a slow cooker, add ¼ to ½ cup beef broth per pound of meat, and stir to distribute the liquid. Set the slow cooker to warm (ideally around 165°F) rather than low to prevent the meat from overcooking or drying out during the party.
You can also hold pulled beef in a covered aluminum pan in a 170-180°F oven for 2-3 hours without quality loss. Place the shredded beef in a deep pan, add a splash of beef broth, cover tightly with foil, and keep warm in the low oven. Check every 30-45 minutes and add more broth if the meat looks dry. This method works well if you don’t have a slow cooker or need the oven for other dishes.
For maximum moisture retention, refrigerate the whole smoked chuck roast after it’s cooled, then reheat and shred it 1-2 hours before serving. Whole pieces of meat retain moisture better than shredded meat during storage. Reheat the whole roast in a covered pan with beef broth at 300°F for 30-45 minutes until warmed through, then shred and transfer to your holding vessel. The meat will be just as moist as if you’d shredded it immediately after smoking.
Avoid letting pulled beef sit out at room temperature for extended periods both for food safety and quality reasons. Meat held between 40-140°F enters the danger zone for bacterial growth, and it also dries out faster at room temperature than when properly held warm. If your party lasts longer than 2 hours, use one of the warm-holding methods above rather than leaving the beef on a platter.
What’s the Best Wood for Smoking Pulled Beef?
Oak and hickory are the best woods for smoking pulled beef because they provide strong, classic smoke flavor that complements beef’s rich taste without overwhelming it. Oak gives a medium smoke flavor that’s slightly sweet and traditional, working well if you want smoke presence without dominating the meat’s natural beef flavor. Hickory provides stronger, more assertive smoke with bacon-like notes that stands up well to chuck roast’s fatty, robust character.
Mesquite creates intense, earthy smoke flavor that works well with beef but can become overpowering if used for the entire 7-9 hour smoke. Consider using mesquite for the first 2-3 hours to build a strong smoke base, then switch to oak or hickory for the remaining cook time. This gives you mesquite’s distinctive flavor without the bitterness that can develop from extended exposure.
Fruit woods like apple and cherry produce milder, sweeter smoke that many pitmasters feel gets lost on beef, particularly fatty cuts like chuck roast. These woods work better on pork and poultry where their subtle flavors can shine through. However, mixing fruit wood with a stronger wood like oak (50/50 blend) can create interesting flavor complexity if you find pure hickory or mesquite too intense.
Avoid soft woods like pine, cedar, or fir, which contain resins that create acrid, unpleasant smoke and can make meat taste like chemicals. Also skip wood that’s been treated, painted, or pressure-treated, as these contain toxic chemicals that transfer to your food during smoking. Always use properly seasoned hardwood chunks or chips specifically sold for smoking meat.
Can You Make This Recipe in an Oven Instead of a Smoker?
You can make pulled beef in the oven by slow-roasting chuck roast at 275-300°F for 4-5 hours until tender, though you’ll miss the smoke flavor that defines this recipe. Place the seasoned roast in a covered Dutch oven or roasting pan with a lid, add ½ cup beef broth to create steam and prevent drying, and roast until it reaches 200-205°F internal temperature and probes tender. The results will be tender and suitable for shredding, but lack the smoky bark that makes smoked pulled beef special.
For a closer approximation of smoked flavor without a smoker, add 1-2 teaspoons liquid smoke to the beef broth in the roasting pan, though be conservative since liquid smoke can quickly become overpowering. You can also create a makeshift smoke by placing a small aluminum pan with soaked wood chips on the oven’s bottom rack during the first hour of cooking, though this creates minimal smoke and can set off smoke detectors.
The texture of oven-roasted pulled beef will be slightly different from smoked because the dry heat environment of a smoker creates bark that oven-roasting can’t replicate. Oven-roasted chuck will be tender and juicy but have a softer, less crusty exterior. If you want some crust development, roast uncovered for the first 2 hours, then cover for the remaining time to prevent excessive moisture loss.
A better alternative if you don’t have a smoker is using a charcoal or gas grill with indirect heat setup. Add wood chunks to the charcoal or use a smoker box on a gas grill, set up two-zone cooking with the roast on the cool side, and maintain 225-250°F grill temperature. This creates authentic smoke flavor and bark similar to a dedicated smoker while working with equipment you might already own.
Ready to Level Up?
Take your backyard cooking from good to legendary.
This is where I keep all my most-used smokers, knives, and favorite cooking tools.
Shop My Gear CollectionExplore More Recipes
Find more diverse flavors at CWFeats.com