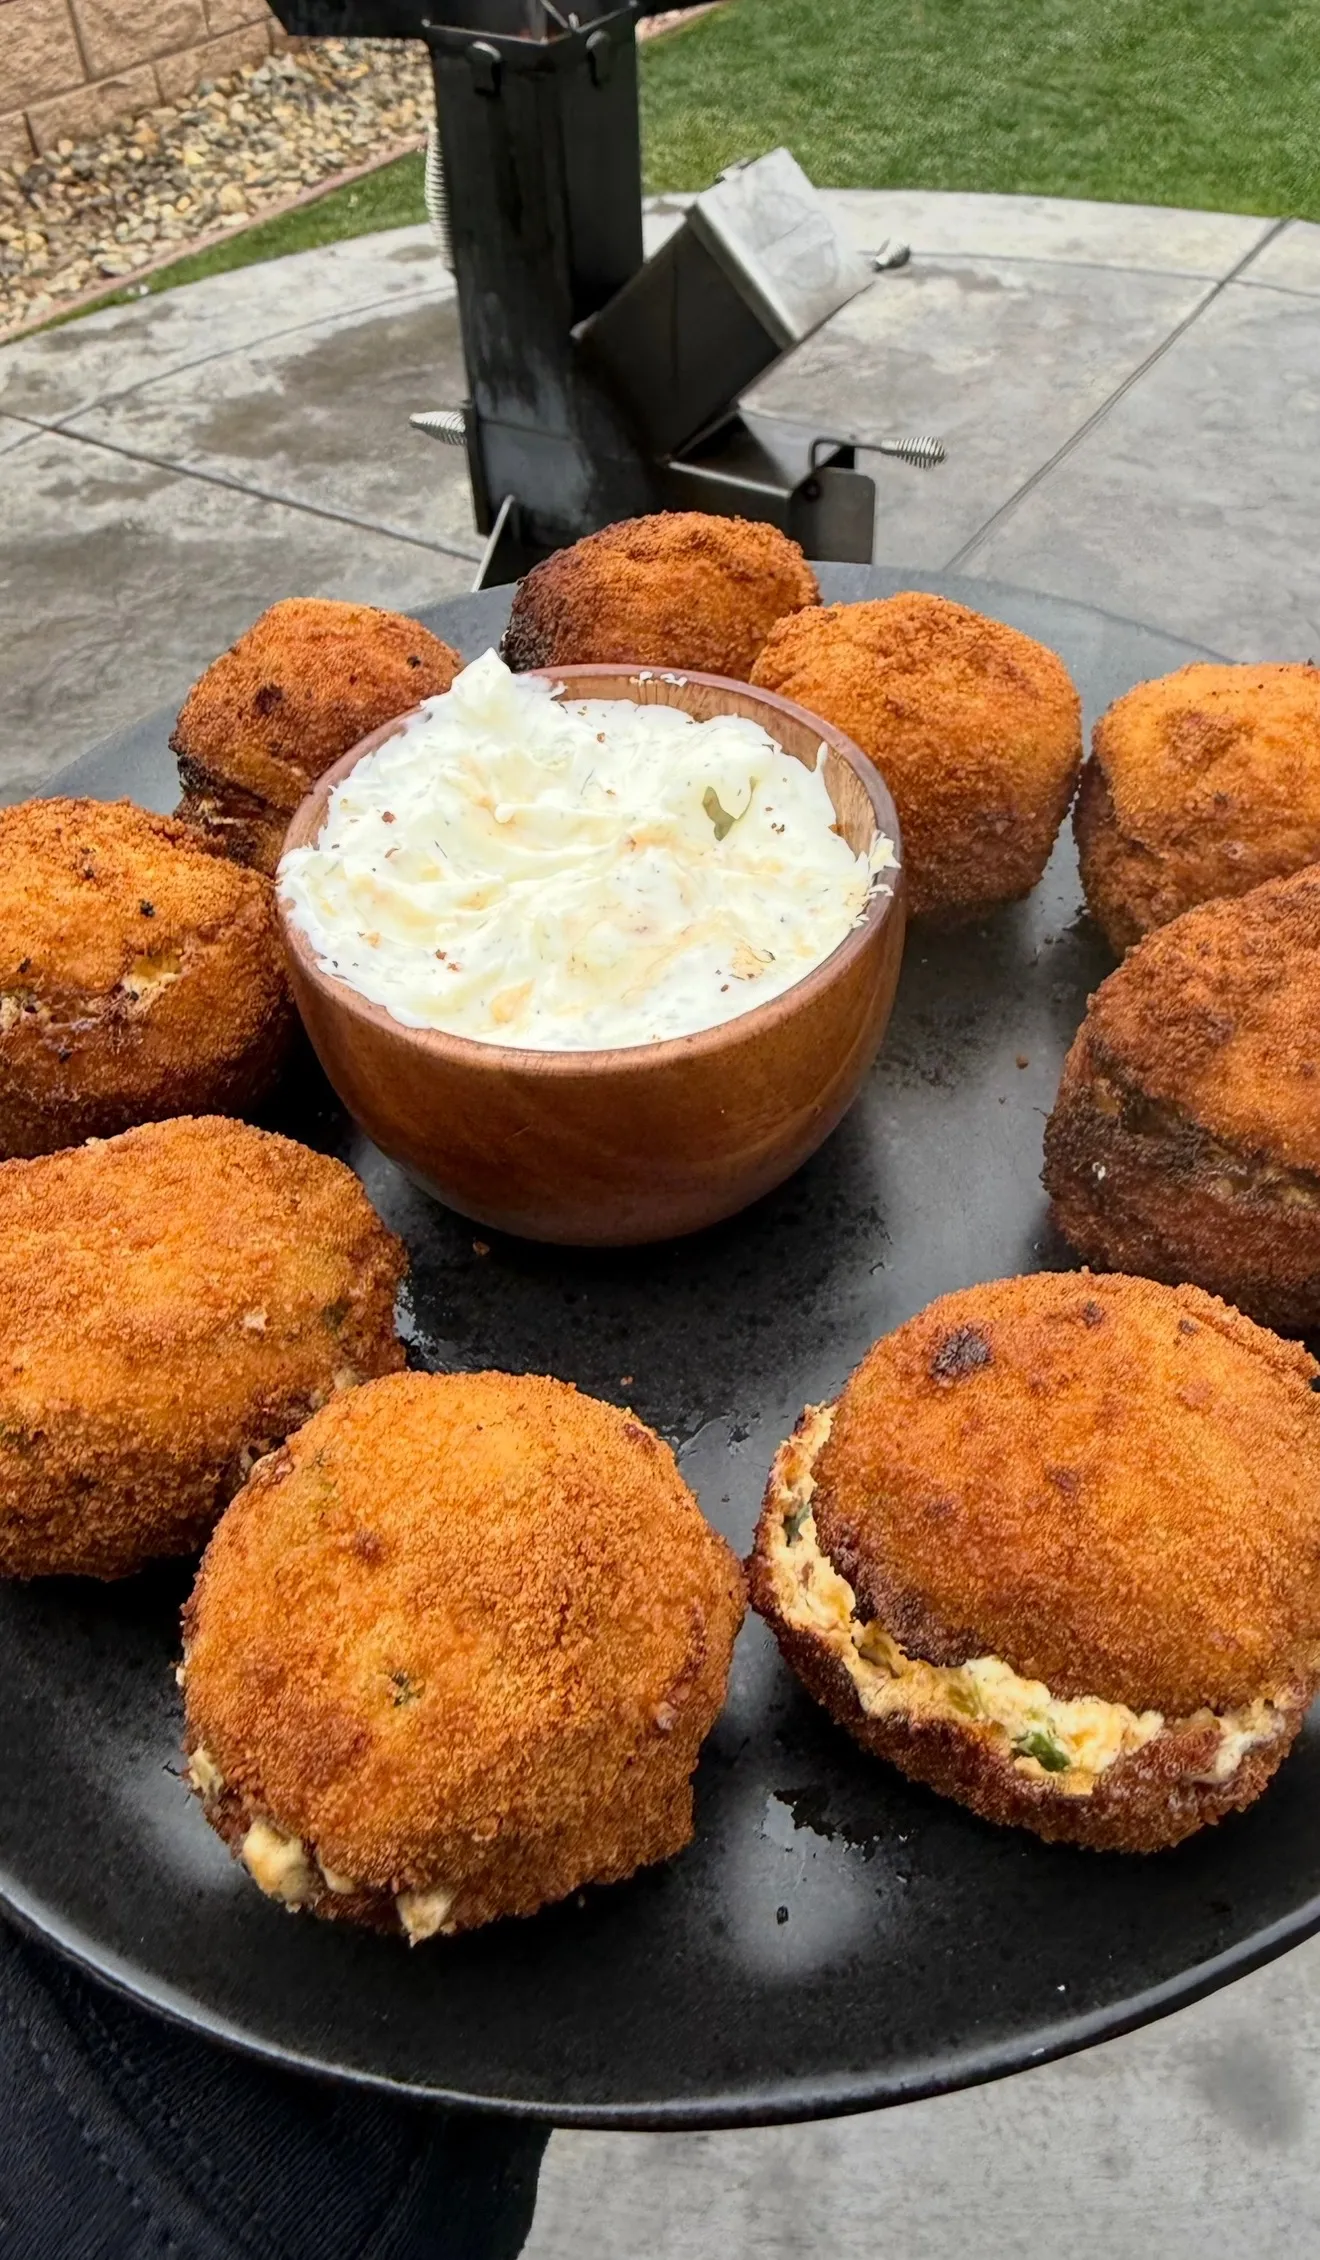
These deep fried jalapeño popper bites pack everything great about a jalapeño popper into a crispy, poppable ball. A filling of softened cream cheese, shredded cheddar, finely diced jalapeños, bacon bits, and BBQ seasoning gets rolled into 1/2-inch balls, frozen to firm up, then breaded in a classic flour, egg, and panko station and fried at 350°F until golden. The freeze step is the trick that keeps the cheese from leaking in the oil. Each bite fries in just 2 to 3 minutes to a crunchy shell with a molten, cheesy center. The recipe makes a generous batch of party-ready bites and comes together fast, served hot with ranch, spicy ranch, or any dipping sauce you like.
Building the Jalapeño Popper Filling
The Cream Cheese and Cheddar Base
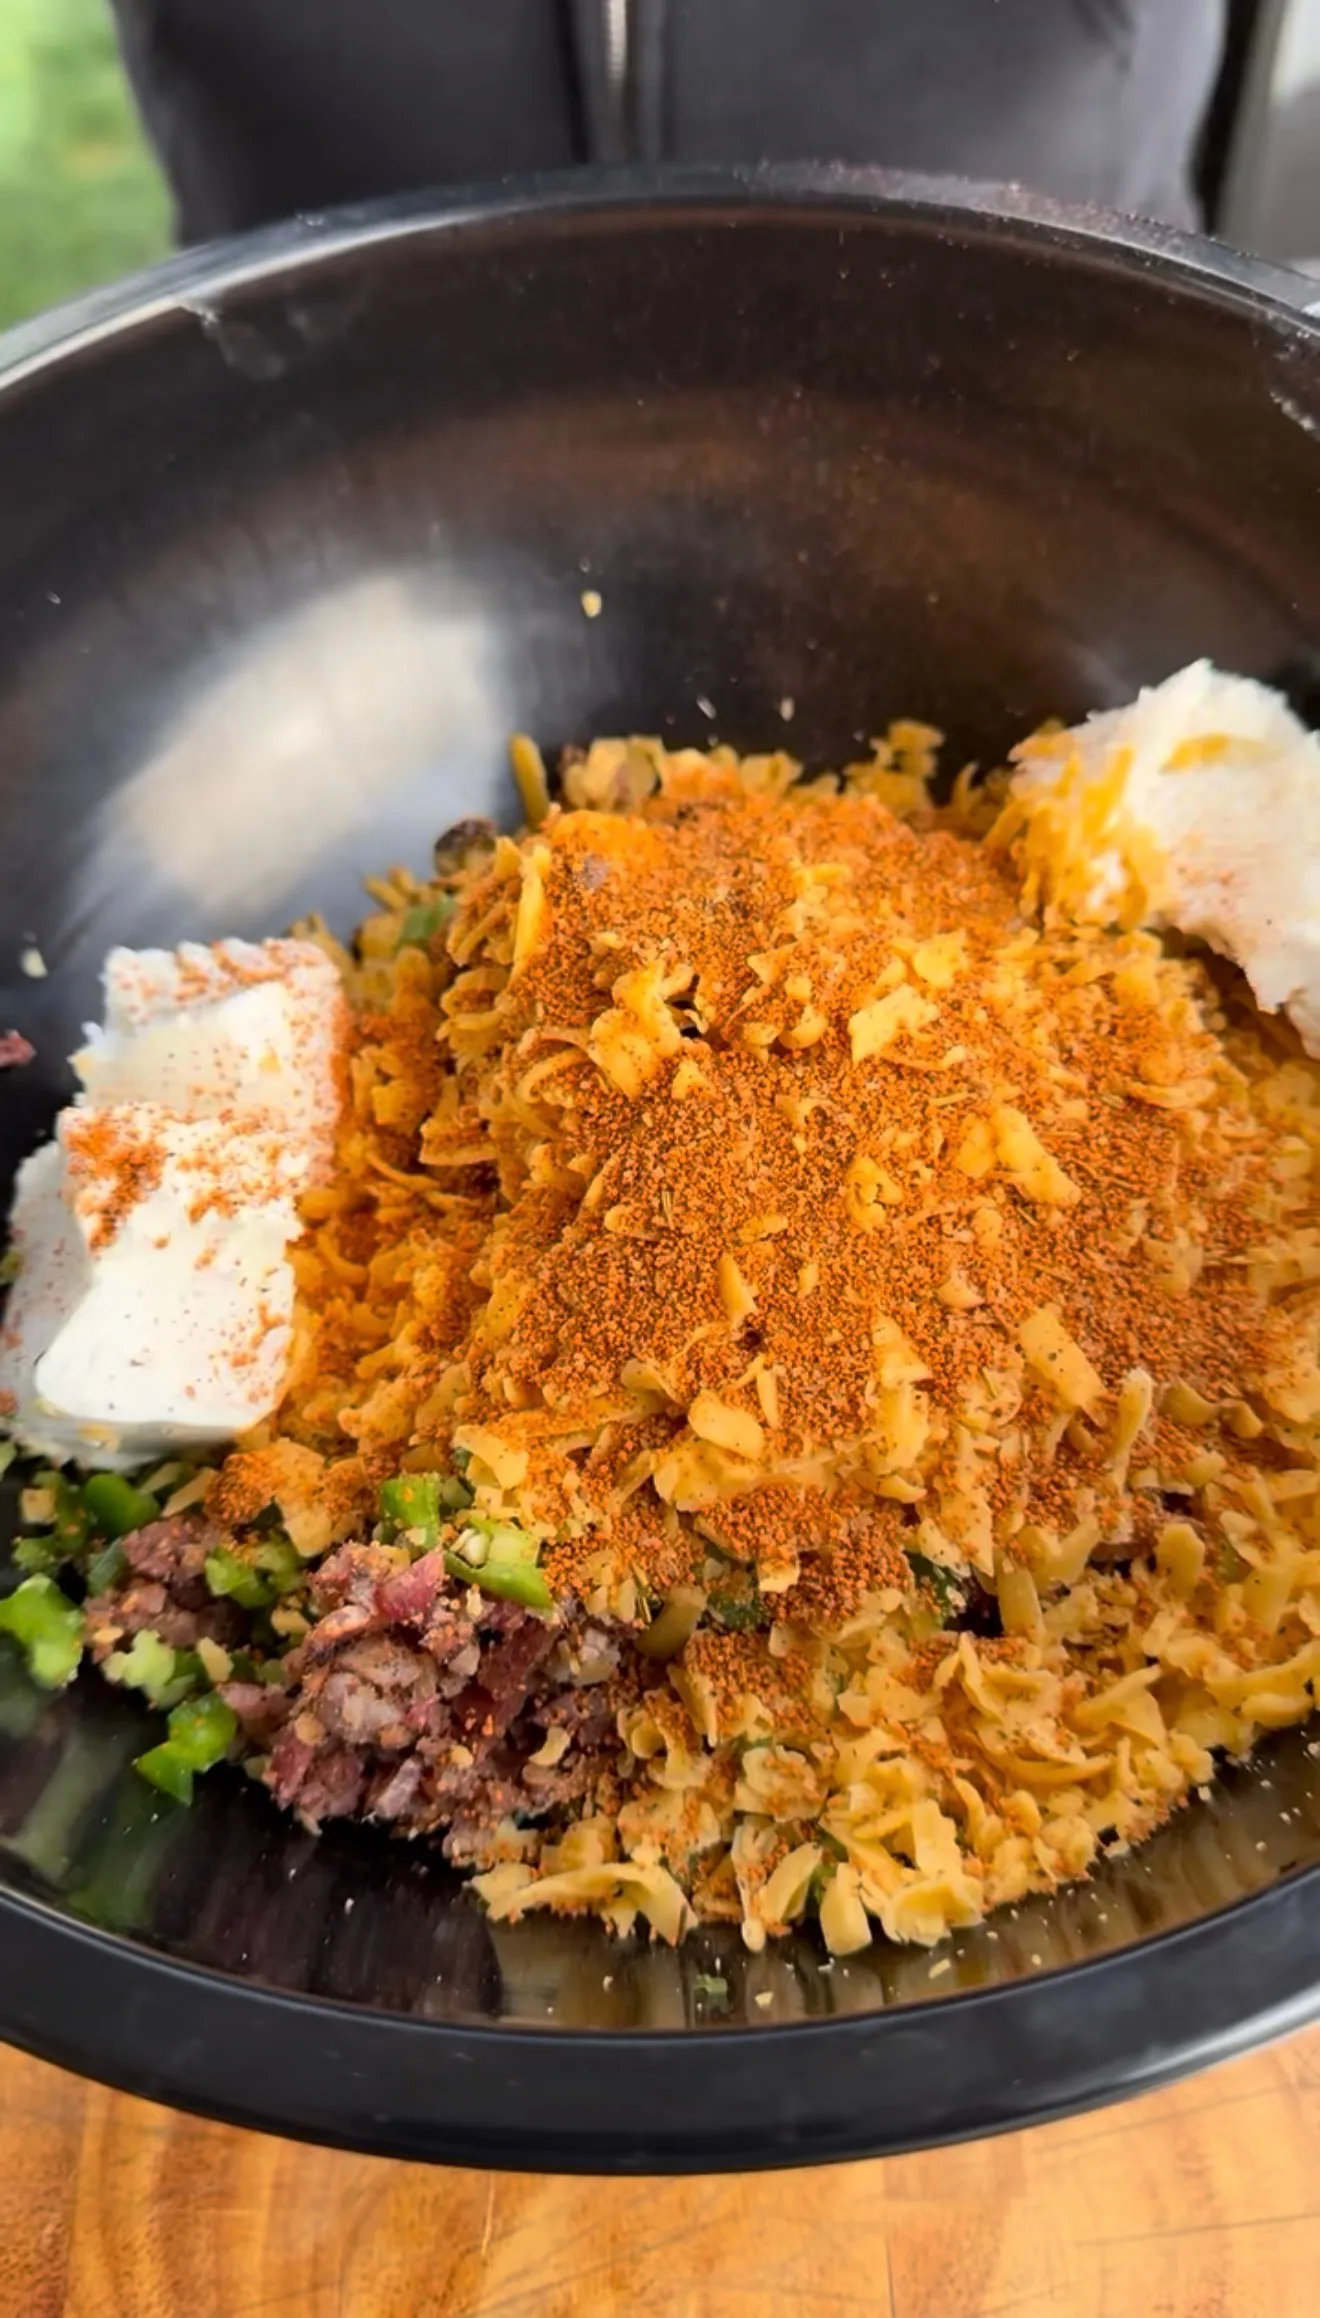
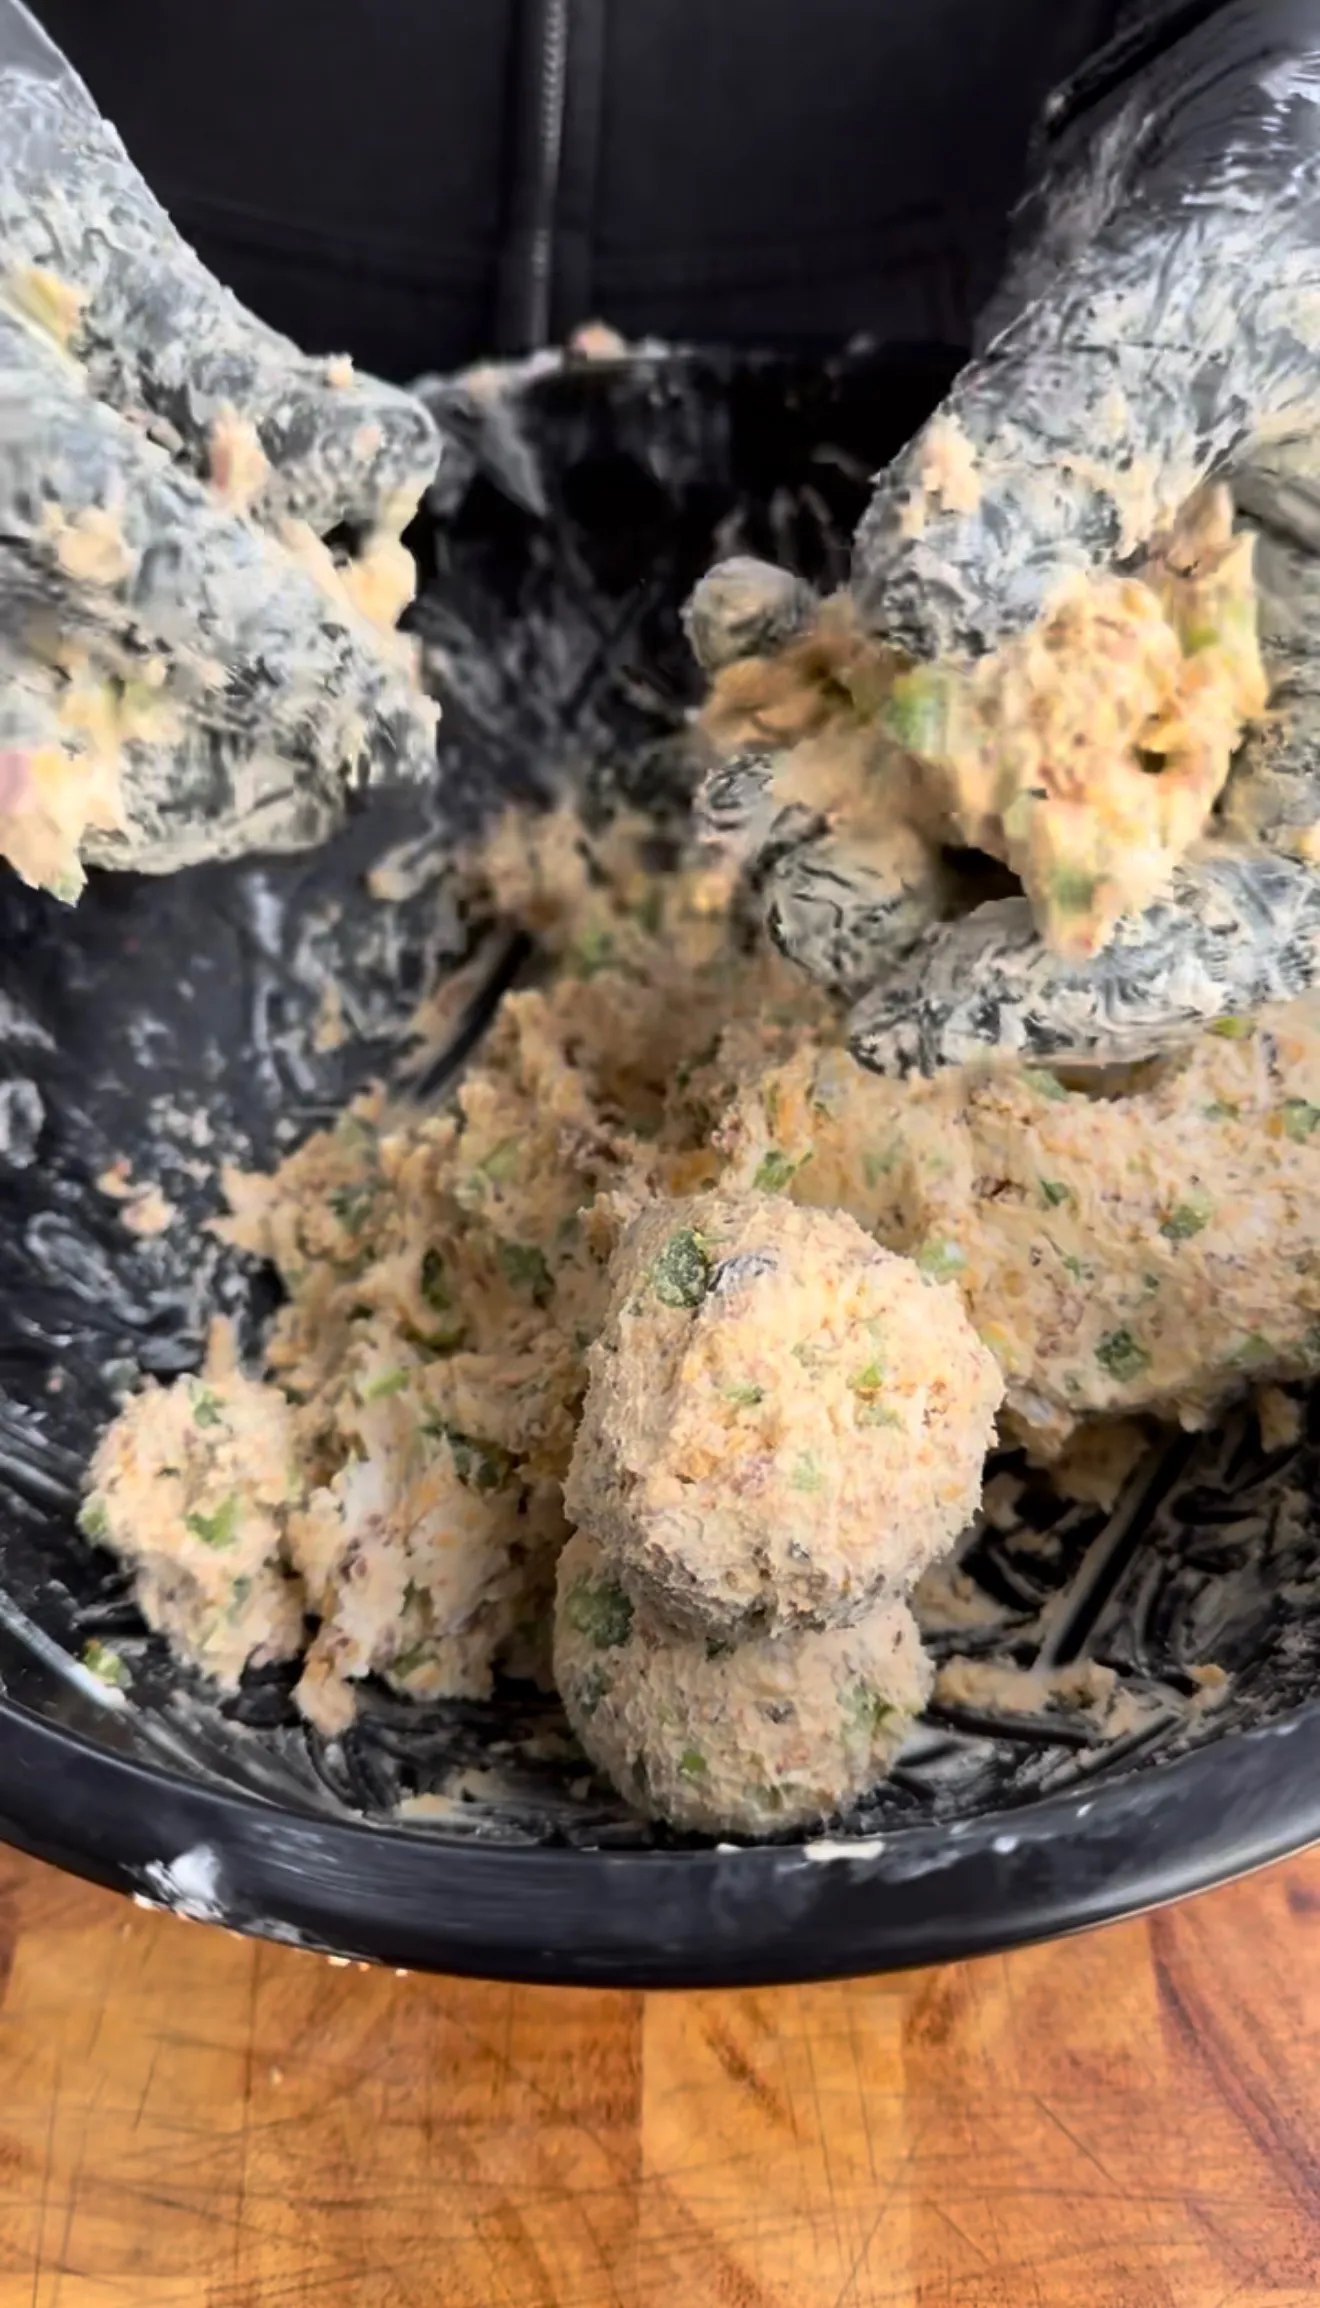
The filling starts with 8 ounces of softened cream cheese and 1 cup of shredded cheddar, and both matter for different reasons. The cream cheese is the binder that holds the bite together and gives it that signature popper tang and creaminess. The cheddar adds sharp flavor and the stretchy melt you want in the center. Softening the cream cheese first is not optional, since cold cream cheese will not mix evenly and leaves lumps. Let it sit at room temperature for 30 to 60 minutes before mixing. As a result, the two cheeses blend into a smooth, scoopable base that carries the other ingredients.
Jalapeños, Bacon, and BBQ Seasoning
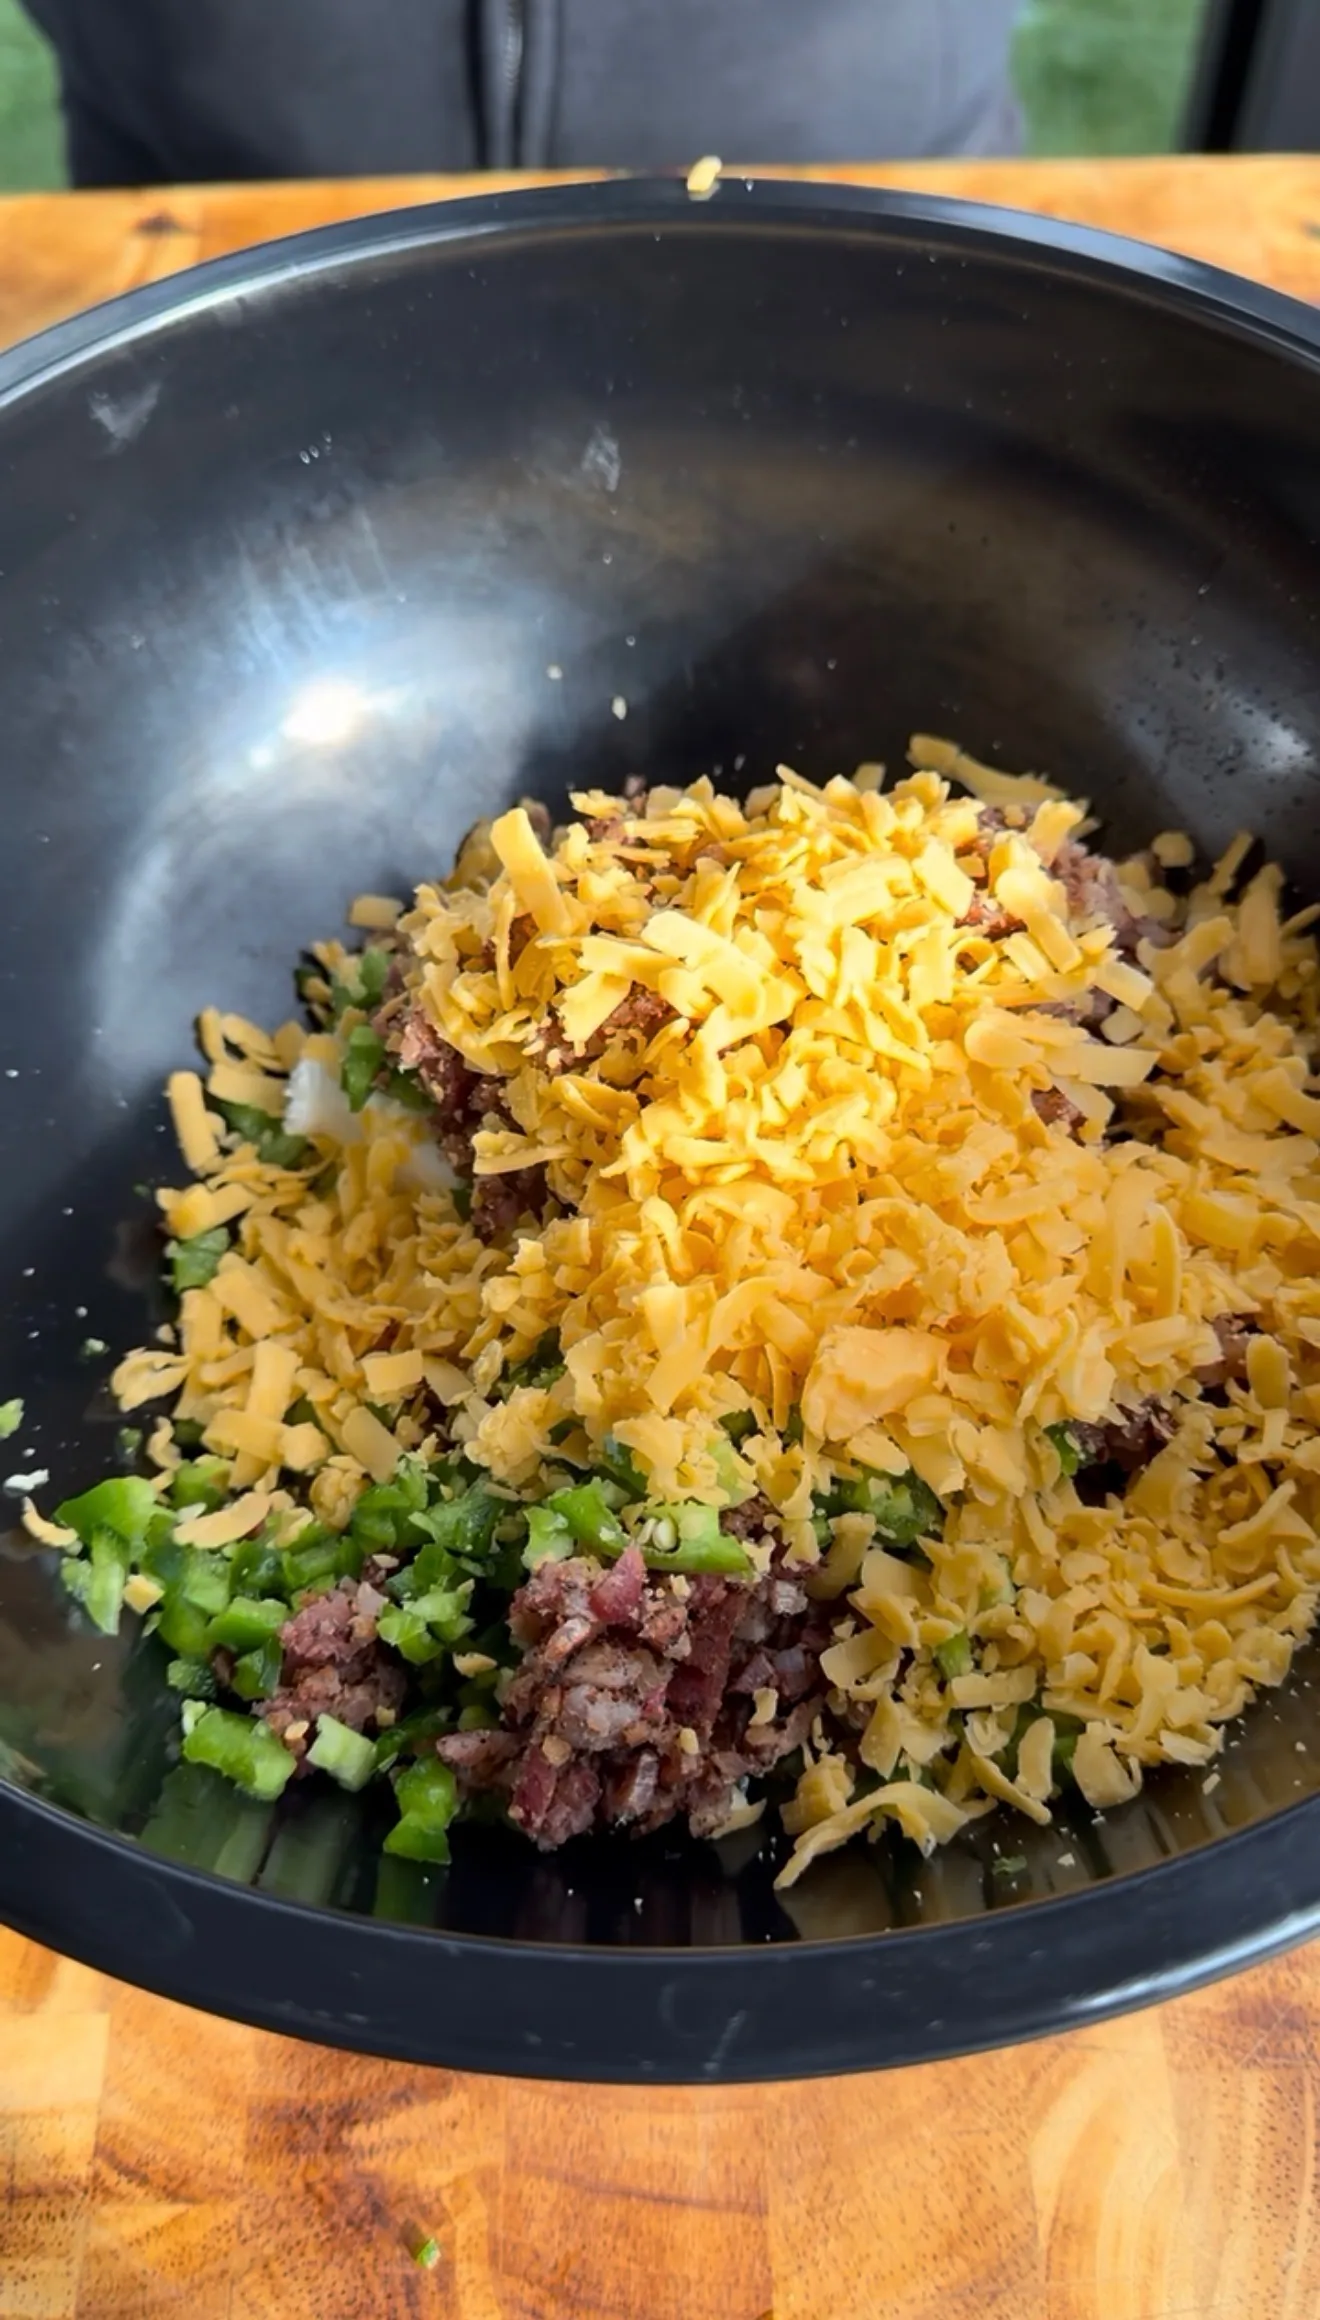
Two finely diced jalapeños bring the heat and the fresh pepper flavor that define a popper. Dice them small so the heat distributes evenly and the bites hold together without big chunks breaking the surface. The 1/4 cup of bacon bits adds smoky, salty crunch, and the 1 tablespoon of BBQ seasoning ties everything together with sweet, smoky depth that sets these apart from a plain popper. Mix until fully combined so every bite has the same flavor balance. Furthermore, taste the filling before shaping, since this is your chance to adjust the heat or seasoning before the bites are breaded and fried.
Why the Freeze Step Is Non-Negotiable
Firm Bites Hold Their Shape
After scooping the mixture into 1/2-inch balls, the bites go into the freezer for 20 minutes, and skipping this step is the most common way these fail. Cheese fillings are soft at room temperature and turn liquid the instant they hit 350°F oil. Freezing firms the bites so they hold their round shape through breading and frying. As a result, the cold center buys you time: the panko shell crisps and sets before the cheese inside fully melts and tries to escape. Therefore, do not skip or shorten the freeze, since it is what keeps your poppers intact instead of leaking into the oil.
Shaping Consistent Bites
Use a small cookie scoop or a measuring spoon to portion the filling into even 1/2-inch balls, then roll them smooth between your palms. Consistent size matters for two reasons. Evenly sized bites fry at the same rate, so none are underdone while others overcook, and uniform bites look better on the serving plate. Place them on a parchment-lined baking sheet with a little space between so they freeze individually rather than fusing together. Moreover, working quickly while the cream cheese is still cool from mixing makes shaping cleaner and less sticky.
The Three-Stage Breading Station
Flour, Egg, Panko in Order
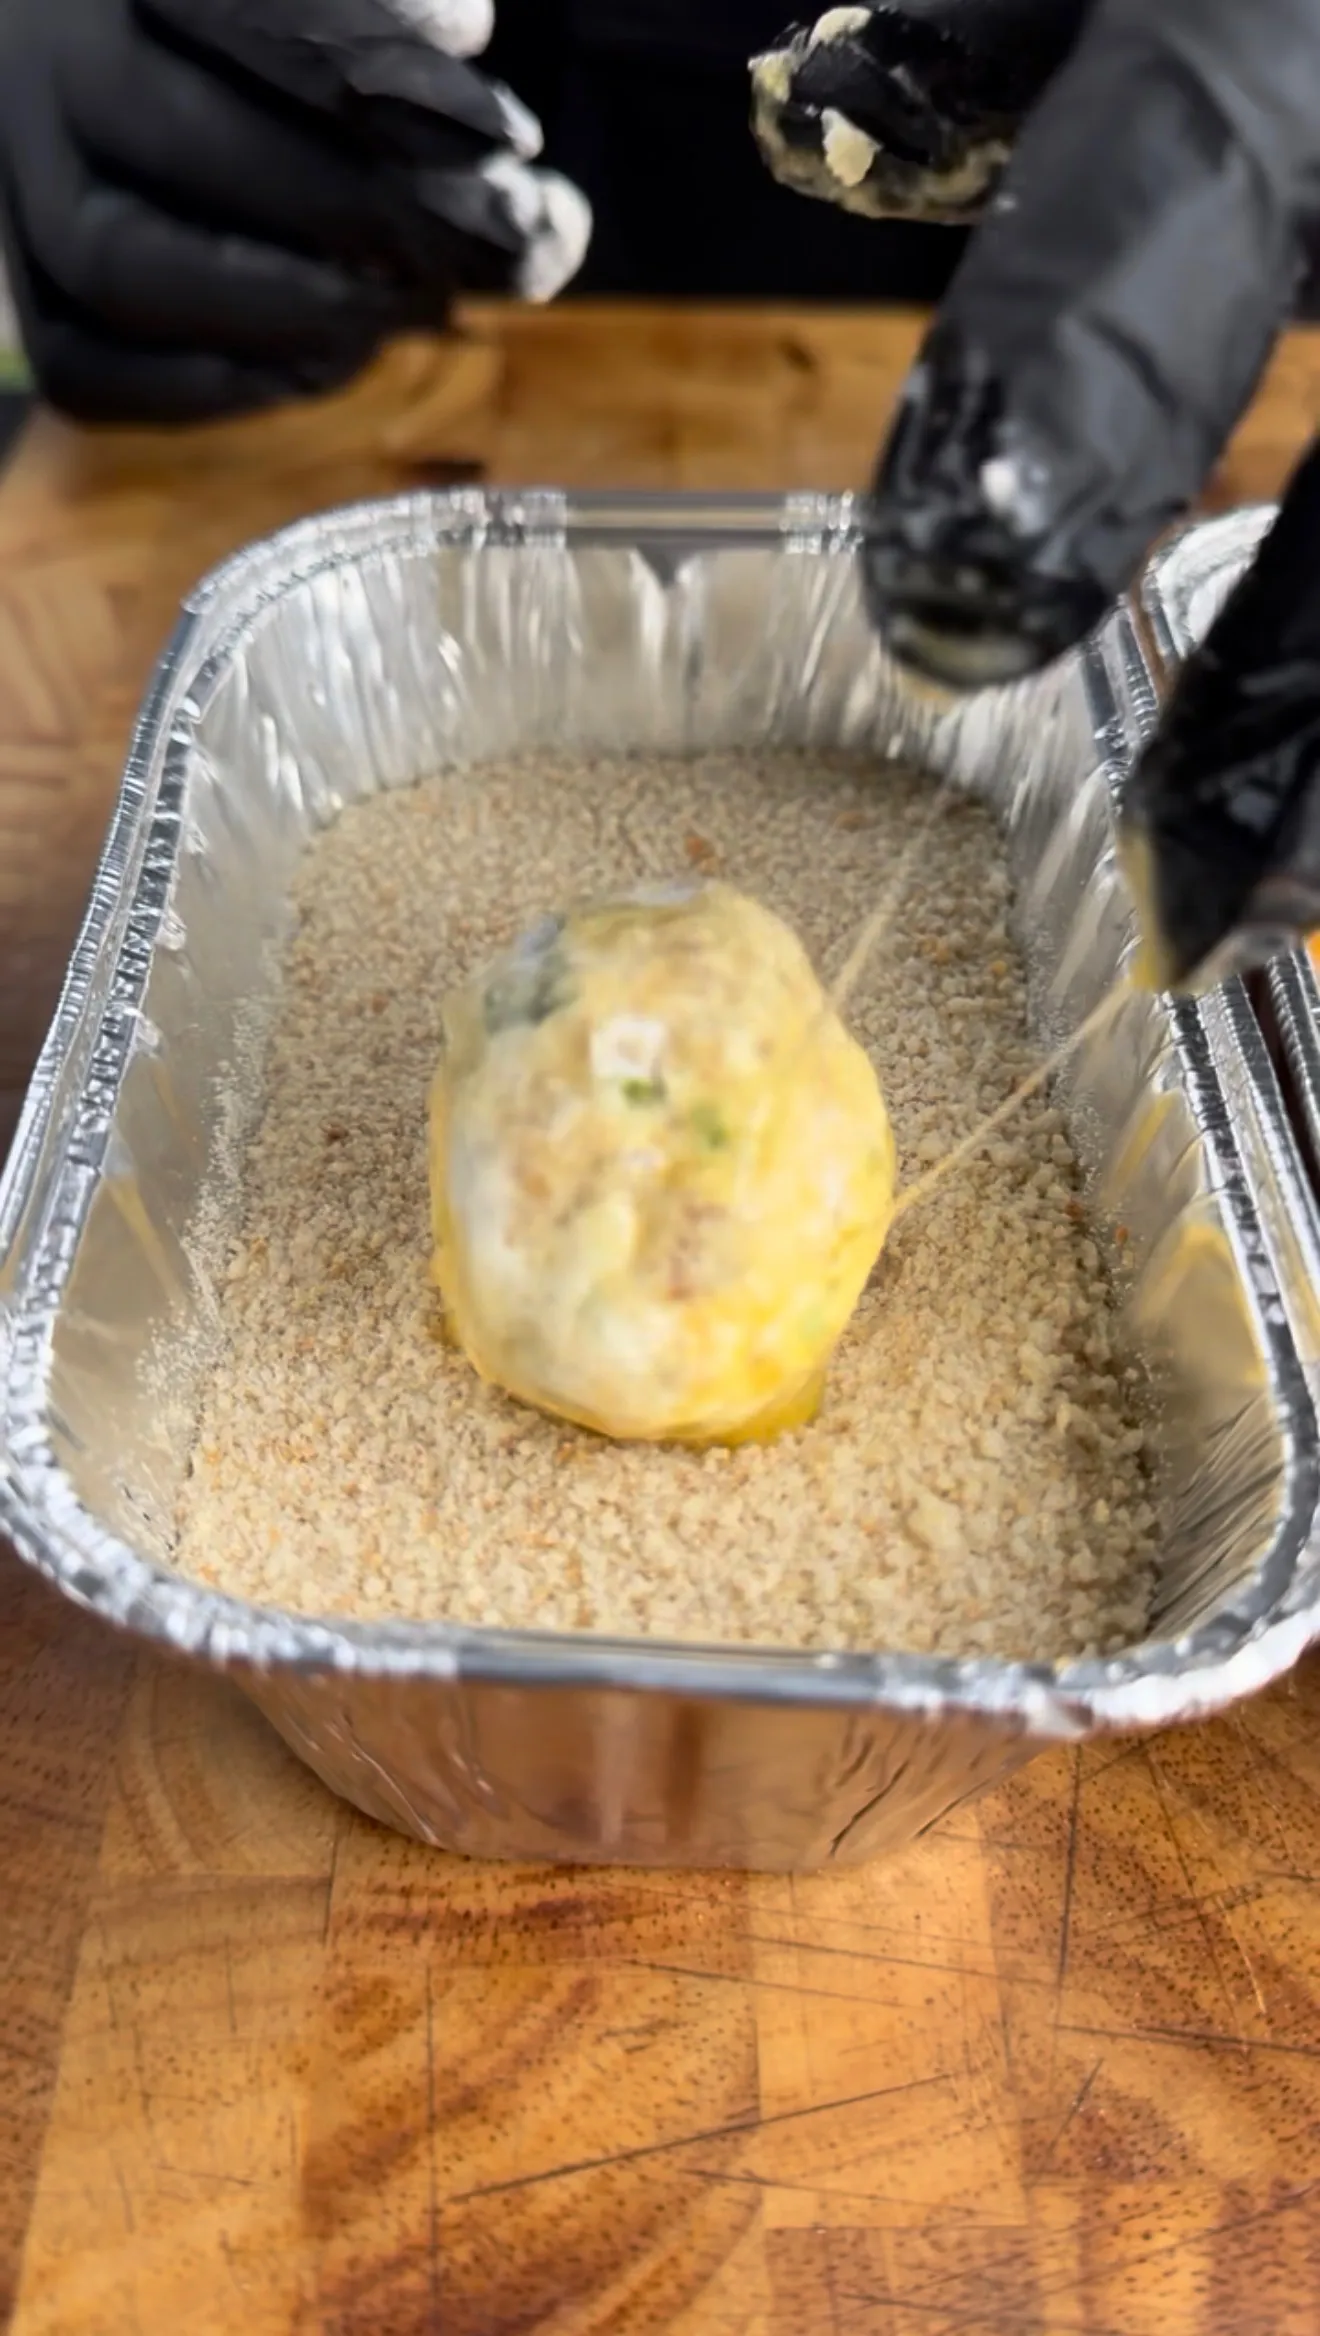
Set up a standard breading station with three shallow dishes: 1 cup of flour, 2 beaten eggs, and 1.5 cups of panko breadcrumbs. The order is not arbitrary. The flour dries the surface of the cold bite and gives the egg something to grip. The beaten egg is the glue that holds the panko on. The panko forms the final crunchy shell. Coat each frozen bite in flour first, then the egg wash, then the panko, pressing gently so the crumbs adhere. Consequently, this three-layer system builds a coating that stays put in the oil instead of falling off.
Why Panko Beats Regular Breadcrumbs
Panko is the key to the crunch. These Japanese-style breadcrumbs are larger, flakier, and drier than standard breadcrumbs, so they fry up into a noticeably crispier, lighter shell that stays crunchy longer. Standard breadcrumbs absorb more oil and turn dense. For an even sturdier coating, you can double-bread the bites by repeating the egg and panko steps, which builds a thicker shell that gives extra insurance against cheese leaks. Additionally, keep one hand for the dry steps (flour and panko) and one for the wet step (egg) to avoid building up a clumpy mess on your fingers.
Frying at 350°F for the Perfect Crunch
Hold the Oil Temperature
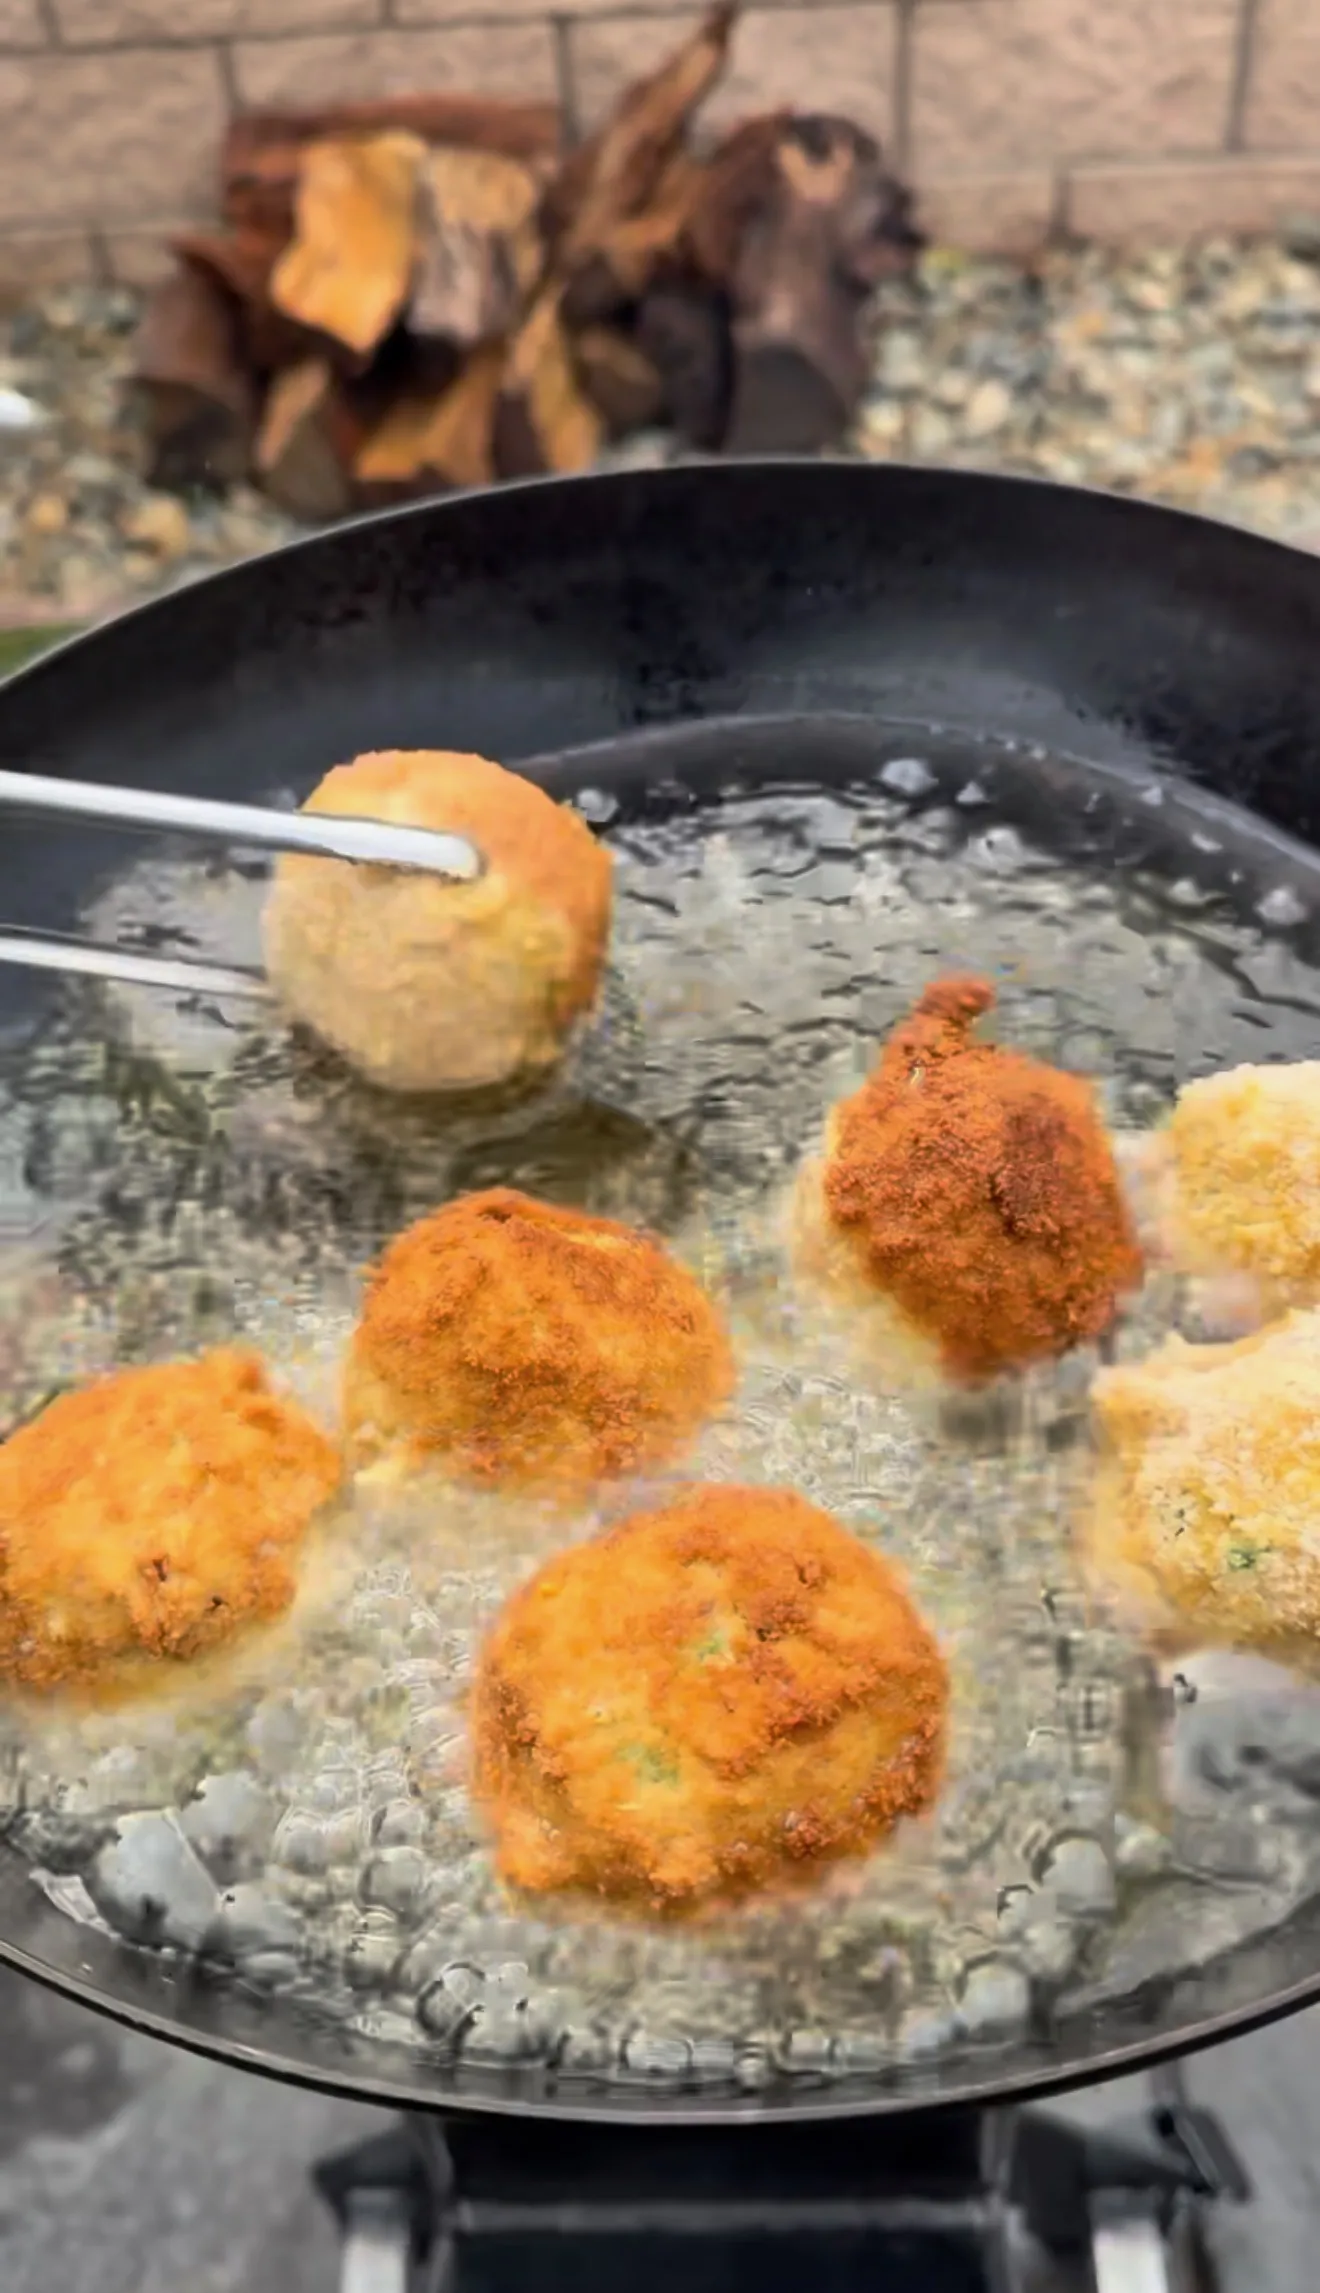
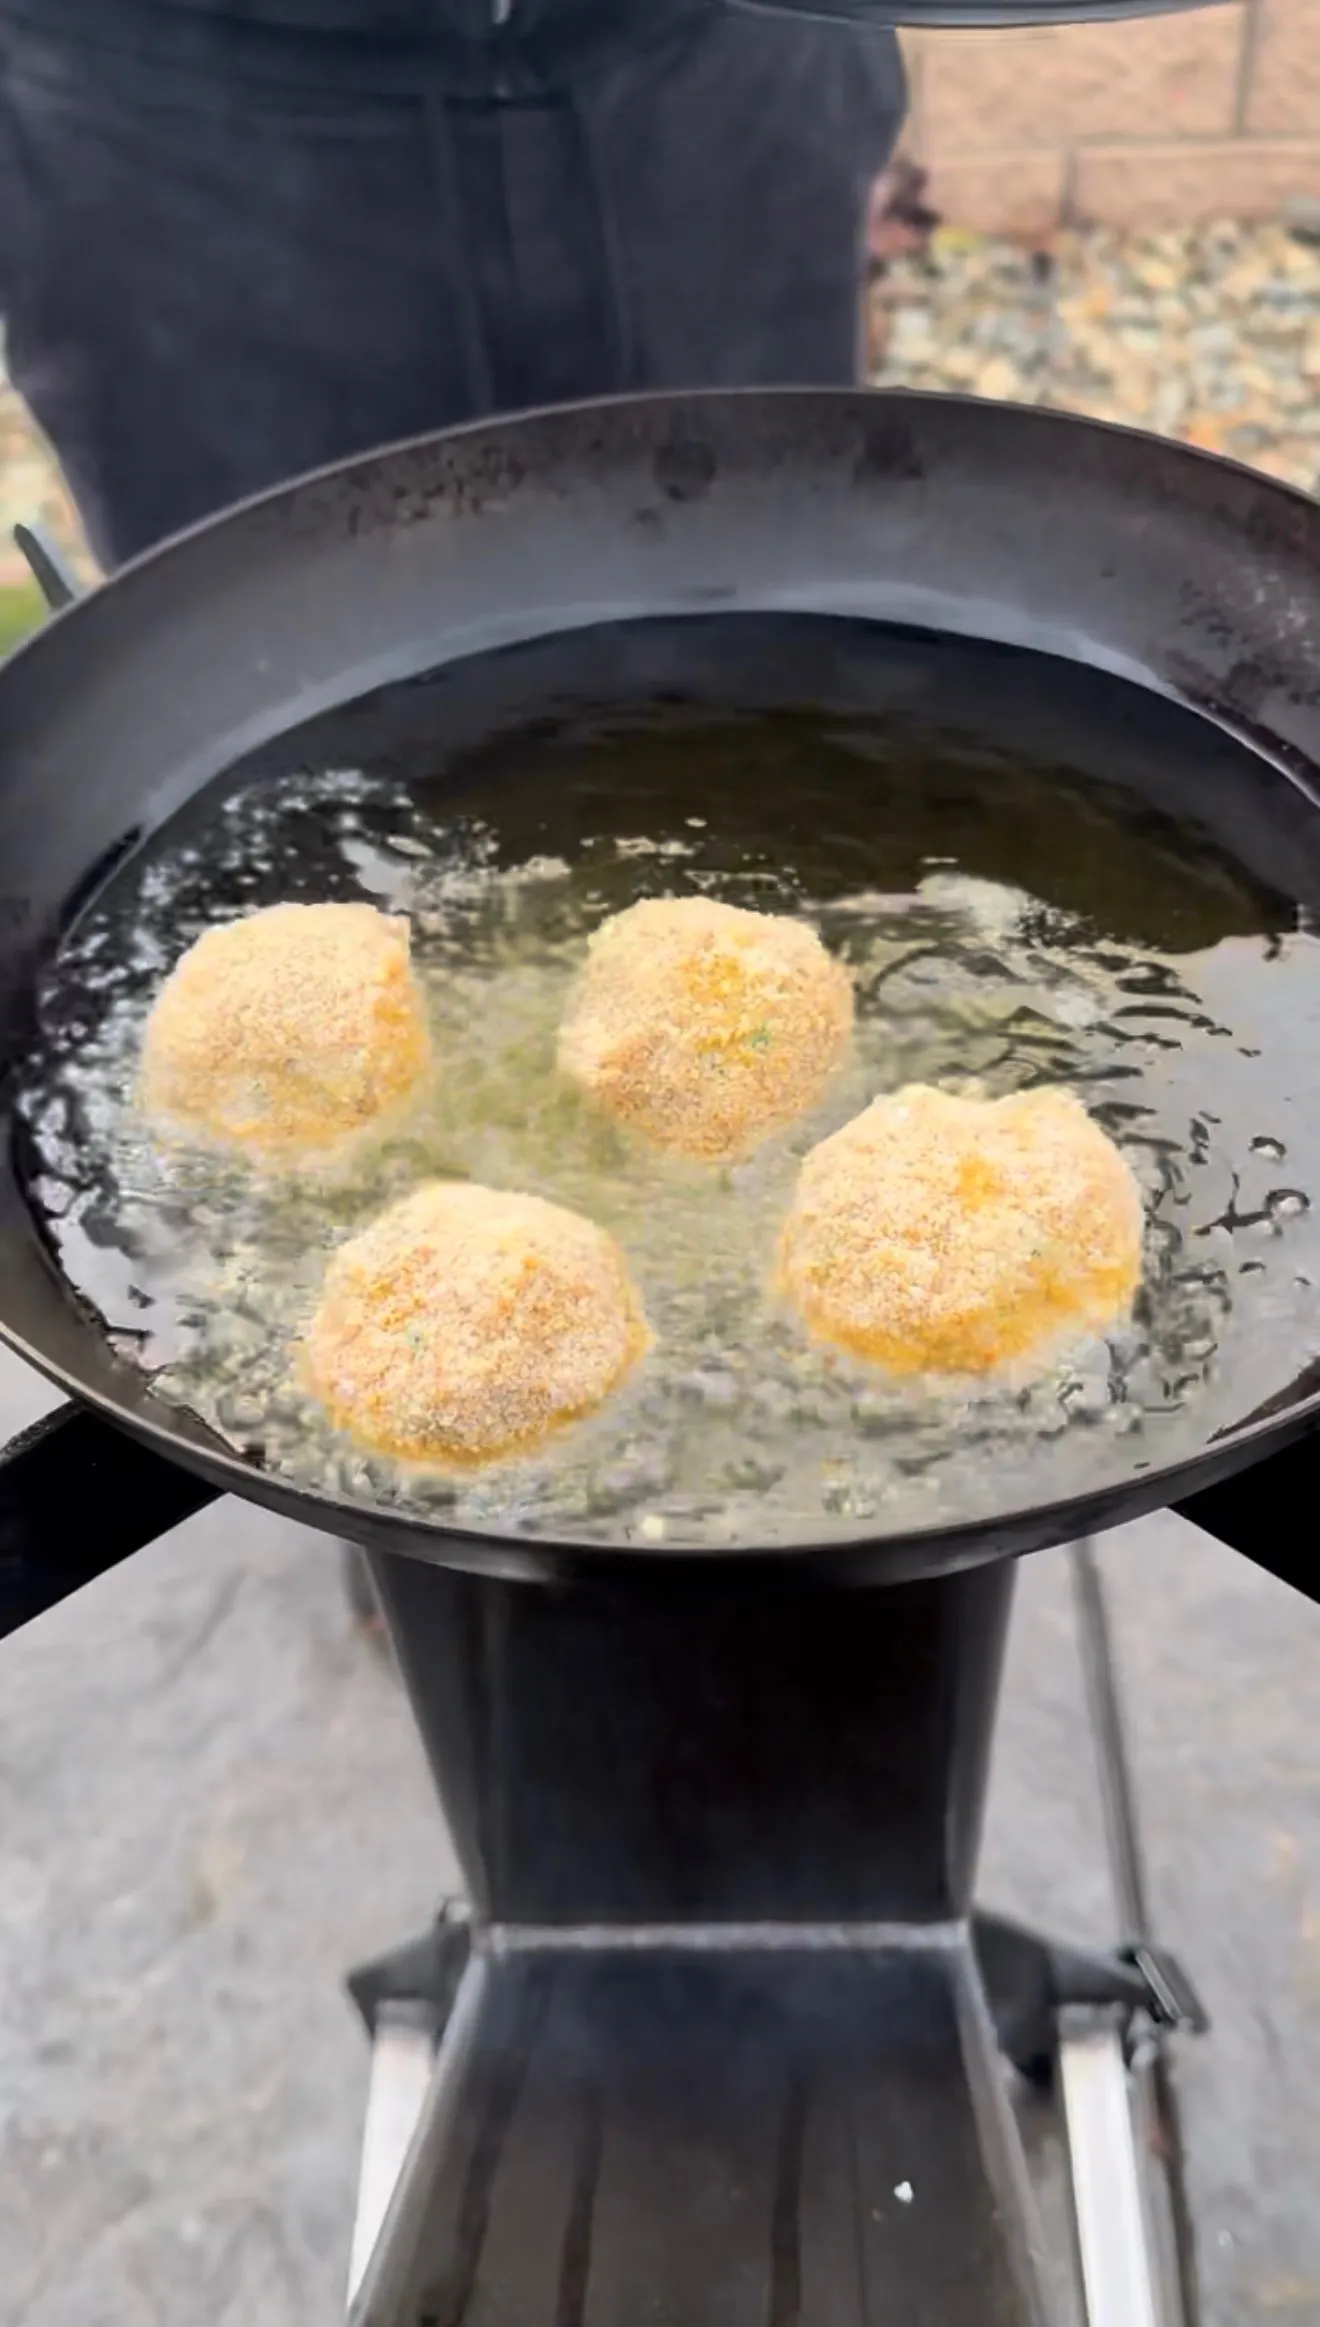
Heat a neutral frying oil to 350°F and use a thermometer to hold it there. This temperature is the balance point for these bites. Hot enough to crisp the panko fast, but not so hot that the shell burns before it sets. Too hot and the coating browns before it can seal, letting the cheese leak. Too cool and the bites absorb oil and the filling melts out before the crust firms. Fry in batches for just 2 to 3 minutes until golden brown and crispy. As a result, the short fry time and steady temperature give you a crunchy shell with the cheese still molten inside.
Don’t Crowd the Pot
Fry the bites in small batches and resist dumping them all in at once. Adding too many cold bites at once crashes the oil temperature, which leads to greasy, soft poppers and raises the risk of cheese leaks. Crowded bites also stick together and fry unevenly. Add only enough to fill the oil surface in a single uncrowded layer, and let the oil return to 350°F between batches. Therefore, frying in two or three rounds takes a few extra minutes but is the difference between crispy, intact bites and a pot of leaked cheese.
Draining, Dipping, and Serving
Drain and Rest Briefly
Transfer the fried bites to a wire rack or a paper-towel-lined tray and let them cool slightly before serving. A wire rack is the better choice, since it lets air circulate and keeps the bottoms from steaming soft against a plate. The brief rest does two things. It lets excess oil drain off, and it lets the molten cheese center cool from scalding to merely hot, which prevents burned mouths. As a result, a 2 to 3 minute rest improves both texture and eating experience without letting the bites go cold.
The Best Dipping Sauces
These bites are built for dipping, and the cool, creamy sauces work best against the spicy, cheesy filling. Ranch is the classic pairing, while spicy ranch leans into the heat for those who want more kick. Other strong options include chipotle ranch, blue cheese, a cool sour cream dip, or even a sweet element like honey or hot honey to play against the BBQ seasoning. Serve the bites hot and cheesy with the dip on the side. Furthermore, these are a natural fit for game day spreads, parties, and appetizer platters, where they disappear fast.

Step-by-Step: How to Make Deep Fried Jalapeño Popper Bites
Step 1: Mix the Filling
In a mixing bowl, combine the softened cream cheese, shredded cheddar, finely diced jalapeños, bacon bits, and BBQ seasoning. Mix until fully combined and the filling is smooth and evenly seasoned throughout.
Step 2: Scoop Into Balls
Scoop the mixture into approximately 1/2-inch balls and place them on a parchment-lined baking sheet, leaving a little space between each so they freeze individually.
Step 3: Freeze for 20 Minutes
Transfer the bites to the freezer for 20 minutes to firm up. This step is essential, since the cold center is what keeps the cheese from melting out before the coating crisps in the oil.
Step 4: Set Up the Breading Station
Set up a breading station with three shallow dishes: the flour, the beaten eggs, and the panko breadcrumbs, arranged in that order.

Step 5: Bread the Bites
Remove the popper bites from the freezer. Coat each bite in flour, then dip into the egg wash, and finally coat with panko breadcrumbs, pressing gently so the crumbs adhere fully.
Step 6: Heat the Oil
Heat the frying oil to 350°F, using a thermometer to confirm and hold the temperature. The right oil temperature is critical for a crisp shell and a molten, intact center.
Step 7: Fry in Batches
Fry the jalapeño popper bites in batches for 2 to 3 minutes, until golden brown and crispy. Don’t crowd the pot, and let the oil return to 350°F between batches.
Step 8: Drain and Serve
Transfer to a wire rack or paper-towel-lined tray and let them cool slightly before serving. Serve hot with ranch, spicy ranch, or your favorite dipping sauce.
Deep Fried Jalapeño Popper Bites
Ingredients
Equipment
Method
- In a mixing bowl, combine the cream cheese, cheddar cheese, diced jalapeños, bacon bits, and BBQ seasoning. Mix until fully combined.
- Scoop the mixture into approximately 1/2-inch balls and place them on a parchment-lined baking sheet.
- Transfer the bites to the freezer for 20 minutes to firm up.
- Set up a breading station with the flour, beaten eggs, and panko breadcrumbs in three shallow dishes.
- Remove the popper bites from the freezer. Coat each bite in flour, then dip into the egg wash, and finally coat with panko breadcrumbs.
- Heat frying oil to 350°F.
- Fry the jalapeño popper bites in batches for 2 to 3 minutes, or until golden brown and crispy. Don’t crowd the pot, and let the oil return to temperature between batches.
- Transfer to a wire rack or paper-towel-lined tray and allow them to cool slightly before serving. Serve hot with ranch, spicy ranch, or your favorite dipping sauce.
Notes
Tried this recipe?
Let us know how it was!Deep Fried Jalapeño Popper Bites — FAQ
Everything you need to nail the crunch, the cheesy center, and zero leaks.
Setup & Basics
Yes, and they freeze beautifully, which makes them perfect for parties. Bread the bites completely, then freeze them solid on a tray and transfer to a freezer bag for up to 2 months. Fry them straight from frozen, adding about 1 to 2 minutes to the fry time, since they start colder. You can also prep the filling and shape the balls a day ahead, keeping them in the freezer until you’re ready to bread and fry. Frying from frozen actually works in your favor here, since the extra-cold center gives the panko shell even more time to crisp before the cheese melts. Make a big batch and keep them on hand for game day.
Both work. Air fryer: Spray the breaded frozen bites generously with oil (this is key for browning) and cook at 375°F for 8 to 10 minutes, shaking the basket halfway, until golden and crisp. Oven: Place on a wire rack over a sheet pan, spray with oil, and bake at 400°F for 12 to 15 minutes. Both methods are lighter and less messy than deep frying, though the shell won’t be quite as uniformly crunchy. The oil spray matters in both, since the panko needs fat to brown and crisp. Keep the bites frozen until they go in, since the freeze step is just as important here to prevent the cheese from melting out.
The number one cause is skipping or shortening the freeze. A room-temperature cheese ball turns liquid instantly in 350°F oil and bursts through the coating. Freeze the bites at least 20 minutes (longer is fine) so the center stays solid while the shell crisps. The second cause is incomplete breading: any bare spot in the flour-egg-panko layers is an escape route for melting cheese, so coat thoroughly and press the panko on. A third factor is oil that’s too hot, which browns the shell before it seals. Hold 350°F. If leaks persist, double-bread the bites for a thicker, sturdier shell.
The heat lives almost entirely in the jalapeños, so adjust there. Milder: Remove the seeds and white membranes before dicing, since that’s where most of the capsaicin sits; this alone cuts the heat dramatically. You can also use just one jalapeño. Spicier: Leave the seeds in, use three jalapeños, or add a diced serrano or a pinch of cayenne to the filling. The cream cheese base tempers the heat considerably, so the fried bites taste milder than the raw filling. Taste the filling before shaping and adjust then, since you can’t change it once they’re breaded. For a smoky angle, swap in diced pickled jalapeños or add a chipotle in adobo.
Technique & Troubleshooting
The oil was too hot, so the panko browned faster than the frozen center could warm through. Drop the temperature to a steady 350°F and use a thermometer to hold it there, since the shell needs the full 2 to 3 minutes to both crisp and heat the center. If you’re frying straight from a long freeze or from fully frozen, the centers need a little more time, so lower the heat slightly and extend the fry by a minute. The opposite problem (cheese leaking) comes from oil that’s too cool or bites that weren’t cold enough, so the 350°F target with properly frozen bites is the balance that solves both. The filling only needs to warm to gooey, since everything in it is already cooked.
Skip the microwave, which turns the crunchy shell soft and rubbery. Reheat leftover bites in a 375°F oven or air fryer for 6 to 8 minutes until heated through and the shell re-crisps. Spread them in a single layer so the heat circulates. Store leftovers refrigerated up to 3 days in an airtight container. These are genuinely best fresh, since the contrast between the crisp shell and molten center fades over time, so fry only what you’ll eat and keep the rest of the breaded bites in the freezer to fry fresh later. That make-and-freeze approach beats refrigerating fried leftovers every time.
Ready to Level Up?
Take your backyard cooking from good to legendary.
This is where I keep all my most-used smokers, knives, and favorite cooking tools.
Shop My Gear CollectionExplore More Recipes
Find more diverse flavors at CWFeats.com