Discada on the Loco Cookers Disco

Discada on the Loco Cookers Disco
Mexican mixed meat feast cooked on a disco – beef, pork, chorizo, bacon, and sausage with fresh vegetables for the ultimate taco filling
Ingredients
- 2 lbs beef fajita (skirt or flank), sliced thin
- 1 lb pork shoulder or country-style ribs, diced
- 1 lb Mexican chorizo (fresh)
- 1 lb bacon, chopped
- 1 lb hot dogs or smoked sausage, sliced
- 1 large onion, sliced
- 1 large bell pepper, sliced
- 4-5 Roma tomatoes, diced
- 4-5 garlic cloves, minced
- 2 jalapeños or serranos, sliced (optional)
- 1 packet taco seasoning (or about 2-3 tbsp)
- 12 oz Mexican lager beer (optional, for extra flavor)
- Corn or flour tortillas, for serving
Discada is the ultimate Mexican party food – a massive mixed grill of beef, pork, chorizo, bacon, and sausage all cooked together on a disco (a large concave cooking surface shaped like a plow disc). This Loco Cookers disco recipe brings together multiple meats with fresh vegetables, creating layers of flavor as each ingredient renders its fat and contributes to the final dish. The result is a smoky, savory, slightly spicy meat mixture that’s perfect for loading into warm tortillas with your favorite toppings.
What makes cooking discada on the Loco Cookers disco special is how the curved surface design naturally pools fats and juices in the center while allowing excess to drain to the sides. This creates both crispy edges and tender, flavorful meat in the middle. The large cooking surface lets you work in stages, cooking each protein separately to develop proper browning before combining everything at the end. This technique ensures each meat reaches its ideal texture rather than steaming together in a crowded pan.
This Mexican disco recipe originated in Northern Mexico and Texas, where cowboys would use old plow discs over open fires to cook whatever meats they had on hand. Today, purpose-built discos like the Loco Cookers version make this easier than ever, with consistent heat distribution and portability. The beauty of discada is its flexibility – you can adjust the meats and vegetables based on what you have available, making it perfect for using up odds and ends or showcasing premium cuts.
Understanding the Disco Cooking Method

The disco cooking surface is fundamentally different from a flat griddle or skillet. The concave shape creates multiple heat zones – the hottest area in the center gradually transitions to cooler zones at the edges. This temperature gradient gives you incredible control over your cook, allowing you to sear meat in the center while keeping cooked ingredients warm at the edges without overcooking them.
Rendered fat from bacon and chorizo becomes the cooking medium for everything else in discada. As these fatty meats cook first, they release oils that coat the disco surface and provide the foundation for building flavor. Each subsequent ingredient cooks in this seasoned fat, picking up the flavors of what came before. This is why the cooking order matters – you’re not just cooking ingredients, you’re building a progression of flavors that culminate in the final mixed dish.
The Loco Cookers disco maintains steady heat around 300°F, which is ideal for discada because it’s hot enough to brown meat without burning the rendered fat. Too high and the bacon fat will smoke and turn bitter. Too low and the meats will steam rather than sear, missing out on that crucial caramelization that makes discada so flavorful. The consistent heat distribution of a quality disco means you don’t have to constantly rotate ingredients or fight hot spots.
Cooking discada is as much about the experience as the food. The large surface area and dramatic presentation of multiple meats sizzling together makes it perfect for entertaining. Guests can gather around the disco, watching the cooking process and building anticipation. This communal aspect is central to discada’s appeal – it’s meant to be shared, passed around in warm tortillas, and enjoyed together.
Choosing the Right Meats

Beef fajita meat (skirt or flank steak) provides the base protein with its beefy flavor and tender texture when sliced thin against the grain. This cut cooks quickly and absorbs the flavors of the rendered fats beautifully. Slice it thin – about 1/4 inch strips – so it sears fast without overcooking. Thicker pieces will be tough and chewy in the final mix.
Pork shoulder or country-style ribs add richness and a different texture than the beef. Dice these into bite-sized cubes so they have enough surface area to brown properly. Pork shoulder has enough fat to stay moist during cooking while developing crispy edges. This meat takes longer to cook than beef, which is why it goes on the disco earlier in the process.
Fresh Mexican chorizo is non-negotiable for authentic discada flavor. The raw, spiced pork sausage breaks down during cooking, releasing oils infused with chili peppers, garlic, and spices that season everything else. Don’t use dried Spanish chorizo – you need the fresh Mexican variety that crumbles and renders fat. This ingredient provides much of the signature flavor that makes discada taste like discada.
Bacon and hot dogs might seem like unusual additions, but they’re traditional in Tex-Mex discada. The bacon provides smoky, salty fat that other ingredients cook in, while hot dogs or smoked sausage add a nostalgic, familiar flavor that appeals to kids and adults alike. Some purists skip the hot dogs, but they’re part of what makes this dish so beloved at family gatherings and parties.
The Layered Cooking Technique

Cooking discada isn’t about throwing everything on at once – it’s a carefully orchestrated sequence that builds flavor with each stage. Starting with bacon renders the primary cooking fat and creates crispy bits that add texture to the finished dish. Remove the cooked bacon but leave the fat – this becomes your cooking medium for everything that follows.
Chorizo goes next because it needs time to break down and release its seasoned oils. Fresh chorizo is raw pork, so it needs to cook through completely. Breaking it apart with your spatula as it cooks helps it crumble into small pieces that distribute throughout the final dish. The orange-red oils from the chorizo mix with the bacon fat, creating a flavorful base that will season everything else.
Each meat cooks separately and gets removed before adding the next. This prevents overcrowding, which would cause steaming instead of browning. It also lets you control doneness for each protein – the pork can cook longer to render fat and become tender, while the beef gets just a quick sear to medium-rare before it comes off. Everything will warm back together at the end, so slight undercooking at this stage is actually beneficial.
The vegetables go last because they need less time and you want them to retain some texture. Soft, mushy vegetables disappear into discada, but vegetables with a slight bite provide textural contrast to all that tender meat. The fresh tomatoes break down just enough to create a light sauce that binds everything together without making it soupy.
The Role of Beer in Discada
Adding beer to discada isn’t just for show – it serves specific culinary purposes. A Mexican lager like Modelo or Pacifico adds subtle malty sweetness and helps deglaze the disco, picking up all those flavorful browned bits stuck to the surface. As the beer simmers, the alcohol cooks off while the malt and hop flavors concentrate and meld with the meat juices.
The liquid from the beer creates steam that helps tenderize the meats during the final simmer. This is especially beneficial for the pork and beef, which can tighten up during their initial sear. The steam gently reheats everything while keeping the meat moist. Most of the liquid evaporates, leaving behind concentrated flavor rather than a soupy mixture.
Use a light Mexican lager rather than a heavy beer or IPA. Dark beers can make discada taste bitter, while hoppy beers add flavors that clash with the chorizo spices. The subtle corn sweetness of Mexican lagers complements the meat without overpowering it. If you don’t drink alcohol, you can skip the beer entirely – the dish will still be delicious, just without that extra layer of malty flavor.
Pour the beer over the meat mixture and let it sizzle dramatically – this is part of the theater of discada cooking. The liquid will foam up initially, then settle into a gentle simmer. Let it reduce for 10-15 minutes, stirring occasionally, until most of the liquid has evaporated and you’re left with glistening, flavorful meat.
Ingredients
- 2 lbs beef fajita (skirt or flank), sliced thin
- 1 lb pork shoulder or country-style ribs, diced
- 1 lb Mexican chorizo (fresh)
- 1 lb bacon, chopped
- 1 lb hot dogs or smoked sausage, sliced
- 1 large onion, sliced
- 1 large bell pepper, sliced
- 4-5 Roma tomatoes, diced
- 4-5 garlic cloves, minced
- 2 jalapeños or serranos, sliced (optional)
- 1 packet taco seasoning (or about 2-3 tbsp)
- 12 oz Mexican lager beer (optional, for extra flavor)
- Corn or flour tortillas, for serving
Step-by-Step Instructions
Preheat the Disco
Fire up your Loco Cookers disco and bring it to medium heat, targeting around 300°F at the cooking surface. This temperature is the sweet spot for discada – hot enough to achieve proper browning and fat rendering without burning the oils that will accumulate as you cook. The Loco Cookers disco distributes heat evenly across the surface, so you won’t have to worry about hot spots or uneven cooking that can plague lower-quality cooking surfaces.
Give the disco a full 10-15 minutes to preheat thoroughly. A properly preheated surface means your first ingredients will sear immediately rather than sticking and steaming. You’ll know it’s ready when you can hold your hand about 6 inches above the surface for only 4-5 seconds before the heat becomes uncomfortable. If you have an infrared thermometer, aim for 300-325°F in the center of the disco.
Render the Bacon
Add your chopped bacon directly to the center of the preheated disco, spreading it out in a single layer. The bacon will immediately start sizzling and releasing fat, which will pool in the center thanks to the disco’s concave shape. Stir the bacon occasionally to ensure even cooking on all pieces. You’re looking for the bacon to become crispy and golden brown, with most of its fat rendered out.
This process usually takes 8-10 minutes depending on the thickness of your bacon. Don’t rush it – properly rendered bacon fat is the foundation of your entire discada. Once the bacon is crispy, use a slotted spoon or spider strainer to remove it from the disco and set it aside on a plate. Leave all that beautiful rendered fat in the disco – this is your cooking medium for everything that follows. The bacon will go back in at the end.
Cook the Chorizo
Add your pound of fresh Mexican chorizo to the bacon fat in the center of the disco. Fresh chorizo is raw, so you need to cook it thoroughly – no pink should remain. Break the chorizo apart with your spatula or wooden spoon as it cooks, crumbling it into small pieces that will distribute throughout the final dish. The chorizo will release bright orange-red oils as it cooks, mixing with the bacon fat to create a flavorful cooking medium.
Cook the chorizo for 8-10 minutes, stirring frequently, until it’s completely cooked through and starting to get crispy on the edges. The oils should be a deep orange color and the meat should be browned. Once done, remove the cooked chorizo with a slotted spoon and add it to the plate with the bacon. Again, leave all that seasoned fat in the disco – you’re building flavor with each layer.
Brown the Pork
Toss your diced pork shoulder or country-style rib pieces into the center of the disco where all that glorious fat has pooled. Spread the pork out in a single layer so each piece has contact with the hot surface. Sprinkle lightly with taco seasoning – about a tablespoon should do it. The pork needs to develop a good brown crust on the outside while cooking through to the center.
Let the pork cook undisturbed for 3-4 minutes to develop a crust on the first side, then stir and continue cooking for another 6-8 minutes total, stirring occasionally. You want the pork fully cooked with crispy edges and a deep brown color. Because pork shoulder has good fat content, it will stay moist even with this higher-heat cooking. Once browned and cooked through, remove the pork and add it to your growing pile of cooked meats.
Sear the Beef Fajita
Add your thin-sliced beef fajita meat to the disco, spreading it out for maximum surface contact with the heat. Sprinkle lightly with taco seasoning – another tablespoon or so. The beef cooks much faster than the pork, so pay close attention. You’re looking for a quick sear that browns the exterior while leaving the interior medium-rare. Overcooking at this stage will result in tough, chewy beef in the final dish.
Stir the beef after 2-3 minutes, then cook for another 2-3 minutes until it’s browned on the outside but still has some pink in the center. Remember, it will cook more when everything combines at the end. Once seared, remove the beef and add it to your meat pile. The disco should have quite a bit of rendered fat and browned bits at this point – that’s exactly what you want.
Cook the Hot Dogs or Sausage
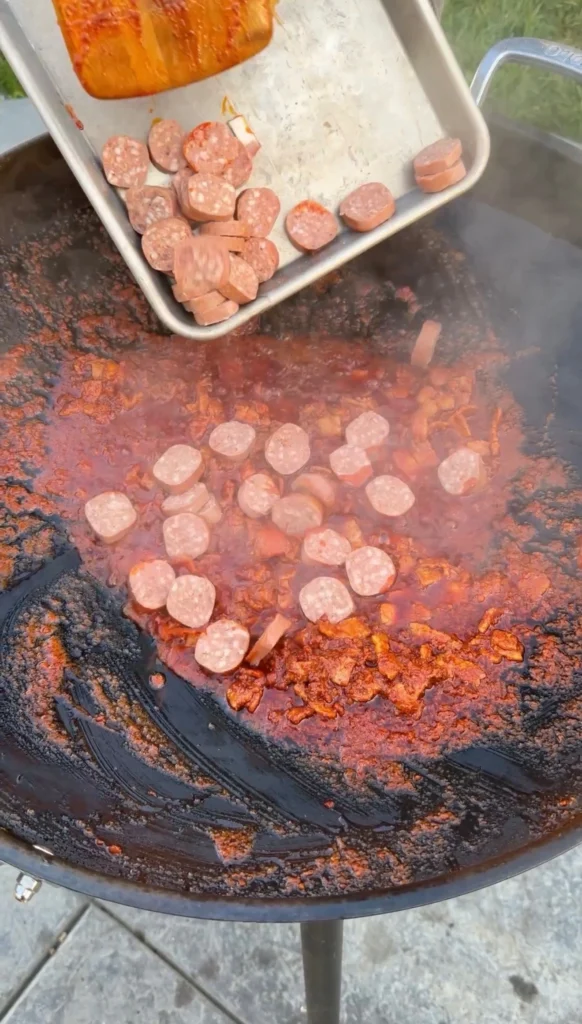
Toss your sliced hot dogs or smoked sausage onto the disco. Since these are already cooked (they’re smoked or precooked sausages), you’re just browning them and heating them through. The rendered fat will help them develop a nice golden-brown exterior with slightly crispy edges. Stir occasionally to brown all sides evenly.
This step takes about 5-6 minutes. You want the hot dog or sausage slices to have good color and crispy edges. The sugars in the hot dogs will caramelize in that flavorful fat, adding another layer to the final dish. Once browned, remove them and add to your meat pile. At this point, you should have bacon, chorizo, pork, beef, and hot dogs all cooked and waiting.
Sauté the Vegetables
Now it’s time for the vegetables. Add your sliced onions and bell peppers to the disco, stirring them into all that remaining fat and browned bits. The vegetables will immediately start softening and picking up all those concentrated meat flavors. Add your minced garlic and sliced jalapeños if using. Stir everything together to coat the vegetables in the seasoned fat.
Cook the vegetables for about 5-7 minutes, stirring frequently, until the onions are translucent and starting to caramelize at the edges. The bell peppers should be softened but still have a slight crunch – you don’t want them mushy. The vegetables provide textural contrast in the final dish, so don’t overcook them into mush. The garlic should be fragrant and golden, and the jalapeños should be softened.
Add Tomatoes and Season
Stir in your diced Roma tomatoes and let them cook down for 5-7 minutes, stirring occasionally. The tomatoes will release their juices, which will mix with all those rendered fats and browned bits to create a light sauce. As the tomatoes cook, use your spatula to scrape up any browned bits stuck to the disco – this fond is pure flavor.
Once the tomatoes have broken down and released most of their liquid, sprinkle the remaining taco seasoning (about 1-2 tablespoons) over the vegetables. Stir well to distribute the seasoning evenly. At this point, your vegetable mixture should be glossy with fat, fragrant with spices, and have a slight sauce consistency from the tomato juices. This forms the base that will bind all your meats together.
Combine All Ingredients

Return all your cooked meats to the disco – the bacon, chorizo, pork, beef, and hot dogs. Use your spatula or spoon to mix everything together thoroughly, making sure the meat gets evenly distributed with the vegetables and tomato mixture. Stir from the bottom up to incorporate any flavorful bits that have settled in the center of the disco.
Let everything heat through together for 3-4 minutes, stirring occasionally. The meats that were set aside have cooled slightly, so they need a few minutes to come back up to serving temperature. This reheating also allows all the flavors to meld together. Everything should be glistening with fat and evenly combined, with the red-orange oils from the chorizo coating everything.
Optional Beer Simmer
If you’re using beer, now’s the time to add it. Pour the 12-ounce Mexican lager over the entire meat mixture – it will sizzle and foam dramatically. Stir well to incorporate the beer and scrape up any remaining stuck-on bits. The alcohol will cook off while the malt and hop flavors concentrate.
Let the mixture simmer for 10-15 minutes, stirring occasionally, until most of the liquid has evaporated. You’re not looking for a dry mixture, but you also don’t want it soupy. The goal is glistening, moist meat with just enough liquid to keep everything cohesive. As the beer reduces, the flavors will concentrate and meld together. If you’re not using beer, just skip this step and proceed directly to serving.
Warm Tortillas and Serve
While the discada finishes, warm your tortillas around the outer edge of the disco where the heat is gentler. The tortillas will pick up some of that delicious fat and get slightly crispy on the outside while staying soft and pliable. Flip them every 30 seconds or so until they’re warm and slightly charred in spots.
Serve the discada directly from the disco, letting everyone gather around and build their own tacos. The meat mixture should be hot, fragrant, and glistening. Provide lime wedges, fresh cilantro, diced onions, and your favorite salsas as optional toppings. The beauty of discada is in its communal nature – everyone standing around the disco, building tacos and enjoying the show. Keep the tortillas warming on the edge and let people serve themselves directly from the cooking surface.

Discada on the Loco Cookers Disco
Ingredients
Method
- Preheat your Loco Cookers disco to medium heat around 300°F. Give it 10-15 minutes to heat evenly across the surface.
- Add chopped bacon to center of disco. Cook 8-10 minutes, stirring occasionally, until crispy. Remove bacon with slotted spoon and set aside. Leave rendered fat in disco.
- Add fresh chorizo to bacon fat. Break apart and cook 8-10 minutes until completely cooked through and starting to crisp. Remove chorizo and set aside with bacon.
- Add diced pork to disco, season with 1 tbsp taco seasoning. Brown well, about 10 minutes total, stirring occasionally. Remove and set aside.
- Add sliced beef fajita meat, season with 1 tbsp taco seasoning. Sear quickly, about 4-5 minutes total, leaving center slightly pink. Remove and set aside.
- Add sliced hot dogs or sausage. Cook about 5-6 minutes until golden and crispy. Remove and set aside.
- Add onions, bell peppers, garlic, and jalapeños to disco. Sauté 5-7 minutes until onions are translucent and vegetables are softened.
- Stir in diced tomatoes and cook 5-7 minutes until broken down. Sprinkle remaining taco seasoning over vegetables and mix well.
- Return all cooked meats (bacon, chorizo, pork, beef, sausage) to disco. Mix thoroughly with vegetables. Heat through 3-4 minutes.
- Optional: Pour beer over mixture, stir well, and simmer 10-15 minutes until most liquid evaporates and flavors meld.
- Warm tortillas on edge of disco. Serve discada hot with warm tortillas, lime wedges, cilantro, and your favorite toppings.
Notes
Cook meats separately to prevent steaming
Don’t skip the beer – it adds great flavor as it reduces
Leftovers keep 3-4 days refrigerated
Tried this recipe?
Let us know how it was!This recipe is designed for the Loco Cookers disco, which provides even heat distribution and the right concave shape for proper discada cooking. However, any large disco or concave cooking surface that can maintain 300°F will work. Avoid flat griddles as they don’t have the pooling effect that’s essential for building layers of flavor from rendered fats.
You can adjust the meat selection based on preference, but don’t skip the bacon and chorizo – their rendered fats are essential for authentic discada flavor. The other meats can be substituted or proportions adjusted. Some people skip hot dogs for a more upscale version, or add different sausages. Just maintain about 5-6 pounds of total meat for the right meat-to-vegetable ratio.
Cooking meats separately prevents overcrowding, which causes steaming instead of browning. Each protein needs direct contact with the hot surface to develop proper searing and caramelization. Cooking separately also lets you control doneness for each meat – the pork needs longer cooking than the beef. Everything reheats together at the end, so the flavors still meld beautifully.
The beer is optional but highly recommended. It adds malty sweetness, helps deglaze the disco to pick up browned bits, and provides liquid for tenderizing during the final simmer. Most alcohol cooks off, leaving concentrated flavor. If you don’t drink alcohol or prefer to skip it, the discada will still be delicious – just skip that step and proceed directly to serving.
Store leftover discada in an airtight container in the refrigerator for up to 3-4 days. Reheat in a skillet over medium heat, adding a splash of water or beer if it seems dry. You can also reheat in the microwave, though the texture won’t be quite as good. The flavors actually improve after a day as everything melds together, making leftovers even more delicious.
Conclusion
Discada on the Loco Cookers disco transforms a simple gathering into a memorable event centered around amazing food and communal cooking. By layering flavors through sequential cooking – rendering bacon fat, breaking down chorizo, searing multiple meats, then combining everything with fresh vegetables – you create a complex, deeply satisfying dish that’s greater than the sum of its parts. The disco’s design facilitates this process perfectly, pooling fats in the center while providing temperature zones for managing different ingredients.
What makes this recipe special is how it balances tradition with accessibility. Discada has roots in Northern Mexican cowboy cooking, but the Loco Cookers disco makes it easy for anyone to recreate this spectacular dish in their backyard. You don’t need specialized skills or hard-to-find ingredients – just good meat, fresh vegetables, and the patience to cook each component properly before combining them.
Whether you’re feeding a crowd at a party or creating a special family dinner, discada delivers bold flavors and interactive cooking that brings people together. The sizzling meats, aromatic spices, and theatrical presentation of cooking everything on one large surface create an experience that’s just as enjoyable to watch as it is to eat. Load it into warm tortillas and enjoy the fruits of your layered cooking technique.
Ready to Take Your Cooking to the Next Level?
This is where I keep all my most-used products, gear, and favorite cooking tools — check it out:
🔥 View My Cooking Gear & ToolsRecipe Categories
If you loved this recipe, you’ll find more to savor across our diverse categories. From beef to pork, chicken to turkey, seafood to appetizers, there’s a wealth of flavors waiting for you. Explore them all at CWFeats.