Smoked Pulled Pork Inside a Pumpkin with Pumpkin BBQ Sauce
Prep Time: 30 min | Cook Time: 8 hrs | Total Time: 8.5 hrs | Servings: 12-14 | Calories: 450/serving
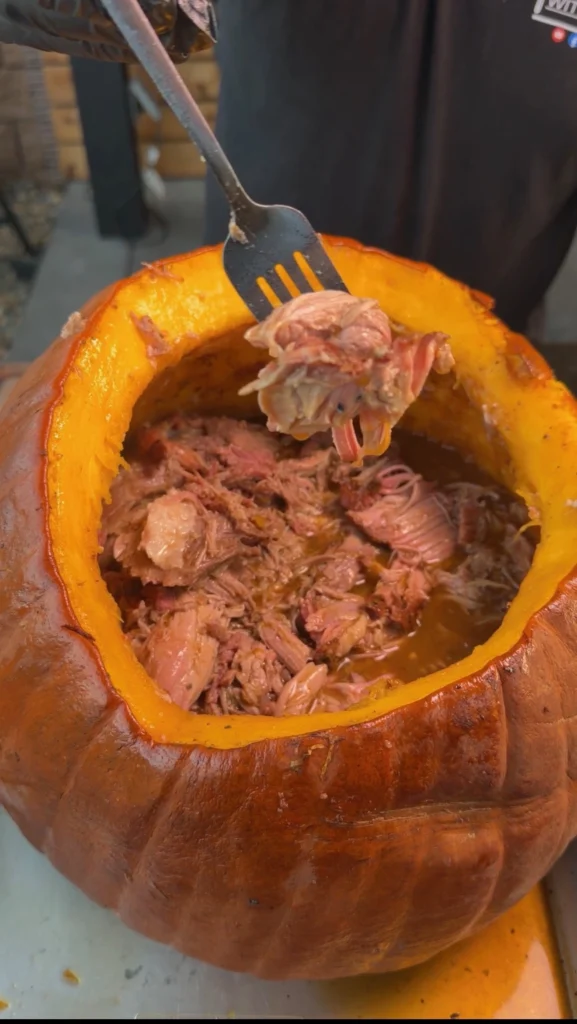
Smoked pulled pork inside a pumpkin combines spectacular presentation with legitimate cooking technique that improves the final product. This pumpkin smoked pork starts with a seven to eight pound pork butt seasoned with BBQ rub and smoked over pecan wood until it reaches 185°F. The partially cooked pork then goes inside a hollowed pumpkin along with apple juice and homemade pumpkin BBQ sauce, returning to the smoker to finish cooking to 203°F. The pumpkin acts as a natural cooking vessel that steams the pork while infusing subtle squash sweetness and creating an unforgettable centerpiece for your table.
What makes this pulled pork in a pumpkin recipe special is how the pumpkin transforms from decorative vessel to functional cookware. As the pork finishes inside the hollowed squash, the pumpkin’s interior steams and caramelizes, releasing natural sugars and moisture that mingle with the apple juice and BBQ sauce. The pumpkin walls insulate the meat, creating a braising effect that helps render the final bits of connective tissue while keeping everything incredibly moist. The result is fall-apart tender pulled pork with subtle pumpkin undertones and a dramatic presentation that turns dinner into an event.
See How It’s Done
Understanding Pork Butt for Pulled Pork
Pork butt, despite its name, comes from the upper shoulder of the pig and is the ideal cut for pulled pork because of its high fat content and abundant connective tissue. A seven to eight pound pork butt contains enough intramuscular fat and collagen to withstand the long cooking time required to reach 203°F without drying out. The fat melts during cooking, basting the meat from within, while the connective tissue breaks down into gelatin that creates that signature pull-apart texture.
The fat cap on pork butt serves multiple purposes during smoking. It protects the meat from drying out during the initial smoke, adds flavor as it renders, and creates a barrier between the meat and direct heat. Scoring the fat cap in a crosshatch pattern allows seasoning to penetrate deeper while helping the fat render more efficiently. The cuts should go through most of the fat but not into the meat itself – about a quarter inch deep spaced an inch apart creates the ideal pattern.
Pork butt has an irregular shape with varying muscle groups that cook at different rates, which is why the temperature progression matters so much. The initial smoke to 185°F develops bark (the flavorful crust) and begins breaking down connective tissue. The final push from 185°F to 203°F inside the pumpkin finishes rendering the stubborn collagen pockets while the moist environment prevents the exterior from drying out. This two-stage cooking creates superior texture compared to cooking entirely in open air.
Why Pecan Wood Works Perfectly
Bear Mountain Pecan Wood Pellets provide a sweet, nutty smoke that complements pork without overwhelming it. Pecan sits between the mildness of fruit woods and the intensity of hickory, creating balanced smoke flavor that enhances rather than dominates. The natural sweetness in pecan smoke pairs beautifully with the pumpkin and the warming spices in the BBQ sauce, creating cohesive flavor throughout the dish.
Pecan burns clean and consistent, producing steady smoke throughout the long cook without creating bitter or acrid flavors. Some stronger woods like mesquite can turn harsh during extended smoking sessions, but pecan maintains its pleasant character even after eight hours. The wood’s moderate smoke production also won’t overpower the subtle pumpkin flavors that develop during the final cooking stage.
Selecting and Preparing the Pumpkin
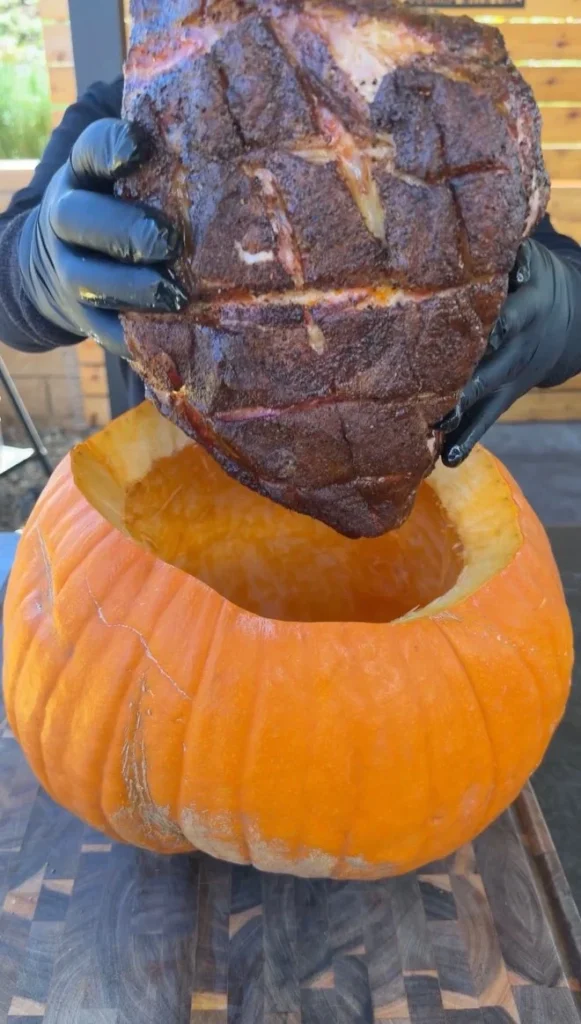
Choosing the right pumpkin is crucial for this recipe’s success. You need a medium to large pumpkin with thick, sturdy walls that can withstand hours in a 300°F smoker without collapsing. Look for pumpkins labeled as “pie pumpkins” or “sugar pumpkins” which have denser flesh than decorative carving pumpkins. The pumpkin should have a strong, intact stem that can serve as a handle and visual centerpiece. Avoid pumpkins with soft spots, cracks, or signs of decay.
The pumpkin needs to be large enough to hold the pork butt with room for liquid but not so massive that it’s unwieldy or takes too long to heat through. A pumpkin that’s roughly the same diameter as the pork butt works well – the meat should fit inside with about two inches of clearance on all sides. This spacing allows liquid and sauce to surround the pork while ensuring the pumpkin walls heat through and contribute their flavor.
Cleaning the pumpkin thoroughly is essential since it becomes a cooking vessel. After cutting the top off, scrape out all seeds and stringy pulp until the interior is smooth. Any remaining fibers will burn or create off-flavors during cooking. Some recipes suggest lightly oiling the interior, but it’s not necessary – the pumpkin’s natural moisture combined with the apple juice and BBQ sauce creates enough steam to prevent sticking.
The Science of Two-Stage Cooking
Smoking the pork butt to 185°F before transferring it to the pumpkin serves multiple purposes beyond just saving time. This initial stage allows smoke to penetrate the meat deeply while the surface remains exposed to dry heat, creating the bark that adds texture and concentrated flavor. If you put raw pork directly into the pumpkin, it would steam rather than smoke, resulting in pot roast texture without the signature pulled pork crust.
The temperature target of 185°F represents a transition point in pork cooking. Below this temperature, the connective tissue remains tough and chewy. At 185°F and above, collagen begins converting to gelatin rapidly, transforming tough meat into tender strands. However, 185°F isn’t quite high enough for perfect pulled pork texture – you need to reach 203°F for the meat to truly fall apart with fork pressure.
Finishing inside the pumpkin from 185°F to 203°F creates a braising environment that’s gentler than continuing to smoke in open air. The enclosed space traps moisture from the apple juice, BBQ sauce, and the pork’s own rendering fat, creating steam that keeps the exterior from drying while the interior continues cooking. The pumpkin walls also act as insulation, maintaining steady heat that promotes even cooking without hot spots.
Building the Pumpkin BBQ Sauce
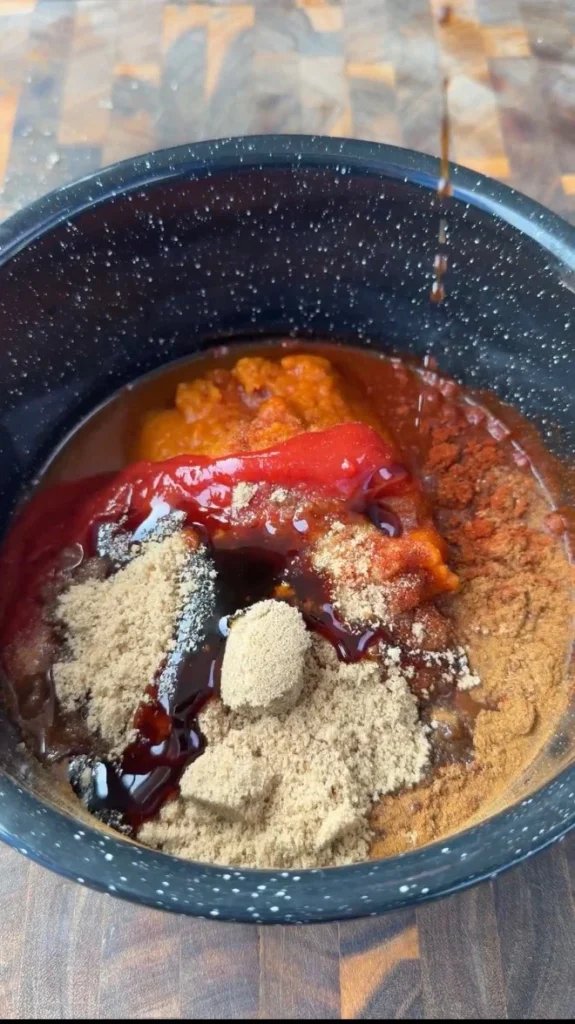
The pumpkin BBQ sauce combines traditional BBQ sauce components with pumpkin purée and warming spices to create a unique condiment that ties the whole dish together. Starting with a ketchup and apple cider vinegar base provides the familiar sweet-tangy backbone of American BBQ sauce. The brown sugar, honey, and molasses add layers of sweetness – brown sugar for caramel notes, honey for floral complexity, and molasses for deep, almost bitter richness that balances the other sweet elements.
Pumpkin purée adds body and subtle squash flavor while contributing natural pectin that helps thicken the sauce. Use canned pumpkin purée rather than fresh – it’s more concentrated and consistent. The pumpkin flavor should be present but not overwhelming; it’s a supporting player that enhances rather than dominates. The Worcestershire sauce and Dijon mustard provide umami depth and tangy complexity that prevent the sauce from tasting one-dimensional.
The warming spices – cinnamon, ginger, smoked paprika – create the bridge between traditional BBQ and autumn flavors. Smoked paprika reinforces the smoke from the wood pellets while adding mild heat and color. Cinnamon and ginger in small amounts enhance the pumpkin’s natural sweetness without making the sauce taste like dessert. The spices should be noticeable but balanced – you want depth, not pumpkin pie on pork.
Ingredients
For the Pork Butt:
- 1 (7-8 lb) pork butt, fat cap scored
- 3-4 tbsp of your favorite BBQ rub
- 1 cup apple juice
- 2 cups Pumpkin BBQ Sauce
- 1 large pumpkin (medium-large, sturdy stem, cleaned and hollowed)
For the Pumpkin BBQ Sauce:
- 1 cup canned pumpkin purée
- 1 cup ketchup
- ½ cup apple cider vinegar
- ½ cup brown sugar
- 2 tbsp honey
- 2 tbsp molasses
- 1 tbsp Worcestershire sauce
- 2 tsp Dijon mustard
- 1½ tsp smoked paprika
- 1 tsp garlic powder
- 1 tsp onion powder
- ½ tsp cinnamon
- ½ tsp ground ginger
- Salt and pepper to taste
Step-by-Step Instructions
Preheat the Smoker and Prepare Equipment
Fill your pellet smoker with Bear Mountain Pecan Wood Pellets and preheat it to 300°F with the lid closed. This temperature is hot enough to develop good bark and render fat efficiently while being gentle enough to prevent the exterior from drying out during the long cook. Make sure you have enough pellets for an eight-hour cook – plan on roughly one pound of pellets per hour of cooking at this temperature.
While the smoker preheats, gather your equipment and set up your workspace. You’ll need a sharp knife for scoring the pork, a cutting board, your BBQ rub, a basting brush, an instant-read thermometer, and a large pan or board for moving the pork later. Have the pumpkin nearby and ready to prep once the pork goes on the smoker. Clear space in your work area since you’ll be handling a large, heavy pork butt that needs room to maneuver.
Score and Season the Pork Butt
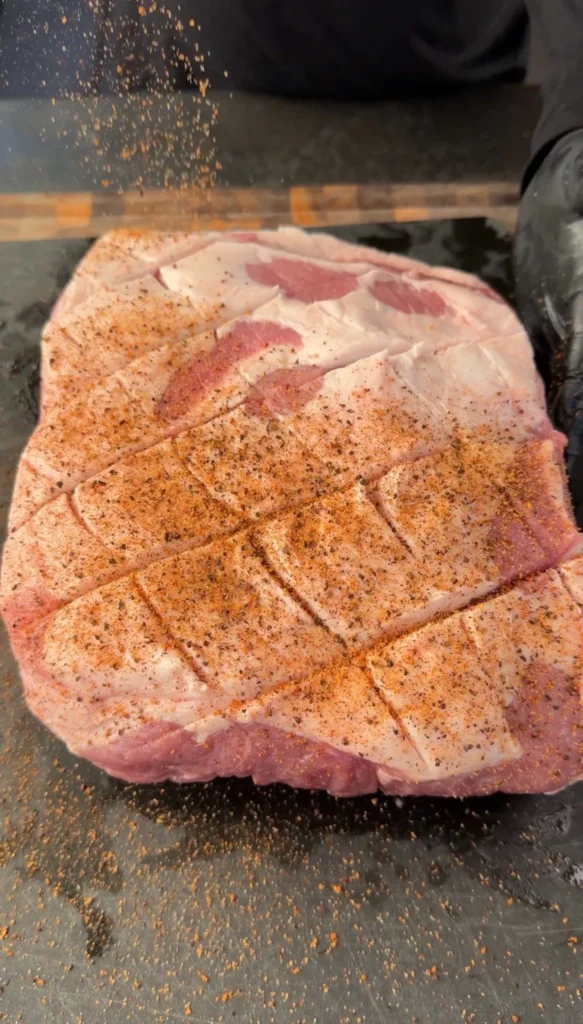
Place the pork butt on a cutting board with the fat cap facing up. Using a sharp knife, score the fat cap in a crosshatch pattern by making parallel cuts about one inch apart going one direction, then rotating ninety degrees and making another set of parallel cuts. The cuts should go through most of the fat layer but not into the meat below – aim for about a quarter inch deep. This scoring helps the fat render more efficiently while allowing seasoning to penetrate deeper.
Pat the entire pork butt dry with paper towels, including the scored fat cap and all sides. Any surface moisture will prevent the rub from adhering properly and will create steam rather than smoke during the initial cook. Once dry, apply your favorite BBQ rub generously to all surfaces – the fat cap, sides, and bottom. Use three to four tablespoons total, pressing the rub into the meat with your hands to ensure good adhesion. The crosshatch scores in the fat cap should fill with seasoning. Don’t be shy with the rub – this is a large piece of meat that can handle bold seasoning, and some will fall off during cooking.
Smoke the Pork Butt to 185°F
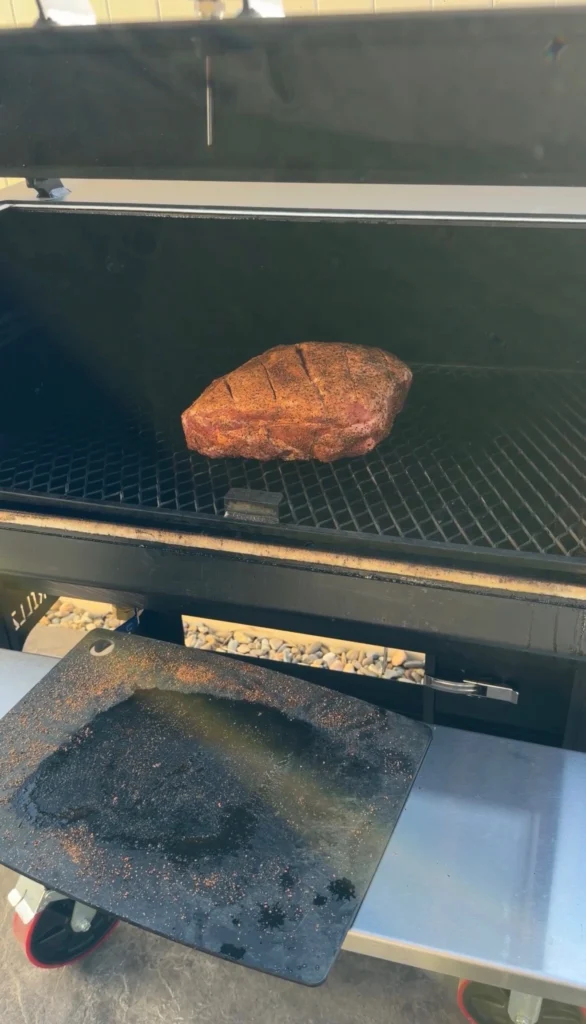
Place the seasoned pork butt directly on the preheated smoker grates, positioning it fat cap up. The fat cap acts as a shield, protecting the meat from drying while basting it as fat renders. Close the smoker lid and let the pork smoke undisturbed for at least two hours before checking it – opening the lid releases heat and smoke, extending cooking time.
After two hours, check the pork’s appearance. It should be developing a dark, mahogany-colored bark on the exterior. Begin monitoring internal temperature with an instant-read thermometer inserted into the thickest part of the meat, avoiding fat pockets which will give false readings. The pork needs to reach 185°F before moving to the pumpkin. At 300°F smoker temperature, this typically takes five to six hours total, but exact timing varies based on the meat’s starting temperature, fat distribution, and how often you open the smoker. Be patient and cook to temperature, not time.
Make the Pumpkin BBQ Sauce
While the pork smokes, prepare the pumpkin BBQ sauce so the flavors have time to meld. In a medium saucepan, combine the pumpkin purée, ketchup, apple cider vinegar, brown sugar, honey, molasses, Worcestershire sauce, Dijon mustard, smoked paprika, garlic powder, onion powder, cinnamon, ginger, salt, and pepper. Whisk everything together thoroughly until no lumps remain and the mixture is uniform in color and consistency.
Place the saucepan over medium-low heat and bring to a gentle simmer, stirring occasionally to prevent scorching on the bottom. Once simmering, reduce heat to low and continue cooking for fifteen to twenty minutes, stirring every few minutes. The sauce will thicken noticeably as it reduces and the flavors concentrate. Taste and adjust seasoning – it should be sweet with noticeable tang from the vinegar, subtle pumpkin flavor, and warming spice notes. The sauce should coat the back of a spoon but still be pourable. Remove from heat and set aside. The sauce can be made up to a week ahead and refrigerated.
Prepare the Pumpkin Vessel
Once the pork butt reaches 185°F internal temperature, it’s time to prepare the pumpkin. Place the pumpkin on a stable cutting board. Using a large, sharp knife, carefully cut around the stem at a forty-five degree angle, creating a lid similar to carving a jack-o’-lantern. The opening should be large enough to fit the pork butt through but not so large that the lid becomes unstable. Remove the lid and set it aside.
Reach inside the pumpkin and pull out all the seeds and stringy pulp. Use a large spoon or ice cream scoop to scrape the interior walls until they’re smooth and clean with no fibers remaining. You want a clean vessel that won’t contribute burnt or bitter flavors during the final cook. The pumpkin walls should be at least an inch thick – if you’ve scraped too much and can see light through any areas, that pumpkin may not be sturdy enough. Once cleaned, wipe the interior with paper towels to remove any remaining moisture or debris.
Transfer Pork to Pumpkin and Add Liquids
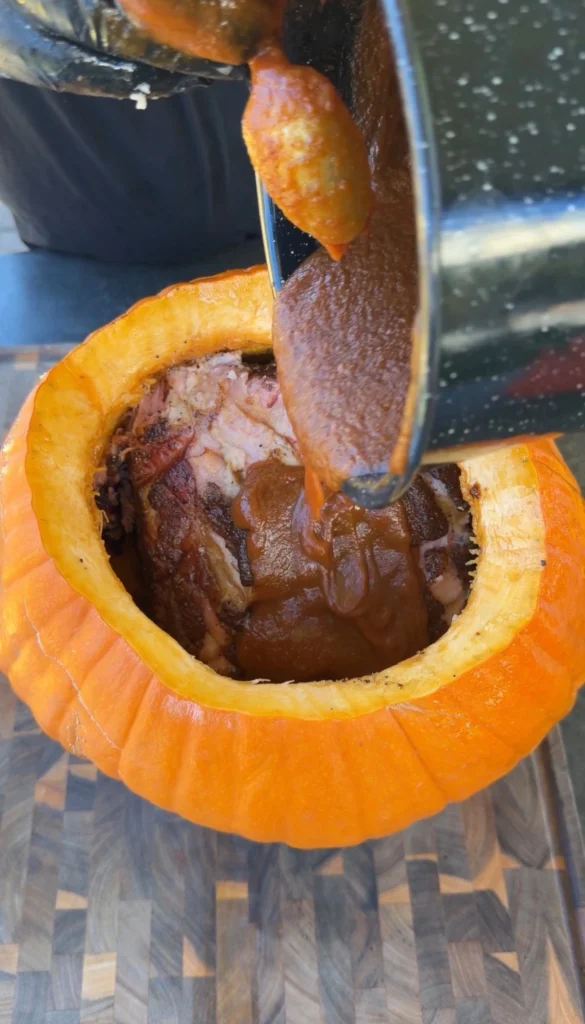
Carefully remove the 185°F pork butt from the smoker and place it inside the hollowed pumpkin. The meat should fit with a couple inches of space around all sides. If the pumpkin opening is too small, you can carefully enlarge it, but don’t remove so much that the structure weakens. Position the pork butt so it sits relatively centered in the pumpkin with the fat cap facing up.
Pour one cup of apple juice over and around the pork butt. The apple juice adds moisture for steaming while contributing subtle sweetness and acidity that complements the pork. Then ladle or pour two cups of the prepared pumpkin BBQ sauce over the pork, allowing it to run down the sides and pool in the bottom of the pumpkin. The liquid level should come about one-third up the sides of the pork. This liquid creates the steam that will braise the pork during the final cooking stage while infusing it with pumpkin BBQ flavor.
Finish Cooking Inside the Pumpkin
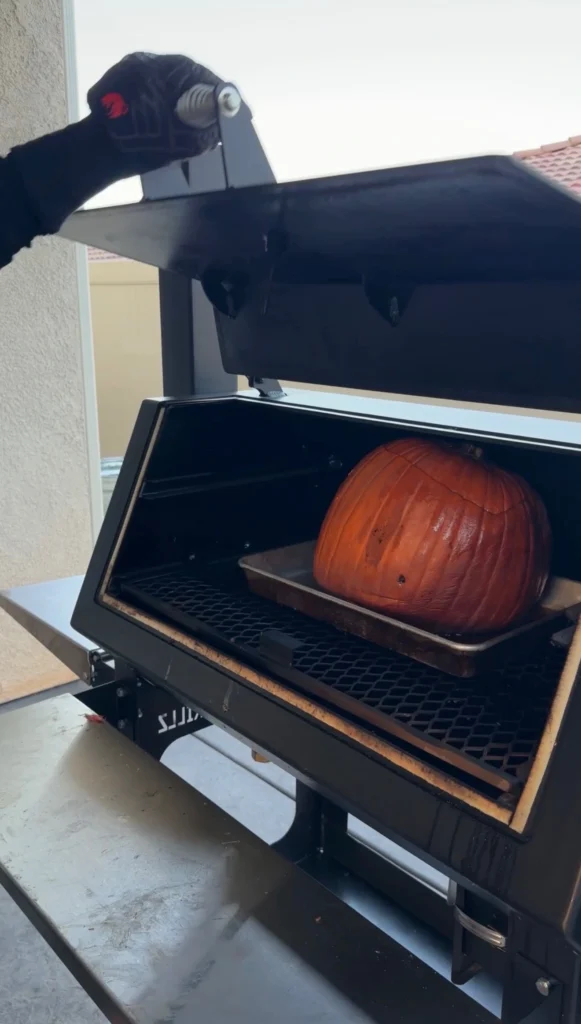
Carefully place the entire pumpkin with the pork inside back on the smoker at 300°F. You can put the pumpkin lid back on for presentation, but it’s not necessary for cooking – the pumpkin itself creates enough of an enclosed environment. Close the smoker and continue cooking, checking internal temperature every thirty to forty-five minutes. You’re looking for the pork to reach 203°F, which typically takes another one and a half to two hours.
As the pork cooks inside the pumpkin, several things happen simultaneously. The pork continues breaking down connective tissue and rendering fat while absorbing moisture and flavor from the apple juice and BBQ sauce. The pumpkin’s interior steams and caramelizes, releasing natural sugars and moisture that contribute subtle squash flavor to the liquid. The pumpkin walls soften slightly but should maintain their structure. If you notice the pumpkin starting to collapse or develop soft spots, reduce smoker temperature to 275°F and continue cooking more gently. When the pork reaches 203°F throughout, it’s ready to rest.
Rest, Shred, and Serve from the Pumpkin
Remove the entire pumpkin from the smoker – use heavy-duty oven mitts or heat-resistant gloves as both the pumpkin and the liquid inside will be extremely hot. Place it on a heat-safe surface like a large cutting board, baking sheet, or trivet. Let the pork rest inside the pumpkin for thirty to sixty minutes. This rest is crucial – it allows the meat’s proteins to relax and reabsorb moisture that was pushed to the exterior during cooking. The internal temperature will drop slightly but the meat will stay hot for over an hour inside the insulated pumpkin.
After resting, use two forks or meat claws to shred the pork right inside the pumpkin. The meat should fall apart with minimal effort, pulling into tender strands. Mix the shredded pork with all the accumulated juices, rendered fat, and BBQ sauce at the bottom of the pumpkin. This mixing step ensures every strand of pork is coated with the flavorful liquid. The pumpkin’s interior will have softened and caramelized – you can scrape some of this into the pork if desired, or leave it for presentation. Carry the entire pumpkin to the table as a dramatic centerpiece and serve the pulled pork directly from it onto buns with additional BBQ sauce and coleslaw if desired.
FAQ
Can I use a different type of squash instead of pumpkin?
Yes, large winter squash like butternut or kabocha can work, though they won’t have the same visual impact as a round pumpkin. Make sure whatever squash you choose has thick, sturdy walls that can withstand hours at 300°F without collapsing. The flavor will be similar but slightly different depending on the squash variety.
What if my pumpkin starts to collapse during cooking?
If you notice soft spots developing or the pumpkin starting to sag, immediately reduce smoker temperature to 250-275°F and continue cooking more gently. You can also place the pumpkin in a large cast iron skillet or roasting pan for additional support. Choose pumpkins with thicker walls (pie pumpkins) rather than thin-walled carving pumpkins to avoid this issue.
Do I have to smoke the pork first, or can it go straight into the pumpkin?
The initial smoke to 185°F is important for developing bark and deep smoke flavor. If you put raw pork directly in the pumpkin, it will steam rather than smoke, resulting in pot roast texture without the signature pulled pork crust. The two-stage method creates superior texture and flavor.
Can I make this in the oven instead of a smoker?
Yes, though you’ll lose the smoke flavor. Roast the seasoned pork butt uncovered at 300°F for about five hours until it reaches 185°F. Transfer to the prepared pumpkin with liquids and continue cooking at 300°F until the pork reaches 203°F. Add a teaspoon of liquid smoke to the BBQ sauce for a hint of smokiness.
How do I know when the pork is done?
The pork is done when it reaches 203°F internal temperature and probes tender – an instant-read thermometer should slide in and out with almost no resistance, like inserting it into soft butter. At this temperature, the connective tissue has fully broken down and the meat will shred easily with forks.
Conclusion
Smoked pulled pork inside a pumpkin proves that theatrical presentation and legitimate cooking technique can work together to create something greater than the sum of its parts. The pumpkin isn’t just a serving vessel – it’s a functional piece of cookware that creates a braising environment while infusing the pork with subtle squash sweetness. The two-stage cooking method ensures proper smoke penetration and bark development before the gentle final cook inside the pumpkin brings everything together.
What makes this pumpkin smoked pork recipe so memorable is how every element serves both practical and visual purposes. The pecan smoke provides balanced flavor, the pumpkin BBQ sauce ties together traditional and autumn flavors, the apple juice creates steam for tender meat, and the pumpkin itself becomes an edible vessel that adds its own character. The result is fall-apart tender pulled pork with complex layers of smoke, spice, and subtle squash that tastes as impressive as it looks.
This pulled pork in a pumpkin works beautifully for fall gatherings, holiday alternatives, or any time you want to create an unforgettable centerpiece. The technique requires planning and time but rewards you with a show-stopping presentation that turns a simple pulled pork dinner into an event. Master this recipe and you’ll have a signature dish that combines barbecue tradition with seasonal celebration in a way that delights both the eyes and the palate.
Ready to Take Your Cooking to the Next Level?
This is where I keep all my most-used products, gear, and favorite cooking tools — check it out:
🔥 View My Cooking Gear & ToolsRecipe Categories
If you loved this recipe, you’ll find more to savor across our diverse categories. From beef to pork, chicken to turkey, seafood to appetizers, there’s a wealth of flavors waiting for you. Explore them all at CWFeats.