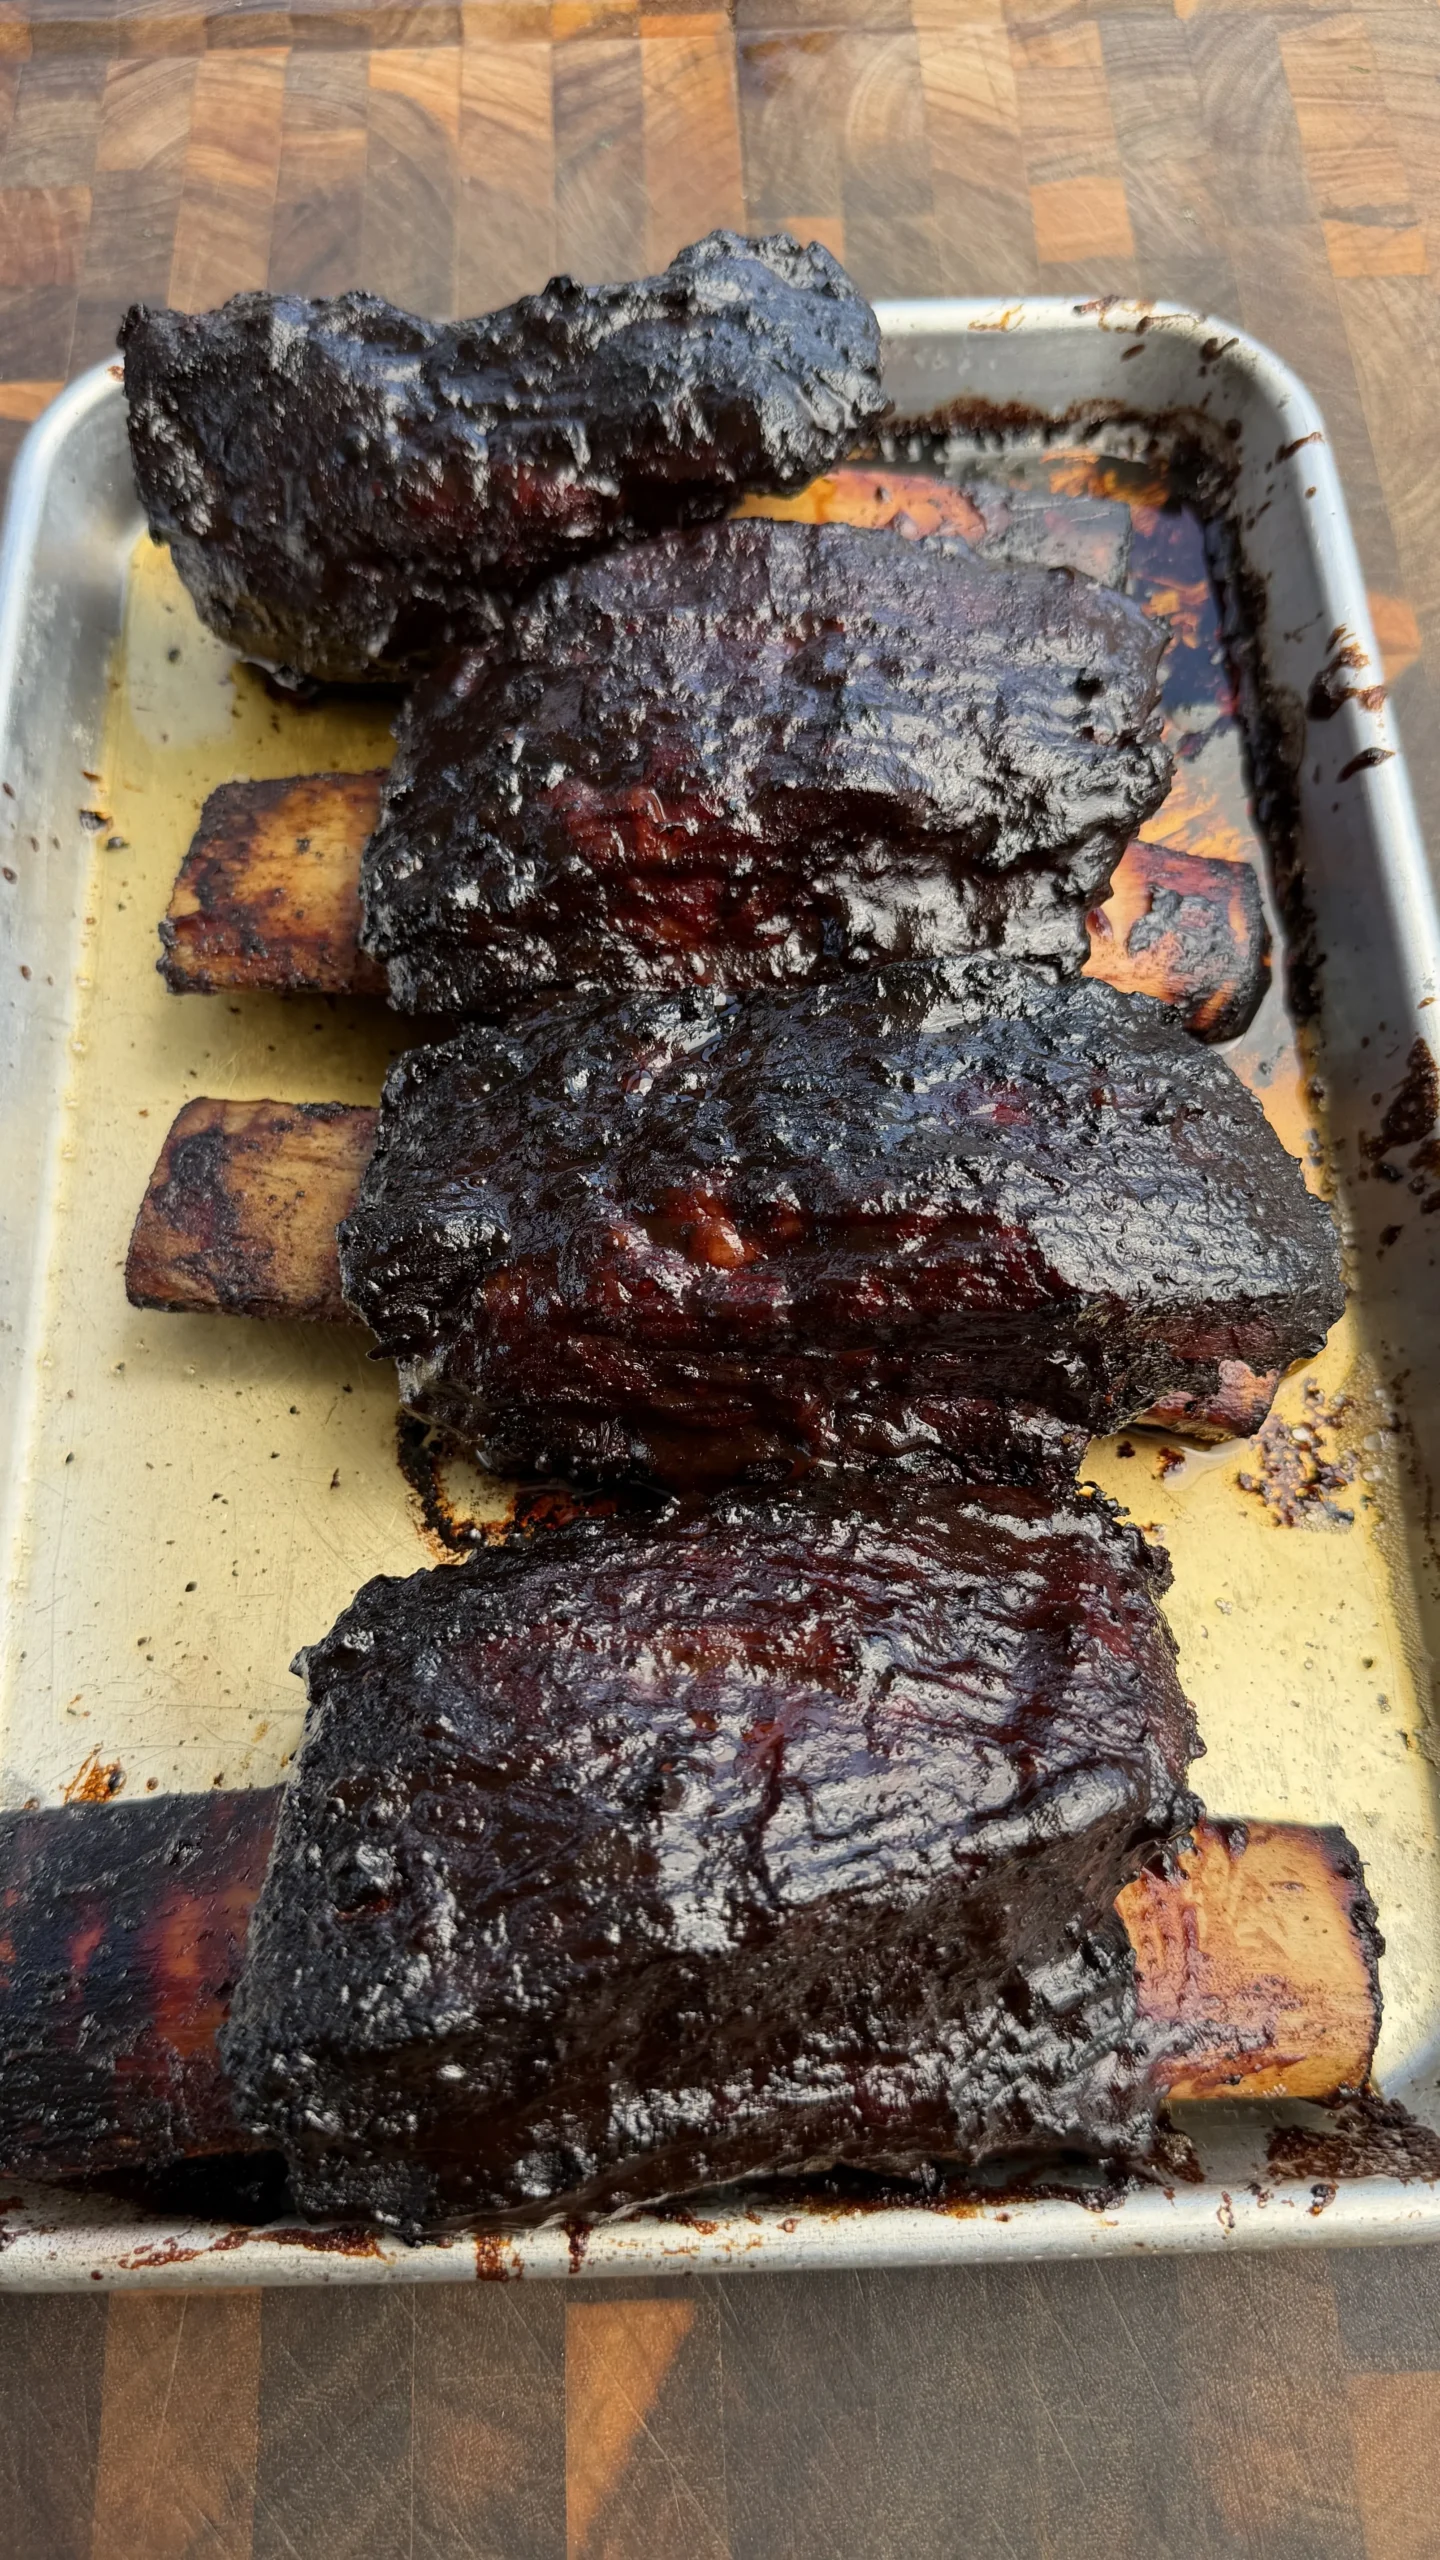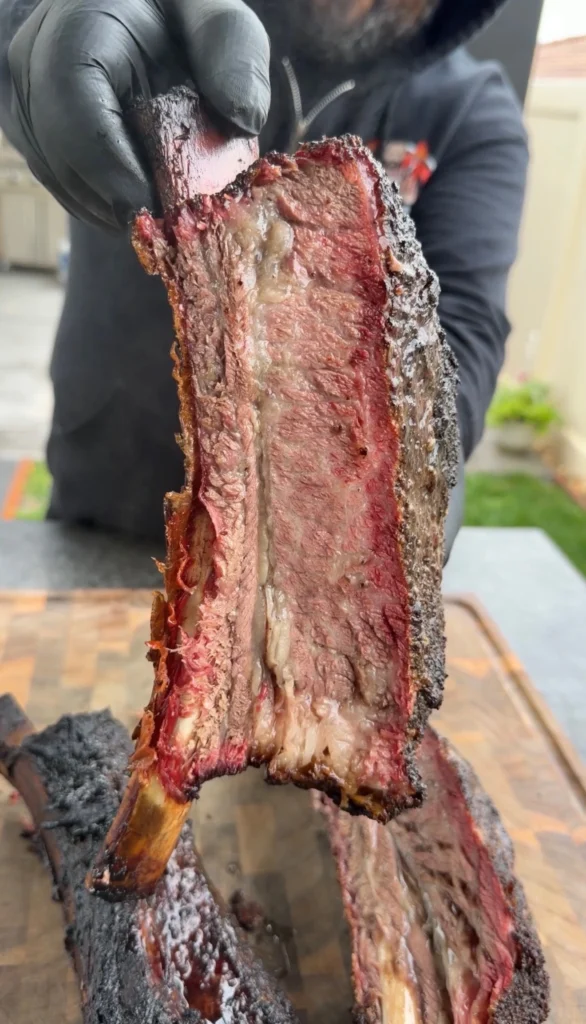
Smoked beef plate ribs are a 3-bone rack of beef plate ribs (also called dino ribs) weighing 6 to 8 pounds, trimmed of excess hard fat on top while leaving the membrane intact on the bone side, coated with yellow mustard as a binder, then seasoned generously on all sides with salt, pepper, garlic seasoning (SPG blend) and smoked at 250 to 275°F over oak or hardwood for 6 to 8 hours. After the first 2 hours to set the bark, you spritz the ribs every 30 minutes with a mixture of Worcestershire sauce and water until the internal temperature reaches approximately 203°F and a probe slides through the meat like soft butter. The ribs rest for 15 minutes before slicing between each bone to serve.
The entire process takes 6½ to 8½ hours from start to finish. This includes 15 to 20 minutes for trimming and seasoning. The minimum smoke time is 6 hours for smaller racks. Larger 8-pound racks can take up to 8 hours. Resting adds another 15 minutes. You can prepare the ribs and make the spritz the night before to streamline cooking day. The actual hands-on time is minimal after the initial 2 hours since you’re only spritzing every 30 minutes.
These beef ribs serve 3 to 6 people depending on appetite and sides. Each bone provides a massive amount of meat compared to pork ribs. A single bone can be a full serving for many people. Heartier eaters might consume two bones. The 3-bone rack is ideal for small gatherings or family dinners. For larger crowds, smoke multiple racks or supplement with other smoked meats.
Jump to RecipeWhat Makes Beef Plate Ribs Different from Chuck Short Ribs
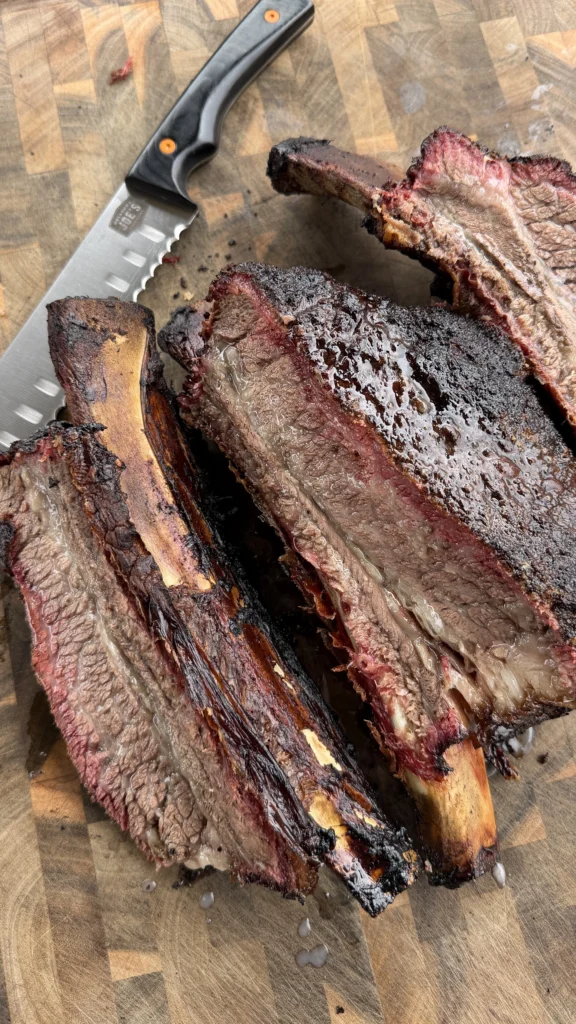
Location on the Cow and Bone Structure
Beef plate ribs come from the short plate section of the cow, located on the belly beneath the ribeye primal. These are ribs 6 through 8 on the cow. The meat attached to these bones is an extension of the ribeye muscle. This gives plate ribs exceptional marbling and rich beef flavor.
Chuck short ribs come from ribs 1 through 5, the chuck section near the shoulder. The meat is from different muscles with different characteristics. Chuck ribs have good flavor but less marbling than plate ribs. The meat is leaner and can be slightly tougher.
Plate ribs are much longer bones, typically 8 to 12 inches. The bones are thick and substantial. This creates the “dinosaur rib” appearance that’s visually impressive. Chuck ribs have shorter bones, usually 4 to 6 inches. They look more like oversized pork ribs.
The meat-to-bone ratio differs significantly. Plate ribs have thick meat caps, often 2 to 3 inches of meat above the bone. A 3-bone rack can weigh 6 to 8 pounds. Chuck ribs have less meat per bone, typically 1 to 1½ inches thick. A 3-bone rack of chuck ribs might only weigh 3 to 4 pounds.
Fat Content and Marbling
Plate ribs have heavy marbling throughout the meat. The fat is distributed in fine white streaks through the red muscle. This intramuscular fat renders during smoking and bastes the meat from inside. The result is incredibly juicy, rich ribs.
The fat cap on top of plate ribs is substantial. It can be ½ to 1 inch thick. You trim some of this hard fat before smoking, but leaving a layer protects the meat and contributes flavor as it renders.
Chuck ribs are leaner overall. They have some marbling but not at the same level as plate ribs. The fat cap is thinner. During long smoking, chuck ribs can dry out more easily without the same fat reserves to maintain moisture.
The fat quality also differs. Plate rib fat has a lower melting point due to its composition. It renders more easily during smoking, creating better texture. Chuck rib fat can be slightly tougher and doesn’t render as completely.
Flavor Profile
Plate ribs taste intensely beefy. The meat comes from a well-exercised area with developed muscle flavor. Combined with the heavy marbling, plate ribs deliver rich, almost steak-like taste. They’re closer to ribeye flavor than any other rib cut.
Chuck ribs have good beef flavor but it’s less intense. The meat is from the shoulder area which works hard but in different ways. The flavor is more similar to chuck roast than ribeye. Still delicious but not as luxurious.
The smoking process affects both differently. Plate ribs’ higher fat content carries smoke flavor throughout the meat. Chuck ribs take on smoke primarily on the surface with less penetration to the interior.
Cost and Availability
Plate ribs are less common in grocery stores. Many butchers don’t regularly stock them. You often need to special order from a butcher or buy from specialty meat suppliers. This scarcity drives up price.
When available, plate ribs typically cost $8 to $12 per pound. A 6 to 8-pound rack costs $50 to $95. This is expensive but competitive with premium steaks when you consider the amount of meat.
Chuck ribs are more widely available. Many grocery stores carry them in the meat case. They’re also cheaper, typically $5 to $7 per pound. A rack might cost $20 to $30.
For competition BBQ and serious smoking, plate ribs are preferred despite the cost. The superior marbling and meat thickness create better results. For casual smoking or budget-conscious cooks, chuck ribs provide acceptable results at lower cost.
Why 250 to 275°F Works Better Than 225°F for Beef Ribs
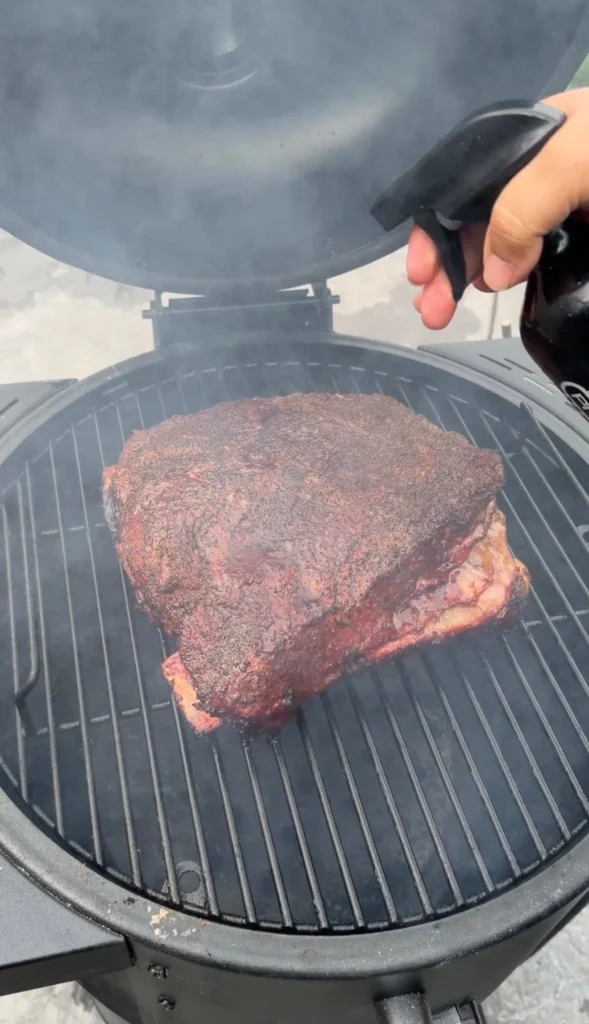
Collagen Breakdown Speed
Beef ribs contain significant collagen in the connective tissue between meat and bone. This collagen must convert to gelatin for tender texture. The conversion happens faster at higher temperatures within the low-and-slow range.
At 225°F, collagen breakdown is very gradual. Beef ribs might take 9 to 10 hours to reach probe-tender texture. The extended time allows more moisture to evaporate. Even with regular spritzing, the meat can become dry on the exterior.
At 250 to 275°F, collagen converts more efficiently. The ribs reach probe-tender texture in 6 to 8 hours. Less time at cooking temperature means less moisture loss overall. The faster conversion also creates better texture. The meat is tender without being mushy.
The higher temperature range also helps fat render more completely. Beef rib fat needs sufficient heat to liquefy and drain away. At 225°F, some fat can remain unrendered, creating waxy texture. At 250 to 275°F, fat renders thoroughly.
Bark Development
Bark is the dark, crusty exterior that forms on smoked meat. It develops through the Maillard reaction between proteins and sugars on the meat surface. This reaction happens more quickly and completely at higher temperatures.
At 225°F, bark formation is slow. After 8 hours, the bark might be minimal. The surface can look pale or grey instead of dark mahogany. The texture is more like a crust than true bark.
At 250 to 275°F, bark sets within the first 2 hours. By the end of cooking, the bark is dark, almost black in spots, with a firm texture. This bark provides flavor complexity and textural contrast against the tender interior.
The SPG seasoning contributes to bark formation. The salt draws moisture to the surface initially, then that moisture evaporates leaving concentrated seasoning. The garlic and pepper toast and caramelize. Higher heat accelerates this process.
Smoke Penetration and Ring Formation
Smoke penetration happens primarily in the first few hours when meat temperature is below 140°F. After the meat exceeds 140°F internally, smoke ring development stops. The smoke flavor continues accumulating on the surface but doesn’t penetrate deeper.
At both 225°F and 250 to 275°F, the meat spends similar time below 140°F. The difference in smoker temperature doesn’t significantly affect this phase. Both temperature ranges produce similar smoke rings.
However, the higher temperature creates cleaner smoke. Fires burn more completely at 250 to 275°F than at 225°F. Clean blue smoke tastes better than thick white smoke. The beef picks up sweet, wood smoke flavor instead of acrid, creosote notes.
The faster cooking also means less opportunity for over-smoking. Beef ribs smoked for 10 hours at 225°F can taste overly smoky or bitter. Ribs smoked for 7 hours at 265°F have balanced smoke flavor.
Temperature Stability
Maintaining 225°F requires careful fire management. Small changes in airflow or fuel cause temperature swings. You might fluctuate between 210°F and 240°F trying to hold 225°F. This inconsistency affects cooking time and results.
The 250 to 275°F range is more stable. Fires burn more robustly. Temperature is easier to maintain without constant adjustment. Even if you swing 10 degrees either direction, you’re still within the acceptable range.
Pellet smokers and electric smokers hold temperature more consistently at 250°F than 225°F. The controllers work better at moderate temperatures. Offset smokers burn cleaner at 250 to 275°F than at lower temps.
Weather affects low-temperature smoking more. On cold or windy days, maintaining 225°F becomes challenging. The 250 to 275°F range is more achievable in adverse conditions.
Should You Remove the Membrane from Beef Ribs Like Pork Ribs
Membrane Thickness and Texture Differences
The membrane on beef ribs is thinner and less prominent than on pork ribs. Pork rib membrane is thick, silvery, and tough. It creates an impenetrable barrier. Beef rib membrane is thinner and breaks down more during cooking.
When you cook beef ribs for 6 to 8 hours at 250 to 275°F, the membrane becomes tender. It’s not chewy or rubbery like undercooked pork membrane. Most people eating properly smoked beef ribs don’t notice the membrane.
The membrane also helps hold the rack together during the long cook. Beef ribs are heavy and can fall apart if the membrane is removed. The membrane provides structural support that keeps bones connected to meat.
Removing the membrane from beef ribs is more difficult than from pork. The membrane adheres tightly to the meat. Trying to remove it often tears chunks of meat away. You can damage the rack attempting removal.
Seasoning Penetration Considerations
Some pitmasters argue that removing the membrane allows better seasoning penetration from the bone side. This is theoretically true but practically minimal. Most flavor comes from the meat side where there’s no membrane.
The mustard binder and SPG seasoning coat all exposed surfaces including the bone side. Even with membrane present, seasoning adheres and contributes flavor. The membrane doesn’t completely block seasoning.
During the long cook, flavors from the seasoning, smoke, and spritz penetrate from all sides. The membrane might slow penetration slightly but doesn’t prevent it entirely. After 7 hours of smoking, the meat is thoroughly seasoned regardless.
Rendering and Moisture Management
Leaving the membrane on helps trap moisture on the bone side. As fat renders from the meat, it can pool slightly between the membrane and bone. This moisture helps keep the meat nearest the bone from drying out.
Without the membrane, rendered fat drips away more readily. The bone side can become drier than the meat side. The membrane acts as a partial barrier that maintains moisture balance.
The membrane also prevents the meat from shrinking away from the bones excessively. Beef ribs naturally pull back from bone ends as they cook. The membrane anchors the meat in place somewhat. This creates better presentation when slicing.
Competition and Tradition
Competition BBQ for beef ribs typically leaves the membrane on. Judges expect it. Removing it is unusual and might signal inexperience rather than technique choice.
Traditional Texas BBQ, where beef ribs are most celebrated, always leaves membrane intact. Aaron Franklin, arguably the most famous pitmaster, doesn’t remove membrane from beef ribs. If it’s good enough for Franklin’s Barbecue, it’s good enough for home cooks.
The only reason to remove membrane from beef ribs is personal preference if you truly dislike any trace of it. But given the difficulty of removal and minimal benefit, most experienced beef rib smokers leave it on.
How to Tell When Beef Ribs Are Probe Tender
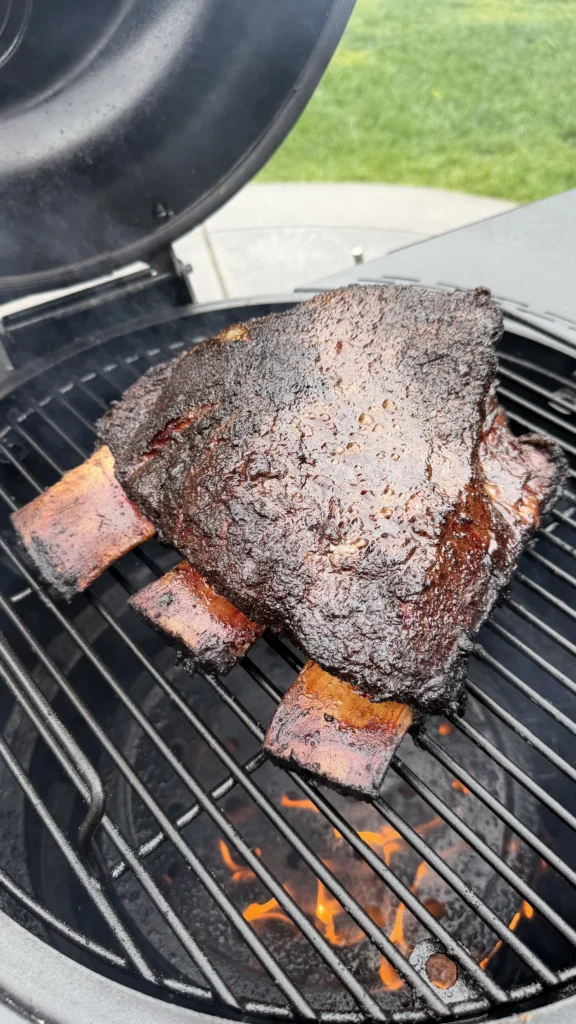
The Butter Probe Test
Insert a thermometer probe or thin skewer into the thickest part of the meat. The probe should slide in with minimal resistance. It should feel like pushing through room-temperature butter. There’s slight give but no hard resistance.
If the probe meets resistance, the ribs aren’t ready. Tough connective tissue that hasn’t converted to gelatin creates resistance. Continue cooking and test every 15 to 20 minutes.
The probe should slide through the entire thickness of the meat easily. Don’t just test the surface inch. Push the probe all the way through. Tenderness should be consistent from surface to bone.
Test multiple spots on the rack. Thickness varies across beef ribs. The thickest areas take longest to cook. If the thick areas are probe tender, the thinner areas are definitely done.
Visual Cues for Doneness
Look for meat pullback from the bone ends. Properly cooked beef ribs show ½ to ¾ inch of exposed bone at each end. The meat shrinks as it cooks, pulling away from bone tips. Less than ½ inch pullback suggests undercooking.
The bark should be dark mahogany to almost black. A well-developed bark indicates sufficient cooking time. Pale bark suggests the ribs need more time regardless of temperature.
The meat surface should look slightly shiny or moist from rendered fat. Overly dry, cracked surface indicates overcooking or insufficient spritzing. Perfectly cooked ribs glisten slightly.
You should see visible marbling fat rendered and incorporated into the meat surface. White fat streaks disappear as they melt. The meat takes on uniform darker color as fat distributes.
The Bounce Test
Pick up the rack with tongs at one end. Properly cooked beef ribs should bend significantly under their own weight. The rack bows in an arc. Undercooked ribs stay relatively straight or bend minimally.
When you bounce the rack gently, the meat should jiggle and move independently of the bones. The meat has loosened from the bone through collagen breakdown. Undercooked ribs move rigidly with meat firmly attached.
However, the ribs shouldn’t fall apart. If the meat is falling off the bones when you pick them up, they’re overcooked. You want tender but not disintegrating.
Temperature as a Guideline, Not a Rule
Internal temperature of 203°F is a useful guideline. Most beef ribs reach probe-tender texture around this temperature. But temperature isn’t absolute. Some racks are tender at 198°F. Others need 207°F.
Temperature varies based on thickness, marbling, and how the particular cow was raised. Grass-fed beef might have different characteristics than grain-fed. Older cattle have tougher connective tissue than younger animals.
Always verify with the probe test even if temperature reads 203°F. If the probe meets resistance, ignore the temperature and keep cooking. When the probe slides through like butter, the ribs are done regardless of temperature.
Use temperature to know when to start testing. Once the ribs reach 195°F, begin checking with the probe every 15 minutes. This prevents overcooking while ensuring you don’t pull too early.
Smoked Beef Plate Ribs
3-bone rack, SPG seasoned, probe tender at 203°F
Ingredients
Beef Ribs
- 1 rack beef plate ribs (3-bone, 6-8 lbs)
- 2-3 tablespoons yellow mustard (binder)
- 3 tablespoons salt, pepper, garlic seasoning (SPG blend)
Worcestershire Spritz
- ¼ cup Worcestershire sauce
- 1 cup water
Wait 2 hours before the first spritz. The bark needs time to set without moisture interference. After 2 hours, spritz every 30 minutes. This replaces surface moisture without washing away the developing bark. The probe test is more reliable than temperature alone for determining doneness.
Step-by-Step Instructions
Step 1: Trim the Beef Plate Ribs
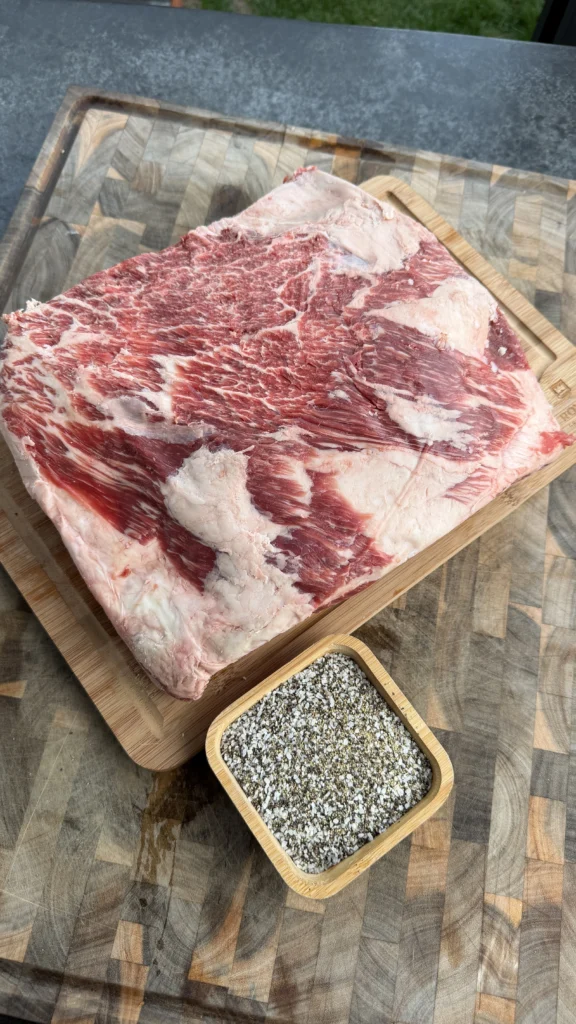
Remove the beef plate ribs from packaging. Place them meat-side up on a large cutting board. Examine the fat cap on top of the meat. This is the thick white layer covering the red meat.
Using a sharp boning or fillet knife, trim away excess hard fat. You want to leave approximately ¼ inch of fat cap. Remove thick, hard white fat that won’t render during cooking. This fat stays rubbery and unpleasant.
Don’t remove all the fat. A thin layer protects the meat and contributes flavor as it renders. Complete fat removal creates dry ribs. Quarter-inch is the sweet spot.
Flip the ribs over to examine the bone side. You’ll see a thin, translucent membrane covering the bones. Leave this membrane intact. Don’t attempt to remove it like you would with pork ribs. The membrane helps hold the rack together and becomes tender during the long cook.
Trim any loose pieces of meat or fat hanging from the edges. These burn during smoking. Clean edges create better appearance and even cooking.
Pat the ribs completely dry on all sides with paper towels. Dry meat accepts seasoning better and develops superior bark.
Step 2: Apply Mustard Binder and SPG Seasoning
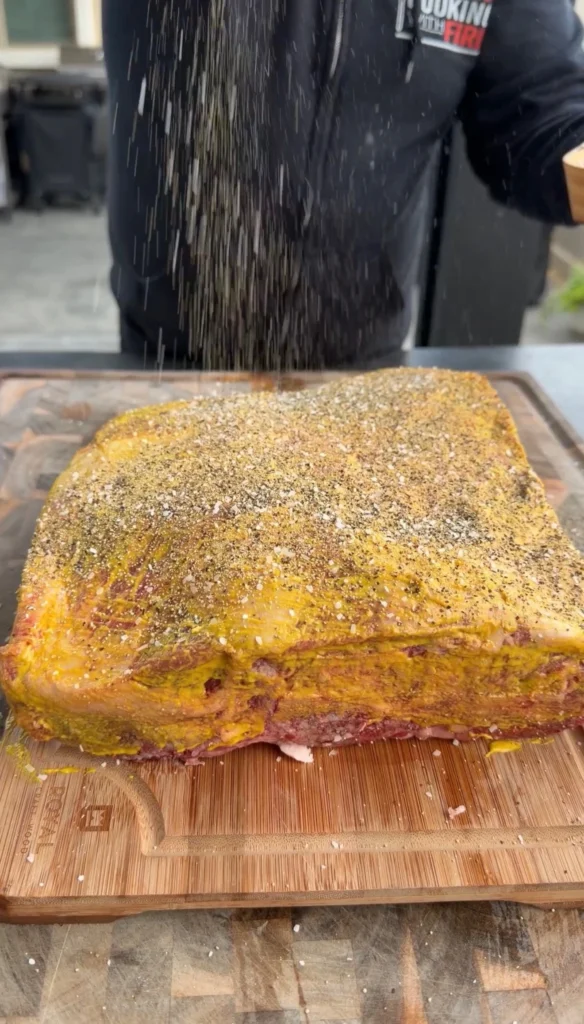
Squeeze 2 to 3 tablespoons of yellow mustard into a small bowl. Using a brush or your hands, apply a thin, even coating of mustard to all surfaces of the ribs. The mustard should barely be visible, just a light slick.
The mustard serves as a binder to help the seasoning adhere. It doesn’t affect flavor. The mustard taste cooks away completely during smoking. Don’t worry about using too much as long as it’s a thin layer.
Season all sides of the ribs generously with salt, pepper, garlic seasoning. Start with the meat side. Apply a heavy coating. You should barely see the meat through the seasoning. Don’t be shy.
Season the bone side next. Apply less here than the meat side but still coat it completely. The edges and ends need seasoning too. Make sure every exposed surface has SPG.
Pat the seasoning gently into the mustard. This helps it adhere and creates better bark. Don’t press so hard that you remove the seasoning. Just a light pat.
Let the seasoned ribs sit at room temperature while you preheat the smoker, approximately 20 to 30 minutes. This allows the salt to begin penetrating the meat.
Step 3: Prepare the Worcestershire Spritz
Combine ¼ cup Worcestershire sauce and 1 cup water in a spray bottle. Shake well to mix thoroughly. The mixture should be uniform brown, not separated.
Set the spray bottle aside until needed. You won’t use it for the first 2 hours of smoking. Keep it at room temperature or slightly warm. Cold spritz can shock the meat and affect bark development.
If you don’t have a spray bottle, you can use a brush to apply the spritz. A spray creates finer mist that distributes more evenly. But a brush works in a pinch.
Step 4: Preheat the Smoker
Preheat your smoker to 250 to 275°F. For stick burners or offset smokers, build a fire with hardwood. Oak is traditional for Texas-style beef ribs. Hickory, pecan, or mesquite also work. Avoid lighter woods like apple or cherry. They’re too subtle for beef.
For pellet smokers, fill the hopper with oak, hickory, or competition blend pellets. Set temperature to 265°F, the middle of the ideal range.
Let the smoker preheat for at least 15 minutes. You want clean, blue smoke. Thick white smoke indicates incomplete combustion. Adjust airflow to achieve thin blue smoke.
Clean the grill grates if needed. Residue from previous cooks can stick to the ribs. A wire brush removes buildup.
Step 5: Smoke the Ribs Bone-Side Down
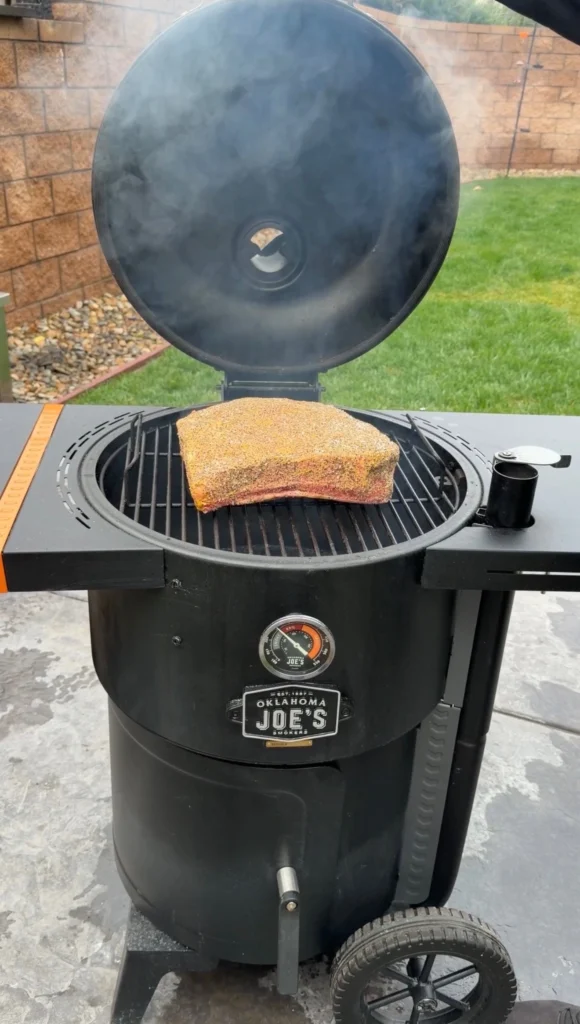
Place the seasoned beef plate ribs on the smoker grates bone-side down. The meat side should face up. This positions the thicker meat toward the heat source on most smokers.
Position the ribs away from direct heat if using an offset smoker. They should be in the indirect zone. On a pellet smoker, place them directly on the grate since heat is already indirect.
Close the smoker lid. Do not open it for the first 2 hours. Every time you open the lid, heat and smoke escape. This extends cooking time. The ribs need uninterrupted heat for proper bark development.
Monitor smoker temperature through the built-in thermometer or a digital remote thermometer. Adjust vents or pellet feeder to maintain 250 to 275°F. Temperature will fluctuate slightly. That’s normal. Just keep it within range.
Add more wood as needed to maintain smoke production. You want smoke throughout the cook, not just the first hour.
Step 6: Begin Spritzing After 2 Hours
After exactly 2 hours of smoking, open the smoker. The bark should be starting to set. The surface should look dry and slightly crusty.
Spray the ribs evenly with the Worcestershire spritz. Cover all exposed meat surfaces. Don’t drench them. A light, even mist is sufficient. Three to four sprays per side.
Close the lid quickly to minimize heat loss. Set a timer for 30 minutes.
Repeat the spritzing process every 30 minutes from this point forward. Open the lid, spray the ribs, close immediately. This regular moisture replacement prevents surface drying without washing away bark.
Continue this pattern until the ribs are done. For a 7-hour total cook, you’ll spritz approximately 10 times after the initial 2-hour wait.
Step 7: Monitor Internal Temperature and Test for Tenderness
After 5 hours of total smoking time, start checking internal temperature. Insert an instant-read thermometer into the thickest part of the meat without touching bone. Bone conducts heat differently and gives false readings.
You’re looking for approximately 203°F internal temperature. But temperature is just a starting point. Some racks are probe tender at 198°F. Others need 207°F.
When the temperature approaches 200°F, perform the probe test. Insert the thermometer probe or a thin skewer into the meat. It should slide in and out with minimal resistance, like pushing through room-temperature butter.
If you feel significant resistance, the ribs aren’t ready. Continue cooking. Test again every 15 to 20 minutes.
Test multiple spots, especially the thickest areas. The entire rack should be uniformly probe tender, not just certain spots.
Step 8: Rest the Ribs
When the ribs pass the probe test at all thick spots and internal temperature is around 203°F, remove them from the smoker. Use heavy gloves or towels. The ribs are hot and heavy.
Place the ribs on a large cutting board or baking sheet. Tent loosely with aluminum foil if desired but it’s not necessary. Don’t wrap tightly. You’ll steam the bark and make it soggy.
Let the ribs rest for at least 15 minutes. This allows juices to redistribute throughout the meat. Cutting immediately causes juice loss. The meat becomes drier.
During rest, the internal temperature may rise another 2 to 3 degrees from carryover cooking. This is normal and expected.
Step 9: Slice and Serve
After resting, flip the ribs bone-side up if they’re still meat-side up. You’ll slice from the bone side for cleaner cuts.
Using a sharp chef’s knife or cleaver, cut between each bone. Apply firm, downward pressure. The knife should cut through relatively easily. If you’re sawing excessively, the knife isn’t sharp enough.
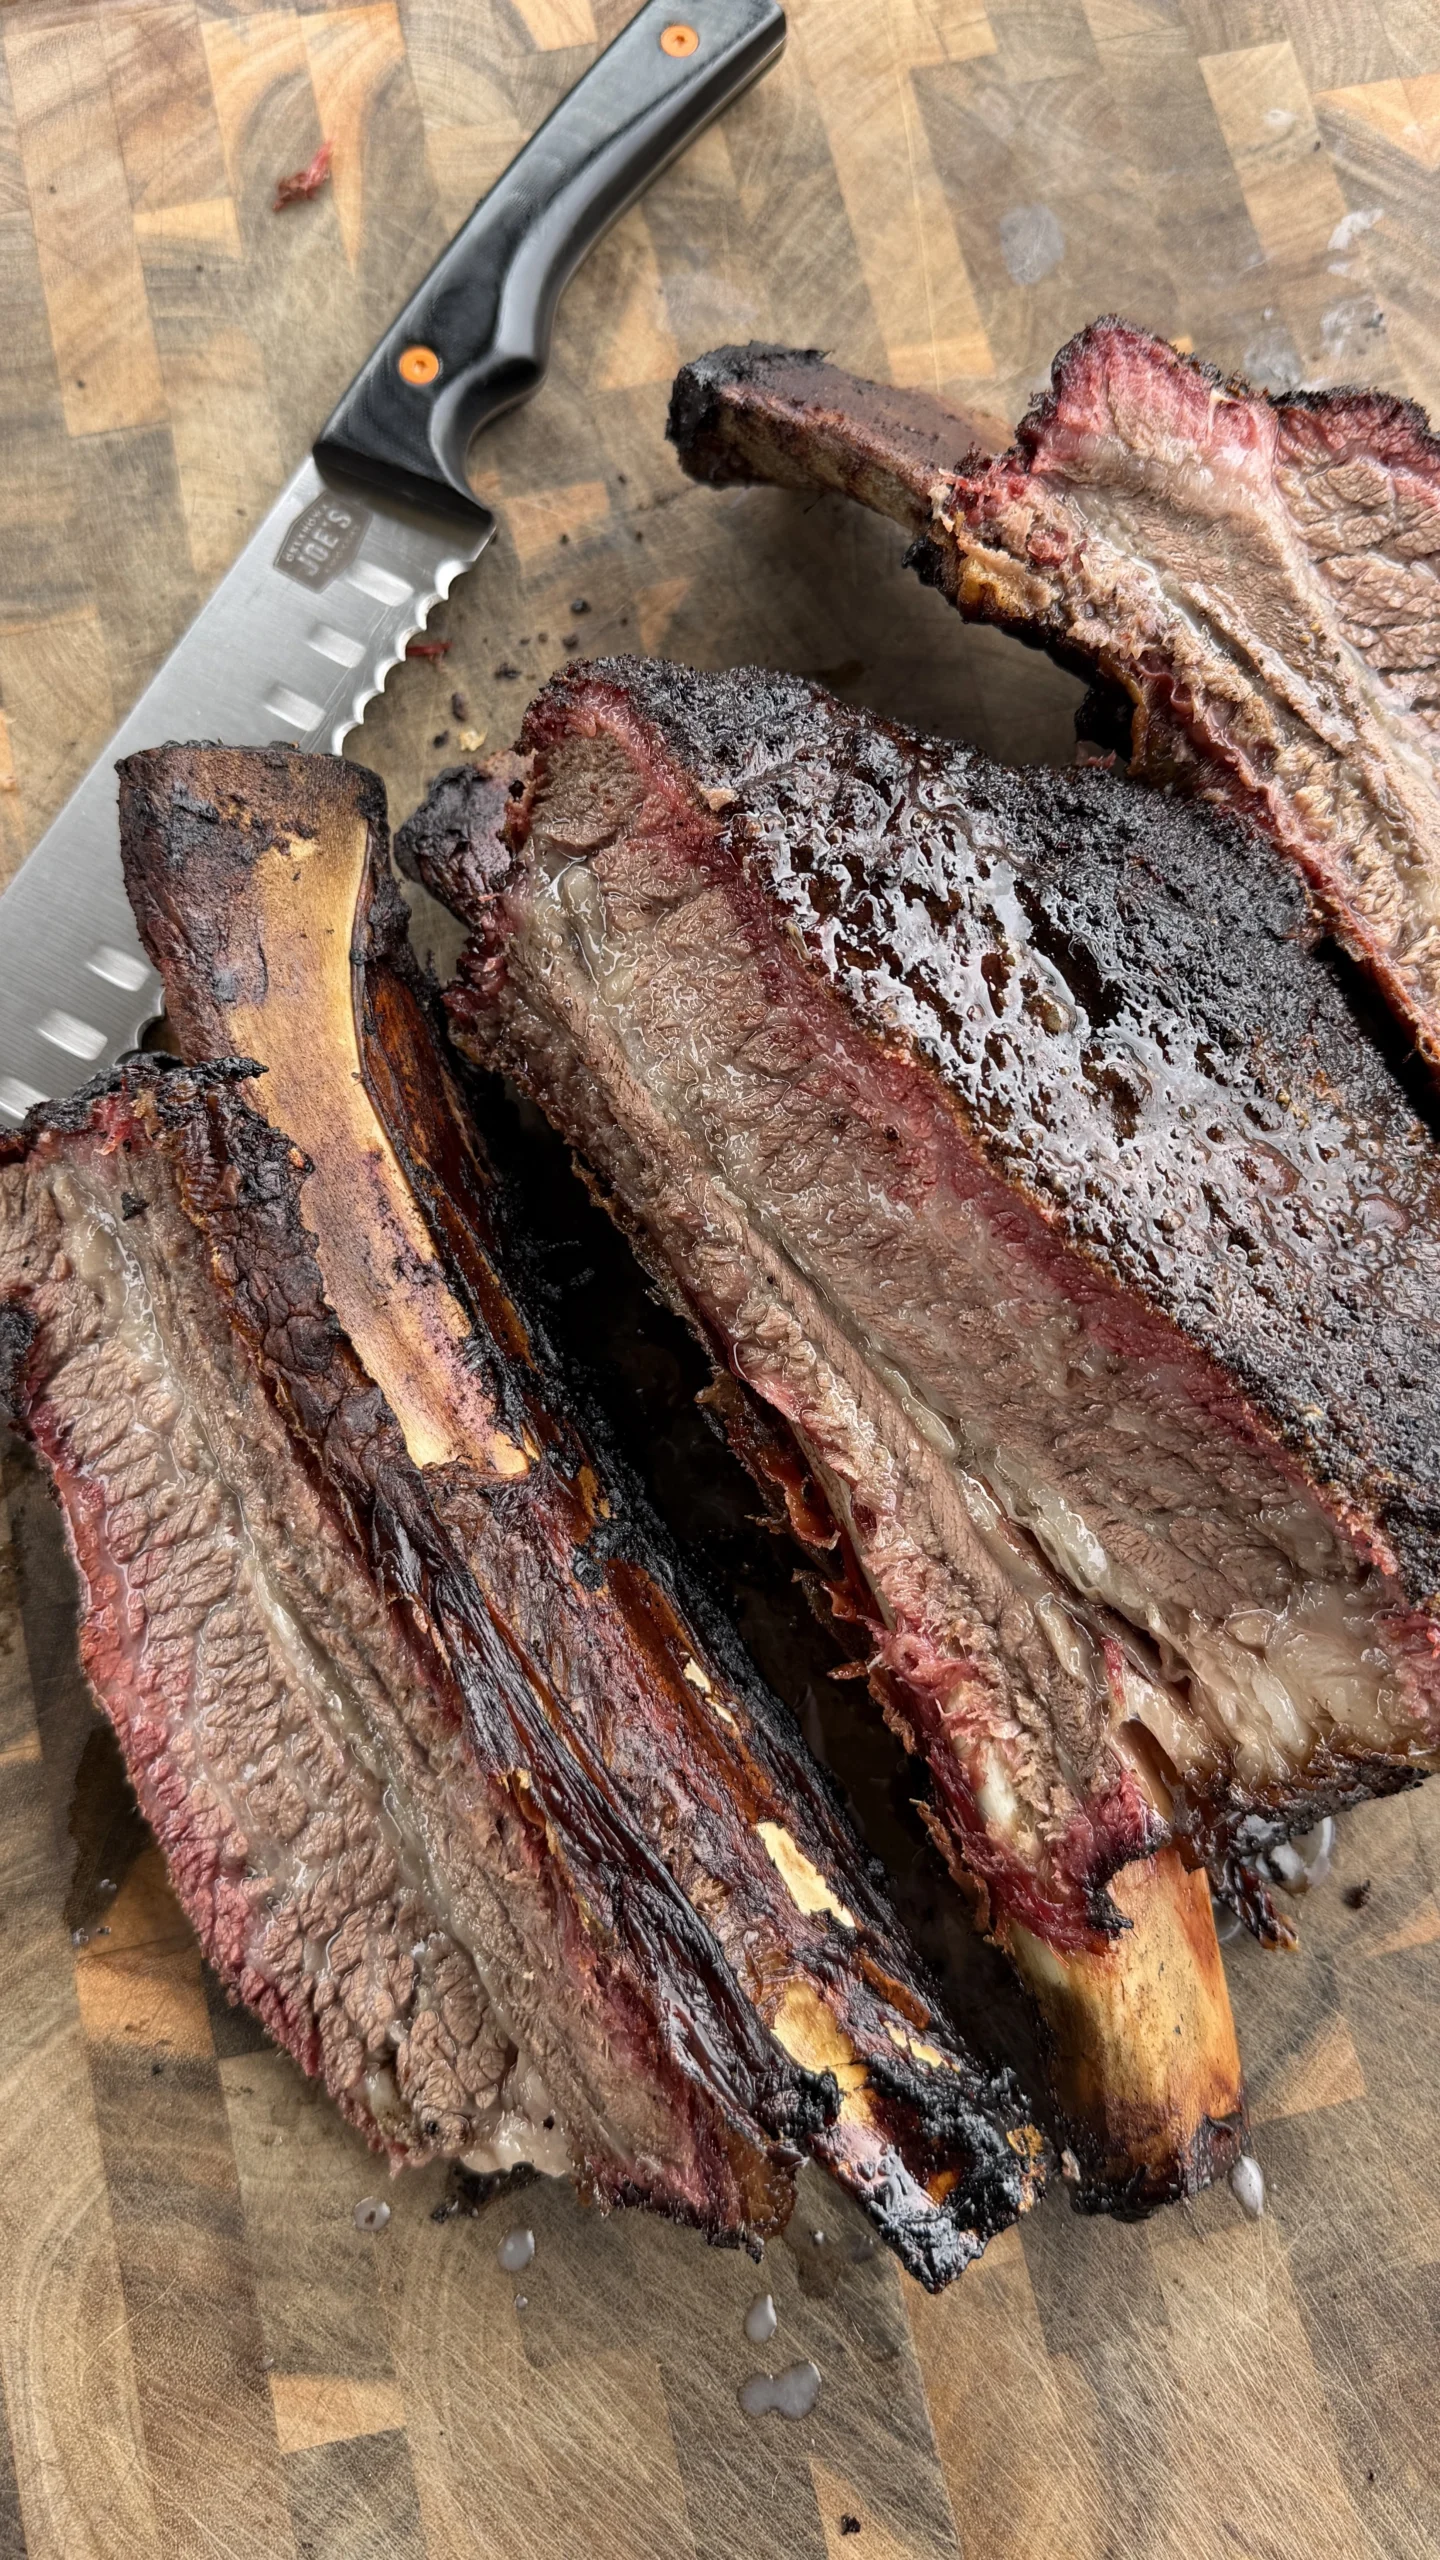
Each bone creates one massive serving. The meat should pull away from the bone with a clean bite but not fall off. You want tender, not disintegrating.
Arrange the individual bones on a serving platter with the meat side visible. The dark bark should be prominent. Serve immediately while hot.
Provide napkins. Beef ribs are messy. Embrace it. That’s part of the experience.
Smoked Beef Plate Ribs
Ingredients
Equipment
Method
- Trim excess hard fat from top of ribs, leaving ¼ inch fat cap. Leave membrane on bone side intact. Pat completely dry.
- Apply thin coating of yellow mustard to all surfaces as binder. Season generously with SPG blend on all sides, especially meat side.
- Mix Worcestershire sauce and water in spray bottle. Set aside.
- Preheat smoker to 250 to 275°F with oak or preferred hardwood.
- Place ribs bone-side down on smoker grates. Close lid. Smoke untouched for 2 hours to set bark.
- After 2 hours, spritz with Worcestershire mixture. Continue spritzing every 30 minutes until done.
- After 5 hours, check internal temperature. When approaching 200°F, test with probe. Continue cooking until probe slides through meat like soft butter and internal temp reaches approximately 203°F. Total time: 6 to 8 hours.
- Remove from smoker when probe tender. Rest 15 minutes loosely tented with foil.
- Flip bone-side up. Slice between each bone. Serve immediately.
Nutrition
Notes
Tried this recipe?
Let us know how it was!Frequently Asked Questions
Can You Wrap Beef Ribs in Foil During Cooking?
You can wrap beef ribs in foil or butcher paper during the cook to push through the stall and speed up cooking. This is called the Texas Crutch. Wrap when the ribs reach 165 to 170°F internal temperature. Unwrap when they hit 200°F to finish and crisp the bark.
Wrapping softens the bark significantly. The steam inside the wrap rehydrates the crusty exterior. Some pitmasters prefer unwrapped ribs for maximum bark. Others wrap for guaranteed tenderness and faster cooking.
If you wrap, add a splash of beef broth or Worcestershire to the foil. This creates steam that helps tenderize. Wrap tightly with heavy-duty foil to prevent leaks. Unwrapped cooking takes 1 to 2 hours longer but produces superior bark.
What Wood Works Best for Smoking Beef Ribs?
Oak is the traditional choice for Texas-style beef ribs. It provides clean, neutral smoke that enhances beef without overpowering. Post oak specifically is preferred in Texas but any oak works.
Hickory creates stronger smoke flavor with bacon-like notes. It’s popular in the Midwest and South. Hickory works well if you like aggressive smoke. But it can become overwhelming during the 6 to 8-hour cook.
Pecan offers middle ground between oak and hickory. The smoke is slightly sweet and nutty. Pecan is common in Texas alongside oak. It creates excellent beef rib flavor.
Avoid fruit woods like apple, cherry, or peach. They’re too mild for beef. The smoke flavor gets lost. Mesquite is controversial. Some love it for beef. Others find it too strong and bitter during long cooks. If using mesquite, blend it with oak.
How Do You Store and Reheat Leftover Beef Ribs?
Store leftover beef ribs in an airtight container or wrapped tightly in foil in the refrigerator for up to 4 days. The ribs stay moist better when stored whole rather than sliced. Slice only what you plan to eat immediately.
For reheating, the oven works best. Preheat to 250°F. Wrap ribs in foil with a few tablespoons of beef broth. Heat for 45 to 60 minutes until warmed through. The foil and liquid prevent drying.
Microwave reheating works in a pinch but affects texture. Use 50% power and heat in 1-minute intervals. The meat can become rubbery.
For freezing, wrap cooled ribs very tightly in plastic wrap, then foil. Freeze for up to 3 months. Thaw in refrigerator overnight before reheating. Frozen beef ribs lose some moisture but are still good.
You can also chop leftover beef ribs and use in tacos, nachos, or burritos. The smoky flavor works well in Mexican applications.
Why Did My Beef Ribs Turn Out Tough?
Tough beef ribs usually mean they didn’t cook long enough. Even if they reached 203°F, the collagen might not have fully converted to gelatin. The probe test would have revealed this. If the probe met resistance, more cooking time was needed.
Insufficient fat cap can cause toughness. If you trimmed too much fat, the ribs dried out during smoking. Leave at least ¼ inch of fat cap for protection and moisture.
Cooking temperature too low extends cooking time excessively. At 225°F, the ribs might take 10+ hours. During this extended cook, they can dry out even while remaining tough. The 250 to 275°F range prevents this.
Some racks are inherently tougher than others based on the cow’s age, diet, and genetics. Grass-fed beef sometimes has tougher connective tissue than grain-fed. You can’t always predict this, but proper cooking technique overcomes most variation.
Can You Make Beef Ribs in an Oven Instead of a Smoker?
You can cook beef ribs in an oven but won’t achieve the same smoke flavor and bark. Preheat oven to 275°F. Season ribs the same way. Place on a wire rack over a baking sheet. Roast for 5 to 6 hours until probe tender.
For smoke flavor, add liquid smoke to the Worcestershire spritz. Use 1 to 2 teaspoons. This approximates smoke character but isn’t authentic.
The bark won’t be as developed in the oven. The dry heat and smoke from a smoker create bark that ovens can’t replicate. The ribs will still taste good but different.
For better results, use a pellet grill, electric smoker, or charcoal grill set up for indirect cooking. These create actual smoke. Even a gas grill with wood chips in a smoker box produces more authentic results than an oven.
Ready to Level Up?
Take your backyard cooking from good to legendary.
This is where I keep all my most-used smokers, knives, and favorite cooking tools.
Shop My Gear CollectionExplore More Recipes
Find more diverse flavors at CWFeats.com