Fried Onion Smash Burgers Recipe
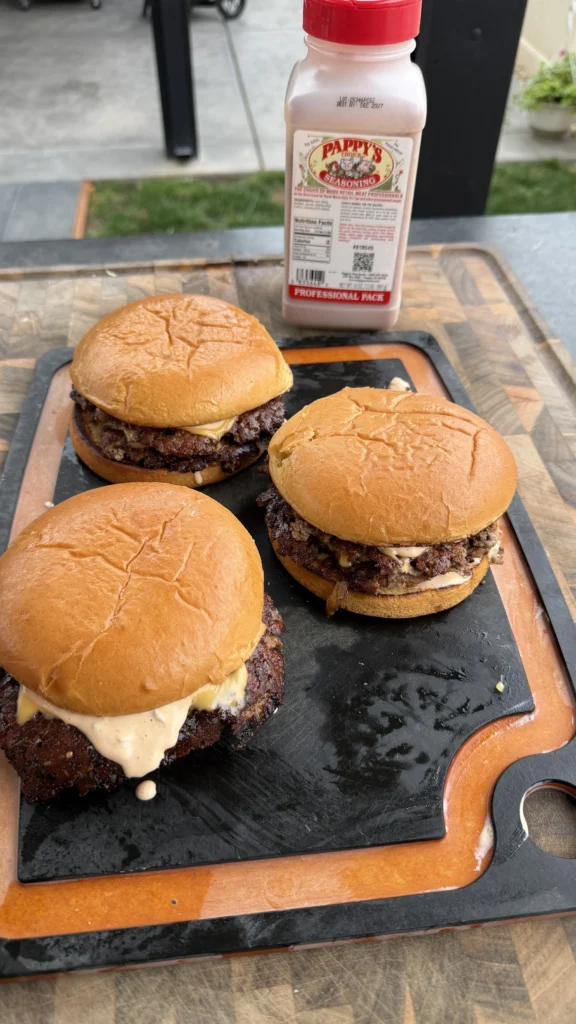
Fried onion smash burgers are 3-ounce balls of 80/20 ground beef topped with paper-thin shaved sweet onions, then smashed firmly onto a screaming hot cast iron skillet or flat-top griddle until the onions press into the meat and fry in the rendered beef fat. You cook the burgers for 1½ to 2 minutes without moving them until the edges turn crispy and deeply browned, flip once, add American cheese, and cook another 30 to 45 seconds until the cheese melts. The burgers get seasoned with salt, pepper, and garlic powder after smashing, not before. You serve them on toasted mayo-brushed buns with homemade burger sauce made from mayonnaise, ketchup, mustard, pickle juice, and relish.
The entire process takes about 30 to 40 minutes from start to finish. This includes 10 minutes to divide the ground beef into loose balls and shave the onions on a mandolin. Making the burger sauce takes 5 minutes. Preheating the skillet takes another 5 minutes. Each burger cooks for about 2 to 3 minutes total. With 10 to 11 burgers, you’ll spend 20 to 30 minutes cooking if working in batches. Toasting the buns happens while the burgers rest.
These smash burgers yield 10 to 11 burgers from 2 pounds of ground beef. Each patty is 3 ounces before cooking. After smashing and cooking, they’re very thin with maximum surface area for crust development. The thin profile creates more crispy edges than thick burgers. You get substantial crust-to-meat ratio in every bite.
The fried onion technique is what makes these burgers special. The onions aren’t added as a topping after cooking. They’re pressed into the raw meat before smashing. As the burger cooks, the onions fry directly in contact with the hot cooking surface and the beef fat. They caramelize and crisp. Some onions meld into the meat. Others create crispy bits around the edges. The result is onion flavor throughout the burger, not just on top.
Jump to RecipeWhat Makes 80/20 Ground Beef the Best Choice for Smash Burgers
Fat Content Creates Rendered Fat for Frying
80/20 ground beef contains 20% fat by weight. When you smash the burger onto a hot surface, this fat renders out immediately. The rendered fat pools around the burger on the cooking surface. The onions and edges of the meat sit in this fat. They essentially fry in beef fat instead of just cooking in their own moisture.
Leaner ground beef like 90/10 or 93/7 doesn’t render enough fat. The burgers cook but don’t fry. The onions can stick to the pan or burn before they caramelize properly. The edges don’t get as crispy. You need that fat for the characteristic smash burger crust and texture.
Ground beef fattier than 80/20, like 70/30, renders too much fat. The burger swims in grease. The excess fat can flare up if cooking over an open flame. The burger shrinks dramatically as fat cooks away. You lose too much weight from the original 3-ounce ball. The final burger feels greasy instead of juicy.
Maillard Reaction Requires Fat and High Heat
The Maillard reaction creates the brown crust on smash burgers. This chemical reaction between proteins and sugars happens most efficiently in the presence of fat at high temperatures. The 20% fat in 80/20 beef provides optimal conditions for browning.
The fat also conducts heat efficiently. It helps the meat reach proper browning temperature faster. Leaner meat takes longer to brown. By the time lean meat develops good crust, the interior is overcooked. 80/20 beef browns quickly while keeping the interior at proper doneness.
The fat layer between muscle fibers also insulates slightly. The exterior can get extremely hot and crusty while the interior stays medium or medium-well. This temperature gradient creates textural contrast. Crispy, caramelized crust gives way to tender, juicy interior.
Flavor Development from Fat
Beef fat carries most of the beef flavor. Lean muscle tissue tastes minerally and slightly metallic. Fat tastes rich, savory, and distinctly beefy. When you render fat during cooking, it releases flavor compounds. These compounds interact with the Maillard reaction products.
The combination creates complex, meaty flavor that defines a great burger. Lean ground beef tastes flat by comparison. Even when cooked perfectly, it lacks the depth that fat provides. The 20% fat in 80/20 gives enough richness without being overwhelming.
The rendered fat also carries flavor to the onions. As onions fry in the beef fat, they absorb some of that beefy richness. The onions don’t just taste like caramelized onions. They taste like beef-flavored caramelized onions. This integration creates cohesive flavor instead of separate meat and onion tastes.
Juiciness and Moisture Retention
Fat melts into liquid during cooking. This liquid stays trapped in the burger’s structure. When you bite into the burger, that liquid fat releases. Your mouth perceives it as juiciness. Lean burgers can’t create this same sensation because they lack fat.
The fat also lubricates the meat fibers. This makes the burger feel tender and moist in your mouth. Lean burgers feel dry and dense even when cooked to proper temperature. The texture is less pleasant regardless of actual moisture content.
For smash burgers specifically, the thin profile means fast cooking. There’s not much time for moisture loss. But any moisture that does evaporate is partially replaced by the fat that melts and stays in the meat. The 80/20 ratio ensures adequate fat remains even after some renders out during cooking.
How to Smash Burgers Correctly for Maximum Crust Development
Use Proper Smashing Tool and Technique
A flat metal spatula works best for smashing burgers. Restaurant-style griddle spatulas with large, flat surfaces are ideal. The wide surface distributes pressure evenly. You create a uniformly thin patty. Narrow spatulas create thick centers and thin edges. The burger cooks unevenly.
Some people use burger presses or smashers designed specifically for this purpose. These work fine but aren’t necessary. A sturdy metal spatula does the job. Place the spatula on top of the meat ball. Press down firmly with your full body weight. Don’t just use your arm. Lean into it.
The goal is to flatten the burger as thin as possible without tearing it. About ¼ inch thickness is ideal. Thinner is better for crust development. But if you go too thin, the burger can fall apart or cook through before developing crust. Quarter-inch gives you the sweet spot.
Timing: Smash Immediately Upon Contact
Place the meat ball on the screaming hot surface. Immediately place the shaved onions on top of the meat ball. Then smash within 2 to 3 seconds. The meat should still be raw when you smash. It shouldn’t have time to form any cooked exterior.
If you wait too long, the bottom of the meat ball starts cooking. A cooked layer forms. When you try to smash, this cooked layer resists. The meat ball doesn’t spread properly. You get a thick burger with poor surface contact. The crust development suffers.
The onions need to be in position before smashing. If you smash first and then try to add onions, they just sit on top. They don’t press into the meat. The integration doesn’t happen. The onions can slide off when you flip. They don’t fry in direct contact with the meat.
Press Once and Only Once
Smash the burger one time with firm, decisive pressure. Hold the pressure for 3 to 5 seconds to ensure full contact with the cooking surface. Then remove the spatula and don’t touch the burger again until it’s time to flip.
Smashing multiple times destroys the crust. The first smash creates maximum surface contact. The meat starts browning immediately. If you lift the spatula and smash again, you break the crust that’s forming. You disrupt the Maillard reaction. The burger ends up with less crust overall.
Pressing down repeatedly also squeezes out juice and fat. The first smash renders some fat naturally. Additional smashing forces more fat out. The burger becomes drier. The cooking surface becomes excessively greasy. You lose the benefits of the fat in the meat.
Surface Contact Is Everything
The entire bottom surface of the burger should contact the cooking surface. Any areas not touching the pan don’t brown. You get spotty crust instead of even coverage. The firm smash ensures complete contact.
This is why the cooking surface must be absolutely flat. Cast iron skillets can develop slight warping over time. If the pan isn’t flat, the burger won’t contact evenly. Some areas overcook while others undercook. Check your pan’s flatness before making smash burgers.
The onions pressed into the bottom also need surface contact. They’re between the meat and the pan. They act like a barrier. But when pressed firmly, they compress and still allow direct heat transfer. The onions caramelize from pan contact. The meat browns around them. You get interwoven meat and onion crust.
Why Sweet Onions Work Better Than Yellow Onions for Fried Onion Burgers
Higher Sugar Content for Better Caramelization
Sweet onions like Vidalia, Walla Walla, or Maui contain more sugar than standard yellow onions. These sugars caramelize when exposed to high heat. Caramelization creates brown color and sweet, complex flavor. The high sugar content in sweet onions makes them caramelize faster and more thoroughly.
Yellow onions have lower sugar content. They can caramelize but it takes longer. In the 1½ to 2 minute cooking time for smash burgers, yellow onions don’t develop as much color or sweetness. Some caramelization happens. But not the deep golden-brown you get with sweet onions.
The caramelized sugar also creates crispy texture. As sugar heats beyond the caramelization point, it forms crispy edges similar to candy. Sweet onions develop these crispy bits. They add textural contrast to the burger. Yellow onions are more likely to stay soft without crispy edges.
Lower Sulfur Compound Concentration
Yellow onions contain higher levels of sulfur compounds. These compounds taste sharp and pungent. They’re what make you cry when cutting onions. The sulfur flavor can overpower in applications where the onion is featured prominently.
Sweet onions are bred to have lower sulfur content. They taste milder and, well, sweeter. When fried into the burger, they provide onion flavor without harshness. The sweetness balances the savory beef. Yellow onions can make the burger taste too sharp or acidic.
The lower sulfur content also means sweet onions produce less acrid smell when cooked at high heat. Yellow onions can develop bitter, burnt onion smell if they hit temperatures above 400°F. Sweet onions tolerate the high heat better. The smell stays pleasant and sweet.
Moisture Content and Texture
Sweet onions have slightly higher moisture content than yellow onions. This might seem like a disadvantage for frying. But the extra moisture helps the onions steam slightly before they fry. This softens them quickly. They can then crisp without burning on the outside while staying raw inside.
The higher moisture also prevents the onions from turning completely dry and brittle. They caramelize and crisp on the edges. But they maintain some tender softness in the centers. This creates better texture than fully dehydrated, crunchy onions.
Yellow onions with lower moisture can dehydrate too much during the brief cooking time. They can turn papery or burnt. The texture is less pleasant. Sweet onions maintain better texture balance between crispy and tender.
Sweetness Balances Savory Beef
The inherent sweetness of sweet onions complements the savory, umami-rich beef. This sweet and savory combination is a classic flavor pairing. It creates more complex taste than savory-only or sweet-only.
Yellow onions lean more savory with their sharper flavor. When combined with savory beef, the overall taste becomes one-dimensional. Everything is savory. Sweet onions provide contrast. The sweetness makes you perceive the beef as more savory by comparison.
This is similar to how a touch of sugar in tomato sauce makes the tomato flavor taste brighter. The sweetness doesn’t make the sauce sweet. It enhances the savory qualities. Sweet onions function the same way in smash burgers. They make the beef taste beefier through contrast.
Should You Season Before or After Smashing the Burger
Moisture Loss from Salt Contact
Salt draws moisture from meat through osmosis. When you salt ground beef before forming it, the salt extracts water from the muscle cells. This water dissolves some proteins. The dissolved proteins create a sticky, sausage-like texture. This is good for sausages and meatballs. It’s bad for burgers.
The sticky texture from pre-salting makes the burger dense and compact. When you bite into it, it feels like you’re biting into a meatloaf. Burgers should be tender and loosely packed. Pre-salting ruins this texture by binding the meat too tightly.
If you salt after forming the meat balls but before cooking, the same moisture extraction happens. The surface becomes wet from extracted juice. When the wet burger hits the hot pan, the moisture has to evaporate before browning can begin. This delays crust formation. You get less crust in the same cooking time.
Seasoning Adhesion After Smashing
When you smash the burger, you create maximum surface area. Seasoning this freshly smashed surface ensures even coverage. The salt, pepper, and garlic powder stick to every part of the exposed meat.
If you seasoned before smashing, much of the seasoning would be on areas that end up not exposed to direct heat. The seasoning gets trapped between layers of meat that fold over during smashing. It’s wasted. The exposed surface that does the browning has less seasoning.
The freshly smashed surface is also slightly moist from the smashing pressure. This moisture helps seasoning adhere. The crystals stick rather than bouncing off. When the surface dries during cooking, the seasoning is locked in place. It can’t blow away from steam or movement.
Heat Activation of Garlic Powder
Garlic powder needs heat to develop full flavor. Raw garlic powder tastes dusty and harsh. Heated garlic powder becomes aromatic and savory. Applying garlic powder to the raw, smashed surface means it gets the full cooking time to develop flavor.
If you mixed garlic powder into the raw meat before forming balls, much of it would be interior. Interior garlic doesn’t get heated enough to activate. It stays raw-tasting. Only the surface garlic develops flavor. This is inefficient use of seasoning.
Garlic powder also burns at temperatures above 325°F if exposed too long. The brief 1½ to 2 minute cooking time for smash burgers is perfect. The garlic browns slightly and becomes fragrant. It doesn’t have time to burn and turn bitter. This timing only works when seasoning happens after smashing.
Maillard Reaction and Salt Interaction
Recent food science research suggests salt can slightly inhibit Maillard browning if applied too far in advance. The salt-extracted moisture creates a barrier. This moisture has to evaporate first. The meat can’t brown until the surface is dry.
Seasoning immediately after smashing means the moisture hasn’t been extracted yet. The surface is raw meat, not salt-extracted juice. The Maillard reaction can begin immediately when heat is applied. This creates faster, more efficient browning.
The salt does eventually help with browning through other mechanisms. It helps maintain protein structure. It seasons the crust so every browned bit tastes good. But the timing matters. Season after smashing, right before cooking, for optimal results.
The Best Temperature and Surface for Cooking Smash Burgers
Cast Iron vs Flat-Top Griddle Performance
Cast iron skillets and flat-top griddles both work for smash burgers. Each has advantages. Cast iron retains heat exceptionally well. When you place a cold meat ball on cast iron, the pan temperature drops slightly but recovers quickly. This heat retention creates consistent cooking conditions.
Cast iron also develops seasoning over time. A well-seasoned cast iron pan is nearly nonstick. The burger releases easily when ready to flip. You don’t tear the crust trying to flip it. The seasoning also adds subtle flavor from previous cooking sessions.
Flat-top griddles have more surface area. You can cook multiple burgers simultaneously without crowding. Professional smash burger restaurants use flat-tops for this reason. The large surface allows high-volume cooking. The burgers don’t affect each other’s cooking temperature.
Flat-tops are typically stainless steel or chrome. They don’t retain heat as well as cast iron. But they recover fast because of high BTU burners underneath. Home flat-top griddles work fine but you might need to work in smaller batches than on a commercial flat-top.
High Heat Is Non-Negotiable
Smash burgers require extremely high heat. The cooking surface should be 450 to 500°F. At this temperature, the Maillard reaction happens rapidly. The onions caramelize in under 2 minutes. The crust develops fully while the interior stays juicy.
Lower heat creates steamed burgers instead of seared burgers. The meat cooks through before developing crust. The onions soften but don’t caramelize. The finished burger tastes boiled rather than grilled or fried. The texture is gray and unappealing.
You can verify temperature with an infrared thermometer. Point it at the cooking surface before adding meat. It should read 450°F minimum. If it’s cooler, let the pan heat longer. Don’t rush. The extra preheating time is essential for success.
Some home stoves can’t reach 500°F on the cooking surface. They don’t put out enough BTUs. If this is your equipment limitation, use the highest heat setting available. Preheat for at least 10 minutes. Accept that your crust might not be quite as aggressive as restaurant smash burgers. It’ll still be good.
Oil Selection and Application
Use high smoke point oil for smash burgers. Avocado oil, refined peanut oil, or grapeseed oil all work. These oils don’t smoke or burn at smash burger temperatures. Regular vegetable oil or canola oil also work. They have adequate smoke points around 400 to 450°F.
Don’t use butter for the cooking surface. Butter burns at these temperatures. The milk solids turn black and taste bitter. You can use butter for toasting buns at lower temperature. But not for cooking the burgers.
Apply oil very sparingly. You need just enough to prevent initial sticking. About ½ teaspoon spread across the cooking surface is sufficient. Too much oil causes the burger to deep fry rather than sear. The texture becomes greasy instead of crispy.
The burger will render its own fat within seconds. This rendered beef fat becomes the primary cooking medium. The initial oil just provides insurance against sticking before the fat renders. Once fat pools around the burger, no additional oil is needed.
Even Heat Distribution Matters
The cooking surface must heat evenly. Hot spots create inconsistent cooking. Some areas of the burger overcook while others undercook. The onions burn in hot spots while staying raw in cool zones. Even heat ensures uniform crust development.
Check for hot spots by sprinkling a few drops of water across the dry, preheated surface. The water should sizzle and evaporate at the same rate everywhere. If some areas boil vigorously while others barely react, you have uneven heating.
For cast iron, preheat slowly over medium heat for 5 minutes, then increase to high for another 5 minutes. This allows the entire pan to heat thoroughly. Rushing to high heat immediately creates hot centers and cooler edges.
For griddles, preheat all burners to the same setting. Let it heat for at least 10 minutes. The thermal mass of the griddle plate takes time to equalize. Patience during preheating creates better cooking results.
Fried Onion Smash Burgers
Paper-thin onions, 80/20 beef, crispy edges, melted cheese
Ingredients
Burgers
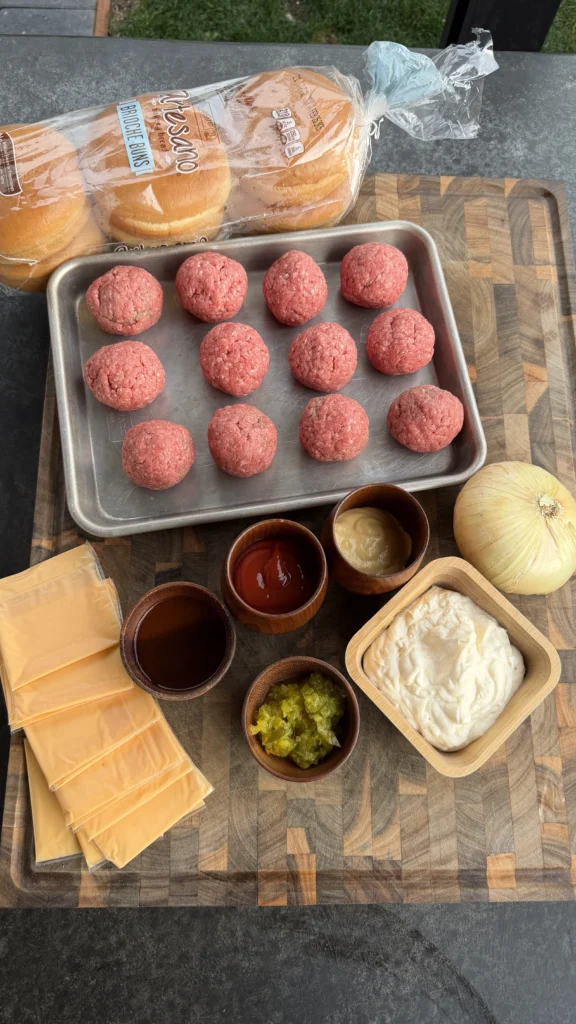
- 2 lb 80/20 ground beef
- Salt, black pepper, and garlic powder (or your favorite burger seasoning)
- 1 sweet onion, shaved paper-thin on a mandolin
- 10-11 slices American cheese
- 10-11 burger buns
Burger Sauce
- ½ cup mayonnaise
- 2 tablespoons ketchup
- 2 tablespoons yellow mustard
- 1 teaspoon salt
- 1 teaspoon black pepper
- 1 teaspoon garlic powder
- 2 teaspoons pickle juice
- 2 tablespoons relish
For the Buns
- Mayonnaise (for spreading)
Smash once and only once with maximum pressure. Use your full body weight. The harder you smash, the more surface contact you create. More surface contact means more crust. Don’t lift and re-smash. This destroys the crust that’s already forming.
Step-by-Step Instructions
Step 1: Prep the Ground Beef and Onions
Remove the ground beef from the refrigerator. Divide it into 3-ounce portions using a kitchen scale for accuracy. Gently form each portion into a loose ball. Don’t compact or squeeze the meat. You want the balls to be airy and loosely packed. Overworking the meat creates dense, tough burgers.
Place the balls on a plate or tray. Keep them refrigerated until you’re ready to cook. Cold meat holds together better during smashing than room temperature meat.
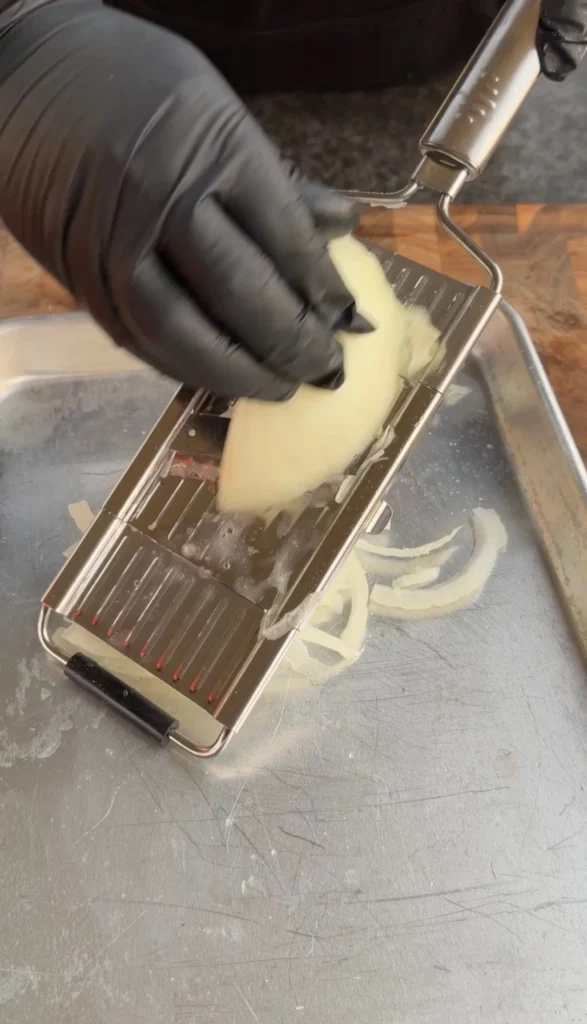
Peel the sweet onion. Using a mandolin slicer, shave the onion into paper-thin slices. The slices should be almost transparent. Thick onion slices won’t integrate into the burger properly. They’ll stay chunky instead of melding with the meat.
If you don’t have a mandolin, use a very sharp knife. Slice as thin as possible. Take your time. Consistent thin slices matter more than speed.
Step 2: Make the Burger Sauce
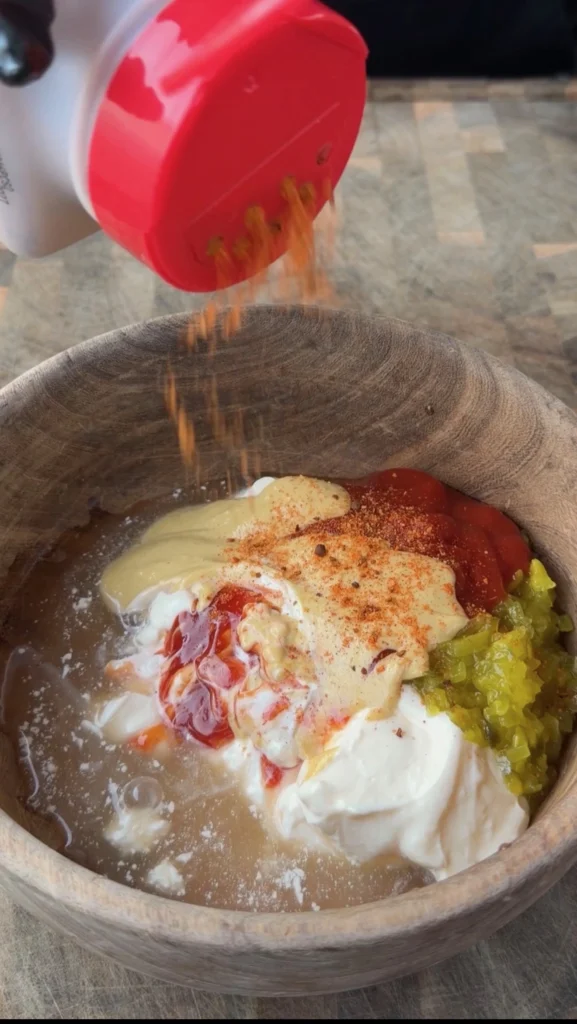
In a medium bowl, combine ½ cup mayonnaise, 2 tablespoons ketchup, 2 tablespoons yellow mustard, 1 teaspoon salt, 1 teaspoon black pepper, 1 teaspoon garlic powder, 2 teaspoons pickle juice, and 2 tablespoons relish.
Whisk everything together until smooth and well combined. The sauce should be creamy with visible relish pieces throughout. It should taste tangy, slightly sweet, and well-seasoned.
Cover and refrigerate until ready to use. The sauce can be made up to 3 days in advance. The flavors actually improve after sitting for a day. The seasonings have time to meld.
Taste and adjust if needed. If you want more tang, add more pickle juice or mustard. For more sweetness, add a bit more relish or ketchup. For more heat, add black pepper or a pinch of cayenne.
Step 3: Preheat the Cast Iron Skillet
Place a large cast iron skillet or flat-top griddle over high heat. Let it preheat for at least 5 to 10 minutes. The surface should be screaming hot. You’re aiming for 450 to 500°F if you have an infrared thermometer to check.
Visual cues that it’s ready: the air above the pan shimmers from heat. A drop of water sizzles and evaporates in under 1 second. The pan might just start to smoke slightly.
Add about ½ teaspoon of high smoke point oil to the cooking surface. Avocado oil, peanut oil, or grapeseed oil all work. Spread it across the surface with a paper towel held by tongs. The oil layer should be barely visible.
Don’t add more oil. The beef will render its own fat within seconds. Too much oil makes greasy burgers instead of crispy ones.
Step 4: Smash and Cook the Burgers
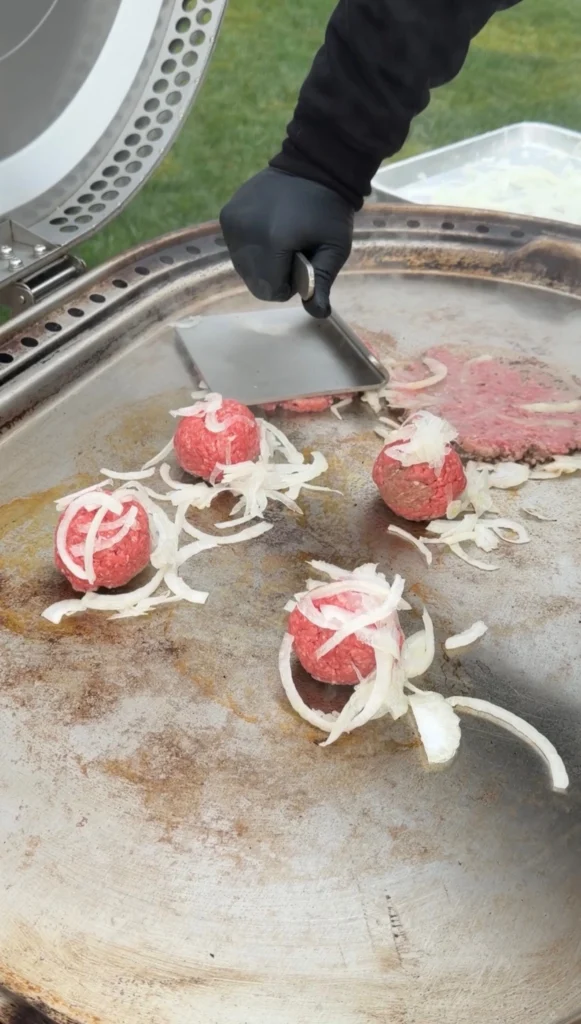
Working in batches of 2 to 3 burgers at a time, place a cold meat ball on the hot cooking surface. Immediately top with a small handful of shaved onions. About 2 to 3 tablespoons of onions per burger.
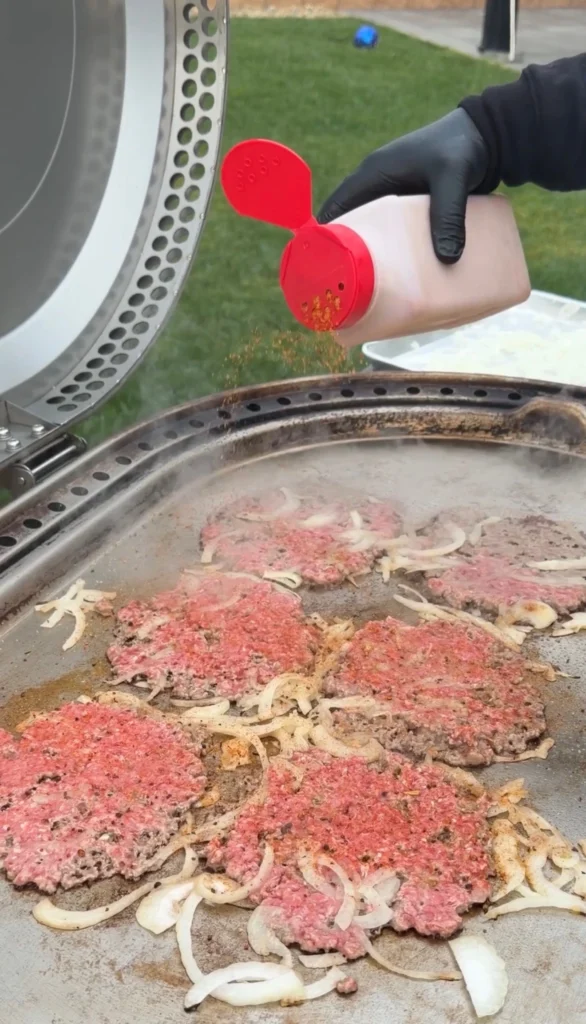
Using a wide metal spatula, smash the burger firmly into the pan. Use your full body weight. Press down as hard as you can without breaking the spatula. Hold the pressure for 3 to 5 seconds to ensure the onions press into the meat and the burger makes complete contact with the pan.
The onions should embed into the meat surface. Some will be fully covered by meat. Others will create a lacy edge around the burger. This is perfect.
Immediately season the exposed top of the burger generously with salt, black pepper, and garlic powder. Don’t be shy. This is your only opportunity to season the meat properly.
Let the burger cook undisturbed for 1½ to 2 minutes. Don’t move it. Don’t press it again. The edges will start to brown and crisp. You’ll see browning creeping up the sides. When about two-thirds of the burger’s height has changed from pink to brown, it’s ready to flip.
Step 5: Flip, Add Cheese, and Finish Cooking
Slide the spatula under the burger. It should release easily if it’s ready. If it sticks, give it another 15 to 30 seconds. When properly crusted, it releases naturally.
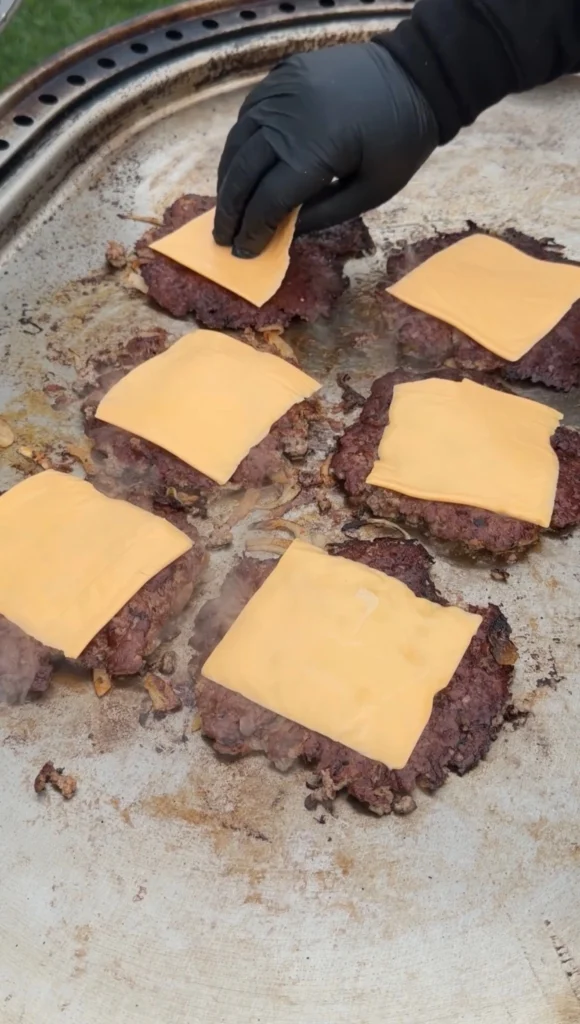
Flip the burger in one confident motion. The onion side should now be facing up. The bottom (former top) should be deeply browned, almost mahogany colored.
Immediately place a slice of American cheese on the burger. American cheese melts at lower temperatures than most cheeses. It also melts smoothly without separating. This is why it’s the classic smash burger cheese.
Cook for another 30 to 45 seconds. The burger is very thin. It cooks through quickly. The second side needs far less time than the first. You’re just warming it through and melting the cheese.
Remove the burger when the cheese is fully melted and starting to drip down the sides. Place on a plate and cover loosely with foil to keep warm while you cook the remaining burgers.
Step 6: Toast the Buns
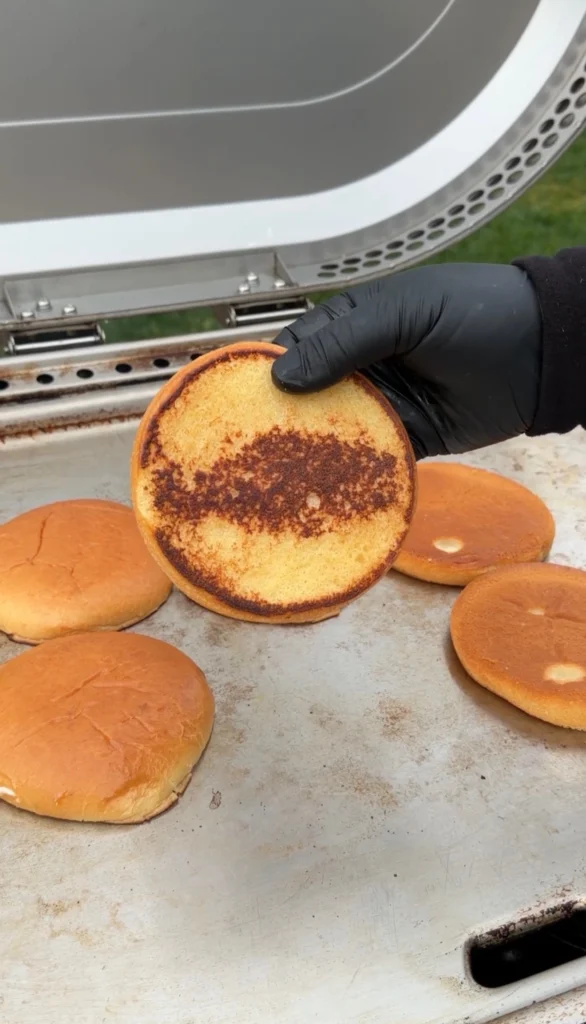
While the burgers rest, prepare the buns. Spread a thin layer of mayonnaise on the cut sides of each bun. Both top and bottom should get mayo.
Heat a clean portion of the skillet or griddle to medium heat. You don’t want it as hot as it was for the burgers. About 350°F is right.
Place the buns cut-side down on the warm surface. Press gently. Toast for 1 to 2 minutes until golden brown. The mayo helps the buns brown and adds richness.
Watch carefully. Buns go from perfect to burnt quickly. When you see golden color developing, remove them immediately.
Step 7: Assemble the Burgers
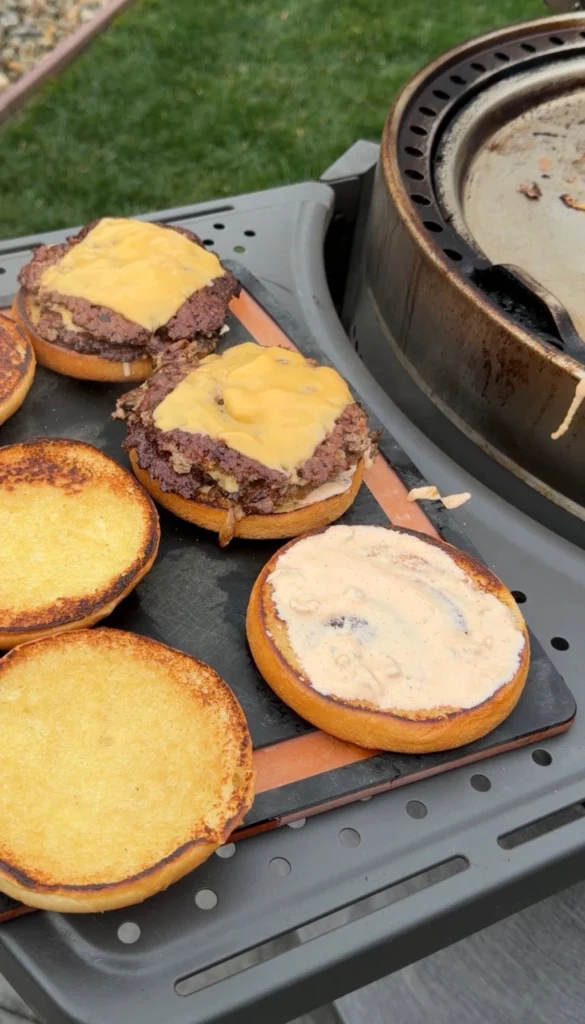
Place the bottom bun on a plate. Add the fried onion smash burger with melted cheese. The cheese should be facing up, draped over the patty.
Spoon or squirt burger sauce generously over the cheese. About 1 to 2 tablespoons per burger. The sauce should coat the top of the patty.
Place the top bun on the burger. Press down gently to compress slightly. This makes the burger easier to bite into.
Serve immediately while the burger is hot and the bun is warm. Smash burgers are best eaten fresh. The crust loses its crispiness as it sits. The burger can become soggy from the sauce.
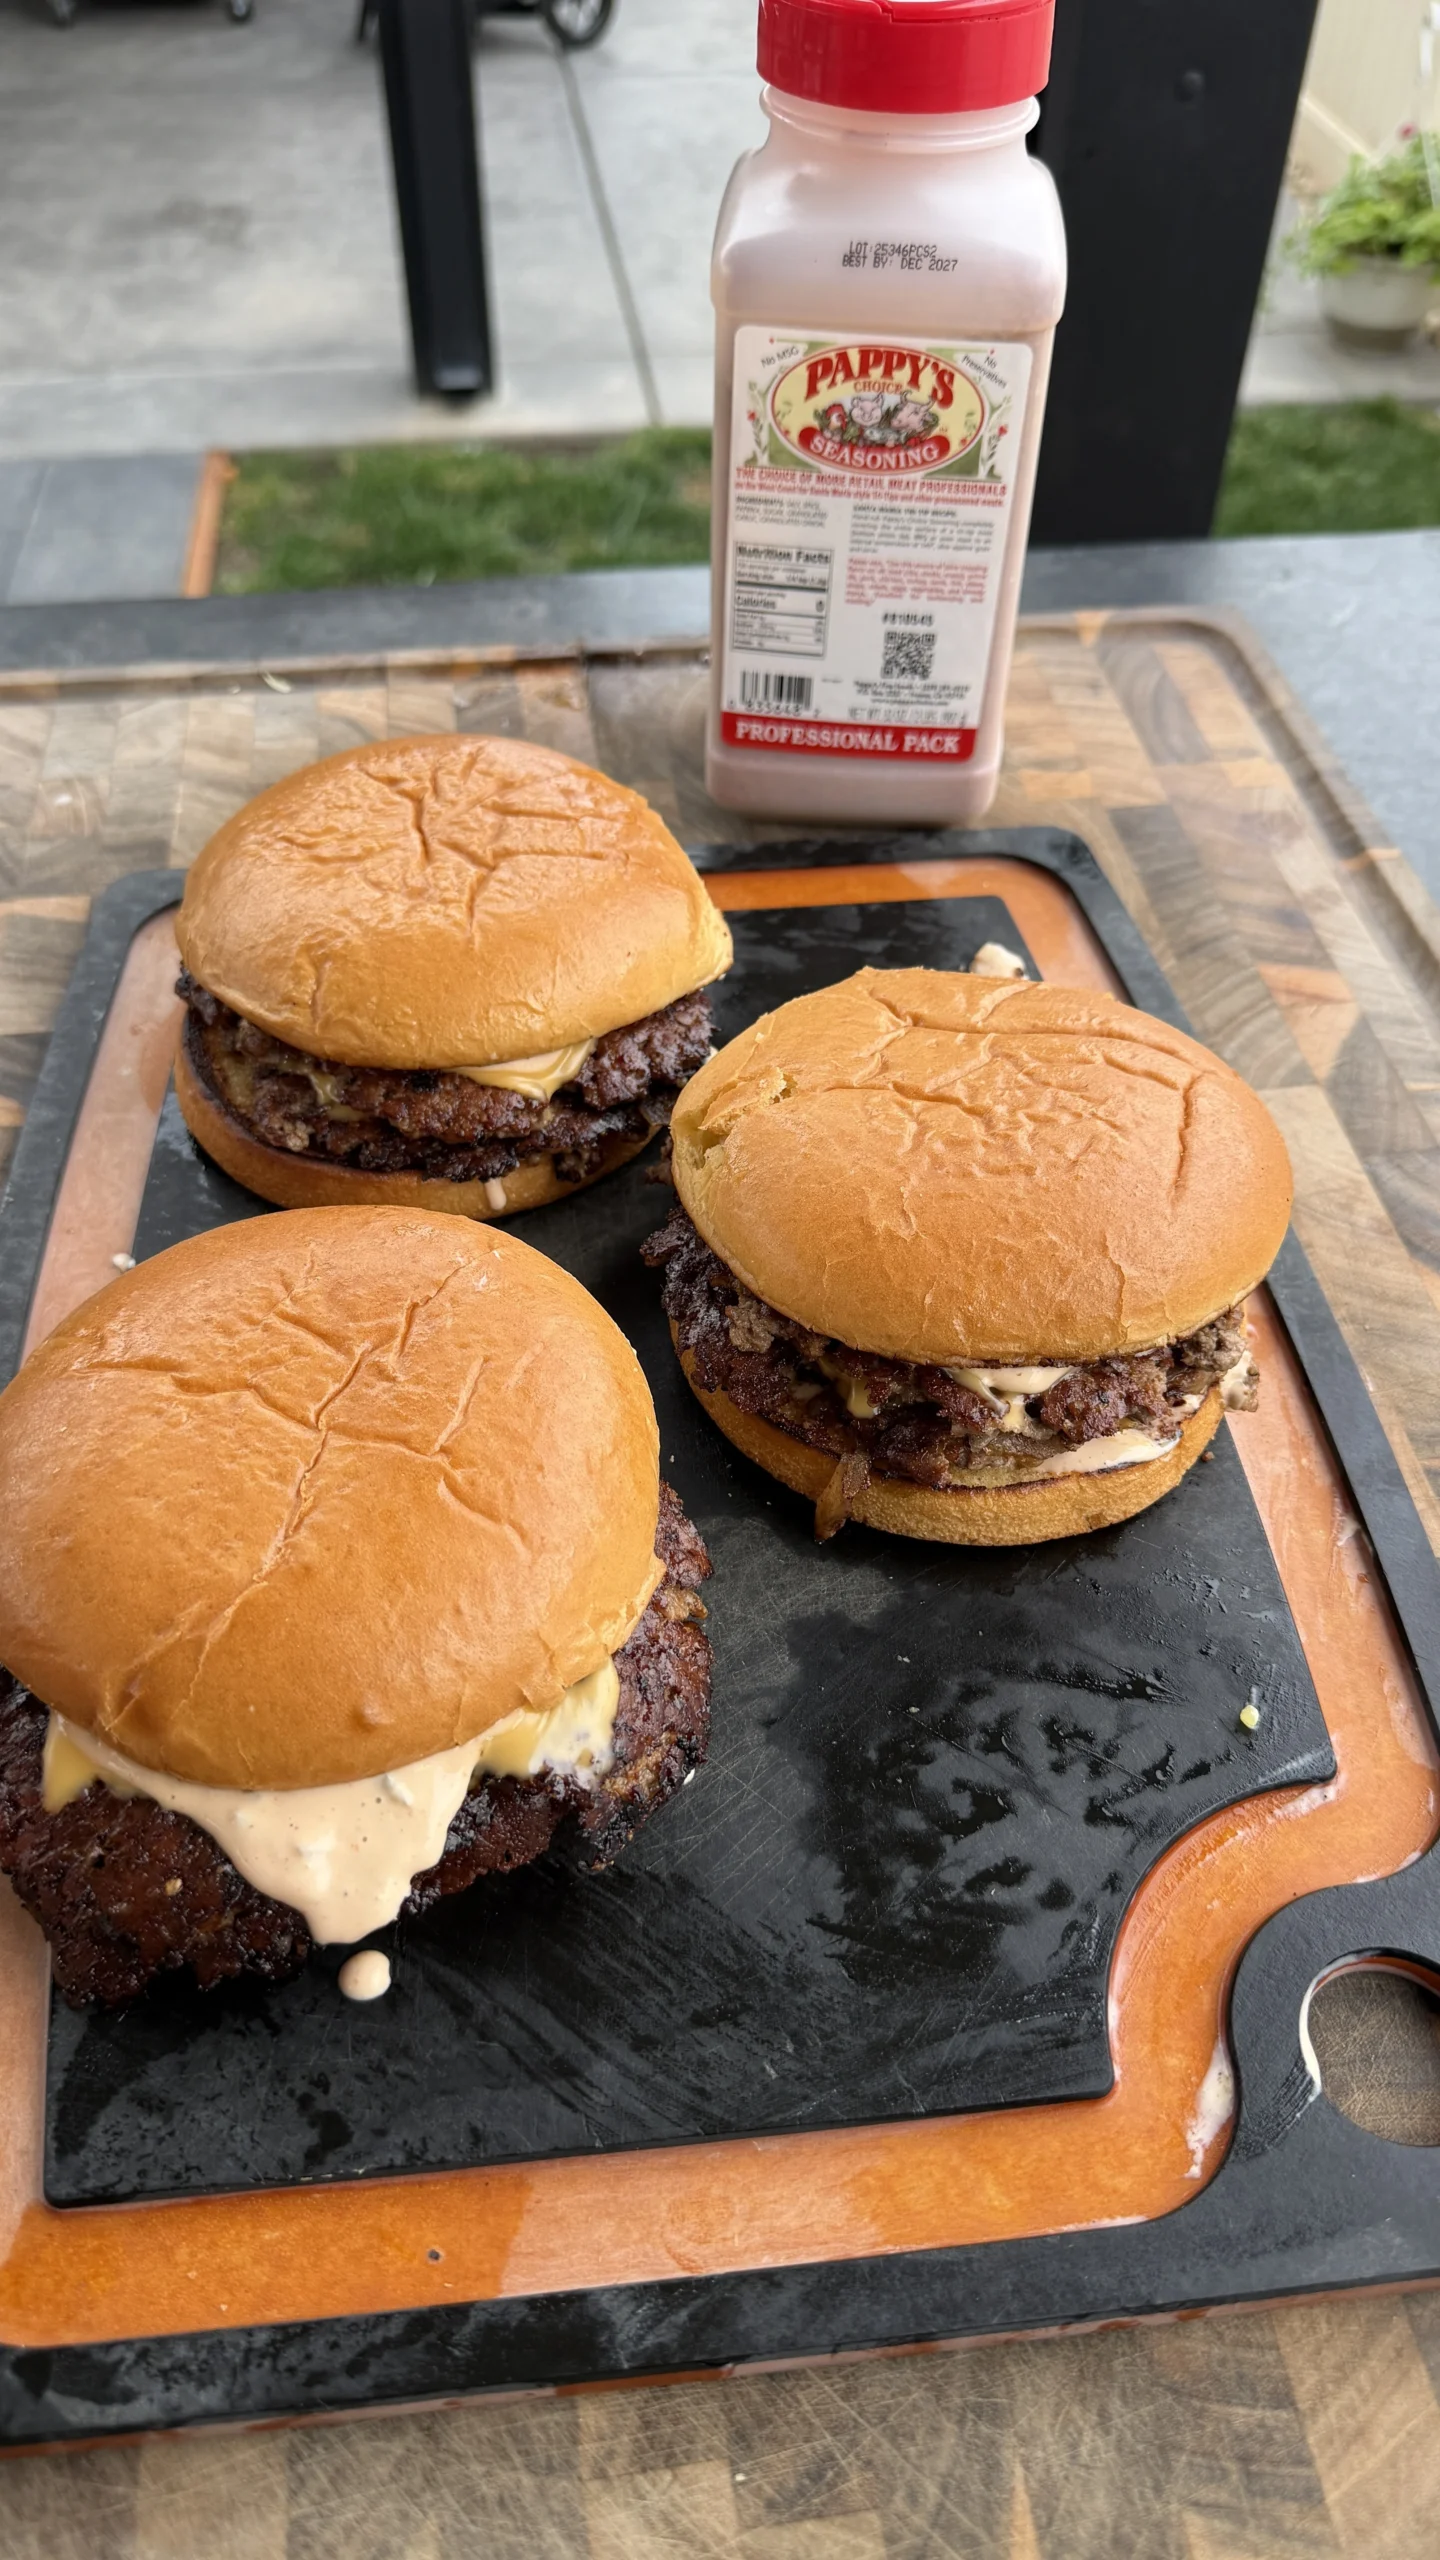
Fried Onion Smash Burgers
Ingredients
Equipment
Method
- Divide ground beef into 3-ounce portions. Gently form into loose balls without overworking. Refrigerate until ready to cook. Shave sweet onion paper-thin on a mandolin.
- In a bowl, whisk together mayonnaise, ketchup, mustard, salt, pepper, garlic powder, pickle juice, and relish until smooth. Refrigerate until serving.
- Preheat cast iron skillet or flat-top griddle over high heat for 5 to 10 minutes until 450 to 500°F. Add ½ teaspoon high smoke point oil and spread across surface.
- Place a meat ball on hot surface and immediately top with 2 to 3 tablespoons shaved onions. Smash firmly with a wide spatula using full body weight for 3 to 5 seconds. Season top generously with salt, pepper, and garlic powder. Cook undisturbed 1½ to 2 minutes until edges are deeply browned.
- Flip burger. Add American cheese slice. Cook 30 to 45 seconds until cheese melts. Remove and keep warm. Repeat with remaining burgers.
- Spread mayonnaise on cut sides of buns. Toast cut-side down on medium heat skillet 1 to 2 minutes until golden brown.
- Assemble: bottom bun, smash burger with cheese, burger sauce, top bun. Serve immediately.
Nutrition
Notes
Tried this recipe?
Let us know how it was!Frequently Asked Questions
Can You Make Smash Burgers Without a Mandolin for the Onions?
You can use a very sharp chef’s knife to slice the onions thin. The key is getting them as close to paper-thin as possible. Thicker slices won’t integrate into the burger properly. They stay chunky and can slide off when you flip.
Practice your knife skills on a cutting board. Hold the onion half firmly. Use a rocking motion with the knife. Try to make each slice uniformly thin. It takes more time and skill than a mandolin. But it’s doable.
Box graters don’t work well for this application. They shred the onion too much. You end up with onion pulp instead of intact slices. The texture is wrong. The onions release too much moisture and make the burger soggy.
If you absolutely can’t slice thin enough, consider caramelizing the onions separately first. Cook them low and slow until golden and sweet. Then place the caramelized onions on top of the burger after cooking. It’s a different technique but still delicious. Just not the same as fried onion smash burgers.
What’s the Difference Between Smash Burgers and Regular Burgers?
Smash burgers are thin patties with maximum surface area for crust development. Regular burgers are thick, staying juicy through a thick profile. Smash burgers rely on the crust and rendered fat for flavor. Regular burgers rely on the meat’s interior juiciness.
Smash burgers cook fast, about 2 to 3 minutes total. Regular burgers take 6 to 10 minutes depending on thickness and desired doneness. Smash burgers are always cooked well-done because they’re so thin. Regular burgers can be cooked to any doneness from rare to well.
The cooking technique differs dramatically. Smash burgers require hard pressing to create thin patties and maximum contact with the cooking surface. Regular burgers should never be pressed. Pressing regular burgers squeezes out juice and makes them dry.
Smash burgers developed as a fast-food style burger. They’re designed for quick cooking and maximum crust. Regular burgers are more traditional steakhouse style. Neither is better. They’re different approaches to burgers with different goals and results.
Can You Use Pre-Formed Burger Patties for Smash Burgers?
Pre-formed patties don’t work for smash burgers. The meat has already been compressed into a specific shape. When you try to smash a pre-formed patty, it resists. The compressed meat doesn’t spread easily. You end up with an irregularly shaped burger with poor surface contact.
Smash burgers need to start as loose meat balls. The meat should be barely holding together. When you smash, the loose structure allows the meat to spread evenly across the cooking surface. This creates the large, thin patty with crispy edges.
Pre-formed patties are designed for grilling or regular pan-frying. They’re meant to hold their shape during cooking. This is the opposite of what you want for smash burgers. Save pre-formed patties for traditional burger cooking methods.
If you have pre-formed patties and want to make smash-style burgers, you could break them apart and re-form them into loose balls. But at that point, you might as well just buy ground beef. It’s less work and produces better results.
How Do You Prevent the Onions from Burning?
The onions fry in the rendered beef fat. This fat provides moisture and prevents direct burning. As long as you use 80/20 ground beef, enough fat renders to protect the onions. Leaner beef doesn’t render enough fat. The onions can burn before the burger finishes cooking.
Shaving the onions paper-thin also helps. Thin onions cook through quickly. They caramelize and crisp in the short 1½ to 2 minute cooking time. Thick onions need longer to cook. They can burn on the outside while staying raw inside.
Temperature control matters. The pan should be extremely hot for good crust development. But if it’s so hot that onions char within 30 seconds, reduce heat slightly. You want vigorous sizzling, not smoking and charring. Around 450 to 475°F is the sweet spot.
If you notice onions burning around the edges while the burger cooks, you can gently scrape the burnt bits away with the spatula. Don’t lift the burger. Just scrape around the edges to remove the worst burnt pieces. Most of the onions will be perfectly caramelized.
What Type of Buns Work Best for Smash Burgers?
Soft potato buns or brioche buns work best. They have slight sweetness that complements the savory beef. The soft texture doesn’t compete with the crispy burger. The buns compress slightly when you bite without falling apart.
Standard white hamburger buns also work fine. They’re neutral and classic. They don’t add much flavor but they don’t detract either. Make sure to toast them. Toasted buns hold up better to the juicy burger and sauce.
Avoid overly crusty artisan buns or hard rolls. The crust creates too much textural contrast. You bite through a hard shell into soft burger. It’s jarring. The crusty bun can also cut the roof of your mouth if particularly hard.
Sesame seed buns are classic for a reason. The seeds add subtle nutty flavor and visual appeal. If using sesame buns, make sure they’re soft, not hard. Many grocery store sesame buns are appropriately soft.
Size matters too. Use standard hamburger-sized buns, not slider buns or oversized buns. The 3-ounce patty, when smashed, creates a burger about 4 to 5 inches in diameter. A standard bun matches this size perfectly. Too small and the burger overhangs. Too large and you taste mostly bread.