
Cajun Butter Butterflied Chicken Drumsticks
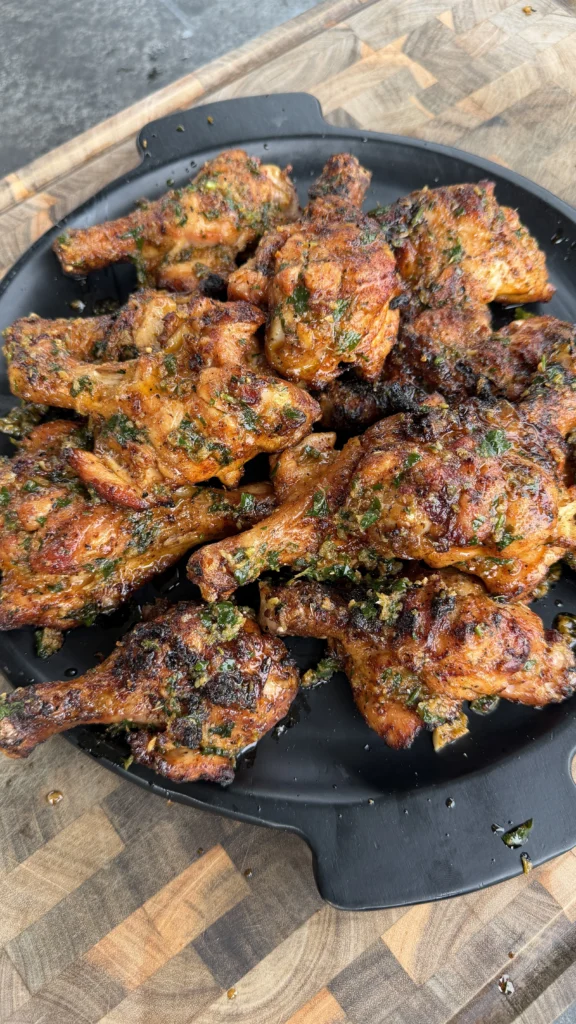
Cajun butter butterflied chicken drumsticks are chicken drumsticks sliced lengthwise along the bone and opened flat, tossed with olive oil, Cajun seasoning, and smoked paprika, then grilled at 375 to 400°F or smoked at 275 to 300°F over applewood or cherrywood for 25 to 35 minutes until they reach 175 to 180°F internal temperature. During the last 10 minutes of cooking, you baste the drumsticks with melted butter mixed with minced garlic, Cajun seasoning, lemon juice, and chopped parsley. The butterflying technique makes the drumsticks cook faster and more evenly. The flattened shape creates more surface area for crispy skin. The Cajun butter adds richness and reinforces the spice flavor.
The entire process takes about 1 hour from start to finish. This includes 15 to 20 minutes to butterfly all the drumsticks and season them. Grilling takes 25 to 35 minutes depending on your grill temperature and drumstick size. Making the Cajun butter takes 5 minutes. You can prepare the drumsticks and make the butter while the grill preheats. Everything times out perfectly for efficient cooking.
These Cajun drumsticks serve 5 to 6 people as a main course with 2 drumsticks per person. You can also serve them as appetizers for larger gatherings. The butterflied shape makes them easier to eat than traditional drumsticks. More surface area is exposed. Diners can bite the meat directly off the bone without rotating the drumstick multiple times.
The smoked paprika in the dry rub is optional but highly recommended. It adds smoky depth even when you’re grilling instead of smoking. Combined with the Cajun seasoning’s heat and the garlic butter’s richness, you get complex, layered flavor. Every bite delivers spice, smoke, garlic, and butter together.
Jump to RecipeWhy Butterflying Drumsticks Creates Better Texture Than Whole Drumsticks
Increased Surface Area for Crisping
Butterflying the drumstick doubles or triples the surface area exposed to direct heat. A whole drumstick is cylindrical. Only one small section contacts the grill grates at a time. You need to rotate it constantly to crisp all sides. Even with rotation, the underside where the bone sits rarely gets truly crispy.
The butterflied drumstick lays flat. Both sides of the meat make direct contact with the grates when you flip once. The skin stretches out instead of bunching around the bone. This stretched skin crisps more thoroughly. You get crackly, rendered skin across the entire surface instead of just spots.
The increased surface area also means more Maillard browning. The proteins and sugars in the chicken skin react with high heat to create deep brown color and complex flavor. More surface contact creates more browning. More browning creates more flavor. The butterflied shape maximizes this beneficial reaction.
Even Cooking From Edge to Center
Whole drumsticks are thick at the meaty end and taper toward the joint. This uneven thickness creates uneven cooking. The thick end can be undercooked while the thin end overcooks. You struggle to get consistent doneness throughout.
Butterflying spreads the meat into a more uniform thickness. When you open the drumstick and flatten it, the thick part spreads out. The overall profile becomes more consistent. Heat penetrates evenly from both sides. The meat cooks through at the same rate.
This even cooking is especially important for chicken. You need to reach safe internal temperature throughout. With whole drumsticks, you might have cold spots near the bone even when the exterior looks done. Butterflied drumsticks eliminate these cold spots through even heat distribution.
Faster Cooking Time
The thinner profile of butterflied drumsticks reduces cooking time by 30 to 40%. Whole drumsticks can take 40 to 50 minutes on the grill. Butterflied drumsticks finish in 25 to 35 minutes. This faster cooking means less moisture loss. The chicken stays juicier.
Faster cooking also means less fuel consumption. Whether you’re using charcoal, propane, or wood, shorter cooking time saves resources. For wood-fired cooking, you don’t need to add wood as many times. The smoke flavor penetrates adequately in the shorter window.
The reduced cooking time also makes these drumsticks more practical for weeknight dinners. You can have them on the table in under an hour total. Whole drumsticks require more planning and time commitment.
Better Seasoning Penetration
When the drumstick lays flat, both interior surfaces are exposed. You can season the inside of the meat directly. Whole drumsticks only have exterior surface available for seasoning. The meat closest to the bone tastes relatively plain.
The Cajun seasoning can coat every part of butterflied drumsticks. The spices contact the meat itself, not just the skin. When you bite into the chicken, you taste seasoning throughout. Not just a spicy skin with bland interior.
The Cajun butter also penetrates better. When you baste the opened drumstick, the butter flows over all surfaces. It seeps into the meat slightly instead of just coating the outside. This creates more integrated flavor rather than just surface seasoning.
What Makes Cajun Seasoning Different from Other Spice Blends
Paprika Base with Heat Layers
Cajun seasoning starts with paprika as the primary ingredient. Paprika provides base flavor and red color. The paprika can be sweet, hot, or smoked depending on the blend. Most Cajun seasonings use a combination to get complexity.
The heat comes from cayenne pepper, black pepper, and white pepper. Using three different peppers creates layered heat. Cayenne provides immediate tongue heat. Black pepper gives sharp, piney spice. White pepper adds fermented, earthy heat. Together they create complex warmth instead of one-dimensional burn.
This differs from Mexican spice blends which rely heavily on cumin and chili powder. Or BBQ rubs which emphasize brown sugar and black pepper. Or Italian seasoning which focuses on herbs. Cajun seasoning’s paprika-cayenne foundation is distinctive.
Aromatic Vegetable Powder Trinity
Traditional Cajun cooking uses the “holy trinity” of vegetables: onions, bell peppers, and celery. Cajun seasoning captures this in powder form. Onion powder, garlic powder, and celery seed appear in most blends. Some include bell pepper powder or dried bell pepper flakes.
These aromatics create savory depth. They’re not just heat. The onion and garlic add umami richness. The celery provides subtle bitterness that balances the heat. Together they taste like sautéed vegetables even in dry form.
Other regional seasonings don’t include this specific combination. Italian seasoning has garlic but not onion powder in most versions. Mexican blends might have onion and garlic but not celery. The trinity is uniquely Cajun and Creole.
Herb Profile: Oregano and Thyme
Cajun blends include dried oregano and thyme. These Mediterranean herbs seem out of place in Louisiana cooking. But they’re there because of French influence in Creole cuisine. The French brought these herbs. They integrated into local cooking.
The oregano provides slight bitterness and peppery notes. The thyme adds earthy, slightly minty flavor. Together they create herbal complexity that balances the heat and aromatics. You taste green notes among the red pepper heat.
This herb component sets Cajun seasoning apart from pure heat blends like chili powder or cayenne. It also distinguishes it from herb-heavy blends like herbes de Provence. Cajun seasoning balances heat, aromatics, and herbs in specific proportions.
Salt and Spice Ratio
Quality Cajun seasonings contain significant salt. The salt amplifies all other flavors. It makes the heat taste hotter. It makes the aromatics more pronounced. But it also means you need to account for salt when using the blend.
Some people prefer salt-free Cajun blends so they can control salt separately. Others like the convenience of all-in-one seasoning. For this recipe, if your Cajun seasoning contains salt, you might not need additional salt. Taste the butter before adding salt to it.
The spice-to-salt ratio varies by brand. Some are aggressively salty. Others are primarily spice with minimal salt. Read labels or taste your specific blend. Adjust other salt accordingly. Too much salt ruins chicken by drawing out moisture and making it taste one-dimensional.
Should You Grill or Smoke Cajun Chicken Drumsticks
Direct Heat Grilling for Maximum Char
Grilling at 375 to 400°F creates aggressive char on the chicken skin. The high heat caramelizes the sugars and proteins rapidly. You get dark grill marks. The skin crisps thoroughly in the relatively short cooking time.
Direct heat also renders fat from the skin efficiently. The fat drips onto the grates or coals. This can cause flare-ups. But when managed properly, minor flare-ups add smoke flavor. The brief flames lick the chicken and deposit smoky compounds.
Grilling takes less total time than smoking. The higher heat cooks the drumsticks through in 25 to 30 minutes typically. This makes grilling more practical for quick weeknight meals. You can have dinner ready in under an hour including prep.
The Cajun butter glazes and caramelizes beautifully over direct heat. The sugars in the butter brown. The garlic pieces char slightly. This creates intense flavor concentration. The drumsticks taste bold and aggressive rather than subtle and mellow.
Low and Slow Smoking for Tender Texture
Smoking at 275 to 300°F cooks the drumsticks more gently. The lower temperature allows smoke to penetrate deeply into the meat. Applewood or cherrywood provide mild, sweet smoke that complements Cajun spices without overwhelming them.
The extended cooking time at lower temperature breaks down connective tissue more thoroughly. The drumsticks become extremely tender. The meat pulls from the bone with minimal effort. This textural tenderness is a hallmark of good smoked chicken.
Smoking also allows the fat to render very completely. At lower temperatures, the fat has time to melt away slowly. The skin might not be as aggressively crispy as grilled chicken. But it becomes richly flavored from the rendered fat and absorbed smoke.
The Cajun butter applied during smoking soaks in more than it caramelizes. The butter penetrates the meat. The chicken tastes buttery throughout instead of just on the surface. This creates richness that balances the heat from the seasoning.
Hybrid Approach: Smoke Then Sear
You can combine methods for best of both worlds. Start the drumsticks on the smoker at 275°F for 20 minutes. This establishes smoke flavor and begins cooking. Then transfer to a hot grill at 400°F for 5 to 10 minutes per side.
The initial smoke phase provides flavor without overcooking. The finish on the grill creates crispy skin and caramelized glaze. You get tenderness from slow cooking plus char from high heat. This two-step approach takes more effort but produces exceptional results.
Apply the Cajun butter during the smoking phase for penetration. Then apply more during the grilling phase for caramelization. The double application creates layers of butter flavor. You taste it in the meat and on the surface.
Flavor Profile Differences
Grilled drumsticks taste charred, crispy, and bold. The high heat creates aggressive Maillard flavors. The Cajun spices taste sharp and pronounced. The char adds slight bitterness that balances the heat.
Smoked drumsticks taste mellow, tender, and sweet. The smoke rounds out the Cajun heat. The longer cooking develops deeper, more complex flavors. The meat tastes richer from the extended fat rendering.
Neither is objectively better. They’re different flavor profiles. Grilling emphasizes boldness and char. Smoking emphasizes tenderness and smoke. Choose based on your preference and available time. Both methods work excellently with Cajun seasonings and butter.
How to Butterfly Chicken Drumsticks Without Cutting Through the Bone
Finding the Right Cutting Line
The drumstick bone runs through the center of the meat. You’re cutting alongside the bone, not through it. Start at the thick end of the drumstick where the meat is most substantial. Look for the natural seam where two muscles meet. This seam often runs along one side of the bone.
Place the drumstick on a cutting board with the thickest part facing up. The bone should be roughly in the center when viewed from above. Your cut will run parallel to the bone from top to bottom of the drumstick.
Feel the bone with your fingers through the meat. This helps you visualize where it runs. You want to cut right next to the bone, not into it. The bone is quite hard. If your knife hits solid resistance, you’ve hit bone. Adjust your angle slightly.
Using Proper Knife Technique
A sharp boning knife or chef’s knife works best. The blade should be thin and flexible enough to follow the bone’s contour. Dull knives slip and tear the meat. Sharp knives cut cleanly with minimal pressure.
Start the cut at the thick end. Insert the knife tip right next to the bone. Keep the blade angled slightly toward the bone. Cut down the length of the drumstick in one smooth motion. Don’t saw back and forth. Sawing tears the meat.
As you cut, use your non-knife hand to pull the meat away from the bone gently. This creates tension. The tension makes it easier to see where you’re cutting. You can follow the bone more accurately. The meat separates cleanly instead of tearing.
When you reach the thin end near the joint, you’ll feel the knife move more freely. The meat is thinner here. Be careful not to cut through completely and separate the meat from the bone. You want the meat still attached at the ends. It should open like a book, not fall apart.
Opening the Drumstick Properly
After cutting along the bone, the drumstick should still be intact at both ends. Grasp the meat on each side of the cut. Gently pull it open. The meat spreads away from the bone. The bone becomes visible running through the center.
The meat might not lay completely flat immediately. There’s still connective tissue holding it to the bone. You can make a few small cuts to release tight spots. But don’t cut aggressively. You want the meat to stay connected to the bone.
Press down gently with your palm to flatten the drumstick further. The meat will resist slightly but should flatten to about ¾ to 1 inch thickness. This is the ideal butterflied thickness. Thinner and the meat can tear. Thicker and it won’t cook evenly.
Trimming Excess Fat and Skin
After butterflying, you’ll notice excess skin and fat around the edges. Trim these pieces with kitchen shears or a knife. Excess skin can burn during cooking. It also doesn’t crisp well because it’s not in contact with the grates.
Pay attention to the thick end where you started cutting. There’s often a significant fat deposit here. Remove most of it. Leave a thin layer for flavor and moisture. But thick fat chunks won’t render properly in the cooking time.
The thin end near the joint has tendons and small pieces of cartilage. You can remove these if they bother you. Or leave them. They’re edible and don’t significantly affect the final dish. It’s mostly a preference call.
Cajun Butter Drumsticks
Butterflied, Cajun-spiced, garlic butter basted
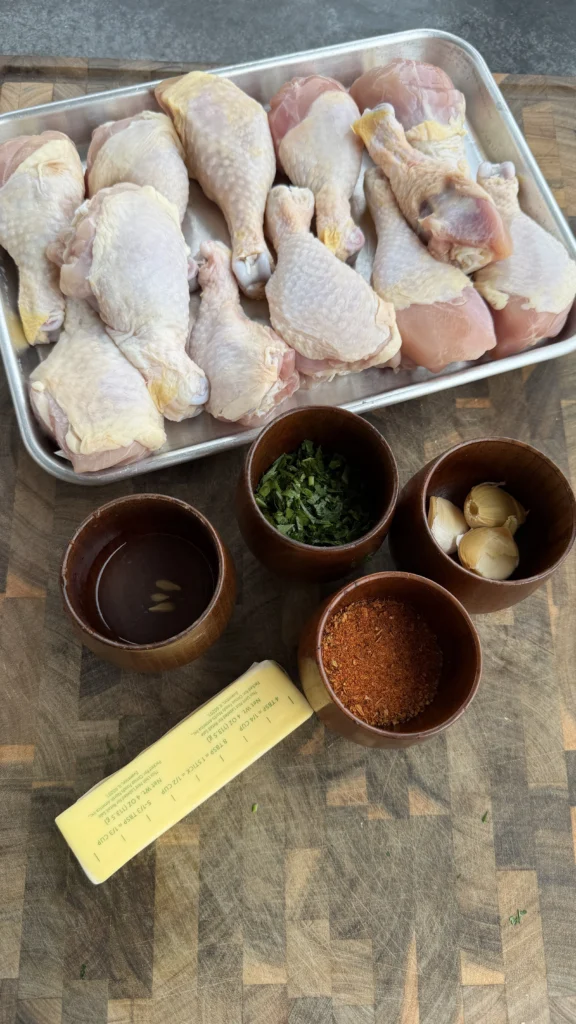
Ingredients
Chicken
- 10-12 chicken drumsticks
- 2 tablespoons olive oil
- 2-3 tablespoons Cajun seasoning (store-bought or homemade)
- 1 teaspoon smoked paprika (optional)
Cajun Butter
- 1 stick (½ cup) unsalted butter, melted
- 3 cloves garlic, minced
- 1 tablespoon Cajun seasoning
- 1 teaspoon lemon juice
- 1 tablespoon chopped fresh parsley
Butterfly the drumsticks by cutting lengthwise along the bone and opening the meat flat. This doubles the surface area for crisping and cuts cooking time by 30%. The meat cooks evenly and you get crispy skin on both sides instead of just one.
Step-by-Step Instructions
Step 1: Butterfly the Chicken Drumsticks
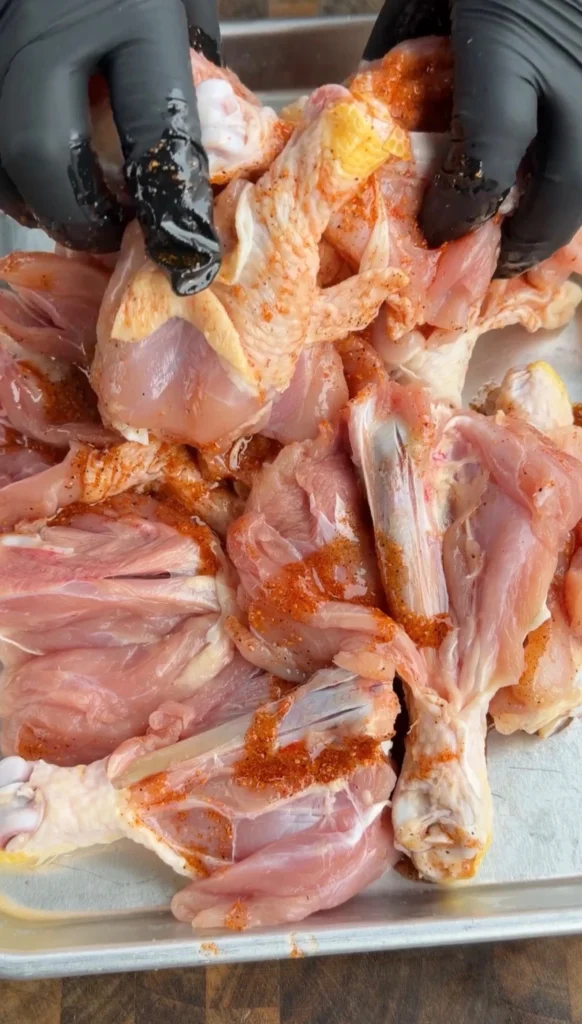
Place a drumstick on a cutting board with the thickest part facing up. Using a sharp knife, locate the bone running through the center. Starting at the thick end, cut lengthwise along one side of the bone. Keep the knife blade angled slightly toward the bone to avoid cutting through it.
Cut all the way down the length of the drumstick in one smooth motion. The meat should still be attached at both ends. Grasp the meat on each side of the cut and pull it open gently. The meat will spread away from the bone like opening a book.
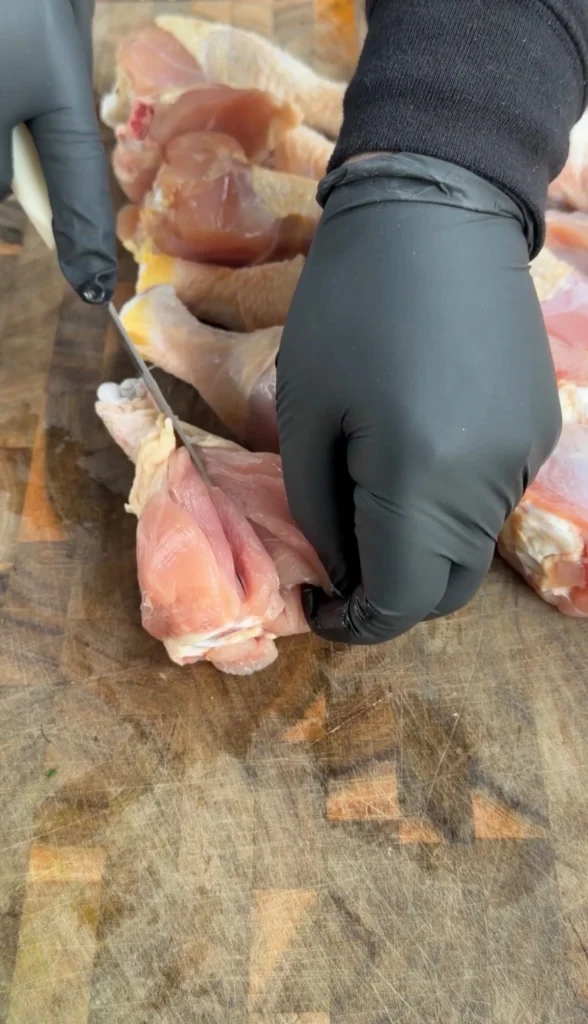
Press down with your palm to flatten the drumstick to about ¾ to 1 inch thickness. The bone should be visible running through the center with meat on both sides. Trim any excess fat or loose skin with kitchen shears.
Repeat with all remaining drumsticks. This is the most time-consuming step. Work carefully but don’t worry about perfection. Even roughly butterflied drumsticks cook better than whole ones.
Step 2: Season the Drumsticks
In a large bowl, toss the butterflied drumsticks with 2 tablespoons of olive oil. Make sure each drumstick is lightly coated. The oil helps the seasoning stick and promotes browning.
Add 2 to 3 tablespoons of Cajun seasoning and 1 teaspoon of smoked paprika if using. Toss again to coat every surface. Get the seasoning into all the crevices created by butterflying. Both sides of the meat should be well-seasoned.
Let the drumsticks sit at room temperature for 15 to 20 minutes while you preheat the grill. This allows the seasoning to adhere better. The meat also cooks more evenly when not ice-cold from the refrigerator.
Step 3: Make the Cajun Butter
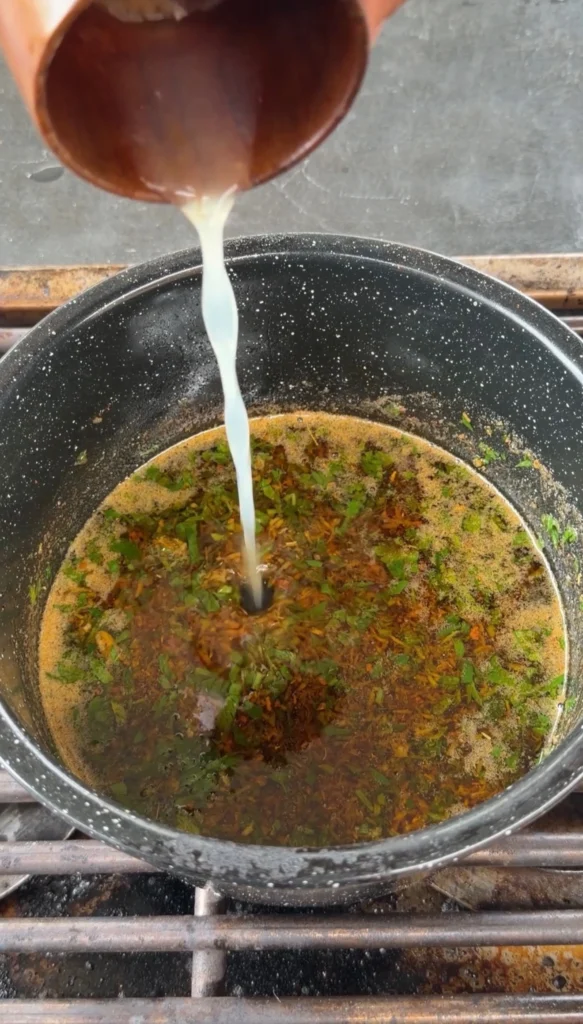
In a small saucepan over low heat, melt 1 stick of unsalted butter. Once melted, add 3 cloves of minced garlic. Cook gently for 1 to 2 minutes until the garlic is fragrant but not browned.
Remove from heat. Stir in 1 tablespoon of Cajun seasoning, 1 teaspoon of lemon juice, and 1 tablespoon of chopped fresh parsley. Mix well until the seasoning is evenly distributed throughout the butter.
Keep the butter warm but not hot. If it cools and solidifies, reheat it gently before basting. You want it liquid for easy brushing but not so hot that it burns the chicken.
Reserve about half the Cajun butter for finishing after the chicken comes off the grill. Use the other half for basting during cooking. Never use butter that has touched raw chicken for the finishing step.
Step 4: Preheat the Grill or Smoker
For grilling, preheat to medium-high heat, about 375 to 400°F. Set up for direct cooking. Clean and oil the grates to prevent sticking.
For smoking, preheat to 275 to 300°F. Add applewood or cherrywood chunks or chips. These mild fruit woods complement Cajun flavors without overwhelming them. Hickory or mesquite would be too strong.
The grill or smoker should be fully preheated before adding chicken. This ensures consistent cooking temperature throughout. Cold spots cause uneven doneness.
Step 5: Grill or Smoke the Drumsticks
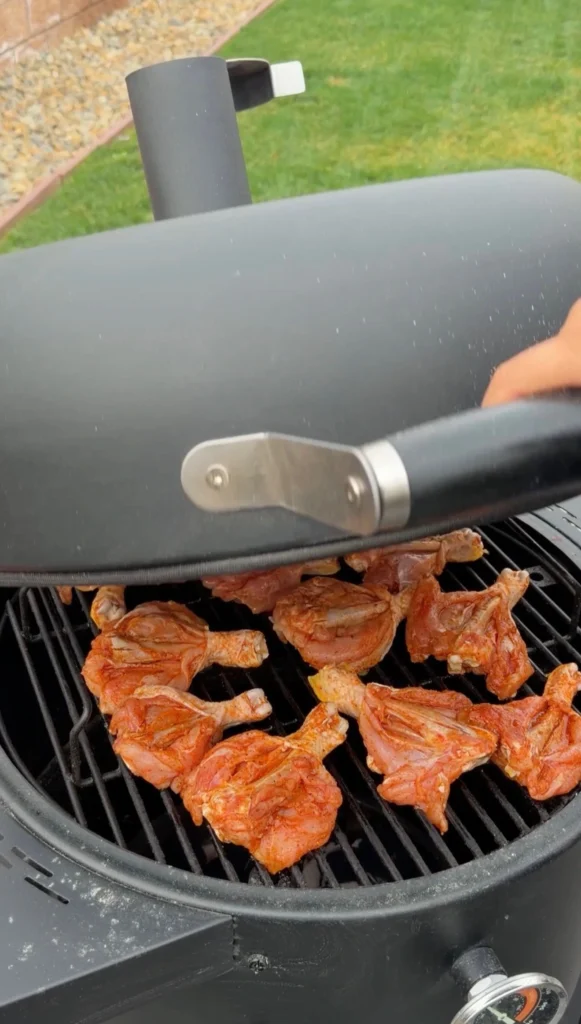
Place the butterflied drumsticks on the grill or smoker skin-side down first. The skin side should face the direct heat source. This renders fat and crisps the skin.
For grilling at 375 to 400°F, cook for 12 to 15 minutes skin-side down. Don’t move them during this time. Let them develop crust and grill marks.
For smoking at 275 to 300°F, cook for 15 to 20 minutes skin-side down. The lower heat means longer cooking time. The smoke penetrates during this phase.
Flip the drumsticks using tongs. Cook for another 10 to 15 minutes on the second side. The total cooking time should be 25 to 35 minutes depending on your temperature and drumstick size.
Step 6: Baste with Cajun Butter
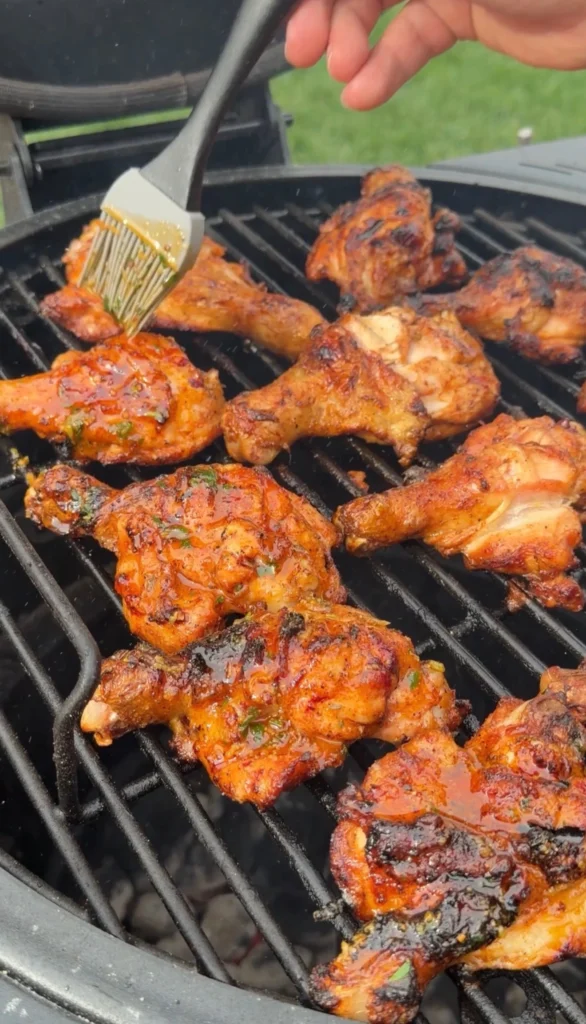
During the last 10 minutes of cooking, start basting the drumsticks with the Cajun butter. Use a silicone brush or basting mop. Apply butter generously to both sides.
Flip the drumsticks one more time after applying butter. This allows the butter to caramelize slightly on the hot grates. The garlic pieces will toast and the butter will create a glossy glaze.
Continue basting every 2 to 3 minutes during the final cooking phase. You should use about half the prepared Cajun butter for this step. The other half stays clean for finishing.
Check internal temperature with an instant-read thermometer. Insert it into the thickest part of the meat without touching bone. Pull the drumsticks when they reach 175 to 180°F. At this temperature, the meat is fully cooked and the collagen has broken down for tender texture.
Step 7: Rest and Finish
Remove the drumsticks from the grill or smoker. Place them on a serving platter. Immediately brush with the reserved clean Cajun butter. This adds an extra layer of flavor and creates a beautiful glossy finish.
Let the drumsticks rest for 5 minutes before serving. This allows the juices to redistribute. The internal temperature will climb another 3 to 5 degrees during the rest.
Optionally, squeeze fresh lemon juice over the drumsticks. The acid brightens the rich Cajun butter flavors. Garnish with additional chopped parsley for color and freshness.
Serve hot. The drumsticks are best eaten immediately while the skin is crispy and the butter is still glossy.
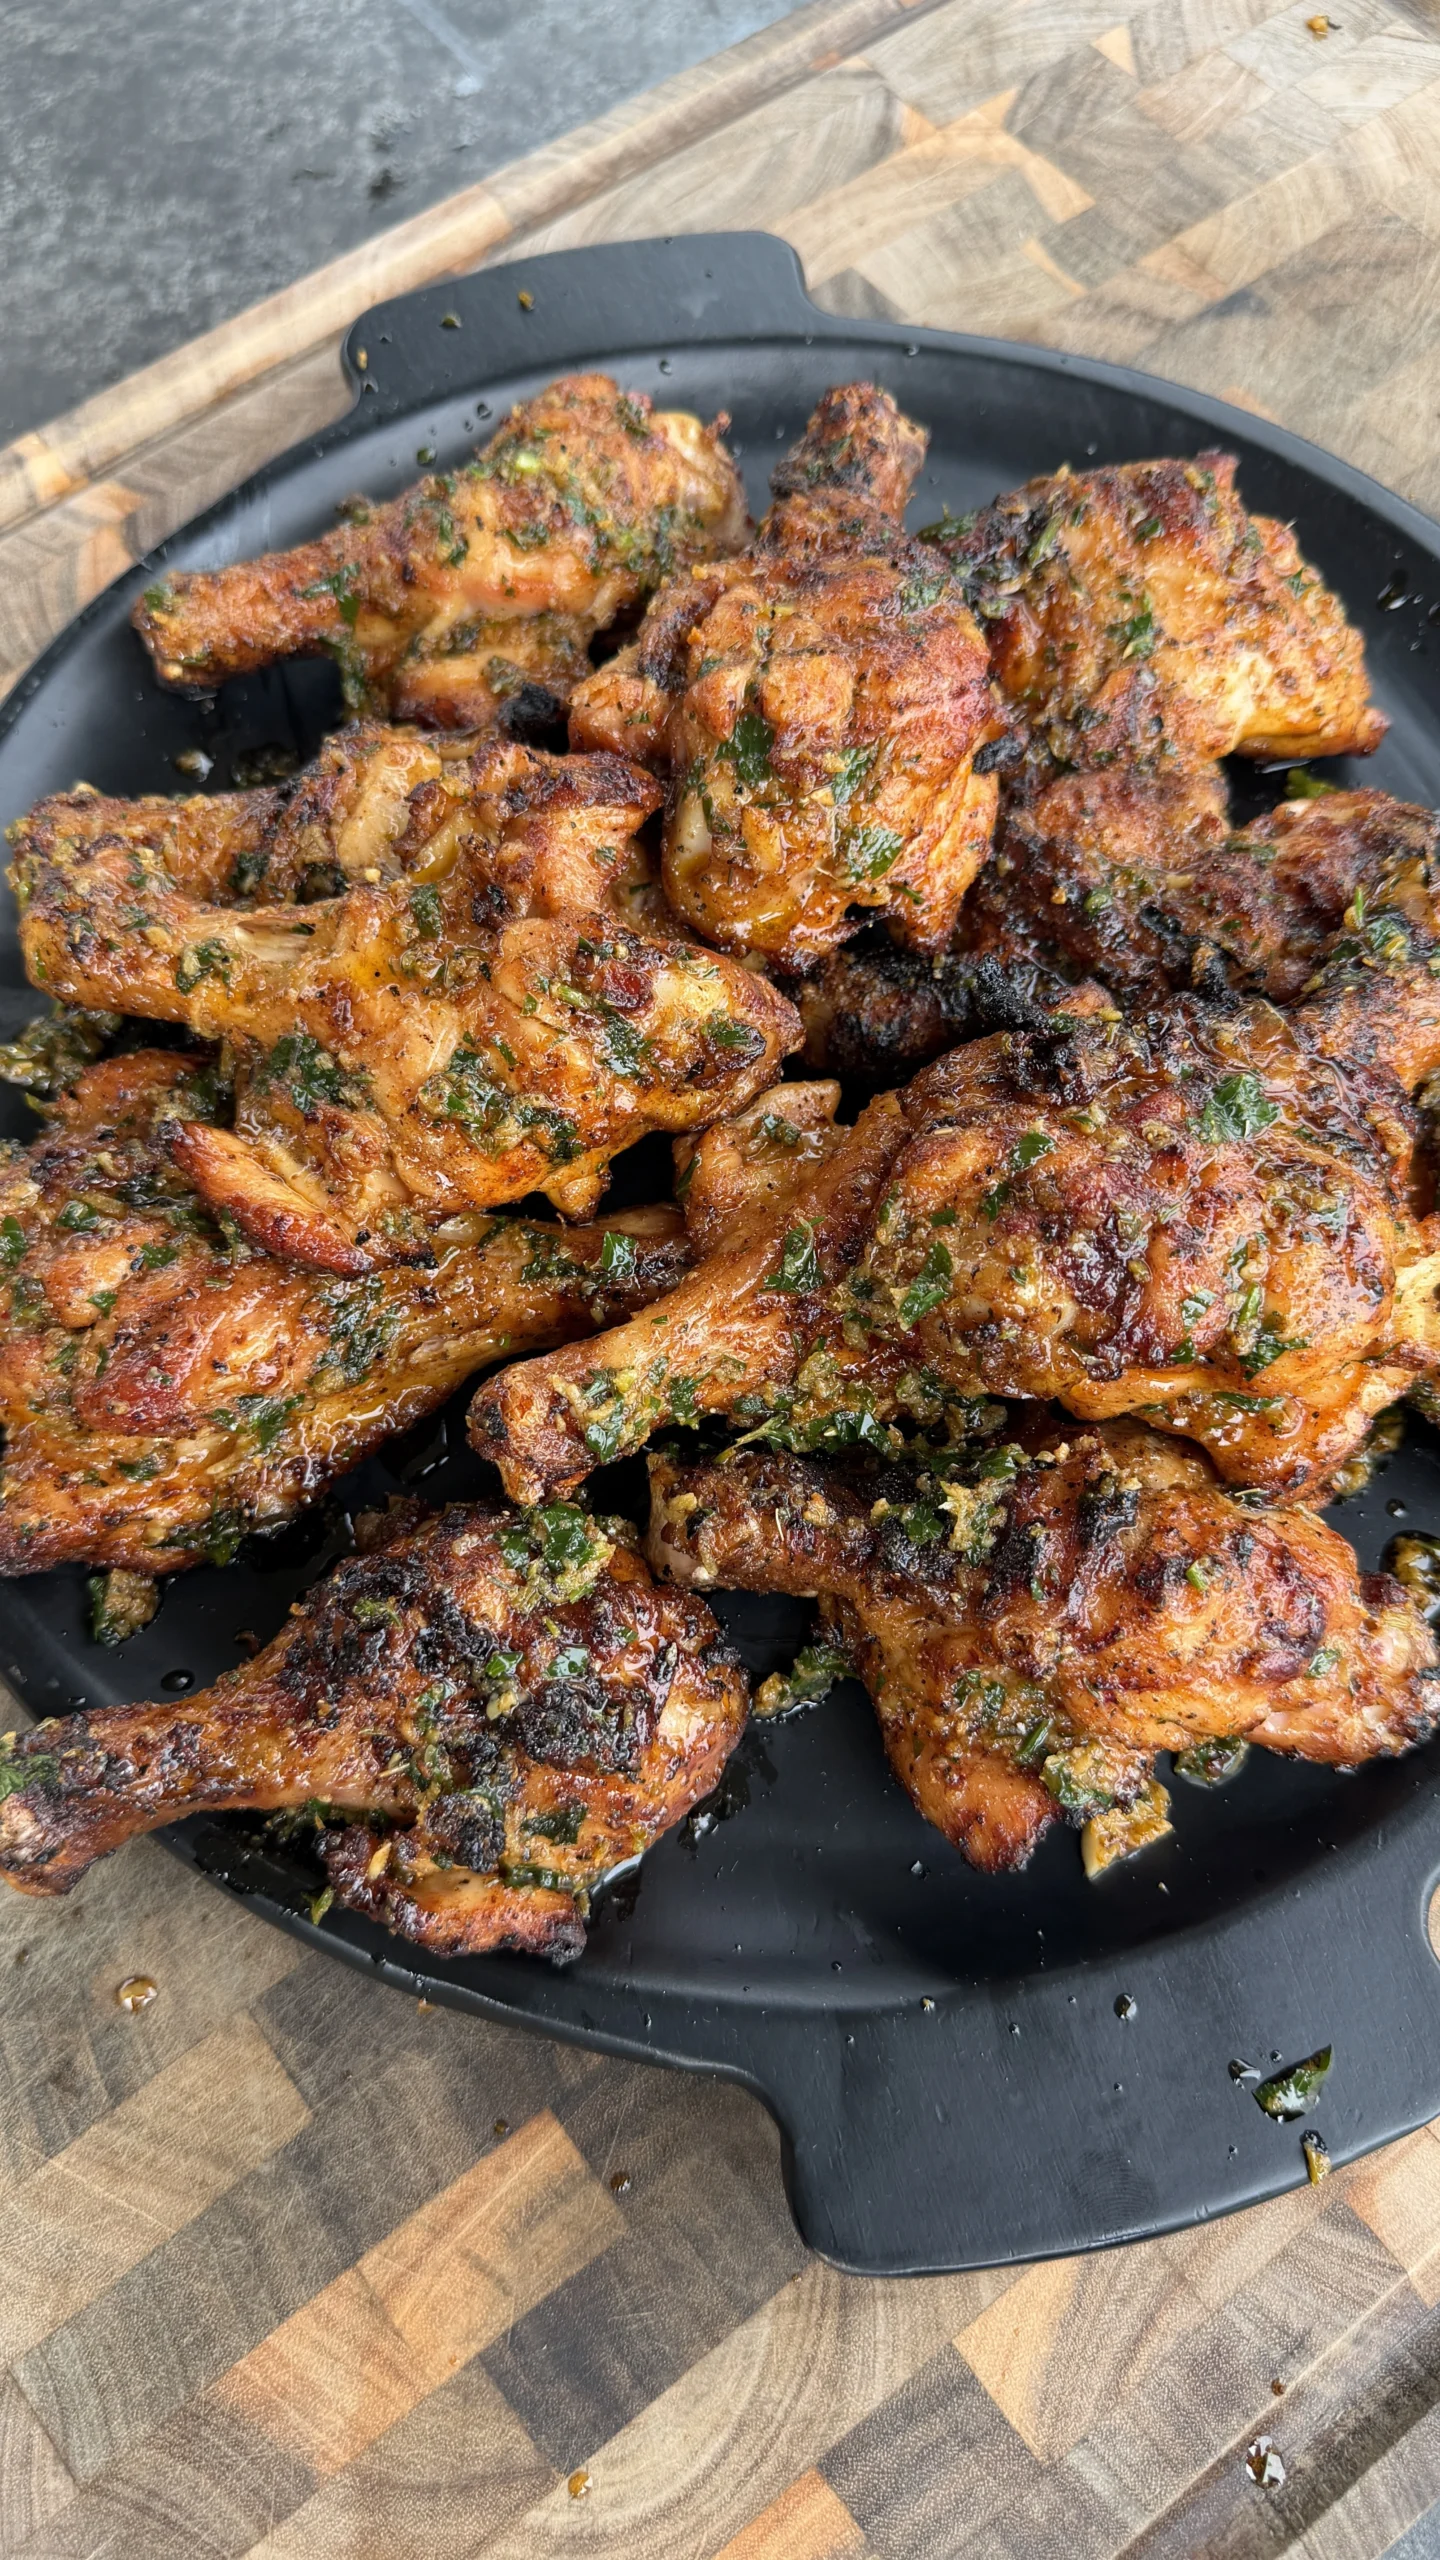
Cajun Butter Butterflied Chicken Drumsticks
Ingredients
Equipment
Method
- Butterfly each drumstick by cutting lengthwise along the bone and opening the meat flat. Press to flatten to about ¾ to 1 inch thickness. Trim excess fat and skin.
- Toss butterflied drumsticks with olive oil, Cajun seasoning, and smoked paprika until all surfaces are coated. Let sit at room temperature 15 to 20 minutes.
- Melt butter in a small saucepan over low heat. Add minced garlic and cook 1 to 2 minutes until fragrant. Remove from heat. Stir in Cajun seasoning, lemon juice, and parsley. Reserve half for finishing.
- Preheat grill to 375 to 400°F for direct cooking, or preheat smoker to 275 to 300°F with applewood or cherrywood.
- Place drumsticks skin-side down on grill or smoker. Grill for 12 to 15 minutes then flip and cook 10 to 15 minutes more. For smoking, cook 15 to 20 minutes per side. Total time: 25 to 35 minutes.
- During the last 10 minutes, baste drumsticks with Cajun butter every 2 to 3 minutes. Cook until internal temperature reaches 175 to 180°F.
- Remove from heat and brush with reserved clean Cajun butter. Let rest 5 minutes. Optionally squeeze lemon juice over top and garnish with parsley. Serve hot.
Nutrition
Notes
Tried this recipe?
Let us know how it was!Frequently Asked Questions
Can You Use Chicken Thighs Instead of Drumsticks?
Chicken thighs work excellently with this recipe. They’re also dark meat with similar fat content and collagen. The butterflying technique works the same way. Cut along the bone and open the thigh flat.
Boneless, skinless thighs don’t need butterflying. They’re already relatively flat. Just season and grill or smoke them as-is. The cooking time will be slightly shorter than bone-in drumsticks. Pull them at 175°F.
Bone-in, skin-on thighs are the closest substitute for drumsticks. They have the same rich, dark meat flavor. The skin crisps beautifully. The only difference is shape. Thighs are rounder. Drumsticks are more elongated.
If using thighs, you might need to adjust quantities. Thighs are larger than drumsticks. Plan for 8 to 10 thighs to serve the same number of people as 10 to 12 drumsticks.
How Spicy Are These Drumsticks?
The spice level depends entirely on your Cajun seasoning blend. Commercial Cajun seasonings range from mild to very hot. Tony Chachere’s Original is medium heat. Slap Ya Mama is hotter. Zatara in’s is milder.
If you’re sensitive to heat, start with 2 tablespoons of Cajun seasoning instead of 3. You can always add more heat with extra cayenne at serving. But you can’t remove heat once it’s applied.
The Cajun butter tempers the heat slightly. The butter fat coats your tongue and reduces the perception of spiciness. The lemon juice also brightens and balances without adding heat.
For kids or heat-averse eaters, you can make half the batch with regular paprika and garlic powder instead of Cajun seasoning. Everyone gets drumsticks appropriate for their spice tolerance.
Can You Make These in the Oven?
You can bake these drumsticks in the oven. Preheat to 425°F. Place the butterflied, seasoned drumsticks on a wire rack set over a baking sheet. The rack allows air circulation for even cooking and crisping.
Bake for 30 to 35 minutes, flipping once halfway through. Start basting with Cajun butter during the last 10 minutes. Check internal temperature. Pull at 175 to 180°F.
The texture will be different from grilled or smoked versions. Oven-baked drumsticks won’t have char or smoke flavor. But they’ll still be flavorful from the Cajun seasoning and butter.
For crispier skin, finish the drumsticks under the broiler for 2 to 3 minutes. Watch carefully. The butter can burn quickly under direct broiler heat. This adds some char similar to grilling.
Do You Have to Butterfly the Drumsticks?
Butterflying is highly recommended but not absolutely required. You can make this recipe with whole drumsticks. The cooking time will increase to 40 to 50 minutes instead of 25 to 35 minutes.
Whole drumsticks won’t get as crispy on all sides. You’ll need to rotate them multiple times during cooking. The skin will crisp on the side touching the grates. The underside stays softer.
The seasoning won’t penetrate as deeply with whole drumsticks. You’re only seasoning the exterior. The meat near the bone tastes blander. Butterflied drumsticks allow seasoning contact with more surface area.
If you’re short on time or uncomfortable with the butterflying technique, whole drumsticks are acceptable. The flavor will still be good from the Cajun butter basting. Just understand the texture and seasoning penetration won’t be optimal.
How Do You Store and Reheat Leftover Drumsticks?
Store leftover drumsticks in an airtight container in the refrigerator for up to 4 days. The skin will soften during storage. You can’t maintain crispy skin through refrigeration.
For reheating, the oven works better than the microwave. Preheat to 350°F. Place drumsticks on a baking sheet. Heat for 12 to 15 minutes until warmed through. The skin will crisp up slightly but not as much as when fresh.
You can also reheat on the grill over medium heat. Place drumsticks over indirect heat. Close the lid and heat for 10 to 12 minutes. Brush with additional butter during reheating if you have any left.
Microwave reheating makes the skin rubbery. Use it only if you have no other option. Heat on 50% power in 30-second intervals. This reduces rubberiness somewhat but doesn’t eliminate it.
For best results, only make what you’ll eat immediately. The drumsticks are at their peak right off the grill with crispy skin and hot Cajun butter glaze.
Ready to Level Up?
Take your backyard cooking from good to legendary.
This is where I keep all my most-used smokers, knives, and favorite cooking tools.
Shop My Gear CollectionExplore More Recipes
Find more diverse flavors at CWFeats.com