
Smoked Jalapeño Cheddar Cheeseburger Sliders
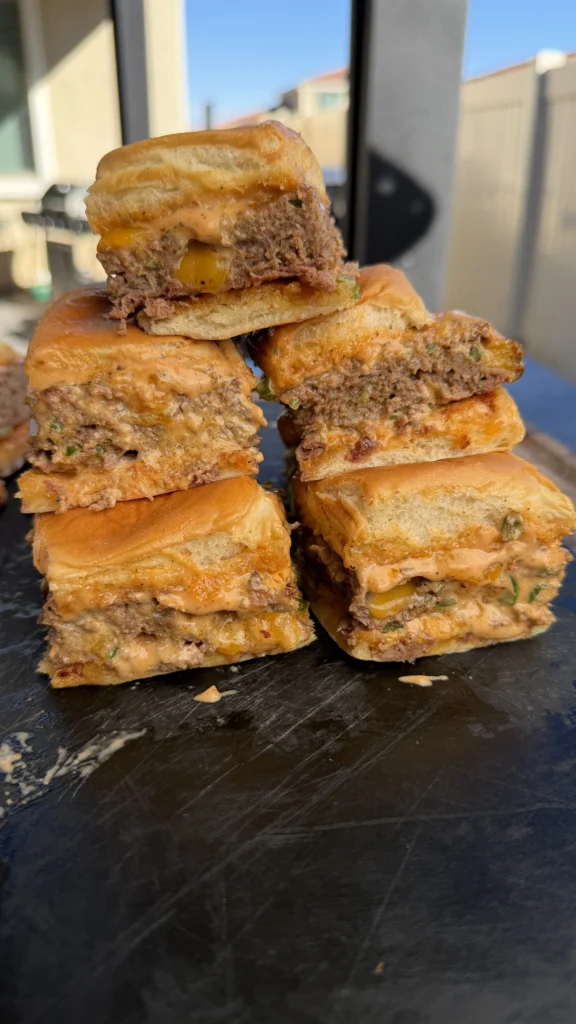
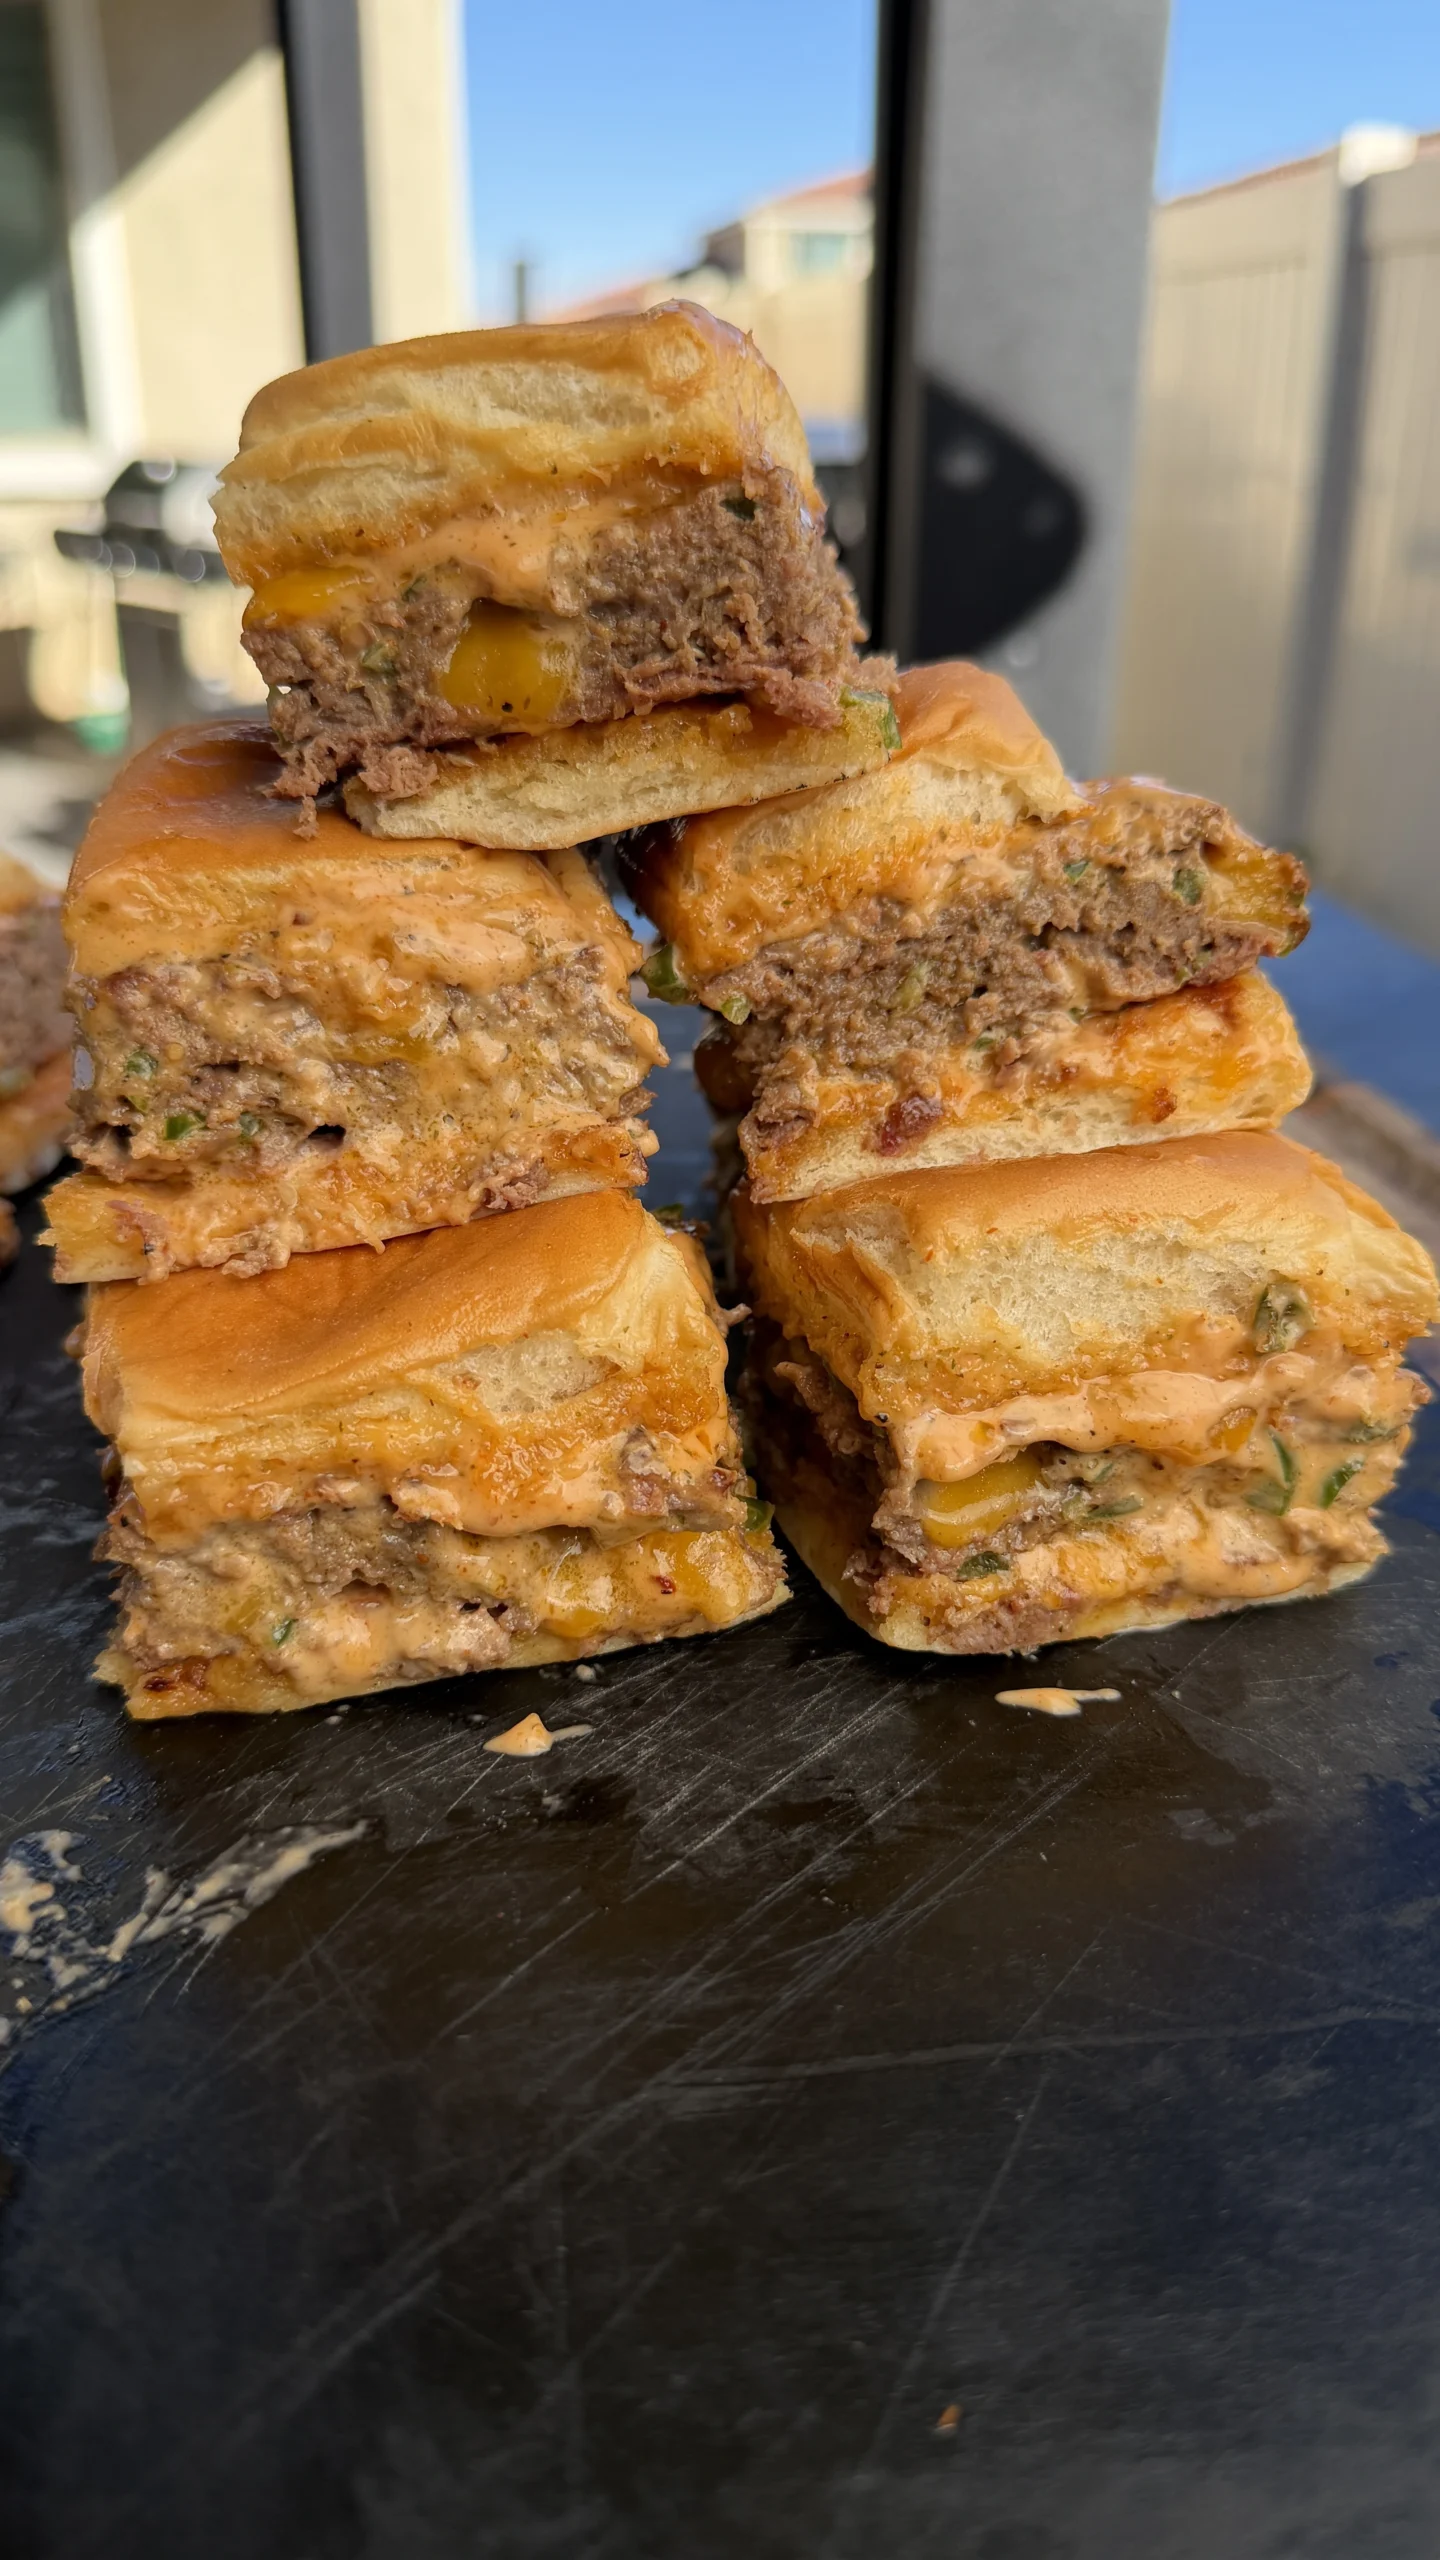
Smoked jalapeño cheddar cheeseburger sliders is 2 pounds of 80/20 ground beef mixed with cubed sharp cheddar cheese, diced jalapeños, and steak seasoning, formed into one giant patty on a baking sheet, then smoked at 250°F until the internal temperature reaches 165°F. The giant patty sits on toasted King’s Hawaiian sweet rolls spread with spicy burger sauce made from mayonnaise, ketchup, spicy brown mustard, sriracha, and honey. After smoking and resting, you slice the entire assembly into 12 individual sliders. Each slider gets juicy beef with pockets of melted cheese and spicy jalapeño heat balanced by the sweet rolls and tangy sauce.
The entire process takes about 1 hour 10 minutes from start to finish. This includes 20 minutes to prep the meat mixture, toast the rolls, and make the sauce. You get 40 to 50 minutes of smoking time depending on your smoker’s temperature consistency. A 5 to 10-minute rest period after smoking lets the juices redistribute through the meat. During this rest, the residual heat continues melting the cheese cubes into gooey pockets throughout the patty.
These smoked burger sliders deliver smoke flavor in every bite without requiring individual patty formation. The giant patty method saves time compared to shaping 12 separate sliders. You mix one batch of seasoned beef and press it into a single slab. The connected format also prevents the beef from shrinking into uneven shapes. Traditional slider patties often puff up in the middle or shrink smaller than the buns. The sheet pan method creates uniform thickness that matches the roll dimensions perfectly.
The smoke penetrates the meat during the 45-minute cook at 250°F. This low temperature allows gradual rendering of the 20% fat content in the ground beef. The fat bastes the meat from the inside as it melts. The cheese cubes also melt gradually. They create pockets of gooey cheddar distributed throughout instead of a single cheese slice on top. The jalapeños soften and release their heat into the surrounding meat. You get spice in every bite, not just where you happen to hit a pepper piece.
Jump to RecipeWhy the Giant Patty Method Works Better Than Individual Sliders

Time Savings and Consistency
The giant patty method eliminates the time-consuming process of forming 12 individual slider patties. Shaping uniform small patties takes practice. Each one needs to be the same size and thickness. Otherwise, some cook faster than others. You end up with a mix of well-done and medium burgers.
With the sheet pan method, you press the entire 2 pounds of beef mixture into one even layer. This takes about 2 minutes instead of 10 to 15 minutes for individual patties. You just dump the seasoned beef onto your baking sheet. Press it out with your hands until it’s roughly rectangular and about 1 inch thick. The shape doesn’t need to be perfect. You’ll trim it to match the roll dimensions before assembling.
The uniform thickness also ensures even cooking throughout. Every part of the giant patty reaches 165°F at roughly the same time. You don’t need to monitor multiple pieces or worry about some being done while others are still raw. One temperature check in the center tells you the entire patty is ready.
Preventing Shrinkage and Puffing
Individual burger patties tend to shrink and puff during cooking. The proteins contract as they heat. The patties pull inward at the edges. They dome up in the middle. This creates burgers that are smaller than your buns and awkwardly thick in the center.
The giant patty method minimizes this problem. The connected format distributes the shrinkage across the entire slab. Instead of each patty shrinking individually, the whole sheet tightens slightly. The edges might pull in a bit. But the center-to-edge shrinkage is less dramatic than with separate patties.
The weight of the meat also helps. Two pounds of beef in one slab is heavy enough to resist major puffing. Individual 2 to 3-ounce slider patties are light. They easily dome up as the proteins contract. The giant patty stays relatively flat because of its mass.
Easier Handling on the Smoker
Moving 12 individual slider patties on and off the smoker grates is tedious. You need to carefully place each one. Make sure they’re spaced properly. Then you need to flip each one individually if you want grill marks on both sides. Finally, you transfer 12 separate pieces to a platter.
With the giant patty, you place one baking sheet on the smoker. That’s it. No flipping required. The smoke circulates around the entire sheet. When it’s done, you pull one sheet off. The whole process is cleaner and faster.
The sheet pan also catches any rendered fat and cheese that melts out during cooking. Individual patties on grates would drip fat into your smoker. This creates potential flare-ups and mess. The contained pan keeps everything tidy.
Presentation and Assembly Advantages
The giant patty method creates a professional, clean presentation. When you place the entire cooked patty on the bottom half of the connected rolls, it looks impressive. You’re assembling one giant sandwich that you’ll slice into portions.
The connected format also helps the sliders hold together during serving. Each slider remains attached to its neighbors until you pull it apart. This prevents them from sliding around on the platter or falling apart when people grab them.
Why Mixing Cheese and Jalapeños Into the Meat Prevents Dry Sliders

Internal Moisture Distribution
When you mix cubed cheddar cheese directly into the ground beef, you create pockets of fat throughout the patty. Cheese is approximately 25 to 35% fat depending on the variety. As the cheese melts during smoking, this fat distributes into the surrounding meat. It acts like additional marbling.
Ground beef already contains fat from the 80/20 ratio. But that fat is distributed somewhat unevenly. Some bites might hit a fatty spot. Others might be leaner. Adding cheese cubes ensures every section of the patty gets extra fat. The melted cheese creates channels that keep the meat moist and juicy.
This is particularly important for slider-sized portions. Small burgers can dry out quickly because of their high surface area to volume ratio. More of the meat is exposed to heat. The added cheese compensates for this. Even if the outer edges cook slightly more than the center, the melted cheese keeps everything moist.
Preventing Cheese Slippage
Traditional cheeseburgers place a slice of cheese on top of the patty. This works fine for large burgers. But with sliders, the cheese often slides off when you bite. The small format creates less surface tension. The cheese has nowhere to grip.
Mixed-in cheese cubes can’t slide anywhere. They’re trapped inside the meat. Every bite guarantees melted cheese. You don’t get some bites with cheese and others without. The distribution is more consistent throughout the patty.
The cubed format also provides better coverage than a single slice on top. One slice might cover the center of the slider. But the edges have no cheese. Mixing in multiple cubes ensures the edges get cheese too.
How Jalapeños Add Moisture and Flavor
Fresh jalapeños are about 90% water. When you dice them and mix them into the beef, they release some of this moisture during cooking. The water steams inside the patty. It keeps the meat from drying out. The jalapeños also add textural contrast with their slight crunch. Even after smoking, they retain some firmness.
The capsaicin in the jalapeños also stimulates saliva production. This makes the sliders taste juicier than they actually are. Your mouth waters more when eating spicy food. The perceived juiciness increases even if the actual moisture content is the same as a non-spicy burger.
Dicing the jalapeños small ensures even distribution. You don’t get some sliders that are extremely spicy while others have no heat. Every slider gets a consistent amount of jalapeño. The heat builds gradually as you eat instead of hitting you all at once.
Fat Retention During Low-Temperature Smoking
Smoking at 250°F is gentler than grilling at 400°F or higher. The lower temperature renders fat more slowly. Less fat drips out of the meat. More stays in the patty where it contributes to juiciness.
The cheese cubes benefit from this low temperature too. They melt gradually instead of liquefying instantly. A fast, hot cook would turn the cheese into liquid that runs out of the meat. The slow smoke lets the cheese soften and integrate without completely liquefying. You get gooey pockets instead of cheese-flavored grease puddles.
The jalapeños also soften at 250°F without burning or becoming mushy. Higher heat would char the outside of the jalapeño pieces. Lower heat would leave them too crunchy. The smoke temperature is perfect for softening them to a pleasant texture.
Why King’s Hawaiian Rolls Are Perfect for Smoked Sliders
Sweet and Savory Balance
King’s Hawaiian rolls have a subtle sweetness that balances the savory beef, sharp cheddar, and spicy jalapeños. The rolls contain sugar and pineapple juice concentrate. This creates a bread that’s slightly sweet without being dessert-like.
The sweetness works particularly well with smoke flavor. Smoked meats often have deep, slightly bitter notes from the combustion. The sweet rolls counteract this. They create a sweet-smoky-savory-spicy flavor profile that’s more complex than using regular burger buns.
The honey in the burger sauce echoes the sweetness of the rolls. Together they create a cohesive flavor where the sweet elements complement rather than compete. The sriracha and mustard provide tangy heat. The mayo and ketchup add richness and acidity. Everything balances.
Soft Texture That Won’t Overwhelm the Meat
King’s Hawaiian rolls have an extremely soft, pillowy texture. They’re more tender than standard slider buns. This matters with the giant patty method because you’re creating a substantial sandwich. If you used dense, chewy buns, the bread would compete with the meat. The slider would be hard to bite through.
The soft rolls compress slightly when you bite. This allows your teeth to penetrate the burger easily. You get clean bites instead of the filling squirting out the sides. The structural integrity is surprisingly good despite the softness. The rolls don’t disintegrate or get soggy quickly.
The lightness of the rolls also prevents the sliders from feeling too heavy. Two pounds of beef plus a pound of cheese creates rich, indulgent sliders. Heavy bread would make them overwhelmingly filling. The airy rolls keep them in the realm of finger food rather than full meals.
Connected Format Matches the Giant Patty Method
King’s Hawaiian rolls come as a connected sheet of 12 rolls. They’re still joined together when you buy them. This perfectly matches the giant patty method. You slice the entire sheet of rolls in half horizontally. You keep them all connected. This creates two large pieces: a bottom platform and a top lid.
Size Match with the Baking Sheet Patty
A standard package of King’s Hawaiian rolls measures roughly 9 by 6 inches when connected. A standard baking sheet or small aluminum pan is similar dimensions. When you press your 2 pounds of beef mixture onto a sheet, you can shape it to approximately match the roll footprint.
This means minimal trimming or adjustment when assembling. The patty fits the bread naturally. You’re not trying to force a round patty onto a square bun or vice versa. The rectangular format works for both components.
Some of the beef might extend slightly beyond the rolls. You can trim these edges and use them for cook’s snacks. Or you can fold the excess over during assembly. It creates thicker sliders at the edges, which some people prefer.
Why 250°F Smoking Temperature Keeps Burgers Juicy
Gradual Fat Rendering Without Drying
At 250°F, the fat in 80/20 ground beef renders slowly over 40 to 50 minutes. The fat melts and distributes through the meat. It doesn’t drip away quickly. This bastes the burger from the inside as it cooks. You retain more of that flavorful fat in the finished patty.
Compare this to grilling at 450°F or higher. At high heat, the fat liquefies rapidly. It drips through the grates or runs off the edges before the meat can absorb it. You end up with a drier burger sitting in a pool of rendered fat that’s wasted.
The lower temperature also prevents the exterior from forming a hard crust too quickly. When you sear beef at high heat, the outside proteins tighten into a shell. This shell squeezes moisture toward the center. The center becomes wet while the exterior dries out. At 250°F, the proteins cook more gradually. They retain moisture more evenly from edge to center.
Smoke Penetration and Flavor Development
Low-temperature smoking allows smoke to penetrate the meat more deeply. Smoke particles adhere to the cool surface of the beef when you first put it in the smoker. As the meat warms slowly, the smoke flavors have time to work their way inward.
At higher temperatures, the surface of the meat heats up quickly. It forms a barrier that prevents smoke penetration. You get smoke flavor on the outside only. The inside tastes like regular beef. With low and slow smoking, the entire patty takes on smoke character.
The 45-minute smoke time is long enough for significant smoke absorption. Burgers cooked at 450°F for 8 to 10 minutes don’t have enough time to absorb much smoke. The quick cook gives you char and crust. But minimal smoke flavor penetrates. The low-and-slow method prioritizes smoke over crust.
Gentle Cooking of Mixed-In Ingredients
The cheese cubes and jalapeños mixed into the beef benefit from gentle heat. At 250°F, the cheese melts gradually. It becomes gooey without separating into oil and solids. High heat would break the cheese emulsion. You’d get greasy pockets instead of creamy melted cheese.
The jalapeños soften at 250°F without turning mushy or charring. They retain some texture and structure. Their water content releases slowly. It steams the surrounding meat gently. High heat would evaporate this moisture too quickly. You’d lose the moistening effect.
The gentle heat also prevents the exterior of the jalapeño pieces from burning before the inside softens. Even distribution of heat ensures the jalapeños cook through evenly. They contribute moisture and flavor uniformly throughout the smoking process.
Hitting 165°F Without Overcooking
Ground beef should reach 165°F internal temperature for food safety. This kills potential bacteria throughout the meat. At 250°F smoking temperature, the patty reaches 165°F in about 45 minutes. The slow climb to target temperature means you have a wide margin for error.
If you’re smoking at 350°F or higher, the patty might reach 165°F in 20 to 25 minutes. But the temperature is climbing fast. By the time you check it, it might already be at 175°F or higher. Overcooked ground beef becomes dry and crumbly.
At 250°F, the temperature rises about 3 to 4 degrees every few minutes. You have time to check at 150°F and again at 160°F. When you hit 165°F, you can pull immediately. The temperature isn’t racing away from you. This prevents accidental overcooking.
Carryover Cooking Considerations
After you remove the patty from the smoker at 165°F, the internal temperature continues to rise during the rest period. This is carryover cooking. The exterior is hotter than the center. Heat migrates inward during the rest.
With low-temperature smoking, carryover is minimal. Maybe 3 to 5 degrees. The patty ends up at 168 to 170°F after resting. This is perfect. The meat is fully cooked and safe. But it’s not dried out.
High-temperature cooking creates more carryover. A burger pulled at 165°F from a 450°F grill might climb to 180°F during rest. This pushes it into dry, overcooked territory. The gentle smoking method gives you better control over final doneness.
How to Prevent the Giant Patty from Falling Apart

Proper Mixing Technique
The key to a cohesive giant patty is minimal mixing. You want to combine the beef, cheese cubes, jalapeños, and seasoning until just incorporated. Overworking the meat develops too much myosin. This protein creates a tight, dense texture. The patty becomes more like meatloaf than a burger.
Add all your ingredients to a large bowl. Use your hands to gently fold everything together. Break up the ground beef as you mix. Distribute the cheese and jalapeños throughout. But stop as soon as you don’t see any unmixed sections. The mixture should still look somewhat loose and chunky.
If you overmix, the proteins bind too tightly. The patty becomes rubbery and tough. It also shrinks more during cooking as the proteins contract aggressively. A lightly mixed patty stays tender. It holds together through gentle protein bonding without becoming dense.
Using 80/20 Ground Beef for Binding
The 20% fat content in 80/20 ground beef helps bind the patty. As the fat renders during smoking, it creates lubrication between meat proteins. This actually helps them stick together. The melted fat acts like a glue between the muscle fibers.
Leaner ground beef like 90/10 or 93/7 doesn’t have enough fat for this effect. The proteins have less lubrication. They dry out and crumble apart more easily. The patty can’t hold its shape as well. The lower fat content also makes the burger drier overall.
The 80/20 ratio is standard for burgers for good reason. It provides enough fat for flavor, juiciness, and structural integrity. But not so much that the burger tastes greasy. For the giant patty method, this fat content is critical for keeping everything together.
Cheese Cube Size Matters
The cheese should be cut into small cubes, roughly 1/4 to 1/2 inch on each side. Smaller cubes distribute more evenly throughout the meat. They create more binding points where melted cheese connects sections of beef.
Large cheese chunks create problems. They melt into big pockets. These pockets can become weak points where the patty breaks apart. The cheese also pools instead of integrating. You get uneven distribution with some areas having too much cheese and others having none.
Very small shreds or pre-shredded cheese can work. But cubes are better. Shredded cheese has added cellulose to prevent clumping. This coating slightly inhibits melting. Cubed cheese from a block melts cleaner. It integrates better into the beef.
Pressing Firmly Into the Pan
When you transfer your meat mixture to the baking sheet, press it down firmly with your hands. Create an even layer with consistent thickness throughout. Press hard enough to compact the meat slightly. You want to eliminate air pockets. But don’t press so hard that you squeeze out all the fat.
The firm pressing creates a cohesive slab. The beef particles stick together under the pressure. This makes the patty less likely to crack or break when you move it after cooking. The compact structure also helps it cook more evenly. Air pockets can create hot spots or uneven doneness.
Use a baking sheet with sides or a rimmed aluminum pan. This contains the patty and prevents the edges from spreading out too thin. The walls of the pan give the meat something to press against. You can shape it into a neat rectangle that matches your roll dimensions.
Proper Resting Before Slicing
The 5 to 10-minute rest after smoking is crucial. During this rest, the proteins relax. The juices redistribute. The melted cheese firms up slightly. All of this makes the patty easier to handle and slice without falling apart.
If you try to slice immediately after removing from the smoker, the patty will be fragile. The proteins are still very soft. The cheese is fully liquid. The structure can’t support clean cuts. You’ll end up with a mess of crumbled beef and oozing cheese.
After resting, the proteins set. The cheese goes from liquid to gooey. The juices stop flowing freely. The patty becomes firm enough to transfer from the sheet pan to the rolls. Then you can slice through the entire assembly with a sharp knife. Each slider stays intact.
Jalapeño Cheddar Burger Sliders
Smoked giant patty with cheese, jalapeños, spicy sauce
Ingredients
Sliders
- 1 (12-count) pack King’s Hawaiian Original Sweet Rolls
- 2 lbs ground beef (80/20 works best)
- 1 lb sharp cheddar cheese, cut into small cubes
- 3 jalapeños, finely diced (seeds removed for less heat)
- 2–3 tablespoons steak seasoning
- Melted butter (for toasting rolls)
Burger Sauce
- 1 cup mayonnaise
- 2 tablespoons ketchup
- 2 tablespoons spicy brown mustard
- 1 teaspoon steak seasoning
- 1 tablespoon sriracha
- 1 tablespoon honey
Don’t overwork the meat when mixing in the cheese and jalapeños. Gentle folding keeps the beef tender. Overworking develops too much myosin and creates a dense, tough patty instead of a juicy burger.
Step-by-Step Instructions
Step 1: Prepare and Toast the King’s Hawaiian Rolls
Remove the 12-count package of King’s Hawaiian Original Sweet Rolls from the packaging. Keep all the rolls connected. Don’t separate them yet.
Using a large serrated knife, slice horizontally through the entire sheet of rolls. Cut them in half so you have a bottom sheet and a top sheet. Keep each half connected as one piece. Work carefully to make the cut as even as possible. You want both halves to be roughly the same thickness.
Melt 2 to 3 tablespoons of butter in a microwave or small saucepan. Use a pastry brush to lightly coat the cut sides of both the top and bottom sheets. Don’t soak them. Just a light coating of melted butter.
Heat a large skillet or griddle over medium heat. You can also use a grill set to medium. Place the buttered sides of the rolls face-down on the hot surface. Toast for 2 to 3 minutes until lightly golden brown. You want color and a bit of crispness. But don’t burn them.
Remove from heat and set aside. Let them cool slightly while you prepare the meat.
Step 2: Mix the Burger Patty
In a large mixing bowl, combine 2 pounds of 80/20 ground beef, 1 pound of sharp cheddar cheese cut into small cubes, 3 finely diced jalapeños with or without seeds depending on desired heat level, and 2 to 3 tablespoons of your favorite steak seasoning.
Use your hands to gently fold all ingredients together. Break up any large chunks of ground beef. Distribute the cheese cubes and jalapeño pieces throughout. Mix until you no longer see separate piles of ingredients. But stop as soon as everything is combined. Don’t overmix.
The mixture should look somewhat loose and chunky. You should be able to see individual pieces of cheese and specks of jalapeño distributed throughout the red beef. The texture should not be smooth or paste-like.
Step 3: Form the Giant Patty
Transfer the meat mixture to a medium baking sheet or aluminum foil pan. A quarter sheet pan or a 9 by 13-inch disposable aluminum pan works well. The pan should have sides to contain the meat and any rendered fat.
Dump all the meat mixture into the center of the pan. Use your hands to press it out into an even layer. Spread it toward the edges of the pan. Create a rectangular shape roughly the same dimensions as your King’s Hawaiian rolls (approximately 9 by 6 inches).
Press down firmly to compact the meat. You want a thickness of about 1 inch throughout. Check that the patty is level. Some parts shouldn’t be thicker than others. Even thickness ensures even cooking.
The edges don’t need to be perfectly straight. You can clean them up later if needed. The main goal is consistent thickness across the entire patty.
Step 4: Smoke the Patty to 165°F
Preheat your smoker to 250°F. Use your preferred wood. Hickory, oak, or mesquite all work well with beef. Avoid overly mild woods like apple. The beef can handle stronger smoke.
Once the smoker is at temperature and producing clean smoke, place the baking sheet with the giant patty directly on the smoker grate. Close the lid.
Smoke for 40 to 50 minutes without opening the smoker. The exact time depends on your smoker’s temperature consistency and the thickness of your patty. Don’t rush it by increasing the temperature.
After 40 minutes, check the internal temperature by inserting an instant-read thermometer into the thickest part of the patty. You want 165°F for food safety. If it’s not there yet, close the lid and check again in 5-minute intervals.
When the patty reaches 165°F, remove the entire baking sheet from the smoker. The beef should be browned on top. The cheese should be melted into pockets throughout. The jalapeños should be softened. Some fat will have rendered into the bottom of the pan.
Step 5: Make the Burger Sauce While the Patty Smokes

While the patty is smoking, make your burger sauce. In a medium bowl, combine 1 cup of mayonnaise, 2 tablespoons of ketchup, 2 tablespoons of spicy brown mustard, 1 teaspoon of steak seasoning, 1 tablespoon of sriracha, and 1 tablespoon of honey.
Whisk everything together until smooth and well combined. The sauce should be thick but spreadable. It should have a light pink color from the ketchup and sriracha. Taste and adjust if needed. Add more sriracha for extra heat. Add more honey for more sweetness.
Cover and refrigerate until ready to use. The flavors will meld as it sits. Making it while the patty smokes gives it time to develop.
Step 6: Rest the Patty
Once you remove the smoked patty from the smoker, let it rest in the baking sheet for 5 to 10 minutes. Don’t move it or slice it yet. The rest period is critical.
During this time, the proteins will relax. The juices will redistribute from the center back toward the edges. The melted cheese will firm up slightly from fully liquid to thick and gooey. The structure of the patty will become more stable.
You’ll notice the patty stops releasing as much juice after a few minutes of resting. The surface will look set rather than wet and actively bubbling. This tells you it’s ready to handle.
Step 7: Assemble the Sliders

Place the bottom sheet of toasted rolls in your serving dish or on a large cutting board. The toasted side should be facing up. The untoasted side is against the dish.
Spread the burger sauce generously across all 12 bottom rolls. Use a spoon or offset spatula to coat them evenly. You want sauce on every roll. Don’t be stingy.
Using a large spatula or two spatulas, carefully transfer the giant smoked patty from the baking sheet onto the sauced bottom rolls. Position it so it covers all 12 rolls as evenly as possible. Some overhang is fine. The patty will be slightly larger than the rolls in most cases.
Spread more burger sauce on top of the patty. You want sauce on both sides of the meat. This ensures every bite gets that tangy, spicy flavor.
Place the top sheet of toasted rolls over the sauced patty. The toasted side should be facing down against the sauce. The untoasted top should be facing up.
Press down gently on the entire assembly. This helps everything adhere together.
Step 8: Slice and Serve

Using a sharp serrated knife, cut through the entire assembled slider stack. Follow the natural divisions between the rolls. Each King’s Hawaiian roll is slightly separated from its neighbors. Use these lines as your guide.
Cut straight down through the top roll, sauce, meat, bottom sauce layer, and bottom roll. You’ll end up with 12 individual sliders. Each one should have a complete burger with top and bottom bun.
If any cheese or sauce squeezes out during cutting, just push it back into place. The sliders will be a bit messy. This is normal and part of their charm.
Serve immediately while the patty is still warm and the cheese is gooey. These are best fresh. The toasted rolls soften as they sit. The cheese firms up as it cools.
Smoked Jalapeño Cheddar Cheeseburger Sliders
Ingredients
Equipment
Method
- Slice the entire pack of King’s Hawaiian rolls in half horizontally, keeping them connected. Brush cut sides with melted butter. Toast cut-side down in a skillet or on the grill until lightly golden. Set aside.
- In a large bowl, gently mix together ground beef, cubed cheddar cheese, diced jalapeños, and steak seasoning. Mix until just combined. Don’t overwork the meat.
- Press the beef mixture onto a medium baking sheet or aluminum pan. Form into one giant rectangular patty about 1 inch thick, roughly matching the dimensions of the rolls (9 by 6 inches).
- Preheat smoker to 250°F. Smoke the patty for 40 to 50 minutes until internal temperature reaches 165°F.
- While patty smokes, make burger sauce by whisking together mayonnaise, ketchup, spicy brown mustard, steak seasoning, sriracha, and honey. Refrigerate until ready to use.
- Remove smoked patty from smoker. Rest for 5 to 10 minutes in the pan.
- Spread burger sauce on bottom sheet of toasted rolls. Transfer giant patty on top. Spread more sauce over the patty. Add top sheet of rolls.
- Slice through entire assembly following the natural divisions between rolls to create 12 individual sliders. Serve immediately.
Nutrition
Notes
Tried this recipe?
Let us know how it was!Frequently Asked Questions
Can You Make These Sliders on a Grill Instead of a Smoker?
You can make these sliders on a gas or charcoal grill using indirect heat. But you’ll miss the smoke flavor that makes them special. Set up your grill for two-zone cooking. Light burners on one side only for gas. Or pile coals on one side for charcoal.
Place the baking sheet with the giant patty on the cool side of the grill. Close the lid. Maintain a temperature around 300 to 350°F. The patty will cook in 30 to 40 minutes instead of 45 minutes. Check the internal temperature. Pull at 165°F.
For a hint of smoke on a gas grill, add a smoker box filled with wood chips. Place it over the lit burners. The chips will smolder and create smoke. For charcoal, add a few chunks of smoking wood to your coals. Hickory or mesquite work well.
The texture will be the same as smoked sliders. The giant patty method works on any heat source. You just won’t get that deep smoke flavor. If you want actual smoke, invest in a basic bullet smoker or pellet grill. They’re affordable. They make smoking accessible.
What Can You Substitute for King’s Hawaiian Rolls?
You can use other sweet slider rolls if King’s Hawaiian isn’t available. Look for Martin’s Potato Rolls slider size. These are soft and slightly sweet. They work similarly to King’s Hawaiian. Pepperidge Farm makes slider buns that are acceptable. They’re less sweet but still soft.
Regular hamburger buns cut in half horizontally also work. But you lose the connected format advantage. You’ll need to assemble 12 individual sliders. This takes more time. The buns also won’t be as sweet. The flavor profile changes.
If you want to maintain the giant sandwich format, use a large sub roll or French bread loaf. Slice it horizontally. Use the entire loaf as one giant burger. Slice it into portions after assembly. This works but the bread-to-meat ratio is different. You get more bread per bite.
For a savory option instead of sweet, use brioche slider buns. Brioche is rich and buttery. It’s not sweet like King’s Hawaiian. But it’s still soft and delicious. The egg content makes it similar in texture to the sweet rolls.
The best substitute depends on availability in your area. King’s Hawaiian is widely available now. Check the bread aisle at most grocery stores. If you can find them, use them. They’re specifically designed for this application.
How Spicy Are These Sliders?
The spice level depends on how you handle the jalapeños. With seeds removed from 3 jalapeños spread across 2 pounds of beef, the heat is mild to moderate. Most people find them pleasantly spicy. Not overwhelming.
The cheese and beef dilute the jalapeño heat. Each slider gets only a small amount of diced pepper. The sharp cheddar and fatty beef buffer the capsaicin. The sweet rolls also balance the heat with their subtle sweetness.
The burger sauce adds another layer of spice from the sriracha. But 1 tablespoon spread across 12 sliders is modest. You get a warm kick, not intense burn.
For milder sliders, use only 1 or 2 jalapeños instead of 3. Make sure to remove all seeds and white membranes. These contain most of the heat. You’ll still get jalapeño flavor without much spice.
For spicier sliders, leave the seeds in all 3 jalapeños. Or add a diced serrano or two. Serranos are hotter than jalapeños. You can also increase the sriracha in the burger sauce to 2 tablespoons. Or add cayenne pepper to the meat mixture.
Remember that heat tolerance varies between people. What’s mild to one person might be very spicy to another. If cooking for a crowd, err on the milder side. Serve extra sriracha or hot sauce on the side. People can add more heat to their individual sliders.
Can You Prep These Sliders Ahead of Time?
You can prep components ahead. But the final assembly and smoking should happen close to serving time. Mix the burger sauce up to 3 days ahead. Store covered in the refrigerator. The flavors actually improve as they meld.
You can mix the beef, cheese, jalapeños, and seasoning up to 4 hours ahead. Form it into the giant patty on the baking sheet. Cover tightly with plastic wrap. Refrigerate until ready to smoke. Bring to room temperature for 20 minutes before smoking.
The rolls can be sliced and toasted up to 2 hours ahead. Let them cool completely. Store at room temperature wrapped in foil. They’ll stay relatively fresh. Don’t toast them the day before. They get stale.
Don’t assemble the sliders more than 30 minutes before serving. The sauce will make the rolls soggy. The patty will cool down. You want to assemble and slice right before serving. Or assemble and serve immediately.
For parties, you can smoke the patty up to 1 hour ahead. Keep it warm in a low oven at 200°F. Rest it. Then transfer to the oven in the baking sheet. When ready to serve, assemble quickly. The patty will still be warm.
Fully assembled sliders don’t hold well. They’re best eaten fresh. The rolls soften. The cheese firms up as it cools. Make them right before you need them for best results.
How Do You Reheat Leftover Sliders?
Reheat leftover sliders in a 300°F oven for 10 to 12 minutes. Place them on a baking sheet. Don’t wrap in foil. The foil traps steam. This makes the rolls soggy. Direct oven heat re-crisps the toasted surfaces slightly.
The cheese will melt again. The patty will warm through. The rolls will soften but they won’t get soggy if you use dry heat. Check after 10 minutes. The sliders should be hot throughout.
You can also reheat individual sliders in a toaster oven. This works well for one or two sliders. Set to 300°F. Heat for 8 to 10 minutes. The smaller space heats faster.
Don’t microwave these sliders. The microwave steams the bread. It makes it gummy and unpleasant. The cheese overheats in spots. You get scorching hot pockets mixed with cold areas. The texture is all wrong.
If you have just the leftover patty without the rolls, you can reheat it covered with foil at 300°F for 15 minutes. Then assemble fresh sliders with freshly toasted rolls. This gives you better texture than reheating assembled sliders.
Store leftover sliders in an airtight container in the refrigerator for up to 2 days. Beyond that, the quality drops significantly. The rolls get too soft. The patty dries out slightly despite the cheese.
Ready to Level Up?
Take your backyard cooking from good to legendary.
This is where I keep all my most-used smokers, knives, and favorite cooking tools.
Shop My Gear CollectionExplore More Recipes
Find more diverse flavors at CWFeats.com