
Spicy Juicy Lucy
Spicy Juicy Lucy burgers stuff molten spicy Colby Jack cheese inside seasoned 80/20 ground beef patties for a cheese-stuffed burger that erupts with every bite. You divide 1 lb of ground beef into 8 thin patties, season with salt, pepper, and garlic powder, sandwich a slice of spicy Colby Jack between two patties, seal the edges tight, then sear over high heat before finishing on indirect to 155°F. Stack on toasted brioche buns with sriracha mayo and jalapeño relish. Makes 4 burgers in about 30 minutes.
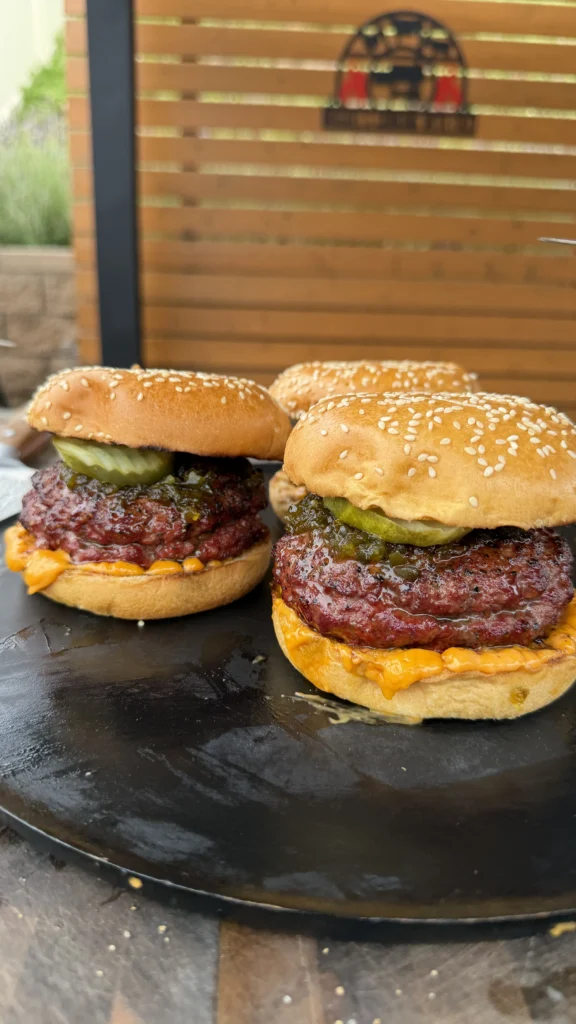
What Is a Juicy Lucy and Why Stuff It With Spicy Cheese
The Cheese Goes Inside, Not On Top
A Juicy Lucy is an inside-out cheeseburger. Instead of melting cheese on top of the patty, you seal it between two thin patties so the cheese melts into a molten pocket during cooking. When you bite through the crust, the cheese erupts. This spicy Juicy Lucy uses spicy Colby Jack instead of the traditional American cheese, which adds pepper heat directly to the melted center.
Why Spicy Colby Jack Works
American cheese is the classic choice because it melts smoothly. Spicy Colby Jack melts nearly as well but adds built-in heat from the jalapeño and pepper flakes in the cheese. Additionally, Colby Jack has a slightly firmer texture than American, which means it holds its shape during assembly and doesn’t leak as easily through the sealed edges during cooking.
How to Form and Seal Spicy Juicy Lucy Patties
Divide Into 8 Thin Patties
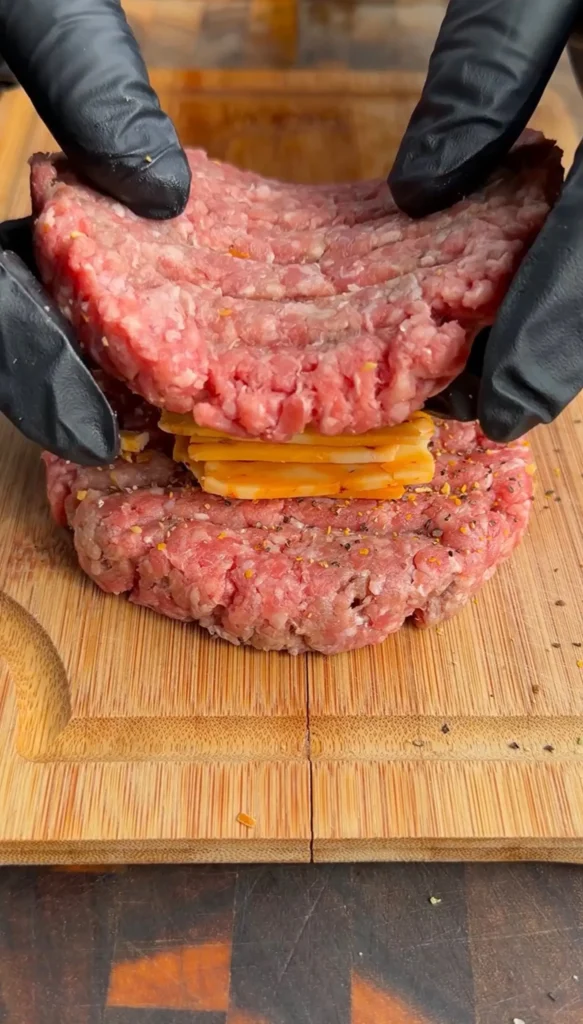
One pound of 80/20 ground beef makes 4 stuffed burgers. Divide the beef into 8 equal portions and press each into a thin, flat patty. The patties need to be thin enough that two stacked together with cheese in the middle don’t become too thick to cook through. Aim for about 1/4 inch thick per patty.
Sealing the Edges Is Critical
Place one slice of spicy Colby Jack on 4 of the patties. Top each with a second patty. Press the edges together firmly, pinching all the way around to create a tight seal. If the edges aren’t sealed properly, the cheese leaks out during cooking and you lose the molten center that defines a spicy Juicy Lucy. Run your fingers along the seam a second time to check for gaps.
Season the Outside After Assembly
Season the outside of each sealed patty with salt, pepper, and garlic powder. Seasoning the outside after assembly ensures the spice hits your tongue first with every bite. The inside patties were already seasoned before the cheese went in, so you get flavor from both layers.
Grilling the Spicy Juicy Lucy to 155°F
Sear First Over High Heat
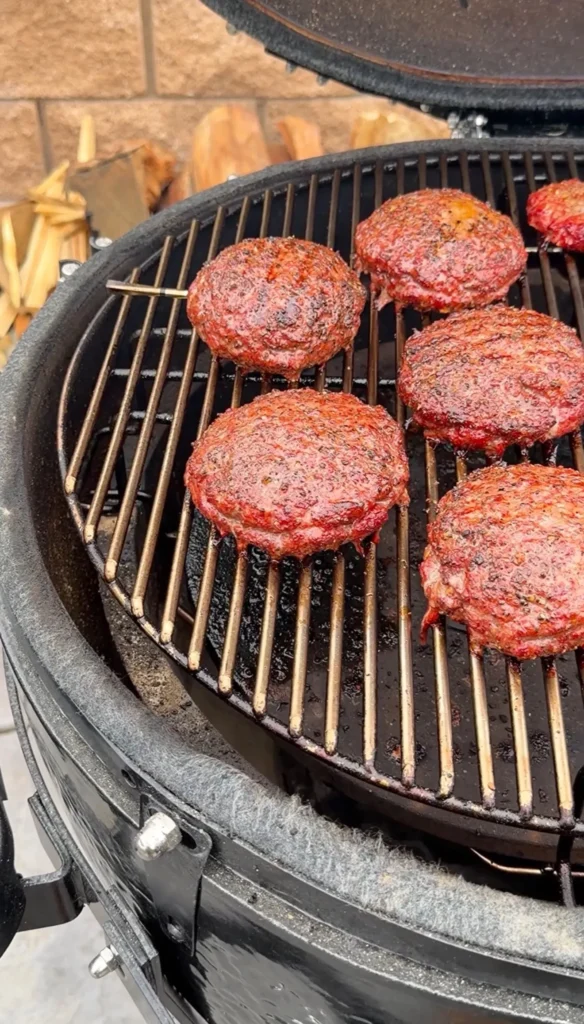
Place the stuffed patties over the hottest part of the grill. Sear 2 to 3 minutes per side to develop a solid crust. The crust locks in the cheese and prevents the patty from falling apart. Do not press down with a spatula during searing. Pressing breaks the seal and forces the melted cheese out through the edges.
Finish on Indirect to 155°F
After searing, move the burgers to indirect heat. Close the lid and cook until the internal temperature reaches 155°F. Because the cheese is sealed inside, the center needs to reach a higher temperature than a standard burger to fully melt the cheese. A standard medium-rare burger pulls at 130 to 135°F, but a spicy Juicy Lucy needs 155°F for a fully molten cheese pocket. Rest for 5 minutes before serving.
Why 80/20 Ground Beef
The 20% fat content in 80/20 ground beef keeps the patties juicy during the longer cook time needed to melt the internal cheese. Leaner blends (90/10 or 93/7) dry out before the cheese center melts properly. The fat also helps the patties hold together around the cheese pocket.
Building the Spicy Juicy Lucy Burger
Toast the Brioche Buns
Toast the brioche buns on the grill or in a skillet until golden. Toasting creates a barrier that prevents the bun from getting soggy when the cheese inevitably leaks during the first bite. Brioche adds richness and sweetness that balances the heat from the spicy Colby Jack, sriracha mayo, and jalapeño relish.
The Sauce and Topping Stack
Spread sriracha mayo on the bottom bun. Place the rested spicy Juicy Lucy patty on top. Add jalapeño relish as the final topping. The sriracha mayo adds creamy heat underneath, and the jalapeño relish adds crunchy, tangy heat on top. Three layers of heat (cheese, mayo, relish) from three different sources create a more complex spicy flavor than any single ingredient alone.
Spicy Juicy Lucy Burger
Stuffed with spicy Colby Jack · Seared + indirect to 155°F · Sriracha mayo
Ingredients
Burger
- 1 lb 80/20 ground beef
- 4 slices spicy Colby Jack cheese
- Salt, black pepper, garlic powder
- 4 brioche buns
Toppings
- Jalapeño relish
- Sriracha mayo
Instructions
- 1
Divide beef into 8 thin patties. Season both sides with salt, pepper, and garlic powder.
- 2
Place 1 slice spicy Colby Jack on 4 patties. Top with remaining patties and seal edges tight. Season outside again.
- 3
Sear over high heat for 2-3 min per side. Do not press with a spatula.
- 4
Move to indirect heat. Cook to 155°F internal. Rest 5 minutes.
- 5
Toast buns. Spread sriracha mayo. Add burger. Top with jalapeño relish.
Seal the Edges
Pinch all the way around twice. Gaps in the seal let the cheese leak out during cooking and you lose the molten center.
Don’t Press
Never flatten with a spatula. Pressing breaks the seal and forces molten cheese out through the edges.
155°F for Melt
Stuffed burgers need higher internal temps than regular burgers to fully melt the cheese pocket inside.
Step-by-Step: How to Make Spicy Juicy Lucy Burgers
Step 1: Divide and Form Thin Patties
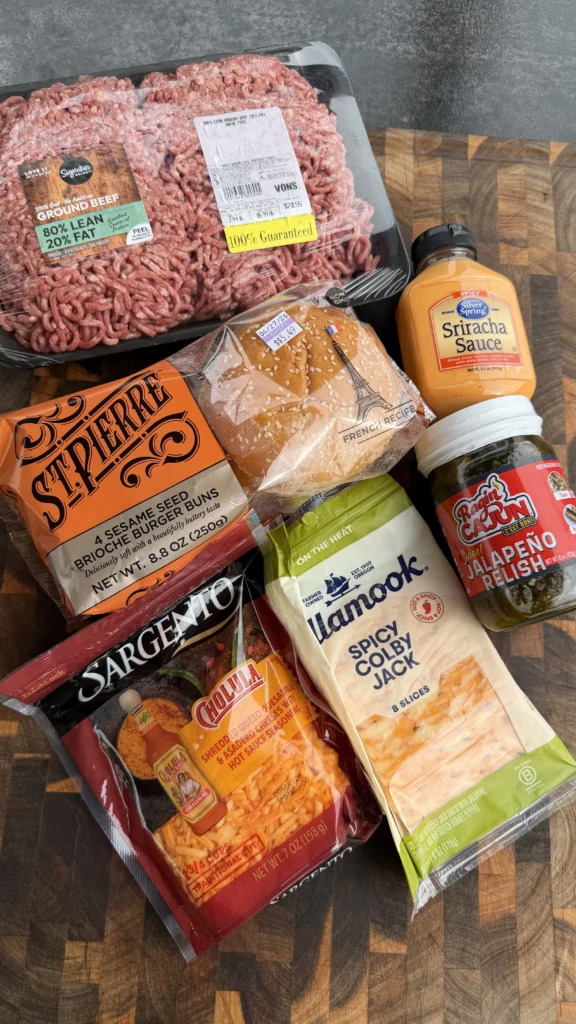
Start with 1 lb of 80/20 ground beef. Divide it into 8 equal portions, roughly 2 oz each. Press each portion into a thin, flat patty about 1/4 inch thick and slightly wider than your bun. The patties need to be thin because two of them stack together with cheese in the middle. If the patties are too thick, the finished burger becomes a baseball-sized mound that won’t cook through before the outside burns.
Work the beef as little as possible during forming. Overworking compacts the meat and produces a dense, tough patty instead of a loose, juicy one. Press just enough to hold the shape. If the edges crack, pinch them back together.
Step 2: Season Both Sides
Season all 8 patties on both sides with salt, black pepper, and garlic powder. You want seasoning on the inside layers (touching the cheese) and on the outside layers (what hits the grill). The inside seasoning flavors the beef directly around the molten cheese pocket. The outside seasoning is what you taste first with every bite. Two layers of seasoning from both directions creates a more complete flavor than seasoning only one side.
Step 3: Stuff With Spicy Colby Jack and Seal
Place 1 slice of spicy Colby Jack cheese in the center of 4 of the patties. Fold the cheese if needed to keep it away from the edges. You want at least a half inch of bare beef around the perimeter so there’s enough meat to seal against the top patty.
Place a second patty on top of each cheese-loaded patty. Now seal the edges. Press the top and bottom edges together firmly, pinching all the way around the perimeter. Run your fingers along the seam a second time to check for gaps. Any opening, no matter how small, will allow the cheese to leak out during cooking. The seal is the single most important step in making a spicy Juicy Lucy. If the cheese escapes, you just have a regular burger with a burnt cheese mess on the grill grates.
After sealing, season the outside of each stuffed patty one more time with salt, pepper, and garlic powder.
Step 4: Sear Over High Heat
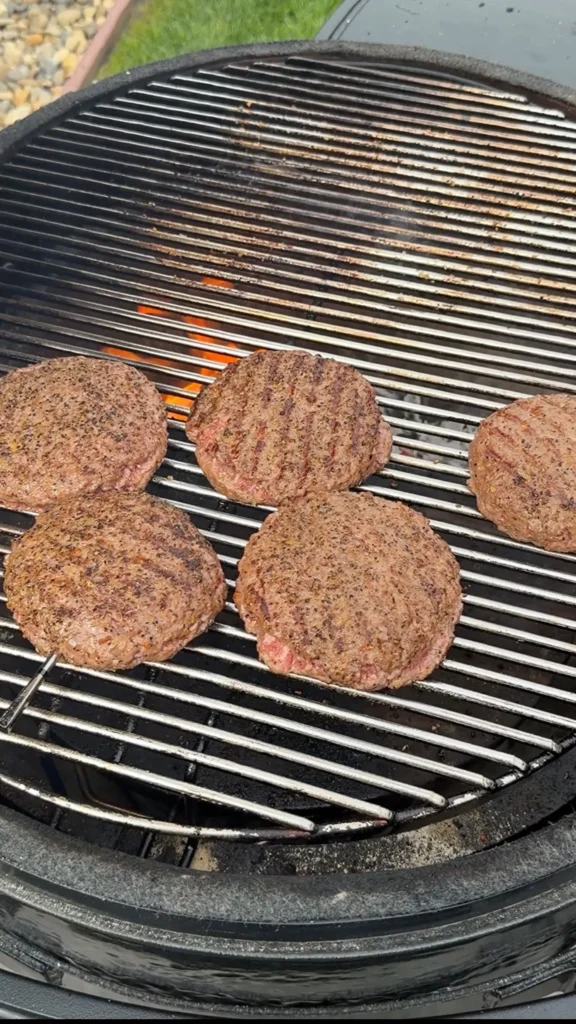
Get the grill as hot as possible for the sear. Place the stuffed patties directly over the coals or burner. Sear for 2 to 3 minutes per side until a solid brown crust forms. The crust locks in the cheese and prevents the patty from falling apart during the flip.
Do not press down on the burger with a spatula at any point. This is the most common mistake. Pressing breaks the seal you spent time creating and forces the melted cheese out through the edges. Flip once, gently, using a spatula slid underneath.
Step 5: Finish on Indirect to 155°F
After searing both sides, move the burgers to indirect heat. Close the grill lid. Cook until the internal temperature reaches 155°F. Use an instant-read thermometer inserted from the side, angling into the meat (not the cheese pocket) to get an accurate reading. If you hit the molten cheese, you’ll get a false high reading.
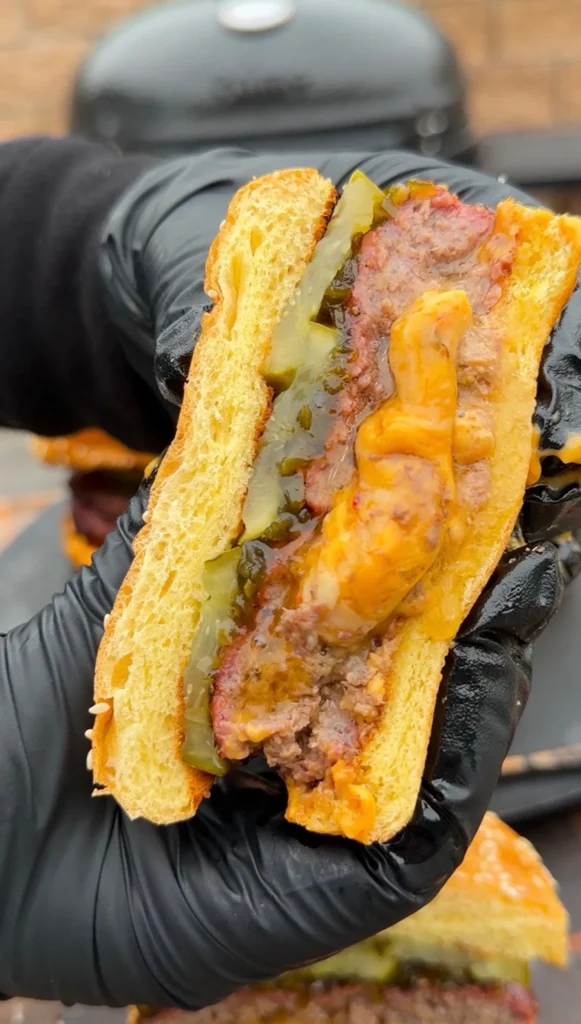
Standard burgers pull at 130 to 135°F for medium rare. A spicy Juicy Lucy needs 155°F because the cheese is sealed inside a thick patty. Lower temperatures leave the cheese only partially melted in the center. At 155°F, the Colby Jack is fully molten and pressurized inside the patty, which is what creates the eruption when you bite through the crust.
Step 6: Rest 5 Minutes
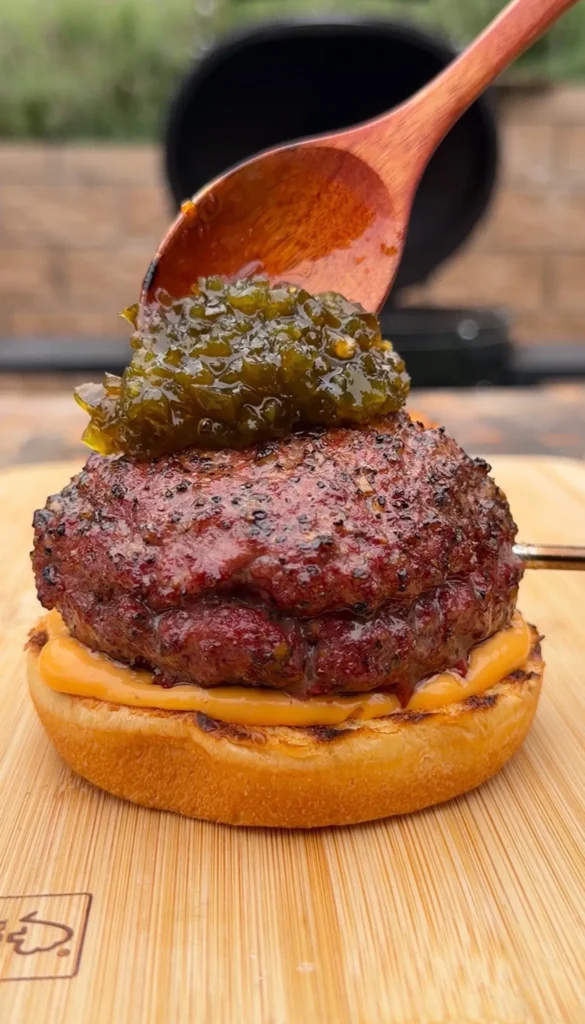
Pull the burgers and let them rest for 5 minutes on a plate or wire rack. This rest is critical for two reasons. First, it lets the internal juices redistribute so the beef stays moist. Second, the molten cheese is extremely hot immediately off the grill. Resting for 5 minutes brings the cheese from scalding to comfortably hot. Biting into a Juicy Lucy straight off the grill is a guaranteed mouth burn. The cheese inside is significantly hotter than the meat around it.
Step 7: Build the Burger
Toast the brioche buns on the grill or in a skillet until golden. Toasting creates a barrier that prevents the bun from going soggy when the molten cheese inevitably leaks during the first bite.
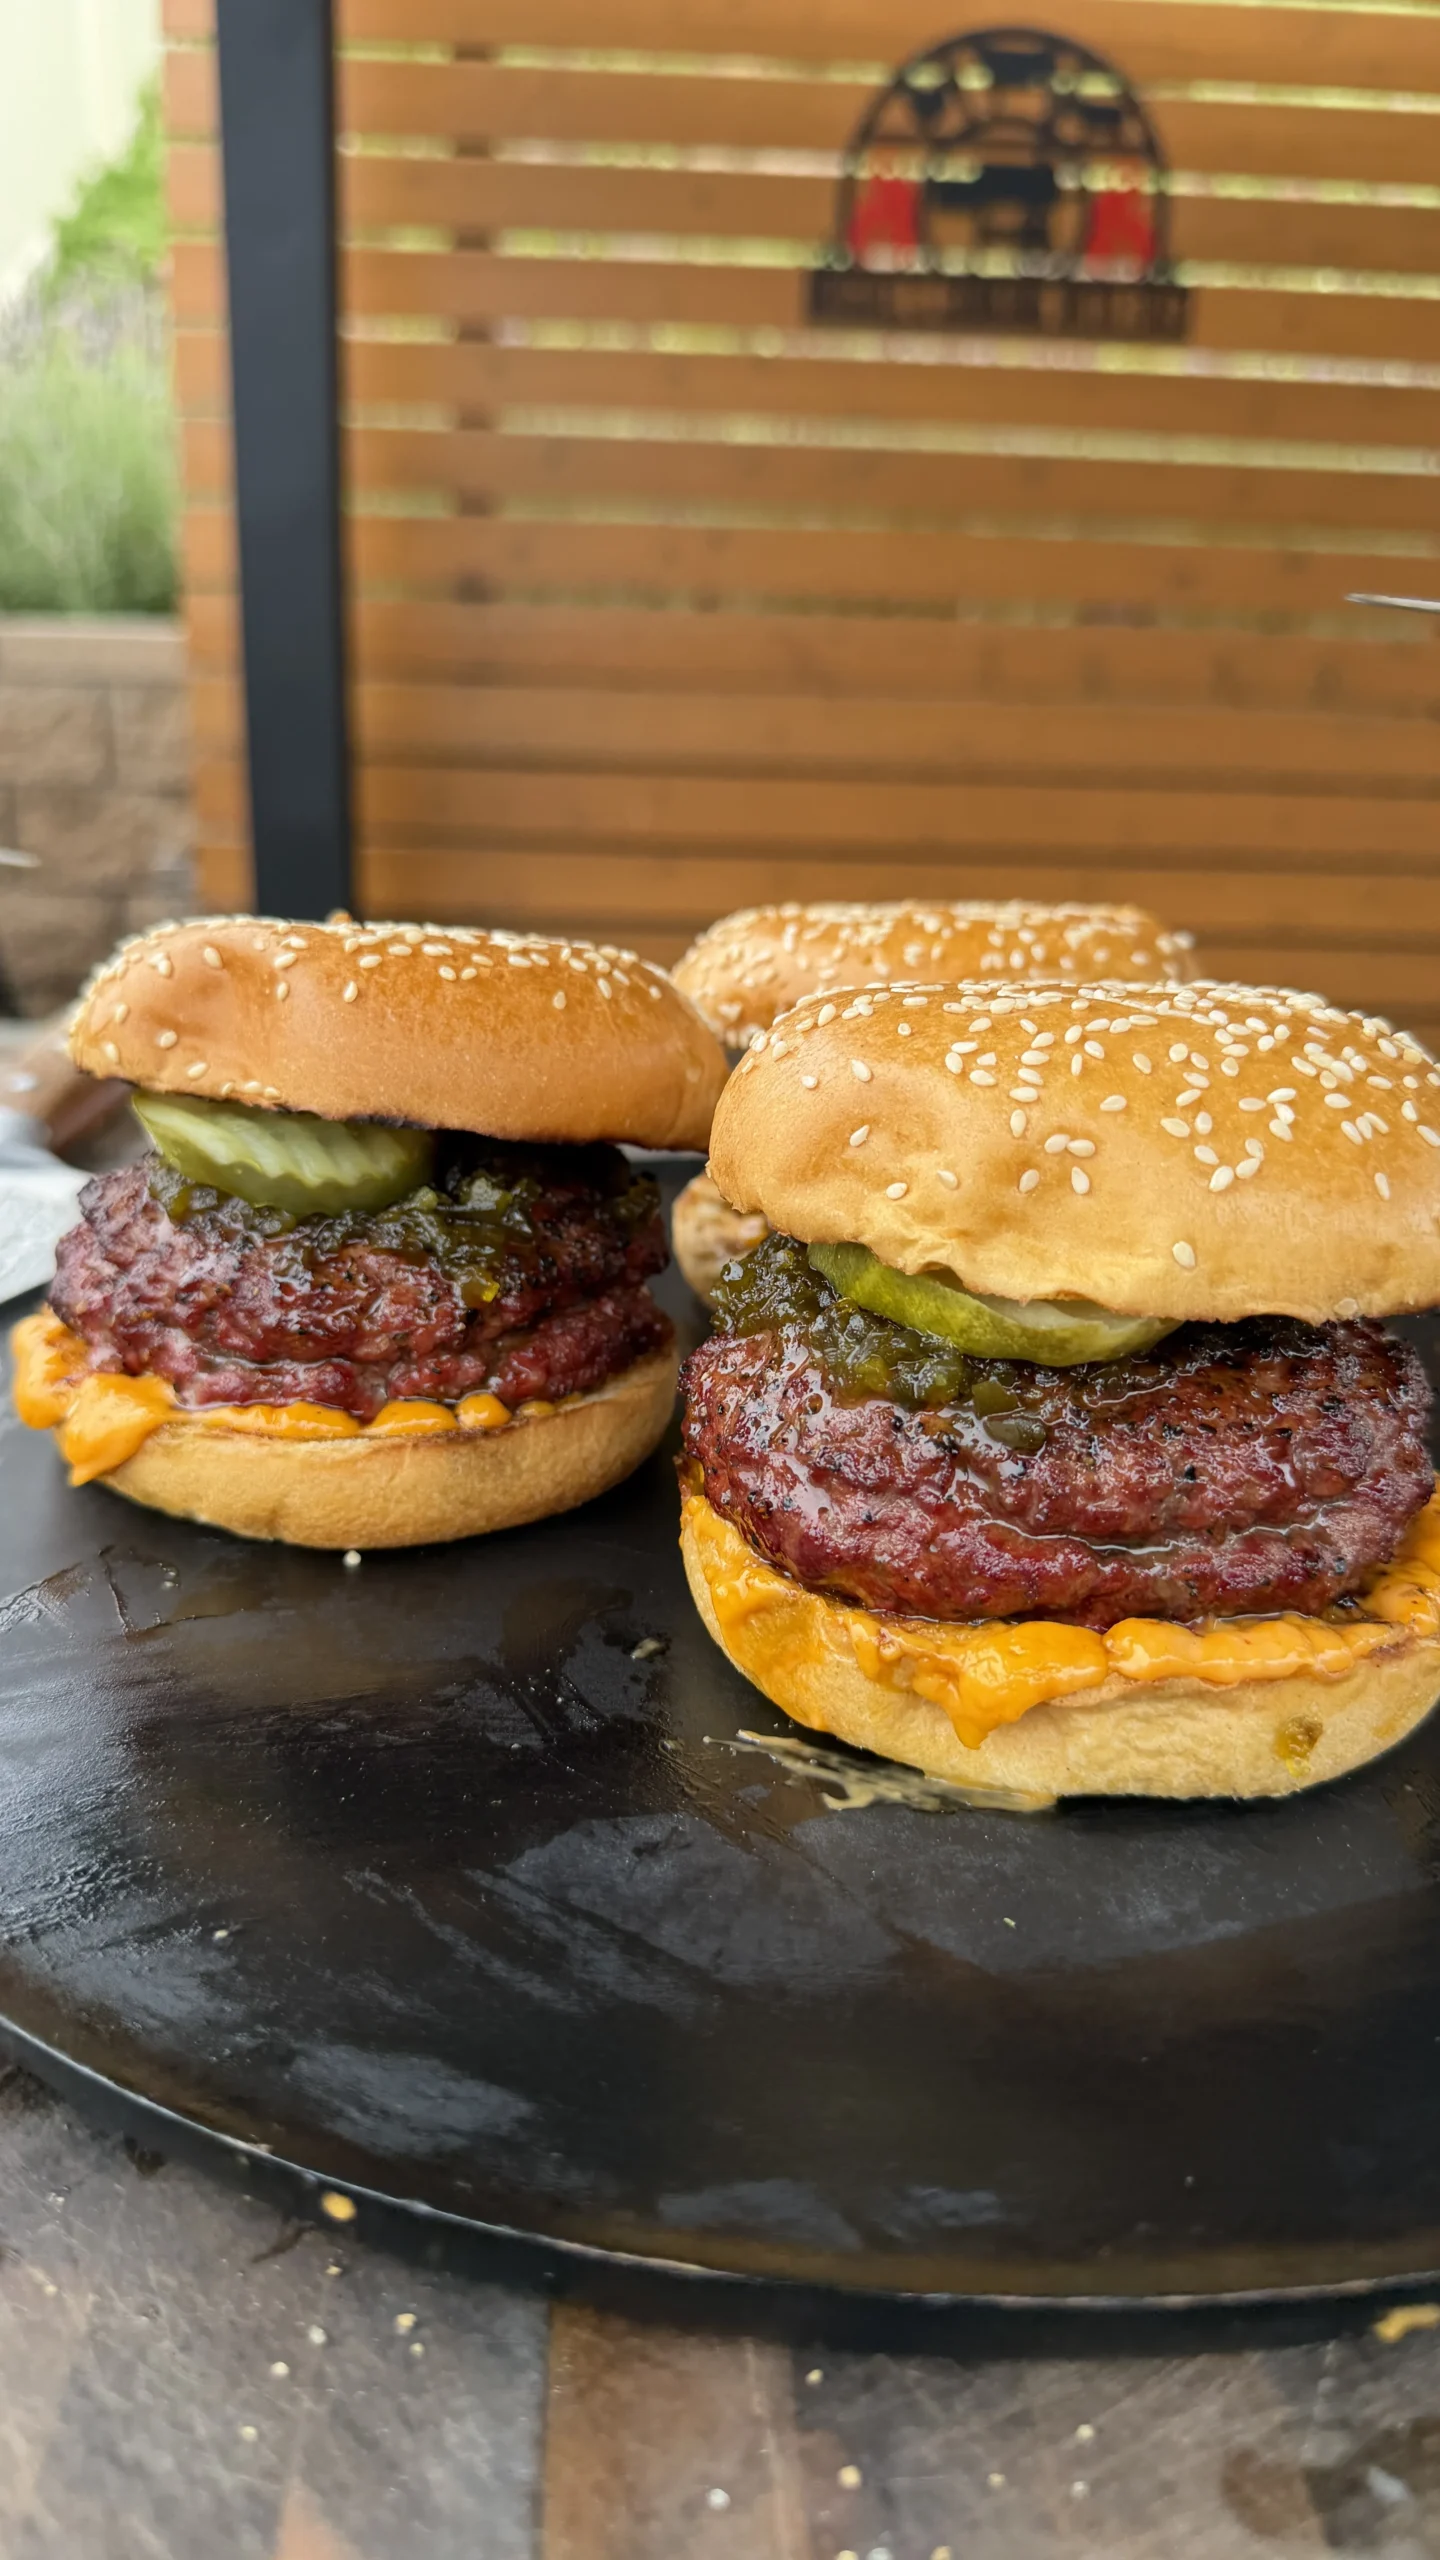
Spread sriracha mayo on the bottom bun. Place the rested spicy Juicy Lucy patty on top. Add a generous spoonful of jalapeño relish as the final layer. The sriracha mayo provides creamy heat from below, the spicy Colby Jack delivers molten heat from inside, and the jalapeño relish adds crunchy, tangy heat on top. Three heat sources from three different textures keeps the spice interesting instead of one-note.
Serve immediately. The cheese stays molten for about 5 minutes before it starts to solidify as it cools.
Spicy Juicy Lucy Burger
Ingredients
Equipment
Method
- Divide beef into 8 thin patties. Season both sides with salt, pepper, and garlic powder.
- Place 1 slice of spicy Colby Jack on 4 patties. Top with remaining patties. Seal edges tight. Season outside again.
- Sear over high heat 2-3 minutes per side. Do not press with a spatula.
- Move to indirect heat. Cook to 155°F internal. Rest 5 minutes.
- Toast brioche buns. Spread sriracha mayo. Add burger. Top with jalapeño relish.
Notes
Tried this recipe?
Let us know how it was!Spicy Juicy Lucy Burger — FAQ
Common questions about making cheese-stuffed burgers on the grill.
Your Questions, Answered
A Juicy Lucy is an inside-out cheeseburger. Instead of melting cheese on top of the patty, you seal it between two thin patties so the cheese melts into a molten pocket during cooking. It originated in Minneapolis in the 1950s.
The edges aren’t sealed tightly enough. Pinch all the way around twice, running your fingers along the seam to check for gaps. Additionally, never press the patty with a spatula during cooking because the pressure breaks the seal.
The cheese is sealed inside the patty and needs higher internal heat to fully melt. A standard medium-rare burger at 130 to 135°F won’t melt the cheese pocket completely. At 155°F, the Colby Jack is fully molten and erupts when you bite through.
Yes. American cheese is the classic choice and melts the smoothest. Pepper Jack, cheddar, and Swiss all work. Avoid hard cheeses like aged Parmesan because they don’t melt into a smooth pocket. For this spicy version, Colby Jack with built-in pepper flakes adds heat without extra ingredients.
Serving & Variations
The 20% fat content keeps the patties juicy during the longer cook time needed to melt the internal cheese. Leaner blends (90/10 or 93/7) dry out before the cheese center melts properly. The fat also helps the patties hold together around the cheese pocket.
Yes. Use a cast iron skillet over medium-high heat. Sear 3 to 4 minutes per side, then reduce heat to medium and cook until 155°F internal. A skillet works well because the flat surface provides even contact for consistent searing.
Yes. Form and stuff the patties, then refrigerate for up to 24 hours. Chilling actually helps because cold patties hold their shape better on the grill and the seal stays tighter. Let them sit at room temperature for 15 minutes before cooking.
Ready to Level Up?
Take your backyard cooking from good to legendary.
This is where I keep all my most-used smokers, knives, and favorite cooking tools.
Shop My Gear CollectionExplore More Recipes
Find more diverse flavors at CWFeats.com