
Steak and Frites Sandwich
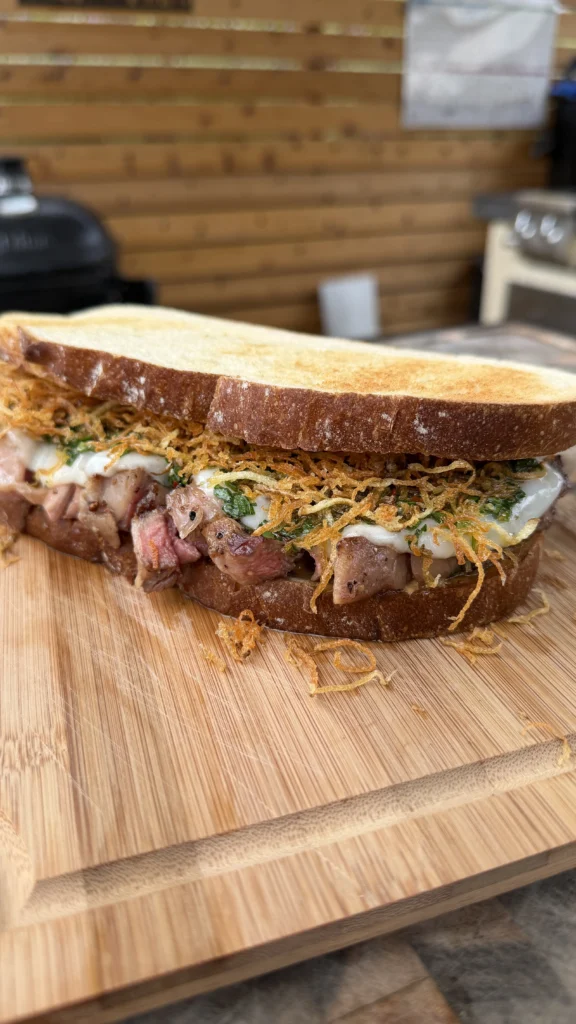
Steak and frites sandwich is two ribeye steaks (1 to 1¼ pounds each, 1 to 1½ inches thick) patted dry, seasoned with kosher salt, coarse black pepper, and garlic powder, then cooked on a grill or cast iron over high heat with a Meater probe inserted in the thickest part, flipping every 2 minutes to build even crust, pulled at 120°F internal temperature for medium-rare, and rested for 8 to 10 minutes until carryover cooking brings them to 125 to 130°F.
The entire process takes about 45 to 50 minutes from start to finish. This includes 10 minutes to make the chimichurri and let it develop flavor. Preparing and frying the shoestring potatoes takes 15 to 20 minutes including cutting on a mandoline, rinsing, drying, and frying. Cooking the steaks takes 8 to 12 minutes depending on thickness. Resting adds another 8 to 10 minutes. Final assembly with melting the cheese and building the sandwiches takes 5 to 7 minutes. The chimichurri can be made ahead to save time on the cooking day.
Jump to RecipeWhy Ribeye Is the Best Steak Cut for Sandwiches

Marbling Creates Self-Basting During Cooking
Ribeye steaks contain significant intramuscular fat throughout the meat. This marbling appears as white streaks running through the red muscle. When the steak cooks, this fat melts and bastes the meat from inside. The rendered fat keeps every bite juicy and flavorful.
Leaner cuts like sirloin or top round lack this marbling. They cook drier because there’s no internal fat to maintain moisture. Even when cooked to proper temperature, lean steaks can taste dry in sandwiches. The bread and condiments can’t fully compensate for dry meat.
The fat content also affects texture. Ribeye stays tender even when sliced thin for sandwiches. The fat lubricates the muscle fibers. Each slice pulls apart easily when you bite. Lean cuts can be chewy when sliced, especially if cooked past medium-rare. The chewing becomes work rather than pleasure.
Fat Cap Provides Additional Richness
Ribeye typically has a fat cap on one edge. This external fat layer adds richness beyond the internal marbling. Some of this fat renders during cooking and drips away. But enough remains to contribute flavor and mouthfeel.
When you slice the rested steak, you can trim excess fat cap if desired. But leaving a thin layer adds desirable richness to the sandwich. The fat melts slightly from the heat of the toasted bread and other warm components. This creates luxurious texture.
The fat cap also protects the meat during high-heat cooking. It acts as insulation on one side. This helps prevent overcooking even when you’re building aggressive crust on both flat sides. The ribeye’s structure makes it forgiving for sandwich preparation where precise timing matters.
Flavor Profile Matches Bold Condiments
Ribeye has robust beef flavor that stands up to strong condiments. The chimichurri is herbaceous and acidic. The chipotle mayo is smoky and spicy. The provolone is sharp and tangy. These bold flavors could overwhelm mild steak cuts.
Ribeye’s rich, beefy taste holds its own against these assertive condiments. You taste the steak distinctly in every bite despite the competing flavors. The beef isn’t lost or masked. It integrates with the other elements to create balanced complexity.
Filet mignon, while tender, has mild flavor. In a sandwich with chimichurri and chipotle mayo, the steak would taste generic. You’d be eating expensive beef without appreciating what makes it special. Ribeye delivers the beef character that justifies using premium steak for sandwiches.
Size and Shape for Sandwich Slicing
Ribeye steaks are typically round or oval. This shape slices efficiently for sandwich assembly. You get consistent, even pieces that layer neatly on bread. The slices cover the bread surface without gaps or excessive overlap.
Strip steaks are longer and narrower. When sliced, they create long strips that don’t fit bread slices well. You end up with meat hanging over edges or needing to cut slices in half. Ribeye’s compact shape is more sandwich-friendly.
The 1 to 1½ inch thickness recommended for these sandwiches is ideal for ribeye. Thinner ribeyes overcook before developing good crust. Thicker ribeyes take too long to cook through. The 1 to 1½ inch range provides optimal crust-to-interior ratio for medium-rare doneness.
Why Flipping Steaks Every 2 Minutes Creates Better Crust

Even Heat Distribution Prevents Burning
Traditional steak cooking teaches one flip. You sear one side, flip once, sear the other side. This method creates uneven heat distribution. The first side gets maximum heat exposure. The second side cooks more gently as the pan cools slightly from adding cold meat initially.
Flipping every 2 minutes equalizes heat exposure. Both sides get identical cooking time and temperature. The crust develops evenly. You don’t have one side deeply browned while the other is pale. The consistency creates better appearance and more uniform flavor.
The frequent flipping also prevents localized overheating. When meat sits on high heat for 5 to 6 minutes continuously, the surface can char or burn before the interior cooks. The 2-minute intervals allow surface temperature to moderate slightly between flips. You get browning without carbonization.
Moisture Redistribution Improves Juiciness
When steak cooks on one side for extended time, juices migrate to the opposite side. The bottom side loses moisture while the top accumulates it. This creates uneven moisture distribution. When you eventually flip, the accumulated moisture on the new bottom side evaporates rapidly. You lose more juice overall.
Frequent flipping prevents this moisture migration. The meat doesn’t sit long enough for significant juice movement. Moisture stays more evenly distributed throughout the steak. When you rest the meat after cooking, the juices are already balanced. Less redistribution is needed during resting.
The even moisture distribution also affects texture. Steaks cooked with one flip can have a gradient from dry exterior to wet interior. Frequently flipped steaks have more uniform texture from edge to center. Every slice tastes equally juicy.
Faster Cooking to Target Temperature
Flipping every 2 minutes actually speeds up cooking slightly. Each flip exposes the other side to maximum heat immediately. There’s no gradual heat penetration from one side only. Both sides cook simultaneously in a sense because you’re constantly alternating.
The faster cooking means less time at high temperature overall. This reduces moisture loss. You reach 120°F internal temperature in 8 to 10 minutes instead of 12 to 14 minutes with single flip method. Those few minutes matter for juice retention.
Faster cooking also means better texture. Proteins don’t have as much time to tighten and squeeze out moisture. The meat stays tender. The difference might seem subtle but it’s noticeable when you slice the rested steak. Frequently flipped steaks slice more cleanly without shredding.
Crust Layering Creates Depth
Each time you flip, you’re building thin layers of crust. The initial browning from flip one remains. Flip two adds another layer on the opposite side. Flip three adds more to the first side. This layering creates depth of flavor.
Single-flip steaks have one thick crust layer per side. The crust can be almost burnt on the surface while less developed underneath. Multi-flip steaks have multiple thin crust layers. Each layer contributes Maillard reaction compounds. The cumulative effect is more complex beefy flavor without any burnt notes.
The layered crust also adheres better to the meat. Single-flip crusts can sometimes pull away from the meat when you slice. Multi-flip crusts are more integrated. They stay attached through slicing and eating. Every bite gets crust rather than it falling off on the cutting board.
What Makes Shoestring Fries Different from Regular Fries

Surface Area to Volume Ratio
Shoestring fries are cut very thin, typically ⅛ to ¼ inch thick. This creates high surface area relative to volume. More surface area means more of the potato is exposed to hot oil. The fries cook faster and develop more crispy exterior.
Regular fries are ⅜ to ½ inch thick. They have lower surface area to volume ratio. More of the potato is interior that doesn’t crisp. You get thicker soft potato core with less crispy surface. The eating experience is more about fluffy potato than crunch.
For sandwiches, shoestring fries provide superior texture. The thin, crispy fries add crunch without adding excessive bulk. They integrate into the sandwich better. Thick fries would create a heavy, clunky sandwich that’s difficult to bite through. Shoestring fries compress slightly when you bite, creating pleasant textural contrast without being obtrusive.
Cooking Time and Oil Temperature
Shoestring fries cook in 2 to 3 minutes at 350°F. The thin cut means heat penetrates to the center rapidly. The potato cooks through before the exterior burns. You get golden color and crisp texture simultaneously.
Thicker fries need 4 to 6 minutes or longer. If you cook them at 350°F for this duration, they can become too dark. Professional operations often par-fry thick fries at lower temperature, then finish at higher temperature. This two-stage process is more complex than most home cooks want.
Shoestring fries simplify the process. One fry at one temperature for 2 to 3 minutes. No blanching required. No two-stage frying. This makes them practical for home cooking when you’re already managing steaks, chimichurri, and sandwich assembly.
Moisture Content and Crispiness
Thin shoestring fries dehydrate more thoroughly during frying. The small volume of potato releases its moisture quickly. What remains is primarily crispy starch with minimal soft interior. This creates maximum crunch.
Thick fries retain more moisture even when properly cooked. The interior stays creamy. While pleasant for fries eaten on the side, this soft interior is less ideal for sandwiches. The moisture can make bread soggy. The soft fries squish rather than crunch when you bite the sandwich.
Shoestring fries stay crispier longer after cooking. The lack of moist interior means less steam softening the crispy exterior. Regular fries begin softening within minutes as interior steam migrates outward. Shoestring fries maintain texture long enough to assemble and eat the sandwiches.
Integration into Steak Sandwich Structure
Shoestring fries fit naturally into sandwich layers. Their thin profile doesn’t create excessive height. The sandwich remains manageable to pick up and bite. The fries distribute evenly across the bread surface. Every bite includes some fries.
Thick-cut steak fries would make the sandwich too tall. You’d need to unhinge your jaw to bite through. Or the sandwich would fall apart from being too loosely stacked to accommodate the height. Structural integrity would suffer.
The shoestring fries also nest into the other ingredients. They settle between the steak slices and around the chimichurri. They become integrated rather than sitting as a separate layer. This integration creates cohesive sandwich where all elements work together rather than competing.
Steak & Frites Sandwich
Ribeye, shoestring fries, provolone, chimichurri
Ingredients
Steak
- 2 ribeye steaks (1-1¼ lb each, 1-1½ inches thick)
- 2 teaspoons kosher salt
- 1 teaspoon coarse black pepper
- 1 teaspoon garlic powder
- 1 tablespoon high-heat oil (avocado or canola)
Shoestring Fries
- 2 large russet potatoes
- Neutral oil for frying
- Salt to taste
Chimichurri
- 1 cup fresh parsley, finely chopped
- 2 tablespoons fresh oregano (or 1 tbsp dried)
- 4 cloves garlic, minced
- ½ teaspoon red pepper flakes
- 2 tablespoons red wine vinegar
- ½ cup olive oil
- Salt and pepper to taste
Assembly
- 4 slices sourdough bread
- 4-6 slices provolone cheese
- ½ cup chipotle mayo
Use a Meater or instant-read thermometer to pull steak at exactly 120°F. Carryover cooking during the 8 to 10 minute rest brings it to perfect 125 to 130°F medium-rare. This precision prevents overcooking and guarantees juicy results every time.
Steak Sandwich Step-by-Step Instructions
Step 1: Make the Chimichurri

In a medium bowl, combine 1 cup of finely chopped fresh parsley. Use flat-leaf Italian parsley, not curly parsley. Flat-leaf has better flavor and texture for chimichurri.
Add 2 tablespoons of fresh oregano if available, or 1 tablespoon of dried oregano. Fresh is preferred but dried works in a pinch. Add 4 cloves of minced garlic, ½ teaspoon of red pepper flakes, and 2 tablespoons of red wine vinegar.
Stir everything together to combine. Pour in ½ cup of olive oil and stir until all ingredients are incorporated. The chimichurri should be chunky with visible herb pieces, not smooth like a sauce.
Season with salt and pepper to taste. Start with ½ teaspoon of salt and ¼ teaspoon of pepper. Taste and adjust. Set the chimichurri aside at room temperature while you prepare everything else. The flavors develop and meld as it sits.
Step 2: Prepare and Fry the Shoestring Fries

Peel 2 large russet potatoes. Using a mandoline with the julienne attachment, cut the potatoes into thin matchstick fries. The julienne blade creates uniform thin strips perfect for shoestring fries. If you don’t have a mandoline, cut by hand as thin as possible with a sharp knife.
Place the cut fries in a large bowl of cold water. Rinse them by swishing around, then drain. Refill with fresh cold water and let them soak for 10 minutes. This removes excess starch that can make them stick together during frying.
Drain the fries completely and pat them thoroughly dry with clean kitchen towels or paper towels. They must be completely dry. Any moisture causes dangerous spattering when they hit the hot oil.
Heat neutral frying oil in a large pot or deep fryer to 350°F. Use enough oil so the fries can float freely, typically 2 to 3 inches deep. Use a thermometer to verify temperature. Too cool and the fries absorb oil. Too hot and they burn before cooking through.
Carefully add the fries to the oil in batches. Don’t crowd the pot. Fry for 2 to 3 minutes until golden brown and crispy. The fries will bubble vigorously at first, then the bubbling slows as they finish.
Remove the fries with a slotted spoon or spider strainer. Let excess oil drip off, then transfer to a paper towel-lined plate. Salt immediately while hot. The salt adheres better to hot fries. Keep the cooked fries in a warm oven at 200°F while you cook the steaks.
Step 3: Season and Prep the Steaks

Remove 2 ribeye steaks from refrigeration 20 to 30 minutes before cooking. Let them come closer to room temperature. Cold steaks cook unevenly.
Pat both steaks completely dry on all sides with paper towels. Moisture prevents proper browning. The drier the surface, the better the crust development.
Season both sides of each steak generously with kosher salt, coarse black pepper, and garlic powder. Use approximately 1 teaspoon of salt total per steak, ½ teaspoon of pepper per steak, and ½ teaspoon of garlic powder per steak. Don’t be shy with seasoning. The high heat cooking requires generous seasoning.
Insert the Meater probe into the thickest part of one steak, positioning it horizontally so the probe is in the center. If you only have one probe, use it on the thicker steak. Check the other steak manually with an instant-read thermometer.
Step 4: Cook the Steaks
Heat a grill or large cast iron skillet over high heat. You want the cooking surface screaming hot. For cast iron, preheat for 5 to 7 minutes. For a grill, let it preheat fully with the lid closed.
Add 1 tablespoon of high-heat oil to the pan. Avocado oil or canola oil work best. They have high smoke points that tolerate the heat. Swirl to coat the surface.
Carefully place both steaks in the hot pan or on the grill grates. They should sizzle immediately and aggressively. If they don’t sizzle loudly, the heat isn’t high enough.
Cook for 2 minutes without moving them. Don’t press down or fiddle with them. Let them develop crust.
After 2 minutes, flip both steaks. Cook for another 2 minutes on the second side.
Flip again. Continue flipping every 2 minutes. Check the Meater temperature after the third flip (6 minutes total). The steaks are likely around 100 to 110°F at this point.
Continue flipping every 2 minutes until the internal temperature reaches 120°F. This typically takes 8 to 12 minutes total depending on steak thickness and heat consistency.
Remove the steaks immediately when they hit 120°F. Transfer them to a cutting board or plate. Let them rest undisturbed for 8 to 10 minutes.
Step 5: Rest and Slice the Steaks
During the rest period, the steaks will continue cooking from residual heat. The internal temperature will rise to 125 to 130°F. This carryover cooking is why you pull at 120°F rather than your final target temperature.
After the full 8 to 10 minute rest, slice the steaks against the grain. Look for the direction the muscle fibers run. Cut perpendicular to these fibers. This creates shorter fibers in each slice, making the meat more tender.
Slice the steaks about ¼ inch thick. You want thin slices that layer well in the sandwich but not so thin they fall apart. Each steak should yield 8 to 12 slices depending on size.
Step 6: Melt the Provolone on the Steak
Heat a clean skillet or return the sliced steak to your cooking pan over medium heat. Arrange the steak slices in the pan in a single layer or slightly overlapping.
Place 2 to 3 slices of provolone cheese over the steak slices. The cheese should cover most of the meat. You can tear the cheese into pieces if needed to distribute it evenly.
Cover the pan with a lid or tent with foil. The trapped heat melts the cheese rapidly. Let it sit for 30 to 60 seconds until the cheese is fully melted and gooey.
Remove the pan from heat. The cheese-covered steak is ready for immediate assembly.
Step 7: Toast the Sourdough
While the cheese melts on the steak, toast the sourdough bread. Place 4 slices in a toaster, on a grill, or in a dry skillet over medium heat.
Toast until golden brown with slight char in spots. The bread should be crispy on the outside but still soft enough to bite through easily. Over-toasted bread becomes too hard and dominates the sandwich texture.
If toasting on a grill or in a pan, toast one side only. The untoasted side goes against the fillings and stays softer.
Step 8: Build the Steak Sandwich

Place 2 slices of toasted sourdough on each of 2 serving plates, toasted side up if you only toasted one side.
Spread approximately 2 tablespoons of chipotle mayo on each of the 4 bottom bread slices. Spread it to the edges so every bite includes mayo.
Divide the provolone-covered steak slices among the 4 bottom bread slices. Arrange them evenly across the bread surface. Each sandwich should get about one-quarter of the total sliced steak.
Spoon approximately 2 tablespoons of chimichurri over the steak on each sandwich. The chunky herbs and garlic should distribute across the meat. Don’t use too much. You want flavor enhancement, not drowning the steak.
Top each sandwich with a generous handful of the crispy shoestring fries. Let them pile up slightly. They’ll compress when you add the top bread. The fries are a main component, not just garnish.
Place the remaining toasted bread slices on top of each sandwich, toasted side down. Press gently to compact the sandwich slightly.
Step 9: Cut and Serve The Steak Sandwich
Using a sharp serrated knife, cut each sandwich in half diagonally. The diagonal cut creates the most attractive presentation and makes the sandwich easier to handle.
Serve immediately while everything is hot. The steak should still be warm, the cheese melted, and the fries crispy. The sandwich is best eaten fresh within 5 minutes of assembly.
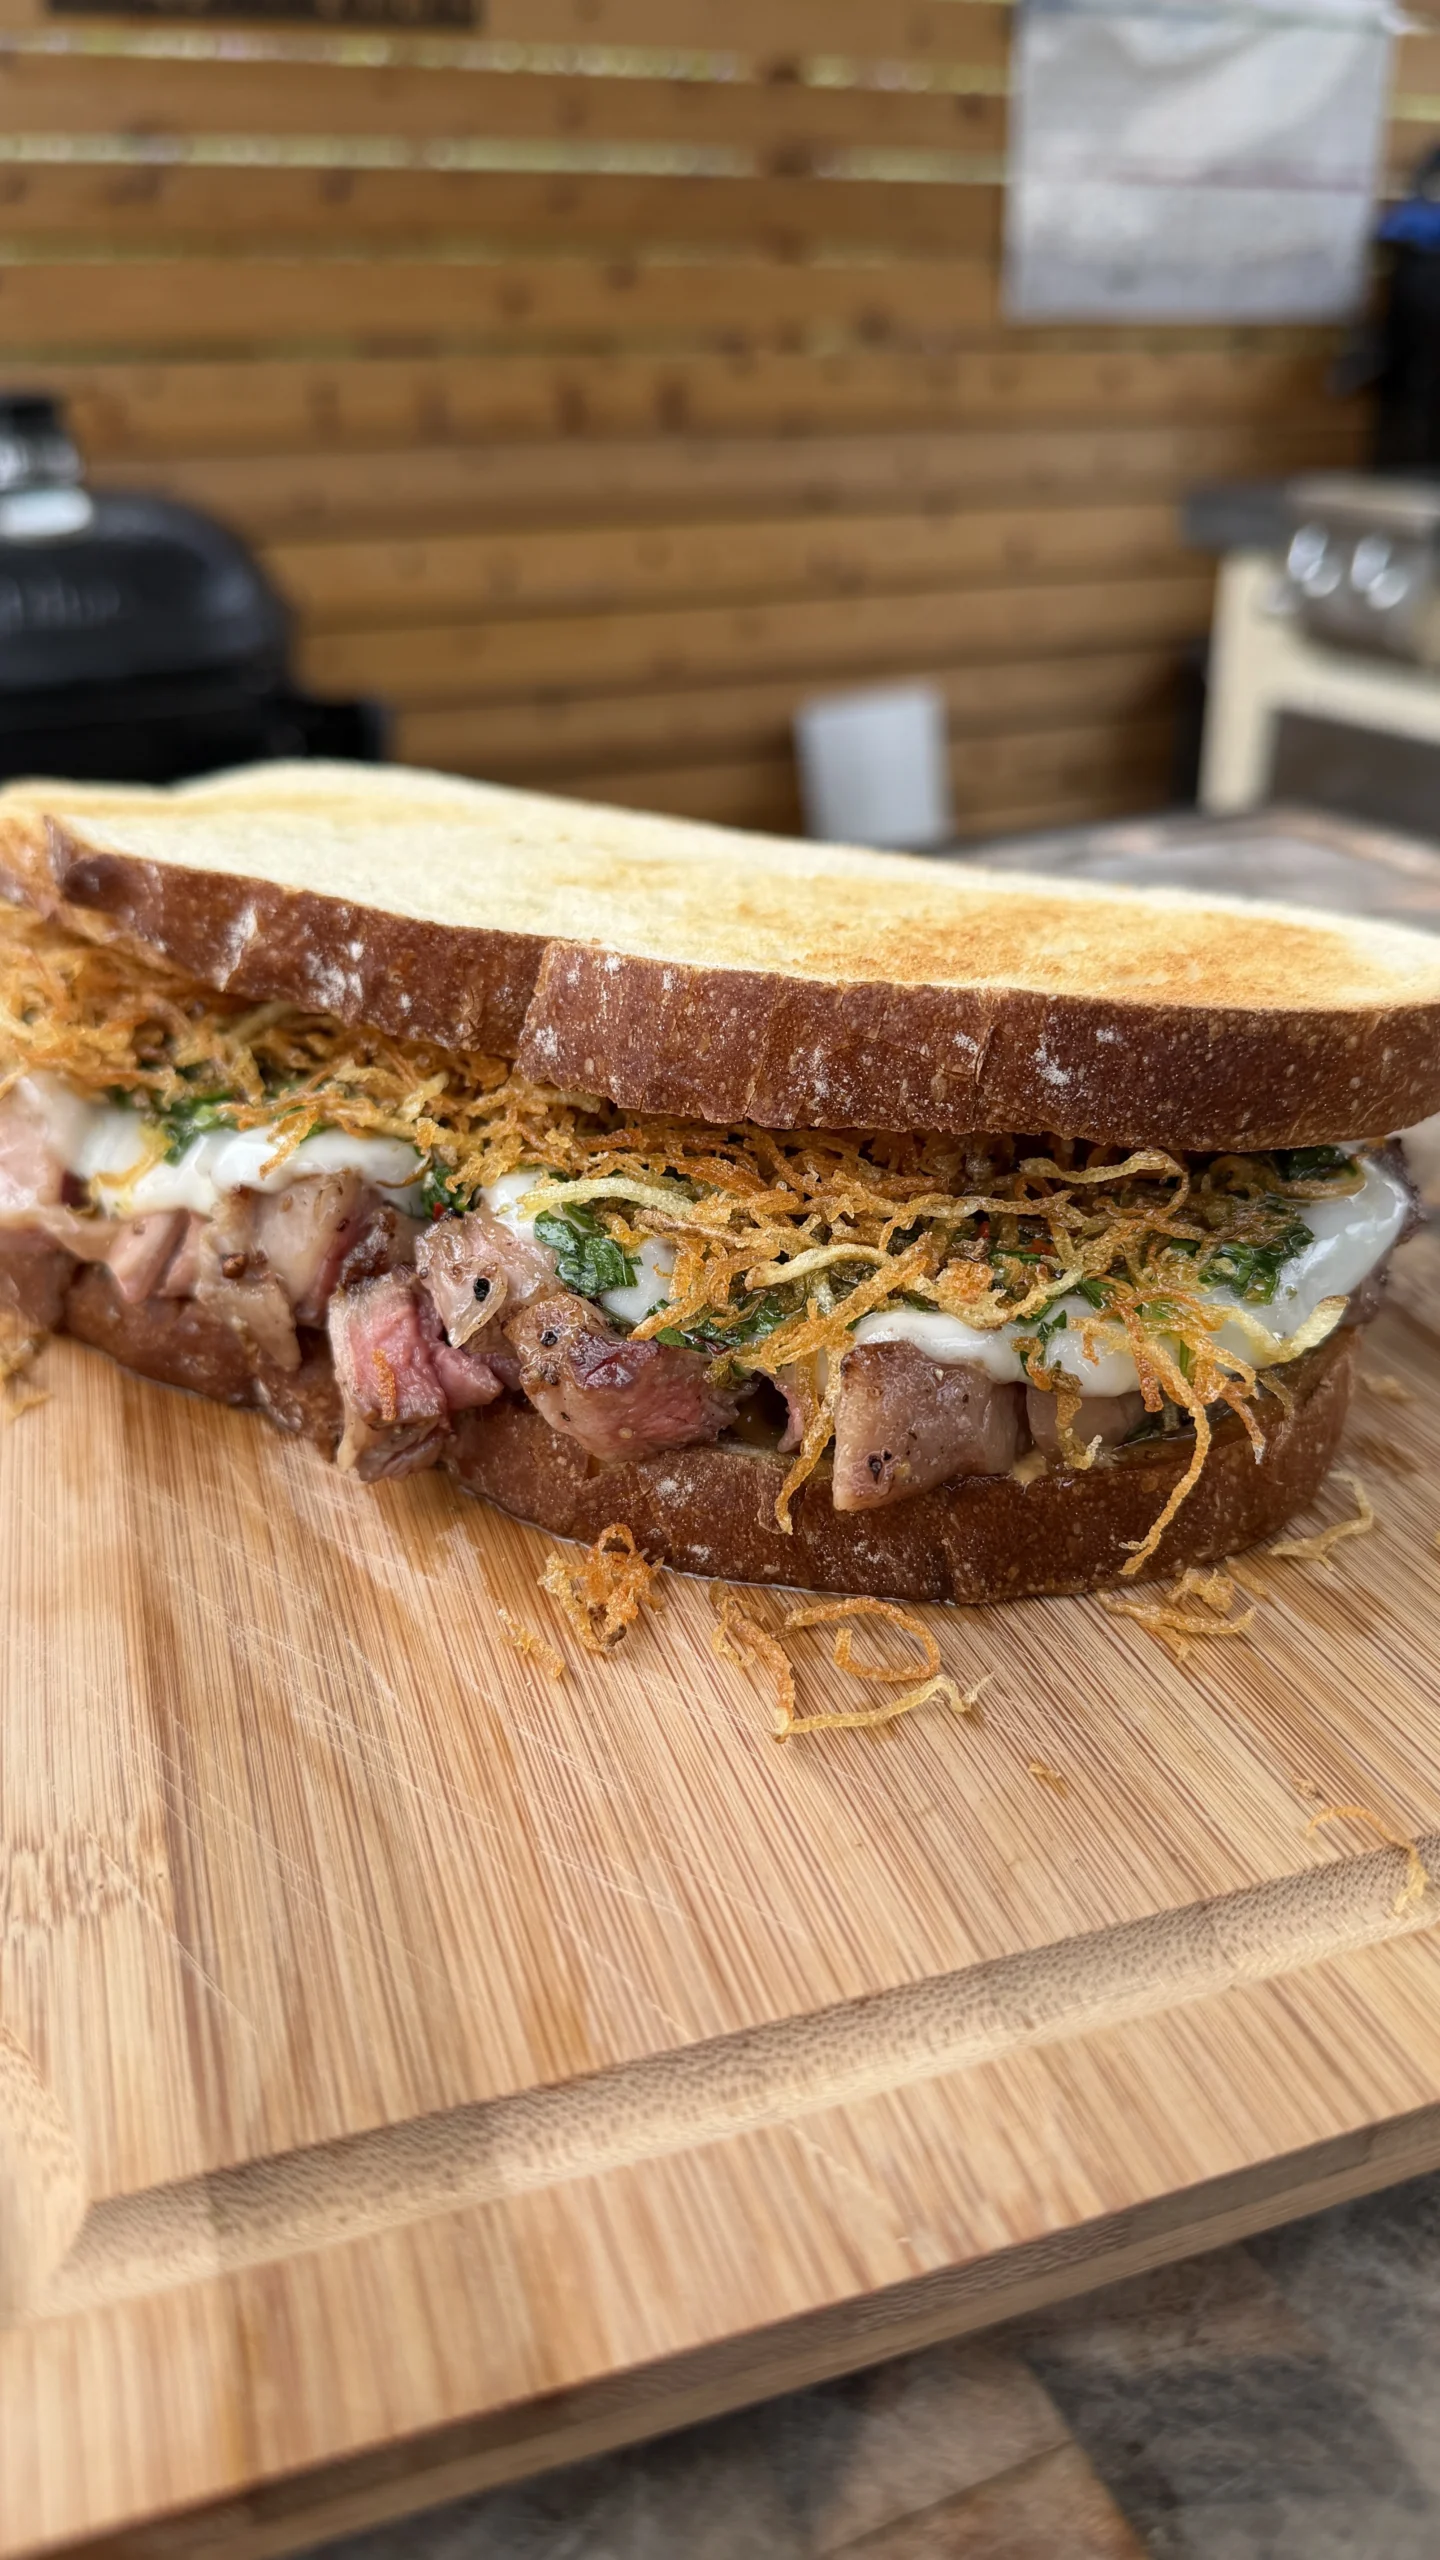
Steak and Frites Sandwich
Ingredients
Equipment
Method
- Make chimichurri: Combine parsley, oregano, garlic, red pepper flakes, and red wine vinegar. Stir in olive oil. Season with salt and pepper. Set aside to let flavors develop.
- Julienne russet potatoes on mandoline into thin matchsticks. Rinse in cold water and soak 10 minutes. Drain and pat completely dry. Heat oil to 350°F. Fry potatoes in batches 2 to 3 minutes until golden and crispy. Remove, drain, and salt immediately. Keep warm.
- Pat steaks dry. Season generously with salt, pepper, and garlic powder. Insert Meater probe into thickest part of one steak.
- Heat grill or cast iron over high heat. Add oil. Place steaks in pan. Cook 2 minutes, then flip. Continue flipping every 2 minutes until internal temperature reaches 120°F, about 8 to 12 minutes total. Remove and rest 8 to 10 minutes. Temperature will rise to 125 to 130°F.
- Slice rested steaks thin against the grain. Place slices in hot pan. Layer provolone over steak. Cover 30 to 60 seconds until cheese melts.
- Toast sourdough until golden brown.
- Build sandwiches: Spread chipotle mayo on bottom bread slices. Add provolone-covered steak slices. Top with chimichurri. Add handful of shoestring fries. Place top bread slice.
- Cut diagonally and serve immediately.
Nutrition
Notes
Tried this recipe?
Let us know how it was!Frequently Asked Questions
Can You Make These Steak Sandwiches with Different Steak Cuts?
Strip steak works well as an alternative to ribeye. Strip steak is leaner but still flavorful. It slices cleanly and has good beef taste. Cook it the same way, pulling at 120°F for medium-rare. The main difference is slightly less marbling. The sandwiches will be slightly less rich but still delicious.
Sirloin can work for budget-conscious versions. Sirloin is significantly leaner than ribeye. It can become tough if overcooked. Pull sirloin at 115°F and rest to 120 to 125°F maximum. Don’t go past medium-rare with sirloin. The texture suffers at higher temperatures.
Avoid filet mignon for sandwiches despite its tenderness. Filet has very mild flavor. In a sandwich with chimichurri and chipotle mayo, the steak flavor gets lost. You’re paying premium prices without getting the benefit. Save filet for preparations where its delicate flavor shines.
Flank steak or skirt steak work if sliced very thin against the grain. These cuts are tougher but have excellent flavor. They need to be sliced thinner than ribeye, almost shaved. The thin slicing breaks up the tough fibers. These cuts are traditional for Philly cheesesteak and work similarly here.
How Do You Store and Reheat Leftover Components?
Store leftover steak in an airtight container in the refrigerator for up to 3 days. Don’t slice it before storing. Keep it whole and slice when ready to reheat. This preserves moisture better than storing slices.
Chimichurri stores well in the refrigerator for up to 1 week in an airtight container. The flavors actually improve after a day. The oil may solidify in the cold. Bring to room temperature before using.
Leftover fries don’t store or reheat well. They become soggy within an hour. If you must store them, spread on a baking sheet uncovered in the refrigerator. Reheat in a 400°F oven for 5 to 7 minutes. They won’t be as crispy as fresh but acceptable.
Don’t assemble sandwiches ahead for storage. The bread becomes soggy. The fries lose crispiness. Only assemble immediately before eating. Prepare and store components separately, then build sandwiches fresh.
Can You Grill the Steaks Instead of Using Cast Iron?
Grilling steaks works perfectly for these sandwiches. Use the same flipping technique. Start steaks on a clean, preheated grill at medium-high to high heat. Flip every 2 minutes. Monitor temperature with Meater probe the same way.
Grill marks add visual appeal and smoky flavor. The char from the grill enhances the sandwiches. Some people prefer grilled flavor to cast iron for outdoor cooking occasions.
The main challenge with grilling is maintaining consistent high heat. Gas grills work well with burners on high. Charcoal grills need well-established hot coals. Don’t try to grill over low, dying coals. You need aggressive heat for proper crust.
Oil the grill grates well before adding steaks. Ribeye fat can cause flare-ups. Keep a spray bottle of water nearby to tame excessive flames. Brief flare-ups add flavor. Extended burning creates acrid taste.
What Other Sauces Work Besides Chimichurri and Chipotle Mayo?
Horseradish cream provides classic steakhouse flavor. Mix prepared horseradish with sour cream or mayo. The sharp, pungent horseradish cuts through rich steak beautifully. Use it instead of chipotle mayo for different flavor profile.
Blue cheese sauce offers tangy, funky contrast. Crumble blue cheese into mayo or sour cream. Add a splash of buttermilk or milk to thin slightly. The cheese’s assertiveness matches the bold beef.
Garlic aioli creates Mediterranean influence. Make or buy garlic aioli and use it in place of chipotle mayo. The garlic complements the chimichurri’s garlic notes without being redundant.
Peppercorn sauce brings French bistro vibes. Make a quick pan sauce with brandy, cream, and cracked black pepper. Drizzle over the steak before building sandwiches. This creates more saucy, less dry sandwiches.
Caramelized onions with mayo work for those who want sweeter notes. Cook sliced onions slowly until deeply browned and sweet. Mix with mayo and spread on bread. The sweet onions balance savory steak.
Why Melt Cheese on the Steak Instead of the Bread?
Melting cheese on the steak creates better integration. The cheese bonds directly to the meat while both are hot. They become a single element rather than separate layers. When you bite the sandwich, the cheese and meat stay together instead of sliding apart.
The moisture from the meat helps the cheese melt smoothly. The juices from the sliced steak create steam that melts the cheese from underneath. Cheese on cold bread melts unevenly or not at all.
Melting cheese on bread can make it soggy. Melted cheese releases moisture as it cools. This moisture soaks into the bread. The structural integrity of the sandwich suffers. Crispy toasted bread becomes soft and weak.
The steakhouse technique of melting cheese on meat is proven. Classic cheesesteaks, patty melts, and bistro sandwiches all use this method. The cheese coating the meat is more appealing visually and texturally than cheese stuck to bread with meat on top.
The brief return to heat after slicing also rewarms the steak slightly. Slicing exposes interior surface that cools rapidly. The 30 to 60 seconds with cheese melting brings the meat back to optimal serving temperature.
Ready to Level Up?
Take your backyard cooking from good to legendary.
This is where I keep all my most-used smokers, knives, and favorite cooking tools.
Shop My Gear CollectionExplore More Recipes
Find more diverse flavors at CWFeats.com