
Sticky Honey Garlic Double Bone Pork Chops
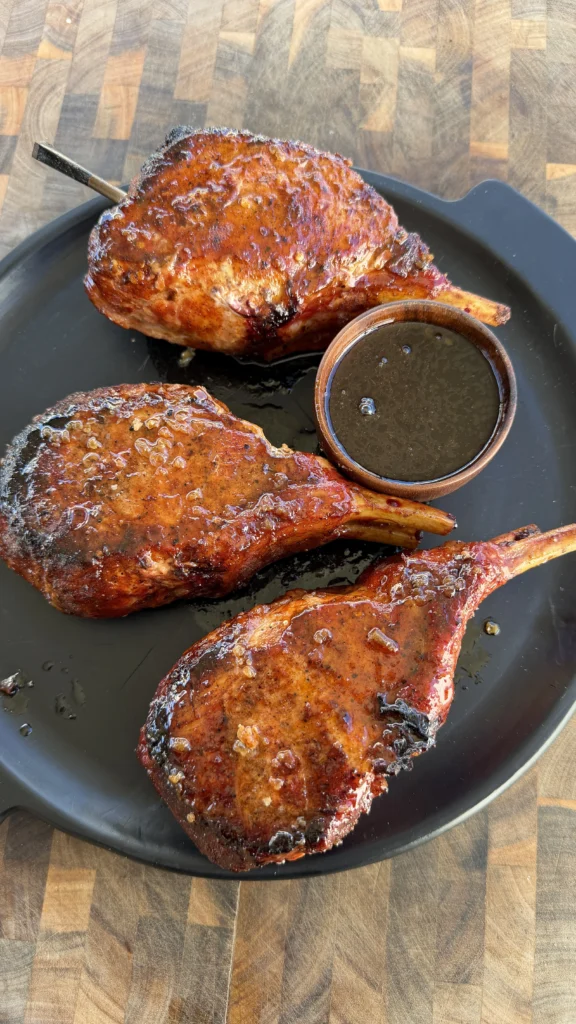
Honey garlic pork chops use three double bone pork chops (1.5-2 inches thick, approximately 1 lb each) patted dry and seasoned generously with 1 tablespoon kosher salt, 2 teaspoons each of coarse black pepper and garlic powder, and 1.5 teaspoons smoked paprika, then rested at room temperature for 20-30 minutes. Cook over indirect heat at 275-300°F with optional apple or cherry wood until internal temperature reaches 125-130°F, approximately 40-50 minutes. Brush with sticky honey garlic sauce made from 3/4 cup honey, 1/2 cup soy sauce, 8 minced garlic cloves, 2 tablespoons butter, 2 tablespoons apple cider vinegar, 1.5 tablespoons sriracha, 1 teaspoon grated ginger, and cornstarch slurry (1.5 teaspoons cornstarch mixed with 2 tablespoons water) simmered until glossy and thickened. Sear over high heat at 450-500°F for 1-2 minutes per side while glazing generously, pulling at 138-140°F internal temperature. Rest for 8-10 minutes to reach final 145°F, brush with additional sauce, and garnish with sesame seeds, green onions, and lime. These sticky honey garlic pork chops deliver restaurant-quality results with juicy, perfectly cooked meat and caramelized sweet-savory glaze that rivals any Asian steakhouse.
The whole process takes about 1 hour 30 minutes from start to finish. Spend 20-30 minutes bringing chops to room temperature after seasoning. Cook for 40-50 minutes over indirect heat. Make the sauce in 10 minutes while chops cook. Sear and glaze for 3-4 minutes total. Rest for 8-10 minutes before serving. The two-stage cooking ensures thick pork chops cook evenly without drying out, while the final sear with sauce creates sticky, caramelized coating without burning the honey. The cornstarch slurry transforms the sauce from thin liquid to thick glaze that clings to every surface.
What Are Double Bone Pork Chops?
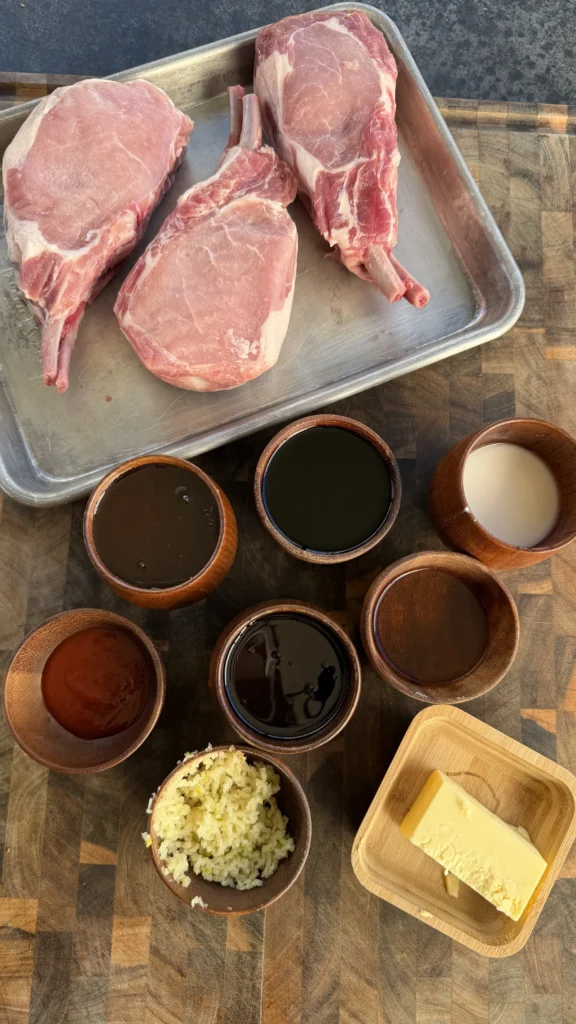
Double bone pork chops are thick-cut chops that include two rib bones instead of the typical single bone. These chops are cut from the rib section of the pork loin, typically 1.5-2 inches thick and weighing approximately 1 lb each. The double bones create dramatic presentation and help the thick chop retain moisture during cooking by conducting heat more slowly than boneless cuts.
The meat between and around the bones comes from the loin muscle, one of the most tender cuts on the pig. This area has moderate marbling that keeps the meat juicy during cooking without being overly fatty. The bones also add flavor as they cook, contributing rich, porky taste that boneless chops can’t match. The bone acts as a heat conductor, cooking the meat from the inside while the exterior browns.
Double bone chops differ from standard pork chops in thickness and cooking requirements. Regular pork chops are typically 3/4 to 1 inch thick and cook in 10-15 minutes. Double bone chops at 1.5-2 inches thick need 50-60 minutes total cooking time using two-stage method. The extra thickness allows for proper searing without overcooking the interior.
You’ll find double bone pork chops at butcher shops or by special order at grocery stores. They’re sometimes labeled as “double-cut” or “thick-cut” rib chops. When buying, look for chops with good marbling throughout, pinkish-red color, and clean bones without cracks. Expect to pay premium prices since these are specialty cuts that require specific butchering.
Why Cook Pork Chops to 145°F Instead of 165°F?
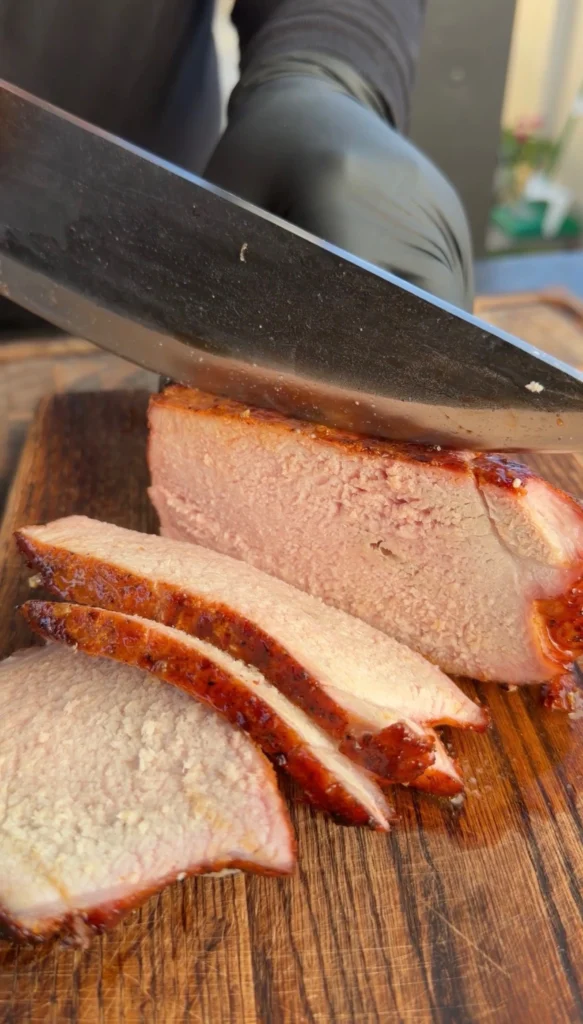
The USDA updated safe pork cooking temperature to 145°F followed by a 3-minute rest in 2011, down from the previous 160-165°F recommendation. Modern pork farming has virtually eliminated trichinosis risk, making lower cooking temperatures safe. At 145°F with proper rest, pork is perfectly safe while remaining juicy and tender rather than dry and overcooked.
Pork cooked to 145°F has a slight blush of pink in the center, which is completely safe and indicates proper doneness. This pink color comes from myoglobin proteins that haven’t fully denatured, not from blood or undercooking. The texture at 145°F is tender and juicy with moisture retained throughout. Above 150°F, pork begins drying out significantly as proteins squeeze out water.
The carryover cooking during rest is critical for thick pork chops. When you pull chops at 138-140°F and rest for 8-10 minutes, internal temperature rises another 5-7 degrees to reach 145°F final. This means the meat never overcooks from direct heat. If you wait until the thermometer reads 145°F before pulling, carryover will push it to 150-152°F, creating dry meat.
For thick double bone pork chops specifically, the 145°F target ensures the center near the bones cooks properly without the exterior becoming overcooked. Bones conduct heat slower than meat, so the area closest to bones is always coolest. By cooking the thickest part near the bone to 145°F, you ensure the entire chop is safe while maximizing juiciness throughout.
How Does the Two-Stage Cooking Method Work?
The two-stage method cooks thick pork chops using gentle indirect heat first, then finishes with high-heat searing. Stage one at 275-300°F brings internal temperature up slowly and evenly to 125-130°F without developing exterior crust. This takes 40-50 minutes, allowing heat to penetrate deep into the thick chop while keeping surface from burning or drying out.
Stage two sears over high heat at 450-500°F for just 1-2 minutes per side. This brief exposure to intense heat creates caramelized crust and char marks without cooking the interior further. The meat is already at safe temperature from stage one, so the sear is purely for flavor and texture. Glazing with honey garlic sauce during searing caramelizes the sugars for sticky coating.
This method prevents the common problem with thick chops: burned exterior with raw interior. If you tried to cook 1.5-2 inch pork chops entirely over high heat, the outside would char before the center reached 145°F. If you cooked entirely over low heat, you’d never develop proper crust and browning. The two-stage approach gets you both even cooking AND excellent crust.
The technique also allows precise temperature control. You can monitor internal temp during the slow indirect phase without worrying about overcooking. Once you hit 125-130°F, the quick sear brings it up the final 10-15 degrees rapidly. This narrow window of high heat minimizes risk of overshooting your target temperature.
Why Wait Until the Sear to Apply Honey Garlic Sauce?
Applying sauce during the sear instead of earlier prevents burning and preserves the sauce’s intended flavor. Honey contains high sugar content that caramelizes around 320°F but burns at 350°F and above. During the 40-50 minute indirect cook at 275-300°F, sauce would burn long before the chops finished cooking. The sugars would char black and taste bitter rather than creating sticky glaze.
Waiting also prevents the sauce from washing away the seasoning you applied to the raw meat. The salt, pepper, garlic powder, and paprika create a dry rub that adheres during cooking, forming flavorful crust. Adding wet sauce during indirect cooking would dissolve this seasoning and prevent proper bark development. The dry surface during indirect cooking allows browning reactions that wet sauce would inhibit.
The brief high-heat sear is perfect timing for sauce application. The intense 450-500°F heat caramelizes the honey quickly, creating the signature sticky glaze in just 1-2 minutes per side. The sauce bubbles, thickens, and browns without burning since exposure is so short. Multiple brushings during the sear build up layers of caramelized sauce that create thick coating.
The cornstarch slurry in the sauce also works better when applied during searing. The slurry thickens the sauce so it clings to meat rather than running off. When brushed onto hot pork chops over high heat, the sauce sets almost immediately into glossy coating. If applied during low-heat cooking, the sauce would remain thin and drip into the drip pan rather than coating the meat.
What Does the Cornstarch Slurry Do for the Sauce?
The cornstarch slurry thickens the honey garlic sauce from thin liquid to sticky glaze that clings to pork chops. Without thickening, the sauce made from honey, soy sauce, vinegar, and other liquids would be watery and run off the meat. The cornstarch creates viscosity that allows the sauce to coat surfaces and build up in layers during multiple brushings.
Mix 1.5 teaspoons cornstarch with 2 tablespoons cold water to create the slurry. This ratio provides enough thickening for 3/4 cup honey base without making it gummy or pasty. The cornstarch must be mixed with cold water first before adding to hot sauce – adding dry cornstarch directly creates lumps that won’t dissolve. The water suspension allows even distribution throughout the sauce.
When you stir the slurry into simmering sauce and cook for 1-2 minutes, the cornstarch granules absorb liquid, swell, and release starch molecules that thicken the mixture. The sauce transforms from thin like soy sauce to thick like syrup. This happens quickly once the sauce reaches 180-200°F. The glossy appearance indicates proper thickening – the sauce should coat the back of a spoon.
The thickened sauce also caramelizes better during searing than thin sauce would. The viscosity keeps sugars concentrated on the meat surface where they can brown rather than dripping off. Each brush stroke builds another layer of glaze. After 2-3 applications during searing, you have thick, sticky coating that looks professional and tastes incredible.
Honey Garlic Pork Chops
Double bone, sticky glaze, perfect 145°F finish
Ingredients
Pork Chops
- 3 double bone pork chops (1.5-2 inches thick, ~1 lb each)
- 1 tablespoon kosher salt
- 2 teaspoons coarse black pepper
- 2 teaspoons garlic powder
- 1½ teaspoons smoked paprika
Honey Garlic Sticky Sauce
- ¾ cup honey
- ½ cup soy sauce (or low sodium)
- 8 cloves garlic, finely minced
- 2 tablespoons butter
- 2 tablespoons apple cider vinegar
- 1½ tablespoons sriracha (adjust heat to taste)
- 1 teaspoon grated ginger (optional)
Cornstarch Slurry
- 1½ teaspoons cornstarch
- 2 tablespoons water
Optional Garnish
- Sesame seeds
- Chopped green onions
- Fresh lime wedges
The two-stage cooking method is essential for thick pork chops. Indirect cooking to 130°F ensures even doneness throughout without drying out. The high-heat sear with sauce glazing creates caramelized crust while bringing internal temp to 140°F. During the 8-10 minute rest, carryover cooking brings final temp to perfect 145°F without overcooking.
Step-by-Step Instructions
Step 1: Season and Rest the Pork Chops
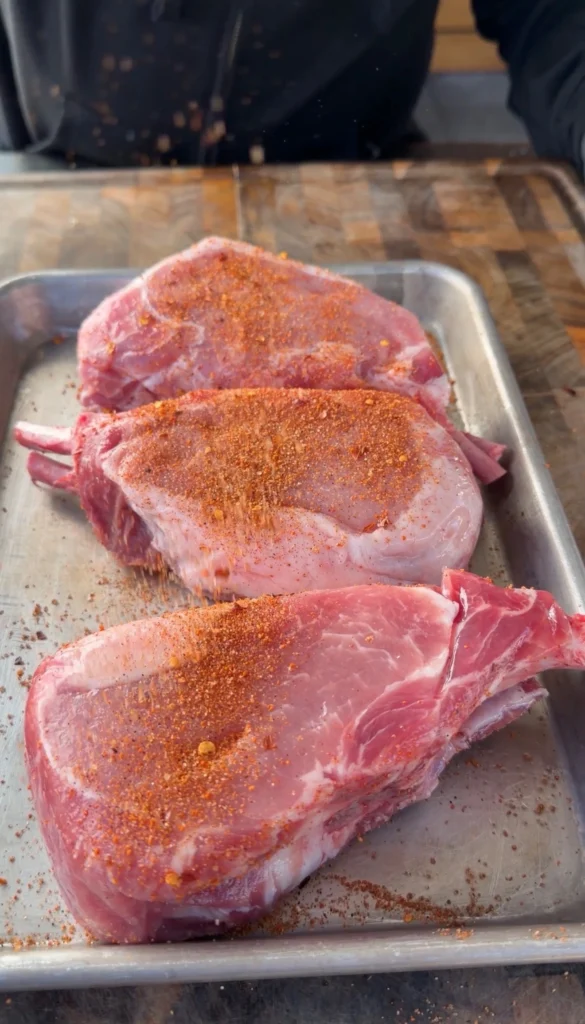
Remove 3 double bone pork chops from refrigeration and packaging. Pat them completely dry on all surfaces using paper towels. Surface moisture prevents seasoning from adhering and creates steam during cooking instead of browning. The chops should feel dry to the touch on all sides.
In a small bowl, combine 1 tablespoon kosher salt, 2 teaspoons coarse black pepper, 2 teaspoons garlic powder, and 1.5 teaspoons smoked paprika. Mix the seasoning blend thoroughly until uniform in color. This simple rub focuses on enhancing pork’s natural flavor without competing with the honey garlic sauce that comes later.
Season all sides of each pork chop generously with the seasoning blend. Use all of the mixture divided evenly among the 3 chops. Press the seasonings into the meat firmly so they adhere well. The chops should have visible coating on all surfaces. Don’t forget to season the edges and areas near the bones where meat is exposed.
Let the seasoned pork chops sit at room temperature for 20-30 minutes before cooking. This removes the chill from refrigeration, allowing more even cooking. Cold chops straight from the fridge cook unevenly with cold centers when the exterior reaches proper sear. Room temperature chops cook through more uniformly during the indirect phase.
Step 2: Set Up Grill for Two-Zone Cooking
Preheat your grill or smoker to 275-300°F using a two-zone setup. On gas grills, turn on burners on one side only and leave the other side off for indirect heat. For charcoal, bank coals to one side. For pellet smokers or offset smokers, maintain steady 275-300°F with no direct heat under where the chops will sit.
If using a smoker or wanting smoke flavor, add a chunk of apple or cherry wood to the heat source. These mild fruit woods complement pork without overpowering it. Oak also works well for slightly stronger smoke. Avoid mesquite or hickory which can be too intense for pork and the Asian-inspired honey garlic sauce profile.
Place a drip pan on the cool side under where the pork chops will cook. This catches rendering fat and prevents flare-ups that could char the chops during the long indirect cook. Add a cup of water to the drip pan to create moisture and prevent fat from burning and smoking excessively.
Let the grill stabilize at 275-300°F with the lid closed for 10 minutes before adding the pork chops. Use the built-in thermometer or an oven thermometer placed at grate level to verify temperature. Adjust vents or burners as needed to maintain steady temp. Stable temperature is crucial for even cooking over the 40-50 minute cook time.
Step 3: Cook Pork Chops Indirect to 130°F
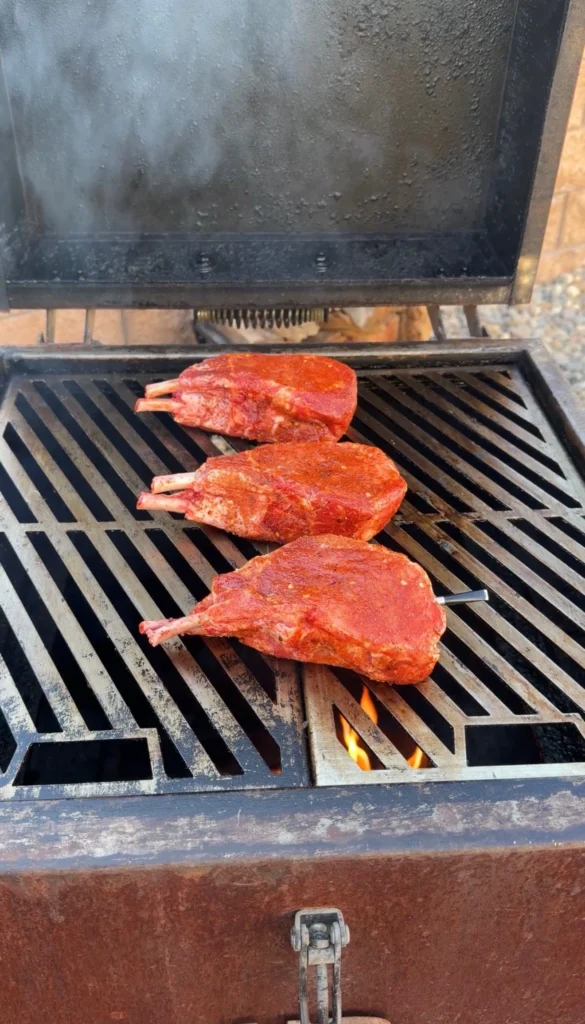
Place the 3 seasoned pork chops on the cool side of the grill over indirect heat. Position them so they’re not touching each other or directly over any heat source. Bone-side down or flat works equally well – just ensure even spacing for air circulation. Close the lid and cook undisturbed for the first 20 minutes.
After 20 minutes, insert an instant-read thermometer into the thickest part of one chop near the bone, avoiding bone contact. The thickest area will be coolest since bones conduct heat slowly. Check all 3 chops. They should be around 90-100°F at this point. Continue cooking with the lid closed.
Check temperature again after another 15 minutes (35 minutes total). The chops should be approaching 120-125°F. From this point, check every 5 minutes since they can climb quickly. You’re looking for 125-130°F in the thickest part near the bone. When the coolest chop reaches 130°F, all chops are ready for searing.
Total indirect cooking time is typically 40-50 minutes for 1 lb double bone chops at 1.5-2 inches thick. Exact timing varies based on grill efficiency, outside temperature, and exact chop thickness. Use the thermometer as your guide rather than the clock. The chops should have developed light color but no significant browning yet.
Step 4: Make the Honey Garlic Sticky Sauce
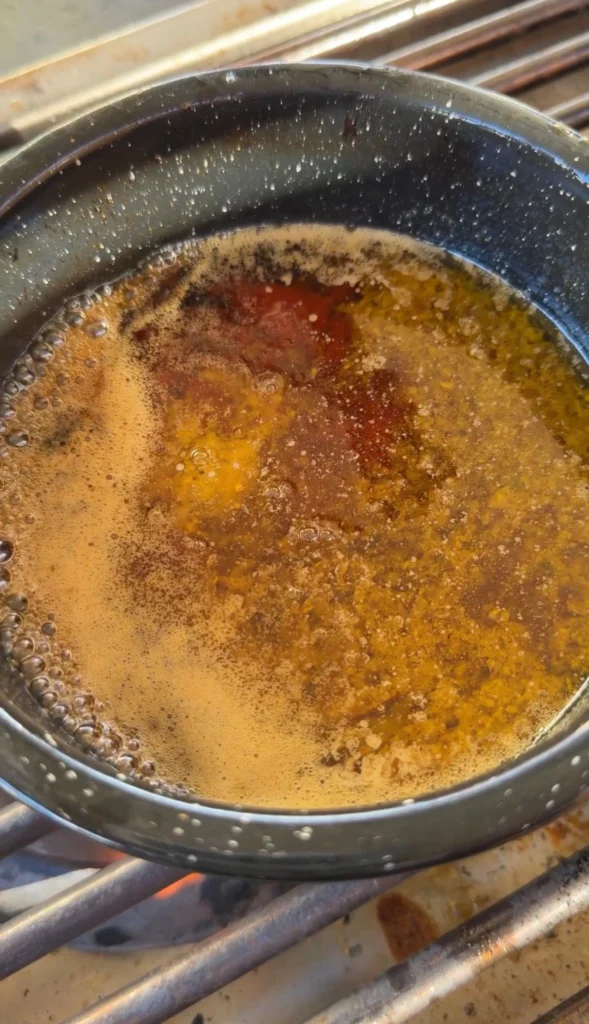
While pork chops cook during the indirect phase, make the honey garlic sauce. In a medium saucepan over medium heat, melt 2 tablespoons butter. Once melted, add 8 cloves of finely minced garlic. Cook the garlic in the butter for 30-45 seconds, stirring constantly. The garlic should become very fragrant but not brown – browned garlic tastes bitter.
Add 3/4 cup honey, 1/2 cup soy sauce (low sodium preferred), 2 tablespoons apple cider vinegar, 1.5 tablespoons sriracha, and 1 teaspoon grated ginger if using. Stir everything together until well combined. The mixture will look separated initially with honey floating on soy sauce, but it will come together as it heats.
Bring the sauce to a simmer and cook for 5-7 minutes, stirring occasionally. The sauce will begin combining into uniform liquid as it heats. The honey will thin, the soy sauce will mix in, and everything will blend into cohesive sauce. Reduce heat slightly if it starts boiling hard – you want gentle simmer, not rolling boil.
In a small bowl, mix 1.5 teaspoons cornstarch with 2 tablespoons cold water to create slurry. Stir until completely dissolved with no lumps. Add the slurry to the simmering sauce and stir continuously. Cook for 1-2 minutes until the sauce thickens noticeably and becomes glossy. It should coat the back of a spoon. Remove from heat and keep warm until chops are ready for searing.
Step 5: Sear and Glaze to 140°F
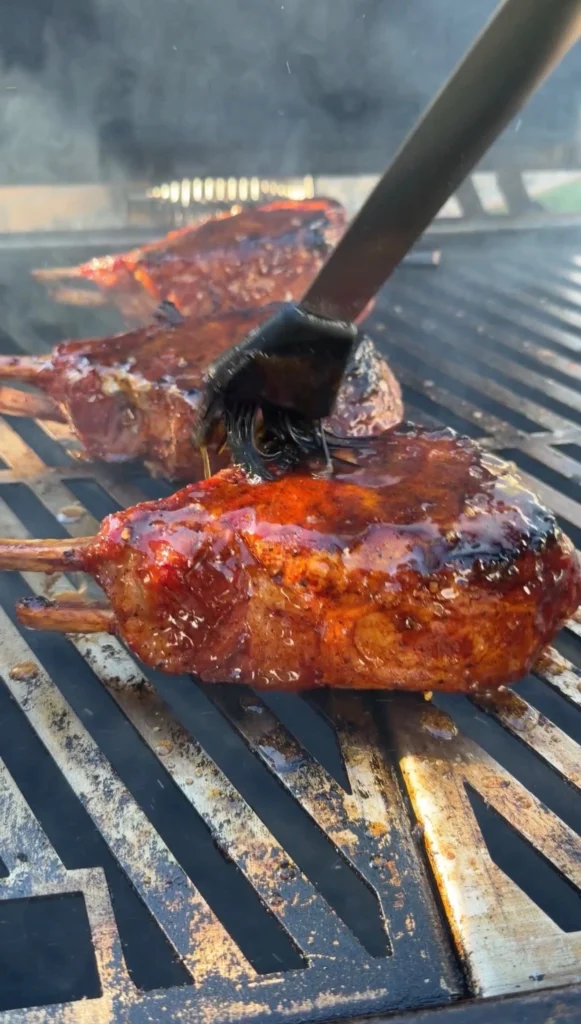
When pork chops reach 130°F internal temperature, remove them temporarily from the grill. Increase grill temperature to 450-500°F by opening vents fully or turning burners to high. Let the grill preheat for 5 minutes until very hot. You want intense heat for quick searing.
Place the pork chops over direct high heat. They should sizzle loudly on contact. Sear for 1-2 minutes on the first side without moving them. Brush the top side generously with warm honey garlic sauce while the bottom sears. The sauce should bubble and caramelize on contact with the hot meat.
Flip the chops using tongs. The first side should be deeply browned with caramelized sauce. Sear the second side for 1-2 minutes while brushing more sauce onto the now-upward facing first side. Build up layers of glaze through multiple applications. Watch closely since the honey can burn quickly at these temperatures.
Insert thermometer into the thickest part. Pull the chops when they reach 138-140°F internal temperature. The brief high-heat sear should bring internal temp up about 10 degrees from the 130°F where you started. Total searing time is only 3-4 minutes. Don’t exceed 140°F or carryover cooking during rest will push them over 145°F final target.
Step 6: Rest and Serve
Transfer the seared and glazed pork chops to a cutting board or serving platter. Tent loosely with aluminum foil and let rest for 8-10 minutes. Don’t skip this rest. The juices need time to redistribute throughout the meat after being driven to the center during cooking. The internal temperature will rise to 145°F final during this period.
During rest, reheat the remaining honey garlic sauce gently if it has cooled. Keep it warm but not simmering. After the 8-10 minute rest, brush each pork chop with additional fresh sauce for final coating. This adds one more layer of sticky glaze and ensures maximum flavor.
Garnish the glazed pork chops with sesame seeds, chopped green onions, and fresh lime wedges if desired. The sesame adds nutty crunch, green onions provide fresh bite, and lime offers bright acidity that cuts through the rich sauce. These garnishes create authentic Asian steakhouse presentation.
Serve the pork chops whole for dramatic presentation or slice them if preferred. To slice, cut perpendicular to the bones, creating medallions that show the bones running through. Either way, the interior should be juicy with slight pink blush indicating perfect 145°F doneness. Serve with extra sauce on the side for dipping and rice or vegetables to complete the meal.
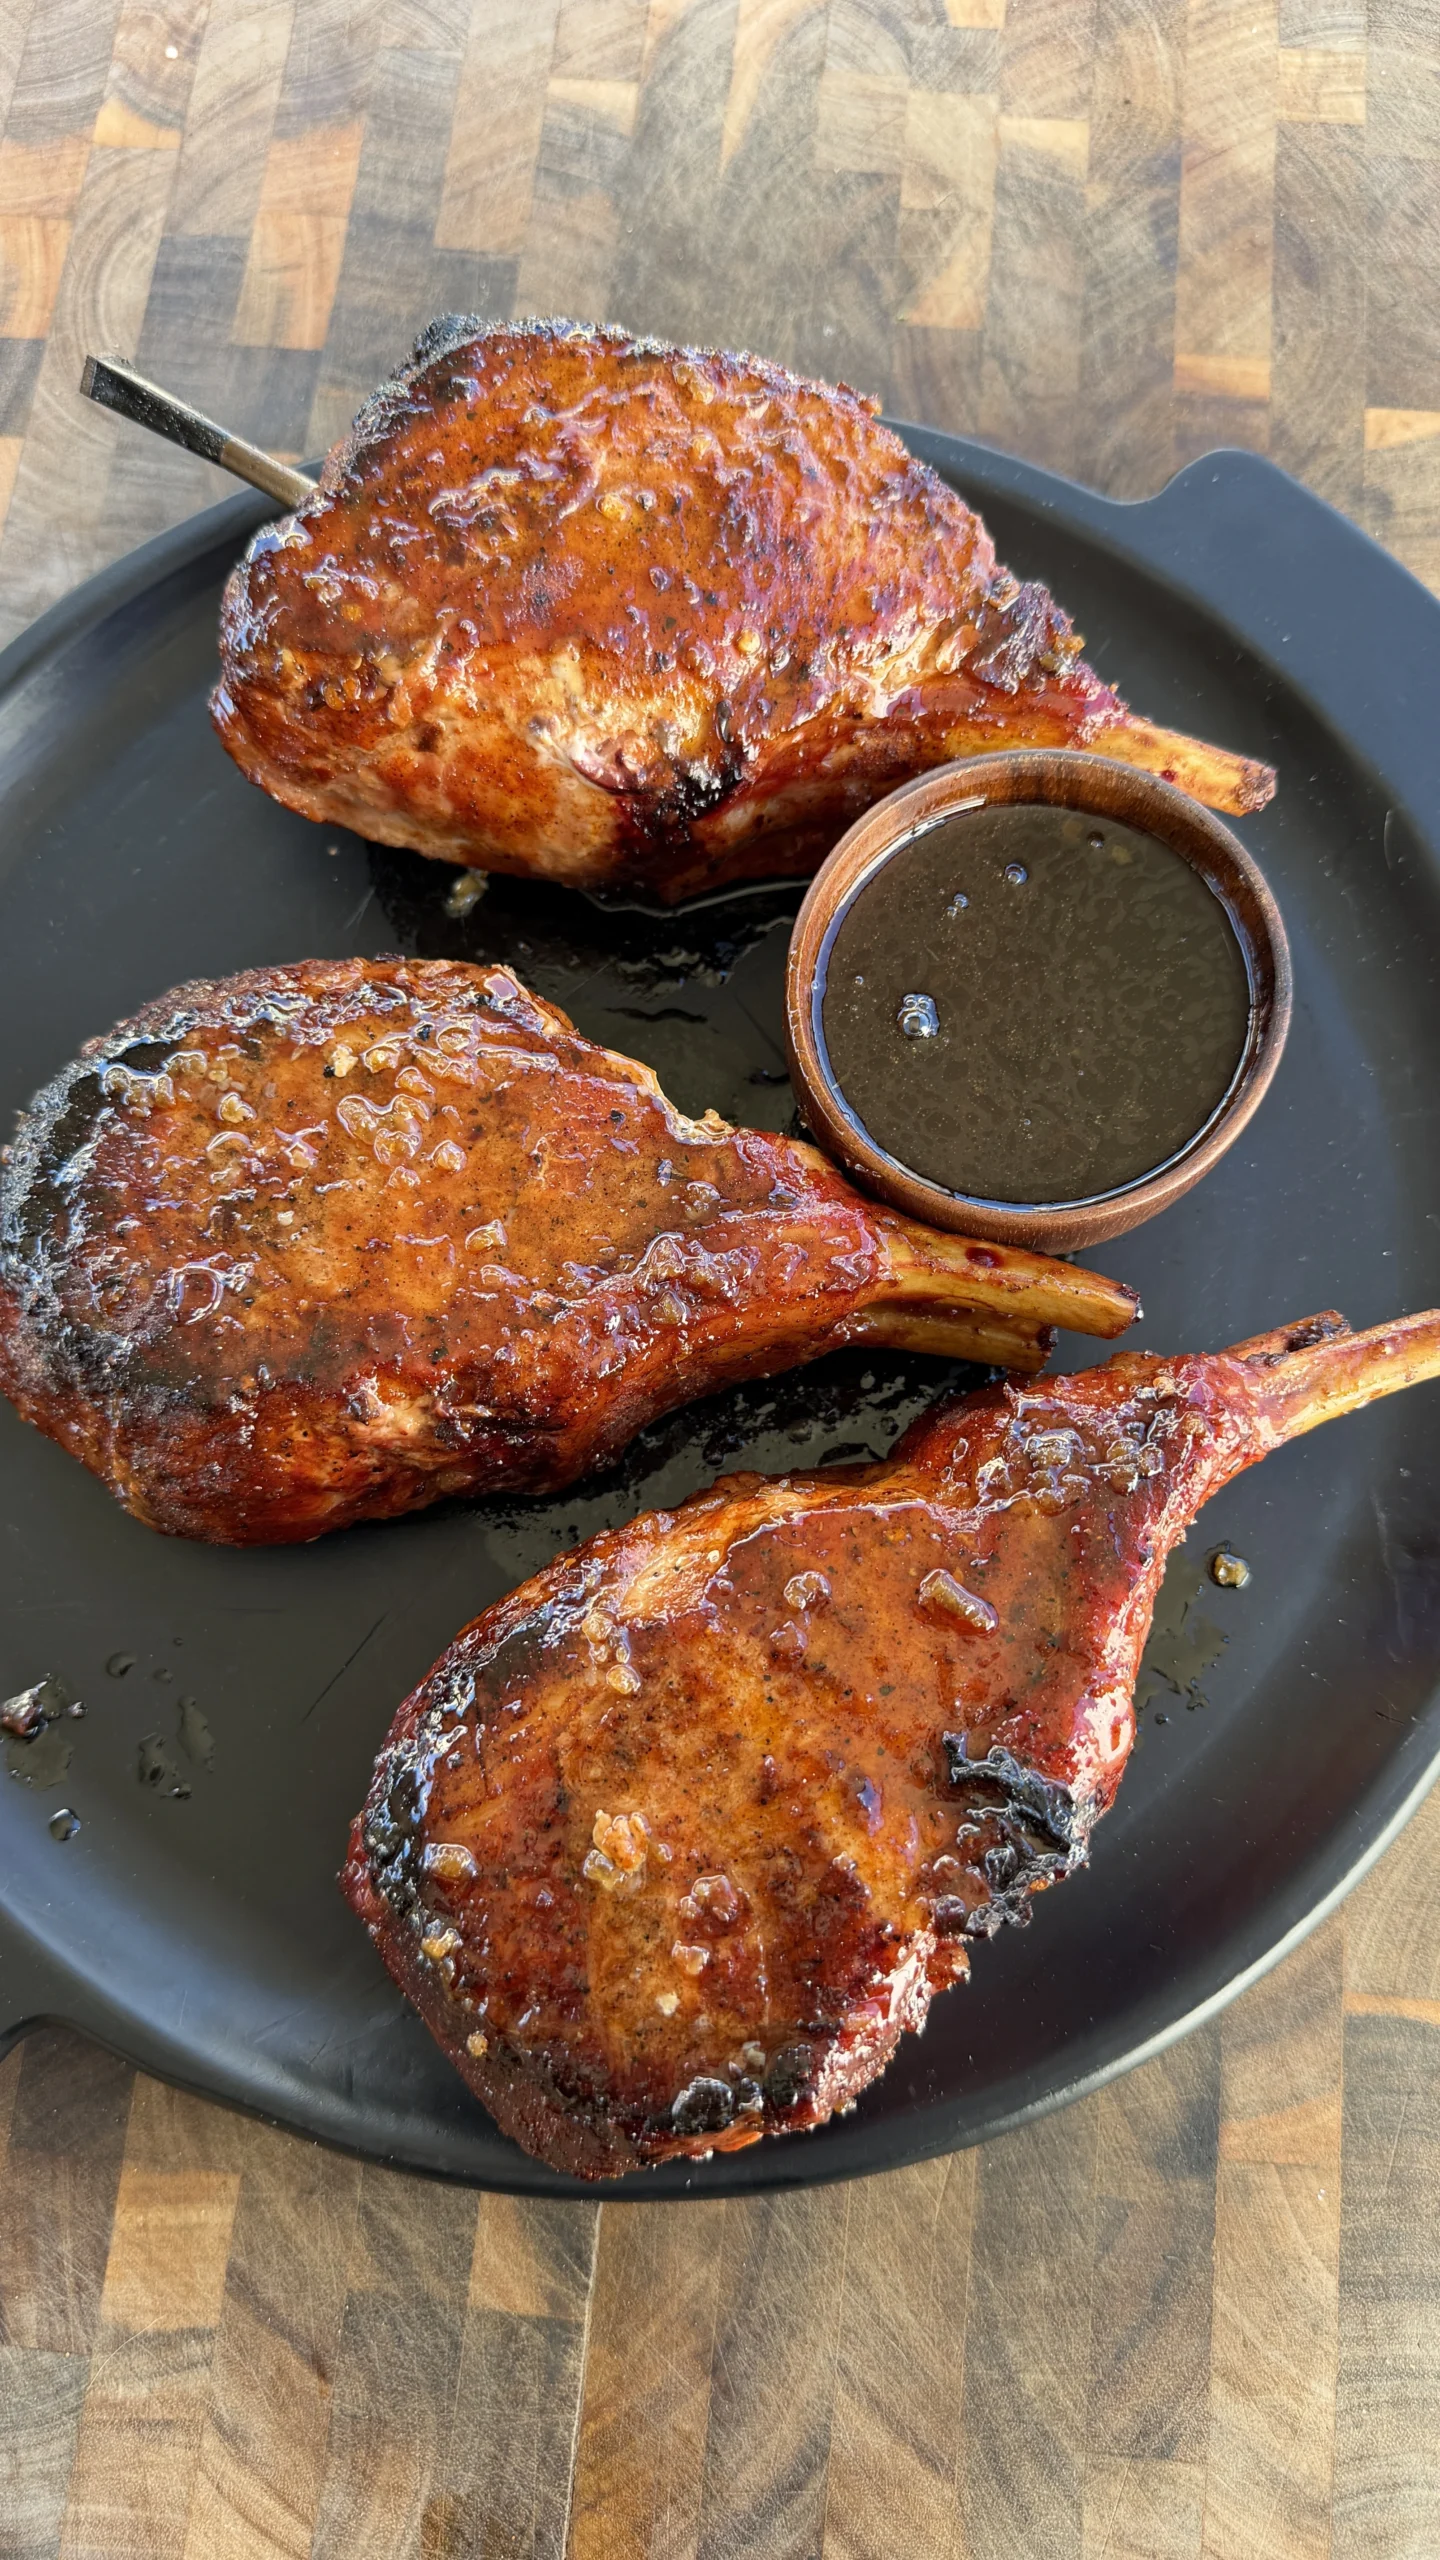
Sticky Honey Garlic Double Bone Pork Chops
Ingredients
Method
- Pat 3 double bone pork chops dry. Mix seasoning: 1 tbsp kosher salt, 2 tsp black pepper, 2 tsp garlic powder, 1.5 tsp smoked paprika. Season chops generously on all sides. Rest at room temperature 20-30 minutes.
- Preheat grill to 275-300°F using two-zone indirect setup. Add apple or cherry wood if smoking. Place chops on cool side over indirect heat.
- Cook indirect until internal temperature reaches 125-130°F, about 40-50 minutes. Check temperature in thickest part near bone starting at 35 minutes.
- Make sauce: Melt 2 tbsp butter, cook 8 minced garlic cloves 30-45 seconds. Add honey, soy sauce, vinegar, sriracha, and ginger. Simmer 5-7 minutes. Mix cornstarch with water, stir into sauce. Simmer 1-2 minutes until glossy and thickened.
- Increase grill to 450-500°F. Sear chops over direct heat 1-2 minutes per side, brushing generously with sauce during sear. Pull at 138-140°F internal temperature.
- Rest 8-10 minutes tented with foil to reach final 145°F. Brush with additional sauce. Garnish with sesame seeds, green onions, and lime. Serve immediately.
Notes
Tried this recipe?
Let us know how it was!Frequently Asked Questions
Can I use regular thin pork chops instead of double bone?
Regular thin pork chops (3/4 to 1 inch thick) cook much faster and don’t benefit from the two-stage method. For thin chops, skip indirect cooking and just sear over medium-high heat for 3-4 minutes per side to 140°F, rest to 145°F. Sauce during the final minute of cooking. They’re done in 10 minutes total versus the hour needed for thick double bone chops.
The thick double bone chops are worth seeking out for this recipe since they stay juicier and create more dramatic presentation. The bones add flavor and the thickness allows proper searing without overcooking.
What if I don’t have a grill?
Use the indoor cast iron and oven method. Heat a large cast-iron skillet over high heat. Sear seasoned chops 2 minutes per side until deeply browned. Transfer skillet to preheated 375°F oven. Cook until internal temp reaches 130°F, about 20-30 minutes depending on thickness.
Remove from oven, brush with honey garlic sauce, and broil 4-6 inches from element for 2-3 minutes, watching closely to prevent burning. Flip, sauce, and broil other side. Pull at 138-140°F and rest to 145°F. Results are nearly identical to grilling.
How do I prevent the honey from burning during searing?
Keep the sear brief – only 1-2 minutes per side at 450-500°F. The short exposure caramelizes honey without burning it. Watch closely and move chops to cooler zone if sauce starts smoking or turning black. Pull immediately when internal temp hits 138-140°F.
Using the cornstarch-thickened sauce also helps since thick sauce sets quickly rather than dripping off and burning on the grates. Brush sauce on top of chops during searing rather than letting it drip down onto the heat source.
Can I make the sauce ahead of time?
Yes, make honey garlic sauce up to 3 days ahead and refrigerate. The garlic flavor intensifies as it sits. Reheat gently over low heat, stirring frequently, before using. Add a tablespoon of water if it thickened too much during storage.
Don’t add the cornstarch slurry until you’re reheating to use. The thickening power can diminish if the slurry sits in acid (vinegar and soy sauce) for extended time. Mix fresh slurry and add during final reheating for best results.
What temperature should I pull thick pork chops from the grill?
Pull thick pork chops at 138-140°F internal temperature for perfect 145°F finish after rest. The carryover cooking during the 8-10 minute rest brings temp up the final 5-7 degrees. If you wait until the thermometer reads 145°F before pulling, carryover will push it to 150-152°F, creating dry, overcooked meat.
Always use an instant-read thermometer inserted into the thickest part near the bone for accuracy. Visual cues alone can’t tell you internal temperature of thick chops.
Ready to Take Your Cooking to the Next Level?
This is where I keep all my most-used products, gear, and favorite cooking tools — check it out:
🔥 View My Cooking Gear & ToolsRecipe Categories
If you loved this recipe, you’ll find more to savor across our diverse categories. From beef to pork, chicken to turkey, seafood to appetizers, there’s a wealth of flavors waiting for you. Explore them all at CWFeats.