Smoked Rib Tip Burnt Ends
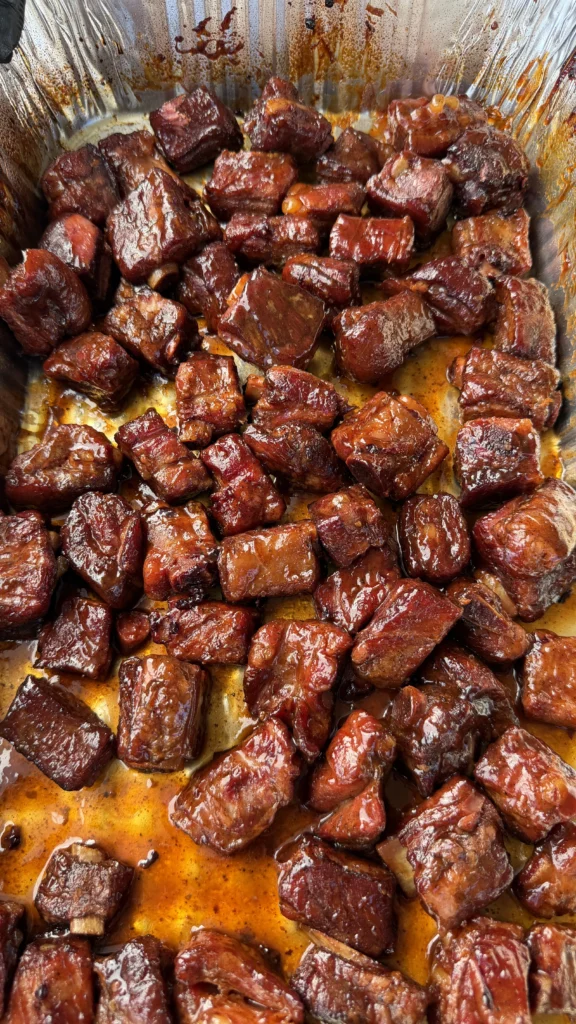
Smoked rib tip burnt ends are made by cutting 4 pounds of pork spare rib tips into individual bite-sized pieces, seasoning generously with 2 to 3 tablespoons of BBQ seasoning, smoking at 250°F for 1½ to 2 hours until the seasoning sets and color develops, then transferring to a foil tray with ½ cup apple juice, ½ cup brown sugar, and ½ cup honey BBQ sauce to braise covered for 1 to 1½ hours until the internal temperature reaches approximately 203°F. After braising until tender, you toss the rib tips in an additional ½ cup honey BBQ sauce and return them to the smoker uncovered for 15 to 20 minutes to caramelize the sauce and create sticky, fall-apart tender burnt ends.
The entire process takes 3½ to 4½ hours from start to finish. This includes 10 minutes for cutting the rib tips into pieces and seasoning. The first smoking phase takes 1½ to 2 hours at 250°F. The covered braising phase takes 1 to 1½ hours. The final uncovered saucing and caramelization takes 15 to 20 minutes. Resting before serving adds 5 minutes. You can season the rib tips the night before and refrigerate, then smoke the next day starting with the pre-seasoned meat.
These pork rib tip burnt ends serve 6 to 8 people as an appetizer or 4 to 6 people as a main course. Four pounds of raw rib tips yield approximately 2½ to 3 pounds after cooking due to fat rendering and moisture loss. As appetizers or party food, ¼ to ⅓ pound per person serves 8 to 12 people. As a main course with substantial sides like coleslaw, baked beans, and cornbread, ½ to ¾ pound per person serves 4 to 6 people. The rib tips are rich and sticky, so smaller portions are satisfying.
Jump to RecipeWhat Makes Rib Tips Different From Spare Ribs

Anatomical Location and Composition
Rib tips are the cartilaginous ends trimmed from spare ribs when creating St. Louis-style ribs. When butchers square off spare ribs, they remove the lower portion that contains mostly cartilage, irregular bones, and small pockets of meat. This trimmed section is the rib tips.
Spare ribs are the full rib section with regular bone structure. Each rib has consistent meat coverage along the length. The bones are hard and defined. Rib tips have irregular structure with soft cartilage, small bone fragments, and varying amounts of meat between cartilage sections.
The meat-to-bone ratio is lower in rib tips than spare ribs. Rib tips have more cartilage and connective tissue relative to meat. This composition affects cooking time and method. The cartilage needs extended cooking to become tender and edible.
Rib tips are also significantly cheaper per pound than spare ribs. They’re considered a less desirable cut. Many butchers sell them at discount prices or give them away. This makes rib tips excellent for burnt end preparation where you’re cutting into pieces anyway.
Texture and Eating Experience
Spare ribs eaten whole have clean bones that you can pick up and eat. The meat pulls away from hard bone. The eating experience is straightforward. Rib tips have cartilage that becomes tender and edible when cooked properly. You eat the cartilage along with the meat.
Properly cooked rib tip cartilage is tender and gelatinous. It has pleasant chew without being tough. Many people enjoy the textural variety. The cartilage provides collagen that converts to gelatin, adding richness to the burnt ends.
When cut into bite-sized pieces, rib tips create perfect burnt end chunks. Each piece has meat, fat, and cartilage. The irregular shapes caramelize differently, creating varied textures in one batch. Some pieces are crustier, others are softer. This variation is desirable.
Spare ribs cut into pieces for burnt ends would work but are less economical. You’re paying premium price for rib meat then cutting it into cubes. Rib tips are designed for this application. Their lower cost and composition make them ideal for burnt end preparation.
Fat Content and Rendering
Rib tips have substantial fat throughout. The fat is distributed in pockets and layers rather than evenly marbled. During the long cook to 203°F, this fat renders completely. The rendered fat bastes the meat and cartilage from within.
This fat content is essential for burnt end success. Leaner cuts would dry out during the extended cook. The rib tips’ fat keeps them moist even at high internal temperatures. The fat also carries flavor and creates rich mouthfeel.
When braising with apple juice and brown sugar, the rendered fat emulsifies with the braising liquid. This creates a rich sauce that coats each piece. The fat content makes the final burnt ends sticky and luscious rather than dry.
Spare ribs have fat but it’s more controlled and consistent. Rib tips have variable fat distribution. Some pieces are fattier, others leaner. This creates interesting variation in the final burnt ends rather than uniform results.
Why 203°F Creates Fall-Apart Tender Texture

Collagen Breakdown Temperature Range
Collagen, the primary connective tissue in pork rib tips, begins breaking down around 160°F. The conversion from tough collagen to tender gelatin accelerates between 180°F and 205°F. This is the temperature range where magic happens in barbecue.
At 185°F, collagen conversion is progressing but incomplete. The rib tips are safe to eat but the texture is somewhat tough. The cartilage still has resistance. The meat doesn’t pull apart easily. You can eat it but it’s not the ideal burnt end texture.
At 195°F, the collagen is mostly converted. The texture is improving significantly. The meat is tender and the cartilage is softening. This is acceptable but not optimal. You’re close to the target but not quite there.
At 203°F, collagen conversion is complete throughout the rib tips. The cartilage is fully tender and gelatinous. The meat falls apart with minimal effort. Each piece has yielding texture without being mushy. This is the sweet spot for burnt ends.
Cartilage-Specific Requirements
The cartilage in rib tips requires higher temperatures than regular meat. Cartilage is primarily composed of collagen and other connective proteins. These proteins are more resistant to breakdown than muscle proteins.
Muscle meat becomes tender at lower temperatures. Chicken breast is tender at 165°F. Pork loin is tender at 145°F. But cartilage needs the extended heat of 200°F+ to become truly tender and edible.
If you pulled rib tips at 165°F or 185°F, the muscle meat portions would be cooked but the cartilage would be tough and unpleasant. People would bite into hard, chewy cartilage. This ruins the eating experience.
At 203°F, the cartilage has transformed. It’s tender enough to bite through easily. The texture is pleasant and adds to the overall burnt end experience rather than detracting from it.
Moisture Retention Through Braising
The braising phase is critical to achieving 203°F without drying the meat. Dry smoking to 203°F would create parched, tough burnt ends. The moisture from apple juice prevents this.
When you braise rib tips covered in foil, you create a humid environment. The apple juice vaporizes and surrounds the meat with steam. This steam penetrates the rib tips, keeping them moist while they climb to 203°F.
The brown sugar in the braising liquid also helps retain moisture. Sugar is hygroscopic, meaning it attracts and holds water molecules. The dissolved sugar helps the meat retain moisture even at high temperatures.
The covered foil tray traps all the rendered fat and juices. These liquids pool around the rib tips. The meat essentially cooks submerged in its own rendered fat plus the added braising liquid. This prevents drying entirely.
The Probe Test for Doneness
Temperature is a guideline but the probe test confirms doneness. Insert a thermometer or probe into multiple rib tip pieces. The probe should slide in with minimal resistance, like inserting into warm butter.
If the probe meets resistance or feels like it’s pushing through dense meat, the rib tips need more time regardless of temperature. The cartilage hasn’t fully broken down. Continue braising and check again in 15 minutes.
When the rib tips are truly done, the probe glides in and out effortlessly. There’s no catching or dragging. This tactile feedback confirms that collagen has converted fully. Temperature reading of 203°F plus easy probe insertion means the rib tips are ready.
Why the Three-Phase Cooking Process Creates Better Results
Phase One: Smoke Ring and Bark Development
The first phase of naked smoking at 250°F for 1½ to 2 hours creates the smoke ring and initial bark. The rib tips are exposed directly to smoke. The smoke compounds penetrate the surface, creating the pink smoke ring visible when you cut into finished burnt ends.
This smoke exposure also allows the seasoning to set. The BBQ rub adheres to the surface and begins forming crust. The sugars and proteins in the rub start browning through the Maillard reaction. This creates foundational flavor that carries through the remaining cooking.
If you skipped straight to braising without initial smoking, you’d lose this smoke character. Braised rib tips without smoke taste more like pot roast than barbecue. The smoke phase is essential to burnt end identity.
The uncovered smoking also allows surface moisture to evaporate. This drying creates better bark formation. Wet surfaces don’t develop bark. The first phase removes excess moisture, setting up proper crust development.
Phase Two: Braising for Tenderness
The second phase shifts from smoke to tenderness. Once you’ve built smoke flavor and initial bark, the priority becomes breaking down connective tissue. Braising is the most effective method for this.
Covering the rib tips with foil traps moisture and creates steam. This humid environment accelerates collagen breakdown. The combination of heat, moisture, and time converts collagen to gelatin much faster than dry heat alone.
The apple juice provides additional moisture and subtle fruity acidity. The acid helps break down proteins while the liquid prevents drying. The brown sugar dissolves into the liquid, creating a sweet coating on each piece.
The ½ cup of honey BBQ sauce in the braise also contributes. The sauce’s sugars caramelize around the rib tips. The sauce’s tomato base provides acid. The sauce integrates with rendered fat to create rich coating.
This braising phase takes the rib tips from 160°F (where they were after phase one) to 203°F. This is where the actual tenderizing happens. Without this phase, you’d have smoky but tough rib tips.
Phase Three: Caramelization and Glaze
The third phase is purely about creating the final glaze and appearance. The rib tips are already tender from phase two. Now you’re adding sticky coating and caramelized surface.
Tossing the tender rib tips in additional ½ cup honey BBQ sauce coats every piece. The pieces are sticky and glistening. Returning them to the smoker uncovered allows the sauce to reduce and tighten.
The 250°F heat causes the sauce’s sugars to caramelize. The sauce thickens and becomes tacky. The surface develops slight char in spots. This creates the characteristic burnt end appearance with dark, caramelized edges.
The uncovered final phase also allows some moisture to escape. This concentrates flavors and creates varied textures. Some surfaces become crusty while others stay saucy. This textural variety is part of burnt end appeal.
If you served rib tips straight from phase two, they’d be tender but swimming in liquid. They’d be more like braised pork than burnt ends. Phase three transforms them into proper sticky, caramelized burnt ends.
Rib Tip Burnt Ends
Smoked 250°F, braised to 203°F, sauced and caramelized
Ingredients
Rib Tips
- 4 lbs pork rib tips (or spare rib tips cut from long strips)
- 2 to 3 tablespoons BBQ seasoning (your favorite pork or BBQ rub)
Braising Liquid
- ½ cup apple juice
- ½ cup brown sugar
- ½ cup honey BBQ sauce (for braising)
Finishing Sauce
- ½ cup honey BBQ sauce (for final toss)
Cook to 203°F internal temperature, not lower. The cartilage in rib tips needs this high heat to become tender and edible. Cover tightly during braising to trap steam. The humid environment accelerates collagen breakdown. Remove cover only for the final saucing phase.
Step-by-Step Instructions
Step 1: Prep and Cut the Rib Tips

If your rib tips come in long strips (as they often do from the butcher), cut them into individual bite-sized pieces. Each piece should be approximately 1 to 2 inches. You want chunks that resemble classic brisket burnt ends in size.
Look for the natural separations between cartilage sections. Cut along these lines when possible. This creates pieces that cook evenly and have good cartilage-to-meat ratio.
Some rib tip strips are already separated into individual pieces. If yours are pre-cut, inspect them for size. Cut any overly large pieces in half. You want relatively uniform sizing for even cooking.
Place all cut rib tip pieces in a disposable aluminum foil pan or large bowl. Having them in a pan makes seasoning easier and provides the vessel for braising later.
Step 2: Season the Rib Tips

Sprinkle 2 to 3 tablespoons of your favorite BBQ seasoning over the rib tip pieces. Use a pork-specific rub or general BBQ rub. The choice is flexible based on preference.
Toss the rib tips to distribute seasoning evenly. Use your hands or tongs to turn pieces so all surfaces get coated. The goal is even coverage, not thick crust. The seasoning should coat but not clump.
Let the seasoned rib tips sit at room temperature for 15 to 20 minutes while the smoker preheats. This allows the seasoning to adhere and begin drawing moisture to the surface. Don’t skip this rest period.
Step 3: Smoke the Rib Tips
Preheat your smoker to 250°F. Use your preferred smoking wood. Hickory, oak, or apple all work well with pork. Avoid mesquite which can be too strong for the sweet burnt end preparation.
Remove rib tips from the foil pan and place them directly on the smoker grates. Spread them out so they’re not touching or piled on top of each other. Air circulation around each piece promotes even smoke exposure.
Smoke uncovered for 1½ to 2 hours. You’re looking for visual cues rather than specific temperature. The rib tips should develop good mahogany color. The seasoning should be set and slightly crusty. The meat should look dry on the surface, not wet.
You’re not cooking to doneness in this phase. You’re building smoke flavor and initial bark. Internal temperature will be around 160 to 170°F after this phase. That’s intentional.
Step 4: Prepare the Braising Liquid
While the rib tips are smoking, prepare the braising mixture. In the aluminum foil pan (or a clean one if you moved rib tips to grates earlier), combine ½ cup apple juice, ½ cup brown sugar, and ½ cup honey BBQ sauce.
Stir the mixture briefly. The brown sugar doesn’t need to dissolve completely now. It will dissolve during the hot braise. Just ensure the ingredients are roughly combined.
Have a piece of aluminum foil large enough to cover the pan ready. You’ll need to cover the pan tightly once the rib tips go in for braising.
Step 5: Braise the Rib Tips

After 1½ to 2 hours of smoking, transfer all rib tip pieces into the foil pan with the braising liquid. Arrange them in a relatively even layer. They can be somewhat piled but try to avoid super thick stacking.
Pour any accumulated juices from the smoker grates into the pan as well. This adds flavor to the braising liquid.
Cover the foil pan tightly with aluminum foil. You want a good seal to trap steam. If the foil doesn’t want to stay sealed, crimp the edges or use a second piece to ensure it’s covered.
Return the covered pan to the smoker at 250°F. Close the smoker lid. Let the rib tips braise for 1 to 1½ hours.
Step 6: Check for Doneness
After 1 hour of braising, check the rib tips. Carefully peel back the foil (watch for hot steam). Insert an instant-read thermometer into several rib tip pieces. You’re looking for 203°F internal temperature.
If they’re at 195 to 200°F, check again in 15 minutes. If they’re below 195°F, re-cover and check again in 20 to 30 minutes.
Also perform the probe test. Insert the thermometer probe into a piece. It should slide in with very little resistance, like inserting into warm butter. If you feel significant resistance, the rib tips need more time regardless of temperature reading.
When the rib tips reach 203°F and the probe slides in easily, they’re done braising. The cartilage should be tender. The meat should be falling apart. Each piece should look soft and yielding.
Step 7: Sauce and Caramelize
Remove the foil cover from the pan. Pour the remaining ½ cup honey BBQ sauce over the tender rib tips. Using a large spoon or tongs, gently toss the rib tips to coat all pieces with the fresh sauce.
The rib tips are very tender at this point. Handle them gently. Some pieces may fall apart slightly. That’s fine. They’re supposed to be fall-apart tender.
Return the now-uncovered pan to the smoker at 250°F. Leave the rib tips uncovered. Cook for an additional 15 to 20 minutes.
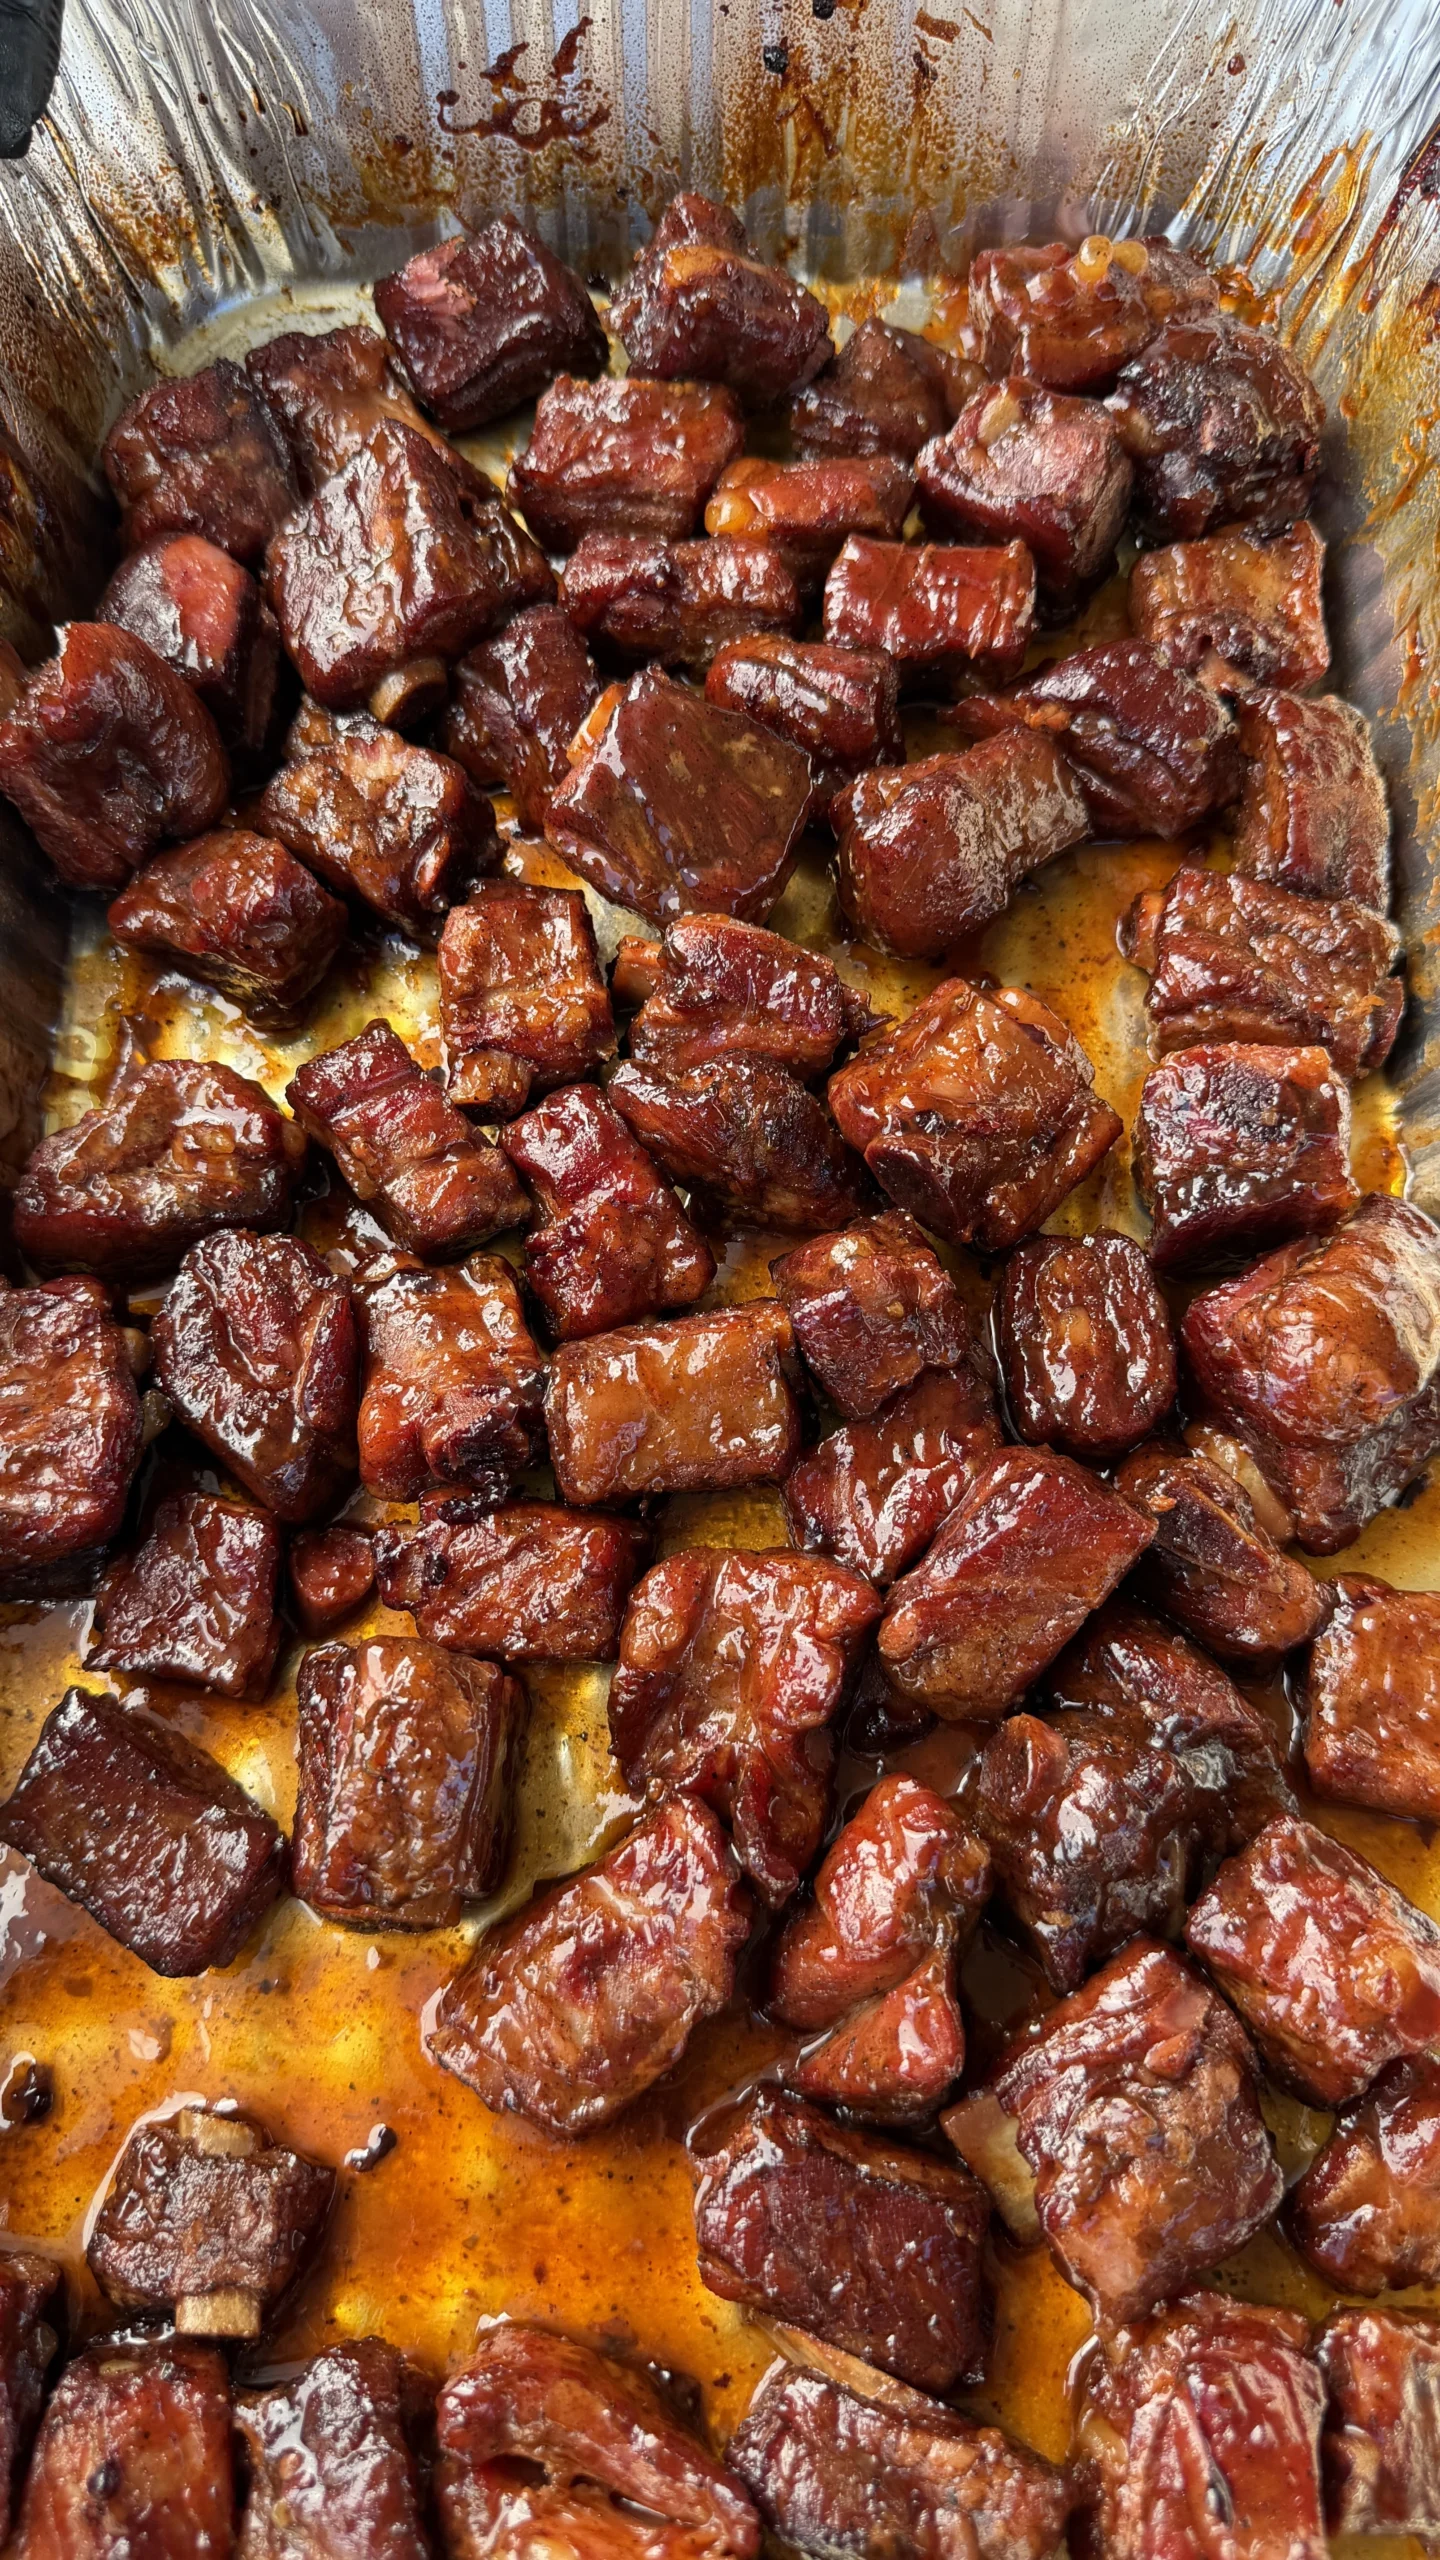
During this final phase, the sauce will reduce and caramelize. The sugars in the sauce will create sticky coating. Some edges will develop slight char. The rib tips will transform from saucy-wet to sticky-glazed.
Watch during this phase to prevent burning. If the sauce starts to char excessively or burn, remove immediately. Some dark caramelization is good. Black burnt sauce is bad.
Step 8: Rest and Serve
Remove the pan from the smoker. Let the burnt ends rest for 5 minutes. This brief rest allows the sauce to set slightly and cool enough to be safely handled.
The rib tip burnt ends are ready to serve. They should be deeply mahogany to almost black in color. They should look sticky and glazed. When you pick up a piece, it should be tender enough to pull apart easily but still hold together.
Serve hot. The burnt ends are excellent as appetizers, party food, or main course. Provide toothpicks or small forks for easy eating.
Smoked Rib Tip Burnt Ends
Ingredients
Equipment
Method
- Cut rib tip strips into individual bite-sized pieces, approximately 1 to 2 inches each. Place in foil pan.
- Season rib tips with 2 to 3 tablespoons BBQ seasoning. Toss to coat evenly. Let sit 15 to 20 minutes at room temperature.
- Preheat smoker to 250°F. Place rib tips directly on smoker grates. Smoke uncovered 1½ to 2 hours until color develops and seasoning sets.
- In aluminum foil pan, combine ½ cup apple juice, ½ cup brown sugar, and ½ cup honey BBQ sauce. Stir to combine.
- Transfer smoked rib tips to foil pan with braising liquid. Cover pan tightly with aluminum foil.
- Return covered pan to smoker at 250°F. Braise 1 to 1½ hours until internal temperature reaches 203°F and probe slides in easily.
- Remove foil cover. Pour remaining ½ cup honey BBQ sauce over rib tips. Toss gently to coat.
- Return uncovered pan to smoker at 250°F. Cook 15 to 20 minutes until sauce caramelizes and becomes sticky.
- Rest 5 minutes. Serve hot.
Nutrition
Notes
Tried this recipe?
Let us know how it was!Frequently Asked Questions
What Are Rib Tips and Where Do I Find Them?
Rib tips are the cartilaginous ends trimmed from spare ribs when creating St. Louis-style ribs. They’re the lower portion of the spare rib that gets cut off during trimming. Most butchers have rib tips available.
Ask your butcher for “pork rib tips” or “spare rib tips.” They’re significantly cheaper than spare ribs, often $2 to $3 per pound. Some butchers give them away or sell them at very low prices.
If your grocery store doesn’t have rib tips in the display case, ask the meat department. They might have them in back. Many stores trim their own spare ribs and have rib tips available on request.
You can also buy untrimmed spare ribs and trim them yourself. The section you remove when squaring off spare ribs into St. Louis-style is the rib tips. This gives you both trimmed ribs and rib tips for burnt ends.
Can You Use Brisket Instead of Rib Tips for Burnt Ends?
Brisket burnt ends are the traditional Kansas City-style burnt ends. Rib tip burnt ends are a budget-friendly alternative. Both work but they’re different in texture and preparation.
Brisket burnt ends come from the point (fatty end) of a whole packer brisket. You smoke the whole brisket, separate the point, cube it, and finish in sauce. Brisket is more expensive and takes longer to cook.
Rib tips cook faster than brisket and cost less. The cartilage in rib tips creates different texture than brisket. Some people prefer the gelatinous cartilage. Others prefer brisket’s pure meat texture.
The technique in this recipe works for brisket point cubes. Just adjust the braising time. Brisket cubes might need 2 to 3 hours of braising to reach 203°F versus 1 to 1½ hours for rib tips.
How Do You Prevent the Sauce From Burning?
The key is the three-phase cooking process. You only add fresh sauce at the very end after braising. The braising phase doesn’t involve heavy sauce that could burn.
During the initial smoke, there’s no sauce at all. Just dry rub. This prevents burning during the 1½ to 2 hour smoke. The ½ cup of sauce in the braising liquid is diluted by apple juice and protected by the foil cover.
The final saucing happens uncovered but only for 15 to 20 minutes. This is enough time to caramelize the sauce without burning. Watch during this phase. If the sauce starts to char excessively, remove immediately.
Using honey BBQ sauce with moderate sugar content helps. Ultra-sweet sauces or sauces with high corn syrup content burn more easily. Choose sauce that’s not pure sugar.
Can You Make Rib Tip Burnt Ends in the Oven?
Oven-braised rib tips work when smoking isn’t possible. You lose the smoke flavor but the tender, saucy texture is achievable. Preheat oven to 300°F.
Season rib tips and brown them in a large skillet or on a baking sheet in the oven for 20 minutes. This creates some surface browning to replace smoke flavor.
Transfer to a covered baking dish with the braising liquid. Cover tightly with foil. Braise at 300°F for 2 to 3 hours until 203°F and tender.
Uncover, add fresh sauce, and return to oven uncovered for 15 to 20 minutes to caramelize. The results are good but lack the smoke character that defines burnt ends.
For closer approximation, add liquid smoke to the braising liquid. Use ½ to 1 teaspoon for subtle smoke flavor. This doesn’t replace real smoking but provides some smoke character.
How Long Do Leftover Burnt Ends Last?
Store leftover rib tip burnt ends in an airtight container in the refrigerator for up to 4 days. The sauce and fat help preserve them. They actually develop more complex flavor overnight.
To reheat, use a 300°F oven for 15 to 20 minutes until heated through. Add a splash of apple juice or water to the container before reheating to prevent drying. Cover with foil during most of reheating, then uncover for the last 5 minutes.
Microwave reheating works but affects texture. Use 50% power and heat in 30-second intervals. The sauce can separate in the microwave. Stir between intervals.
Freeze burnt ends for up to 3 months. Portion into freezer bags and remove excess air. Thaw overnight in refrigerator before reheating. Frozen burnt ends are acceptable but fresh is better.
Leftover burnt ends work excellently in other dishes. Chop them and add to baked beans, mac and cheese, or loaded fries. The rich flavor enhances these dishes significantly.
Ready to Level Up?
Take your backyard cooking from good to legendary.
This is where I keep all my most-used smokers, knives, and favorite cooking tools.
Shop My Gear CollectionExplore More Recipes
Find more diverse flavors at CWFeats.com