
Carne Asada-Style Cheese Crust Tacos
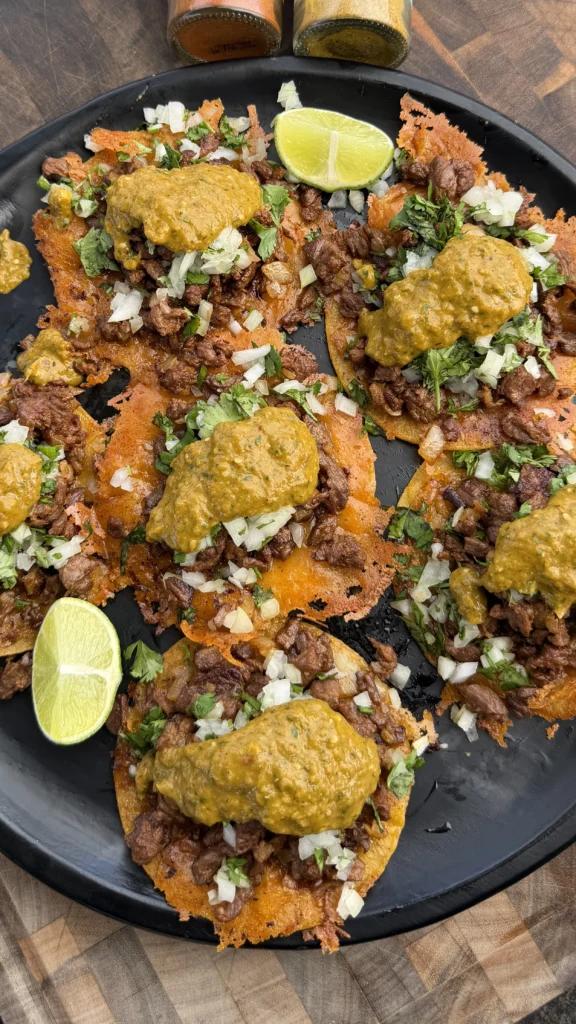
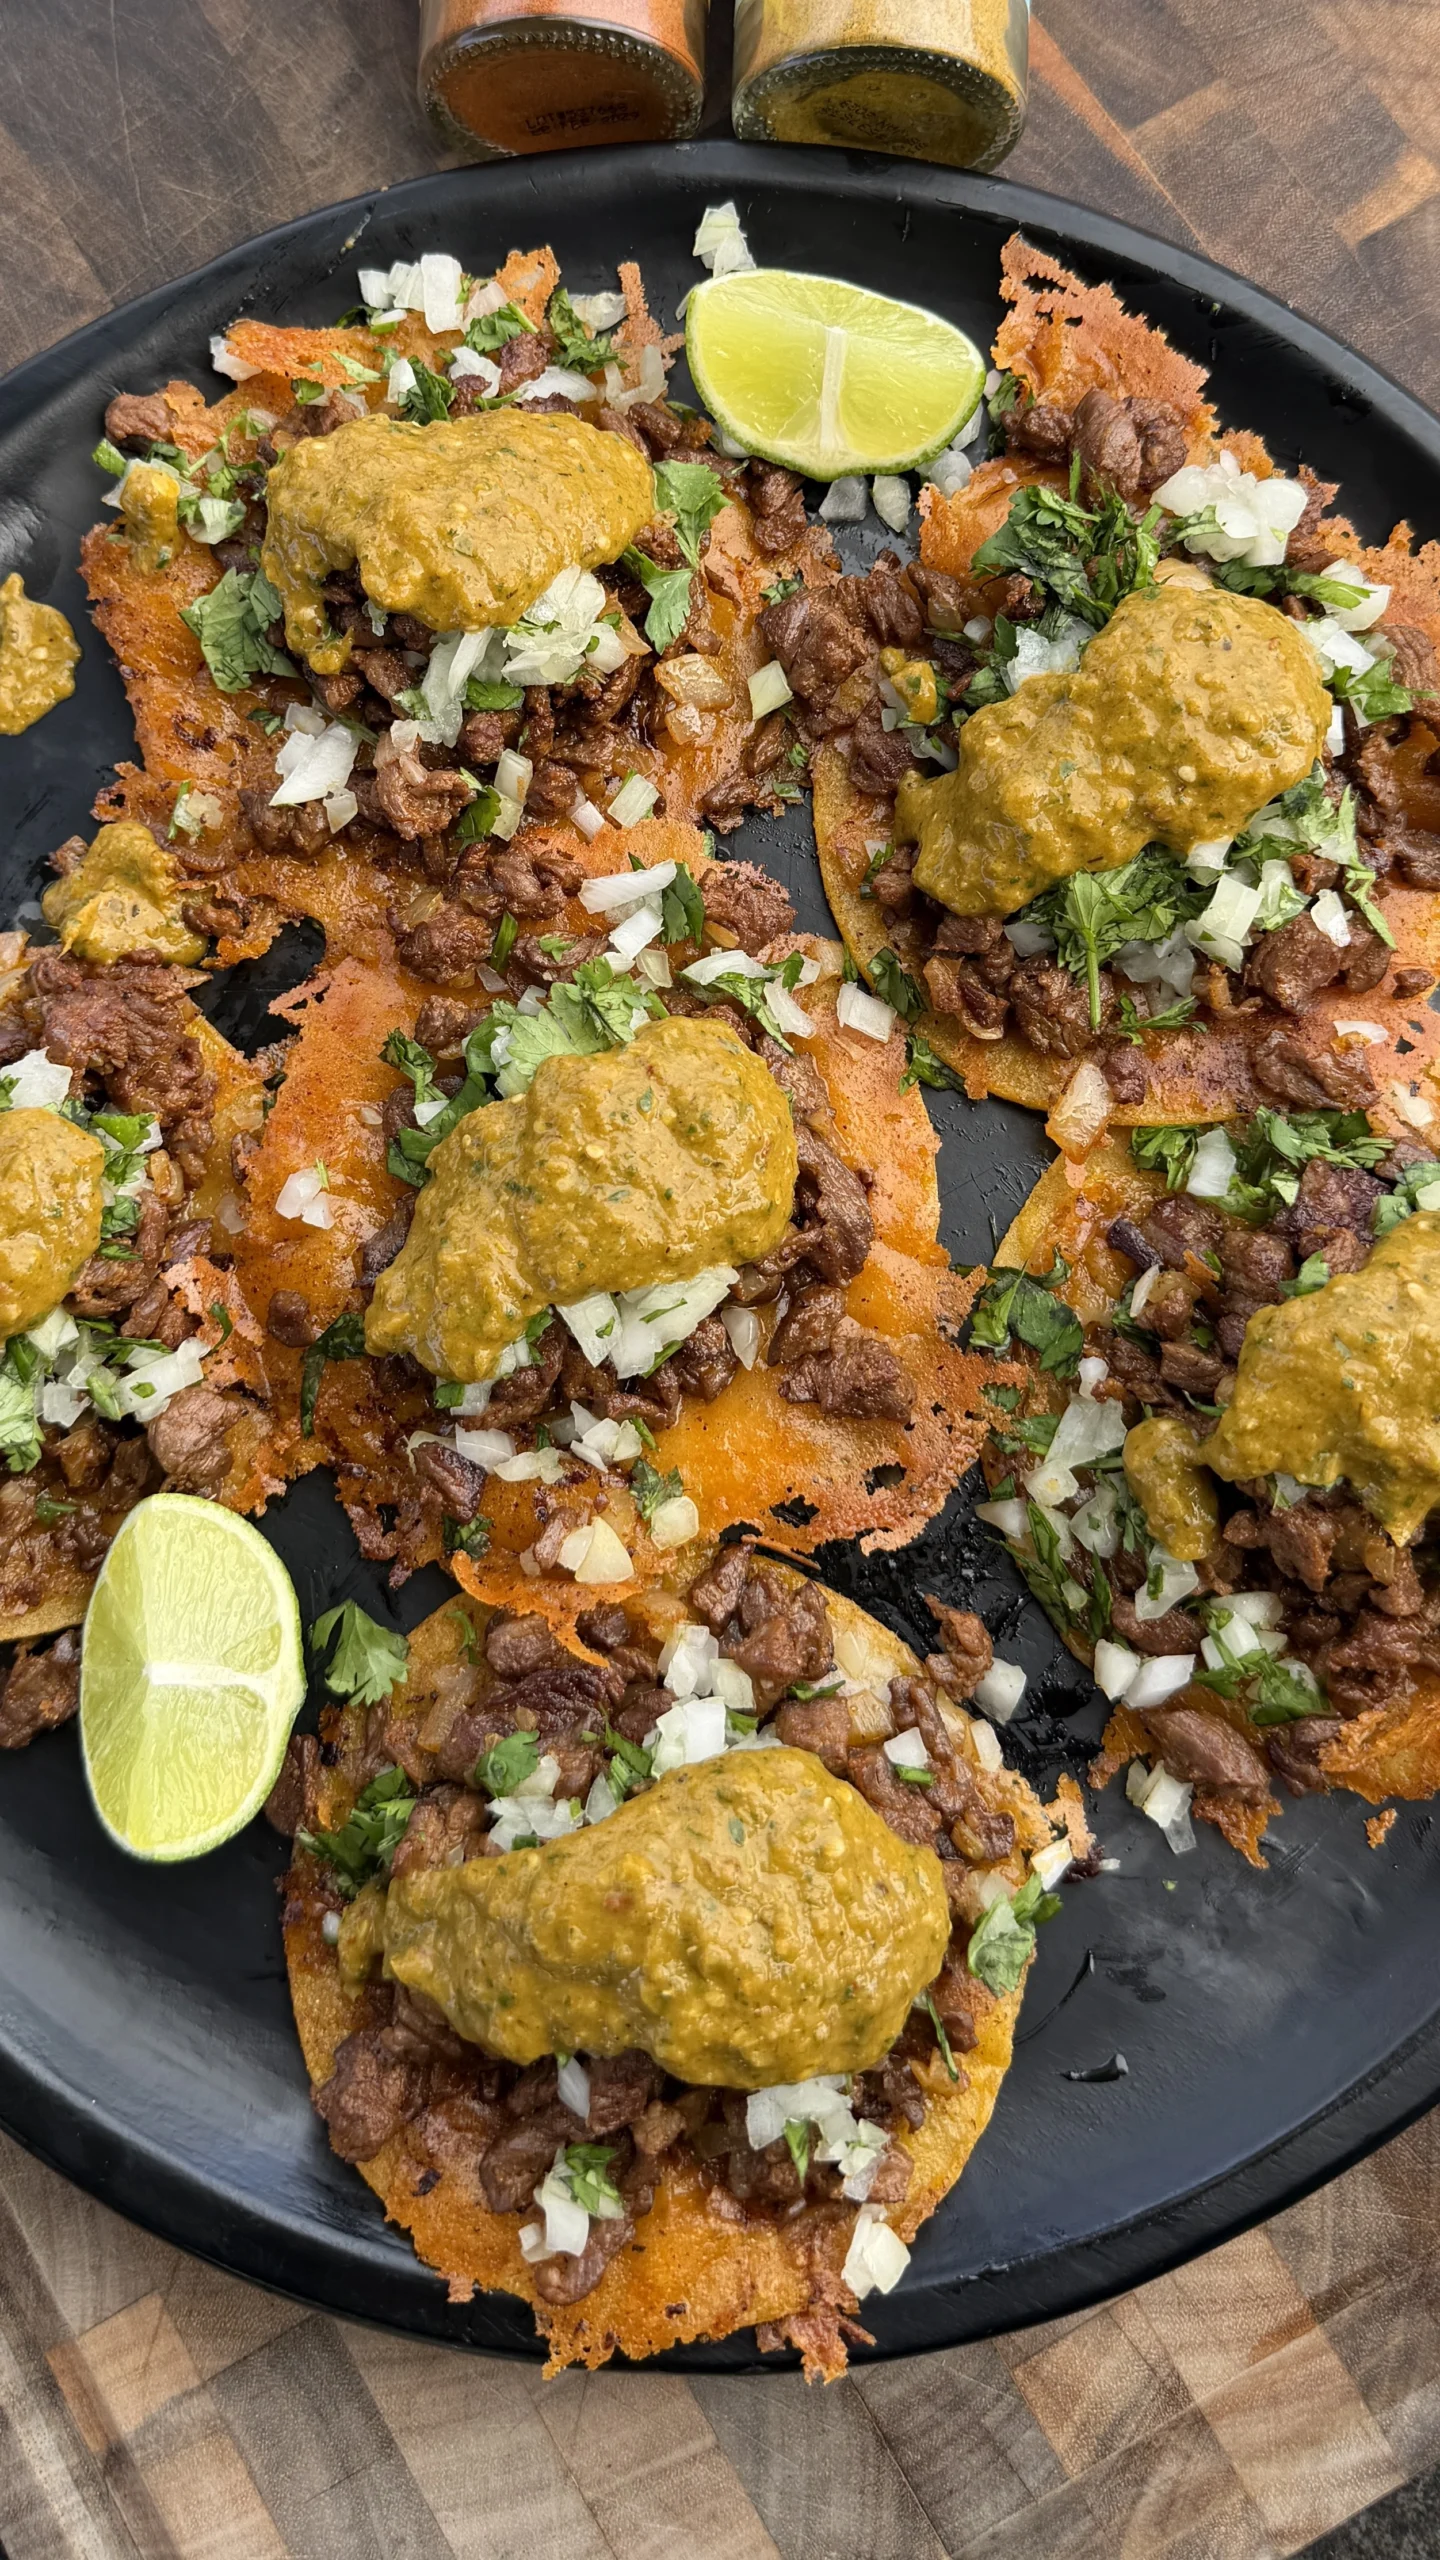
Carne asada-style cheese crust tacos are made by cooking 2 pounds of finely chopped chuck roast on a high-heat griddle with 1 medium finely diced sweet onion and 1 to 2 tablespoons Loisa Sazón seasoning until browned and cooked through, then assembling the tacos by sprinkling approximately ¼ cup shredded Monterey Jack cheese directly onto a low-heat griddle, placing a yellow street corn tortilla on top of the melting cheese, letting the cheese crisp into a golden crust attached to the tortilla, flipping to add the seasoned meat, and topping with fresh cilantro, diced white onion, lime juice, and smoky salsa verde made from 6 charred tomatillos, 2 charred jalapeños, charred garlic and green onions, 2 to 3 chipotle peppers in adobo, and fresh cilantro blended smooth.
The entire process takes 45 to 50 minutes from start to finish. This includes 10 minutes for making the smoky salsa verde by charring vegetables and blending. Cooking the seasoned chuck roast takes 15 to 20 minutes on high heat. Assembling the cheese crust tacos takes about 2 to 3 minutes per taco for a total of 15 to 20 minutes if making 6 to 8 tacos. You can make the salsa verde up to 3 days ahead and refrigerate, then just cook the meat and assemble tacos when ready to serve.
These cheese crust griddle tacos make 6 to 8 tacos depending on how generously you fill them. Two pounds of finely chopped chuck roast yields approximately 1½ pounds cooked meat after browning and fat rendering. Each taco uses about 2 to 3 ounces of cooked meat. For hearty appetites, 2 to 3 tacos per person serves 3 to 4 people. For lighter appetites or when serving with substantial sides like rice and beans, 1 to 2 tacos per person serves 6 to 8 people.
Why Finely Chopped Chuck Roast Works Better Than Sliced Steak

Even Seasoning Distribution
Finely chopped meat has dramatically more surface area than sliced steak. Each small piece gets coated with seasoning. The Loisa Sazón touches every portion of meat. You get consistent flavor throughout rather than seasoned exterior and bland interior.
Sliced carne asada steak has limited surface area. You can season the outside but the center stays relatively unseasoned. When you bite into a taco with sliced steak, some bites are heavily seasoned while others taste bland.
The chopped meat also mixes thoroughly with the diced sweet onion. The onion pieces distribute evenly among the meat. Every forkful of meat contains onion. With sliced steak, the onions sit separately or on top rather than integrating.
Chopped meat absorbs seasoning better during cooking. As the meat browns, the seasoning creates a flavorful crust on every piece. Sliced steak only develops crust on the two flat surfaces.
Faster Cooking Time
Small chopped pieces cook much faster than whole slices or strips. The increased surface area means more meat exposure to direct heat. Two pounds of chopped chuck roast browns completely in 15 to 20 minutes on high heat.
Sliced carne asada steak needs careful cooking to avoid overcooking the exterior while the interior reaches doneness. You need to monitor temperature and timing precisely. Chopped meat cooks through quickly without risk of rare centers.
The faster cooking also means less moisture loss. Quick browning seals the surface before excessive liquid escapes. Sliced steak cooked too long can dry out. Chopped meat stays juicy because it’s off the heat faster.
Better Texture for Tacos
Chopped meat creates ideal texture for tacos. The small pieces are easy to bite through. You don’t need to tear or pull the meat with your teeth. Each bite includes meat, cheese crust, tortilla, and toppings in one clean mouthful.
Sliced steak can be chewy in tacos. When you bite, you might pull the entire slice out of the taco. The meat doesn’t break cleanly. You end up with messy eating where the filling falls out.
Chopped meat also stays in the taco better. The pieces nestle into the tortilla fold. Sliced steak can slide out because the smooth surfaces don’t grip the tortilla. Chopped meat has irregular shapes that interlock.
Chuck Roast Advantages
Chuck roast is well-marbled with fat. When chopped and cooked, this fat renders and bastes the meat from within. The result is rich, beefy flavor. The fat also prevents drying during the quick high-heat cooking.
Chuck roast is also economical compared to skirt or flank steak traditionally used for carne asada. You get similar beefy flavor at lower cost per pound. The chopping technique makes the less-tender chuck roast work perfectly.
The connective tissue in chuck roast breaks down during chopping and cooking. What would be chewy if sliced becomes tender when chopped small. The texture is excellent for tacos.
What Makes the Cheese Crust Technique Superior to Regular Cheese Topping

Structural Integration With Tortilla
When you melt cheese directly on the griddle then place the tortilla on top, the cheese fuses to the tortilla as it crisps. The cheese and tortilla become one unified structure. You can’t separate them without tearing.
Regular cheese topping just sits on the meat inside the taco. It can slide off when you bite. The cheese doesn’t integrate with any component. It’s a separate layer that moves independently.
The fused cheese crust also reinforces the tortilla. The crispy cheese layer adds structural strength. The tortilla is less likely to tear or fall apart when filled. Regular topped cheese doesn’t provide any structural benefit.
Texture Contrast
Crispy cheese creates crunchy texture on the tortilla exterior. When you bite through the taco, you get crispy cheese, then soft tortilla interior, then tender meat. This textural variety makes eating more interesting.
Regular cheese topping is soft and gooey. It doesn’t provide crunch. The entire taco filling is soft textures. Without textural contrast, the eating experience can feel monotonous.
The Maillard reaction happens when cheese browns on the griddle. This creates complex nutty, toasted flavors in the cheese. Regular melted cheese on meat doesn’t brown. It just melts without developing these flavors.
Even Cheese Distribution
The cheese crust technique ensures every bite includes cheese. The cheese covers the entire bottom surface of the tortilla. Whether you bite from the center or edge, you get cheese.
When you top tacos with shredded cheese, the distribution is uneven. Some bites have lots of cheese. Other bites have none. The cheese tends to clump rather than spreading evenly.
The crisped cheese also stays where it’s supposed to. It doesn’t fall out when you eat. Regular shredded cheese can fall from the taco as you bite. You lose cheese that ends up on your plate.
Visual Appeal
The golden-brown cheese crust looks impressive. When you flip the tortilla to reveal the crispy cheese side, it’s visually striking. The contrast between crispy golden cheese and yellow tortilla is appetizing.
Regular cheese-topped tacos look ordinary. Shredded cheese sitting on meat is standard taco presentation. It doesn’t create visual excitement or suggest anything special about the preparation.
For content creation or serving guests, the cheese crust technique provides dramatic presentation. When you show the underside of the tortilla with the crispy cheese layer, people immediately recognize this is different from regular tacos.
Why Street Corn Tortillas Work Better Than Flour for This Recipe
Heat Tolerance and Structure
Yellow street corn tortillas are specifically designed for high-heat cooking. They’re made to withstand direct griddle contact without falling apart. The masa flour structure holds together when heated aggressively.
Flour tortillas can burn or develop hard spots on high heat. They’re designed for gentler heating. When placed on melting cheese over direct griddle heat, flour tortillas can scorch before the cheese fully crisps.
Street corn tortillas are also smaller diameter, typically 4 to 5 inches. This size is perfect for single-serving tacos. Flour tortillas are often 8 to 10 inches, which is too large for this taco style.
Flavor Compatibility
Corn tortillas have earthy, slightly sweet corn flavor. This complements Mexican-style seasoned meat. The corn flavor reinforces the traditional taco profile. It tastes authentic.
Flour tortillas have neutral wheat flavor. They work for burritos or quesadillas but don’t provide the same traditional taco taste. The wheat can clash with the lime, cilantro, and salsa verde flavors.
The corn also pairs excellently with Monterey Jack cheese. The sweet corn and mild cheese create harmonious combination. Flour and cheese is fine but less complementary.
Texture When Filled
Corn tortillas have slight chew even when warm. This texture provides substance. When you bite through the crispy cheese crust into the corn tortilla, you get satisfying textural progression.
Flour tortillas are soft and pillowy. They compress easily. With the cheese crust technique, the contrast between crispy exterior and very soft flour interior might not be as pleasant. The corn tortilla’s slight firmness creates better balance.
Street corn tortillas are also thicker than standard corn tortillas. The extra thickness provides structure for the cheese crust and meat filling without tearing. Thin corn tortillas might break under the weight.
Traditional Authenticity
Street tacos in Mexico use corn tortillas almost exclusively. If you want authentic carne asada-style tacos, corn is the traditional choice. Using flour moves toward Tex-Mex style rather than Mexican street food style.
The cheese crust technique, while not traditional, works best with the traditional tortilla. You’re creating a modern variation on street tacos. The corn tortilla maintains the connection to the original format.
Cheese Crust Carne Asada Tacos
Chopped chuck roast, crispy cheese crust, smoky salsa verde
Ingredients
Seasoned Meat
- 2 lbs finely chopped chuck roast (or taco meat from butcher)
- 1 medium sweet onion (finely diced)
- 1 to 2 tablespoons Loisa Sazón or Loisa Sazón de Mi Tierra (or your favorite taco seasoning)
Smoky Salsa Verde
- 6 tomatillos (husked)
- 2 jalapeños
- 2 garlic cloves
- 3 green onions
- Small handful cilantro
- 2 to 3 chipotle peppers in adobo
- 1 teaspoon Loisa Sazón (optional)
- Salt and black pepper to taste
Cheese Crust Tacos
- Yellow street corn tortillas
- 1 to 2 cups shredded Monterey Jack cheese
Garnish
- Fresh cilantro (chopped)
- White onion (diced)
- Lime wedges
Sprinkle cheese directly on the griddle first, then place the tortilla on top. As the cheese melts and crisps, it fuses to the tortilla creating an inseparable crunchy layer. This prevents cheese from sliding off and creates better texture than topping. Use Monterey Jack for best melting and crisping properties.
Step-by-Step Instructions
Step 1: Make the Smoky Salsa Verde

Heat a griddle or large skillet over high heat. Place 6 husked tomatillos, 2 jalapeños, 2 garlic cloves, and 3 green onions directly on the hot surface.
Char the vegetables, turning occasionally, until blistered and blackened in spots. The tomatillos should soften and develop dark char marks. The jalapeños should blister all over. The garlic should be golden with some char. The green onions should be wilted with charred areas.
This charring takes approximately 8 to 10 minutes total. Don’t rush it. The char creates essential flavor complexity.
Transfer all charred vegetables to a blender. Add a small handful of fresh cilantro (do not char the cilantro). Add 2 to 3 chipotle peppers in adobo directly from the can (do not char the chipotles).
Blend until smooth. The salsa should be slightly thick but pourable. If too thick, add 1 to 2 tablespoons water and blend again.
Taste and adjust seasoning. The salsa should be smoky, tangy, and have moderate heat. Set aside until ready to serve.
Step 2: Cook the Seasoned Meat

Heat a large griddle or flat-top to high heat. You want the surface very hot for proper browning. Let it preheat for 5 minutes.
Add 2 pounds finely chopped chuck roast to the hot griddle. Spread it out in an even layer. Don’t pile it up. You want maximum contact with the hot surface.
Season the meat generously with 1 to 2 tablespoons Loisa Sazón or Loisa Sazón de Mi Tierra. Sprinkle evenly over all the meat. Don’t be shy with seasoning. The meat can handle bold flavor.
Immediately add 1 medium finely diced sweet onion directly on top of the meat. The onion will cook along with the meat. Its moisture will help steam the meat while browning occurs.
Let the meat cook undisturbed for 3 to 4 minutes. You want the bottom to develop good brown crust. Resist the urge to stir immediately.
After 3 to 4 minutes, use a spatula or metal scraper to chop and mix the meat and onions together. Break up any large clumps. Scrape the browned bits from the griddle surface and incorporate them.
Continue cooking, stirring and chopping occasionally, for another 10 to 15 minutes. The meat should be fully browned and cooked through. The onions should be soft and caramelized. The mixture should look well-integrated with no raw meat visible.
Once fully cooked, move the meat to a cooler zone of the griddle or reduce heat to low. Keep the meat warm while you assemble tacos. Don’t let it sit on high heat or it will dry out.
Step 3: Make the First Cheese Crust Taco

Reduce your griddle heat to low or medium-low. The cheese crust needs moderate heat to crisp without burning. If the griddle is too hot from cooking meat, let it cool for 2 to 3 minutes.
Sprinkle approximately ¼ cup shredded Monterey Jack cheese directly onto the griddle surface. Spread it into a circle roughly the size of your tortilla, about 4 to 5 inches in diameter.
Let the cheese melt completely. It should become liquid and start bubbling gently. This takes about 45 seconds to 1 minute.
When the cheese is fully melted and starting to show tiny bubbles, place one yellow street corn tortilla directly on top of the melted cheese. Press down gently with your spatula to ensure good contact.
Let the tortilla sit on the melting cheese for 45 seconds to 1 minute. You’ll see the edges of the cheese starting to turn golden brown. The cheese is crisping and fusing to the tortilla bottom.
Using a wide spatula, carefully flip the tortilla over. The cheese side should now be facing up. You should see golden-brown, crispy cheese fully attached to the tortilla. If you pull at it, the cheese shouldn’t separate from the tortilla.
Step 4: Fill and Fold the Taco
With the cheese-crusted side facing up and the plain tortilla side on the griddle, add 2 to 3 ounces (approximately ⅓ to ½ cup) of the cooked seasoned meat to one half of the tortilla.
The meat should be hot. If it has cooled, briefly reheat it before filling tacos.
Let the filled tortilla stay on the low-heat griddle for another 15 to 20 seconds. This warms the plain side of the tortilla and keeps the meat hot.
Using your spatula, fold the tortilla in half over the meat filling. The cheese crust should be on the outside of the taco. You now have a half-moon shaped taco with crispy cheese on the exterior.
Transfer the completed taco to a serving plate. Keep warm while you make the remaining tacos.
Step 5: Repeat for Remaining Tacos
Repeat the cheese crust process for each additional taco. Sprinkle ¼ cup cheese, place tortilla on top, let crisp, flip, add meat, fold.
You should be able to make 6 to 8 tacos from 2 pounds of meat and 1 to 2 cups of cheese. Work efficiently but don’t rush. Each taco needs proper cheese crisping time.
If your griddle is large enough, you can make 2 to 3 tacos simultaneously. Just make sure you have enough room to flip each tortilla without them overlapping.
Step 6: Garnish and Serve

Top each cheese crust taco with fresh chopped cilantro, diced white onion, and a generous spoonful of the smoky salsa verde.
Serve with lime wedges on the side. Diners can squeeze lime over their tacos just before eating.
Serve immediately while the cheese crust is still crispy and the meat is hot. The tacos are best eaten within 5 minutes of assembly. The cheese crust loses some crispiness as it sits.
Carne Asada-Style Cheese Crust Tacos
Ingredients
Equipment
Method
- Heat griddle or skillet to high heat. Char tomatillos, jalapeños, garlic, and green onions 8 to 10 minutes until blistered and blackened in spots.
- Transfer charred vegetables to blender. Add fresh cilantro, chipotles in adobo, optional Loisa Sazón, salt, and pepper. Blend until smooth. Set aside.
- Heat griddle to high heat. Add 2 lbs chopped chuck roast in even layer. Season with 1 to 2 tablespoons Loisa Sazón. Add diced sweet onion on top.
- Cook undisturbed 3 to 4 minutes. Mix and chop with spatula. Continue cooking 10 to 15 minutes until browned and cooked through. Move to low heat to keep warm.
- Reduce griddle to low heat. Sprinkle ¼ cup Monterey Jack cheese on griddle. Let melt 45 seconds to 1 minute.
- Place corn tortilla on melted cheese. Press gently. Let crisp 45 seconds to 1 minute until cheese turns golden brown.
- Flip tortilla. Add 2 to 3 oz seasoned meat to one half. Fold tortilla in half with cheese crust on outside.
- Repeat for remaining tacos. Top with cilantro, diced white onion, salsa verde, and lime juice. Serve immediately.
Nutrition
Notes
Tried this recipe?
Let us know how it was!Frequently Asked Questions
Can You Use Pre-Made Taco Seasoning Instead of Loisa Sazón?
Yes, any taco seasoning works for this recipe. Loisa Sazón is recommended for its specific flavor profile, but standard taco seasoning from any brand creates good results.
Use the same amount: 1 to 2 tablespoons total for 2 pounds of meat. Adjust to taste. Some taco seasonings are saltier than others. Start with 1 tablespoon and add more if needed.
Loisa Sazón specifically includes achiote which provides orange color and earthy flavor. Regular taco seasoning uses chili powder and cumin for similar effect but without the achiote. The flavor will be slightly different but still delicious.
If you can’t find Loisa brand, look for other Latin seasoning blends. Goya Sazón is widely available and works similarly. Or make your own taco seasoning blend with chili powder, cumin, garlic powder, onion powder, oregano, and salt.
How Do You Prevent the Cheese From Burning?
Temperature control is critical for cheese crust success. Use low to medium-low heat, not high heat. The cheese needs time to melt and crisp gradually. Too-high heat burns the exterior before the interior melts.
Watch for visual cues. The cheese should bubble gently, not aggressively. If it’s smoking or turning dark brown very quickly, reduce heat immediately.
Monterey Jack is more forgiving than other cheeses. Sharp cheddar and parmesan burn easily. Monterey Jack browns gradually, giving you control.
If your first taco’s cheese burns, reduce heat before making the next one. Let the griddle cool for 1 to 2 minutes between tacos if needed. Consistent moderate heat is better than fluctuating between too hot and too cold.
Can You Make These Tacos Without a Griddle?
A large skillet or flat pan works instead of a griddle. You just have less surface area, so you’ll make tacos one or two at a time instead of multiple simultaneously.
Cast iron skillets work excellently. They retain heat well and create even browning. Nonstick skillets also work but won’t develop as much char on the meat.
For the cheese crust technique, any flat cooking surface works. The key is maintaining consistent low heat. Skillets on stovetop burners can have hot spots. Watch carefully and rotate the pan if one area seems hotter.
You need a spatula wide enough to flip the tortilla cleanly without tearing the cheese crust. A fish spatula or large turner works best.
What Other Cheeses Work for the Crust?
Oaxaca cheese (also called quesillo) melts beautifully and creates excellent crust. It’s traditional for Mexican cooking. The stringy texture when melted creates interesting cheese pull when you bite the taco.
Mild cheddar works but browns faster than Monterey Jack. Watch it carefully. The flavor is good but you have less margin for error.
Pepper Jack adds heat from the peppers. This can be good if you want extra spice beyond the salsa verde. But it might be too much heat combined with jalapeños and chipotle.
Avoid low-moisture mozzarella. It doesn’t melt well enough for this technique. Fresh mozzarella has too much moisture and becomes watery. Parmesan burns almost immediately. Stick with Monterey Jack or Oaxaca for best results.
How Do You Store and Reheat Leftover Meat?
Store cooked seasoned chuck roast in an airtight container in the refrigerator for up to 4 days. Keep it separate from tortillas and toppings. The meat reheats better than assembled tacos.
To reheat, warm the meat in a skillet over medium heat. Add a splash of water or beef broth to prevent drying. Stir occasionally until heated through, about 5 to 7 minutes.
Microwave reheating also works. Use 50% power to prevent toughening. Heat in 30-second intervals, stirring between each interval.
Don’t freeze and thaw the cooked meat if possible. The texture degrades. If you must freeze, use within 2 months. Thaw in refrigerator overnight before reheating.
Make fresh tacos with reheated meat. Don’t try to reheat assembled tacos. The cheese crust and tortilla won’t maintain quality. The meat reheats fine but build new tacos fresh.
Ready to Level Up?
Take your backyard cooking from good to legendary.
This is where I keep all my most-used smokers, knives, and favorite cooking tools.
Shop My Gear CollectionExplore More Recipes
Find more diverse flavors at CWFeats.com