
Chile Honey Glazed Beef Dino Ribs Recipe
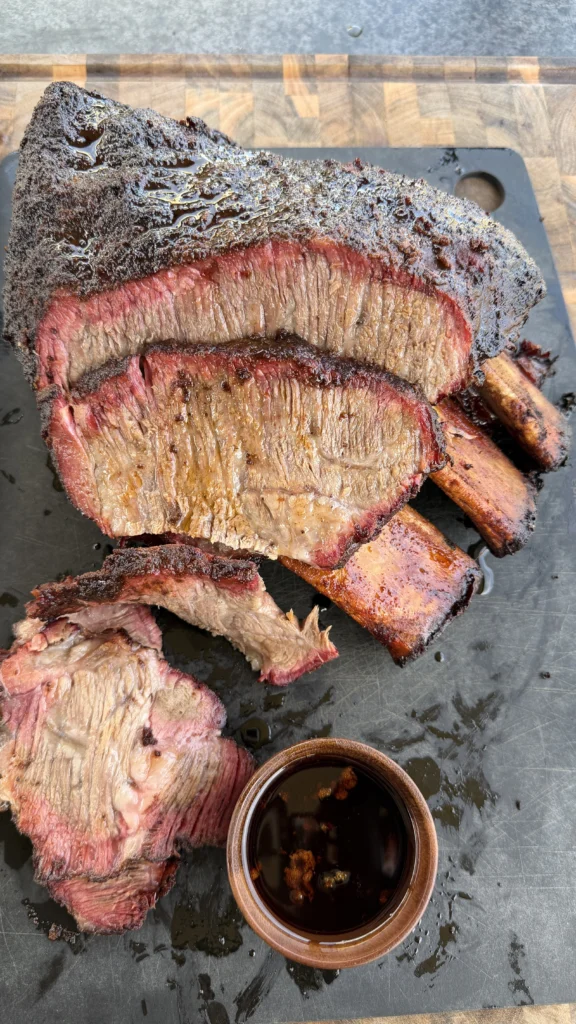
Beef dino ribs use one 8-10 lb rack with 3-4 bones, trimmed of silver skin on the meat side only while leaving the membrane intact on the bone side, coated optionally with neutral oil or yellow mustard as binder, then seasoned generously with chile dry rub made from 2 tablespoons each kosher salt and coarse black pepper, 1.5 tablespoons dark brown sugar, 1 tablespoon each smoked paprika and ancho chile powder, 1 teaspoon garlic powder, and 1/2 teaspoon chipotle powder. Smoke at 275°F using oak or hickory until internal temperature reaches 175°F, then transfer to foil tray and pour chile honey butter sauce (made from 1/2 cup honey, 3 tablespoons butter, 1 tablespoon apple cider vinegar, 1 teaspoon chipotle powder, 1/2 teaspoon smoked paprika, and pinch of salt) over the ribs. Return to smoker and continue cooking until ribs reach 203°F internal temperature and are probe tender. Rest for 15-20 minutes, then slice thin on the bone on a bias without separating individual bones. These chile honey glazed beef ribs deliver tender, pull-apart meat with sweet-spicy glaze that caramelizes during the final cooking stage while the thin slicing technique creates maximum tenderness and impressive presentation.
The whole process takes about 7.5-8 hours from start to finish. Spend 20 minutes trimming and seasoning while the smoker preheats. Smoke for approximately 4-5 hours to reach 175°F internal temperature depending on rack size. Make the chile honey butter sauce in 5 minutes while ribs smoke. Sauce and finish for another 2-2.5 hours until 203°F probe tender. Rest for 15-20 minutes before slicing. The two-stage cooking ensures proper bark development before saucing, while finishing in the foil tray with sauce creates glazed, tender ribs without washing away the carefully built crust.
What Are Beef Dino Ribs?
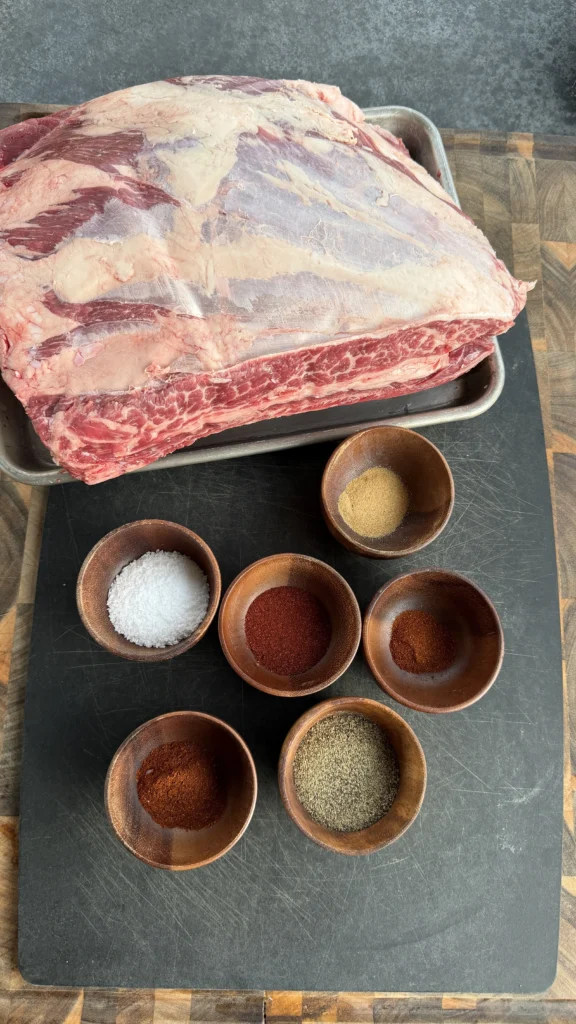
Beef dino ribs are beef plate ribs (also called beef short plate ribs) that come from ribs 6-9 of the cow, located in the short plate section below the ribeye primal. The “dino” nickname comes from their enormous size – each bone is typically 8-12 inches long with thick, heavily marbled meat between the bones. A full rack of 3-4 bones weighs 8-10 lbs before trimming and looks prehistoric when properly smoked and presented.
These ribs contain some of the most richly marbled beef on the entire animal. The meat between the bones is heavily interlaced with fat that renders during smoking, creating incredibly rich, beefy flavor. This marbling is what makes beef plate ribs ideal for low-and-slow smoking since the fat bastes the meat from within as it renders. The meat itself comes from the serratus ventralis muscle which is well-exercised, requiring long cooking times to break down connective tissue.
Beef dino ribs differ from beef back ribs which come from the rib primal (the same section as ribeye steaks). Back ribs have much less meat since most of it is sold as ribeye steaks. Plate ribs have thick, meaty sections between bones. They’re also different from short ribs which are the same cut but portioned differently – short ribs are cut into 3-4 inch sections while dino ribs are left as full-length bones.
You’ll find beef dino ribs at specialty butchers, high-end grocery stores, or by special order. They’re less common than pork ribs but growing in popularity as backyard smoking becomes more popular. When buying, look for racks with heavy marbling throughout, thick meat between bones, and intact bones without cracks. Expect to pay premium prices since these are highly sought after.
Why Leave the Membrane on Beef Ribs?
Leaving the membrane on the bone side protects the ribs during the 6-7 hour smoking process. The membrane acts as a barrier between the bone and the heat, preventing the bone side from drying out or developing overly hard bark. During long low-and-slow cooks, exposed bone can char and become bitter. The membrane shields against this while allowing the meat to cook properly.
The bone side faces down during most of the smoking time, so seasoning doesn’t penetrate there anyway. Leaving the membrane doesn’t prevent flavor development where it matters – on the meat side. By removing only the silver skin from the meat side, you expose the actual meat to rub and smoke while protecting the less important bone side.
This differs from pork ribs where many people remove the membrane. Pork ribs cook faster (4-6 hours) and the membrane can prevent smoke and seasoning penetration during that time. Beef dino ribs cook much longer (6-8 hours) and benefit from the protection. The membrane also helps hold the rack together during the long cook and prevents bones from separating.
The meat side silver skin, however, must be removed. Silver skin is a tough, silvery connective tissue membrane that doesn’t break down during cooking. It prevents rub from adhering and creates chewy spots in the final product. Use a knife to get under the silver skin and peel it away from the meat side, leaving clean red meat exposed for seasoning.
What Temperature Should Beef Dino Ribs Reach?
Beef dino ribs should reach 203°F internal temperature and be probe tender for optimal results. At 203°F, the collagen and connective tissue have fully broken down into gelatin, creating that fall-off-the-bone tenderness BBQ is known for. The intramuscular fat has also rendered completely, leaving buttery pockets throughout the meat rather than chewy fat chunks.
Insert an instant-read thermometer or probe into the thickest part of the meat between bones, avoiding bone contact. Check multiple spots since thickness varies along the rack. When the coolest spot reaches 203°F and a probe or skewer slides in and out with minimal resistance (like probing room-temperature butter), the ribs are done.
The intermediate temperature of 175°F marks when bark is set and it’s time to sauce. At this point, the exterior has developed good color and crust, but the interior still needs more time to reach full tenderness. Saucing at 175°F instead of at the end allows the sauce to cook into the meat during the final 2-2.5 hours rather than just sitting on the surface.
Don’t pull beef ribs before 195°F even if they seem tender. Below this temperature, connective tissue hasn’t fully broken down. Between 195-203°F is the sweet spot where beef ribs transform from tough to tender. Above 205°F, you risk the meat becoming mushy and falling apart too easily. The 203°F target with probe tenderness gives you perfect texture.
Why Sauce Beef Ribs at 175°F Instead of at the End?
Saucing at 175°F internal temperature allows the chile honey butter sauce to cook into the meat during the final 2-2.5 hours of smoking rather than just coating the surface. The sauce penetrates slightly into the meat while caramelizing on the exterior, creating deeper flavor than saucing at the very end. The honey caramelizes gradually over hours rather than burning from being applied to already-hot ribs.
The ribs also finish cooking in the sauce, which adds moisture during the final stage when meat can dry out. The foil tray holds the sauce around the ribs so they essentially braise in the chile honey butter while smoke continues penetrating. This creates incredibly flavorful, moist ribs. Saucing at the end doesn’t give the sauce time to work into the meat or caramelize properly.
The 175°F mark also indicates when the bark is set enough to handle sauce without washing away. Before 175°F, the bark is still developing and sauce would prevent proper crust formation. After 175°F, the bark is solid enough that sauce enhances rather than replaces it. The sauce becomes a glaze that adheres to the existing bark.
Transferring to a foil tray at this stage also makes the final hours of cooking easier. The ribs are stable in the tray and won’t risk falling apart on the grate. The tray catches all the rendering juices and sauce, creating additional sauce for serving. This technique is different from wrapping in foil which steams the ribs – the open tray allows smoke to continue penetrating while the sauce cooks in.
How Do You Slice Beef Dino Ribs on the Bone?
Slicing beef dino ribs thin on the bone on a bias creates maximum tenderness and impressive presentation. Don’t separate the ribs into individual bones like you would with pork ribs. Instead, slice across the entire rack at an angle, cutting through meat and bone together. This creates slices that show cross-sections of multiple bones with meat surrounding them.
Hold a sharp knife at approximately 45-degree angle to the cutting board. Start at one end of the rack and slice downward through the meat and bone, creating slices about 1/2 to 3/4 inch thick. The bias angle creates larger surface area per slice compared to cutting straight down. Each slice should include portions of bone with surrounding meat.
The thin slicing is crucial for tenderness even though the ribs are cooked to 203°F. Beef plate ribs have grain that runs across the bones. Thin slicing cuts across these fibers multiple times, creating short fiber segments that are tender to bite. Thick slices or whole bones require more chewing despite being probe tender. The thin slices also look more elegant and restaurant-quality.
You’ll need a very sharp knife or cleaver to cut through bone. A heavy chef’s knife or Chinese cleaver works well. Apply firm, steady pressure rather than sawing. Some people prefer using a sharp boning knife to cut the meat between bones, then using kitchen shears to cut through the bones themselves. Either method works as long as you maintain the thin, angled slicing pattern.
Beef Dino Ribs
Chile honey butter sauce, smoked to 203°F
Ingredients
Beef
- 1 rack beef dino ribs (3-4 bones, 8-10 lbs)
- Neutral oil or yellow mustard (optional binder)
Chile Dry Rub
- 2 tablespoons kosher salt
- 2 tablespoons coarse black pepper
- 1½ tablespoons dark brown sugar
- 1 tablespoon smoked paprika
- 1 tablespoon ancho chile powder
- 1 teaspoon garlic powder
- ½ teaspoon chipotle powder
Chile Honey Butter Sauce
- ½ cup honey
- 3 tablespoons unsalted butter
- 1 tablespoon apple cider vinegar
- 1 teaspoon chipotle powder
- ½ teaspoon smoked paprika
- Pinch of salt
Leave the membrane on the bone side intact for protection during the long smoke. Only remove silver skin from the meat side. This allows seasoning and sauce to penetrate the meat while the membrane prevents the bone side from drying out or burning during 6-7 hours of smoking.
Step-by-Step Instructions
Step 1: Trim the Beef Dino Ribs
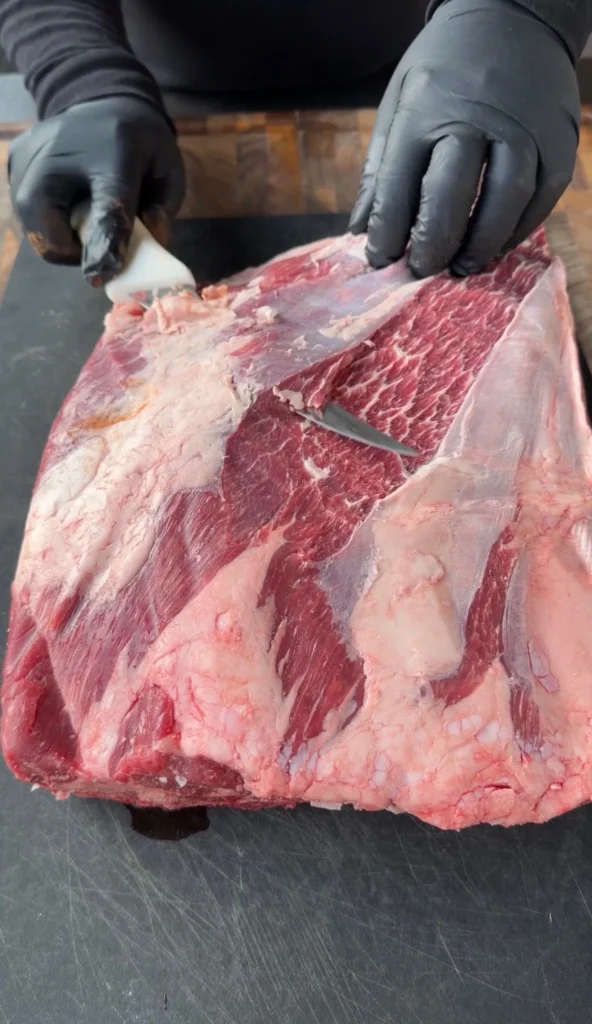
Remove the rack of beef dino ribs from packaging and place on a large cutting board. Pat dry with paper towels. Flip the rack so the bone side faces up. Examine the membrane – a translucent, tough layer covering the bones. Leave this membrane completely intact. Don’t remove it.
Flip the rack over so the meat side faces up. This is where trimming happens. Look for silver skin – a silvery-white, tough connective tissue membrane that covers portions of the meat. It looks shiny compared to the red meat. Using a sharp knife, slide the blade under an edge of the silver skin and peel it away from the meat. Remove all visible silver skin, exposing clean red meat.
Also trim any large, hard fat deposits or loose pieces of fat on the meat side, but leave most of the fat. The marbling throughout the meat should remain – you’re only removing surface fat that’s excessively thick or hard. The goal is exposing meat for seasoning penetration while leaving the fat that will render and baste during cooking.
Check the ends of the rack for any ragged pieces or dried edges and trim those clean. The rack should look tidy with clean red meat visible on the meat side and intact membrane on the bone side. This selective trimming ensures proper seasoning absorption where it matters while protecting the ribs during the long smoke.
Step 2: Apply Optional Binder and Chile Dry Rub
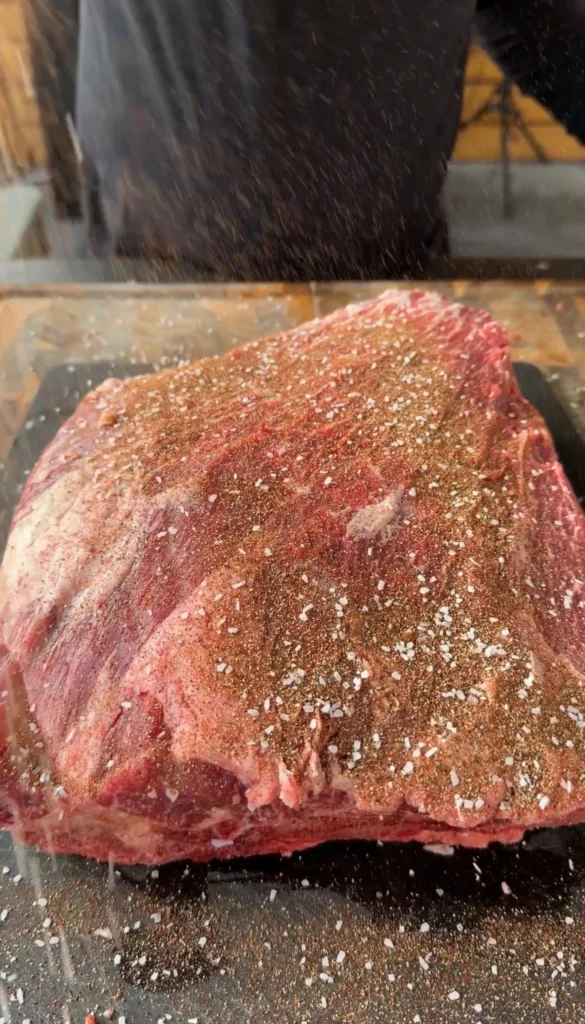
If using a binder, lightly coat the entire rack of ribs with either neutral oil or yellow mustard. Use just enough to create a thin, even coating – about 2-3 tablespoons total. The binder helps rub adhere but isn’t necessary. Some pitmasters skip it entirely and apply rub directly to the meat. Either approach works.
Make the chile dry rub by combining 2 tablespoons kosher salt, 2 tablespoons coarse black pepper, 1.5 tablespoons dark brown sugar, 1 tablespoon smoked paprika, 1 tablespoon ancho chile powder, 1 teaspoon garlic powder, and 1/2 teaspoon chipotle powder in a small bowl. Mix thoroughly until uniform in color with no clumps of any single ingredient.
Season the ribs generously on all sides with the chile rub, focusing especially on the meat side. Use all of the rub – beef dino ribs are massive and need heavy seasoning. Press the rub into the meat firmly so it adheres well. The ribs should have visible coating of dark reddish-brown rub covering all surfaces. Don’t be shy with application.
Let the seasoned ribs sit at room temperature for 20-30 minutes while you preheat the smoker. This takes the chill off the meat for more even cooking and allows the rub to begin penetrating the surface. The salt in the rub starts drawing moisture which dissolves the seasonings, creating a paste that sticks better during smoking.
Step 3: Preheat Smoker and Smoke to 175°F
Preheat your smoker to 275°F using oak or hickory wood. Oak provides classic beef smoke flavor that’s not overpowering. Hickory is slightly stronger but works excellently with beef. Avoid mesquite which can be too intense for the long cook time. Let the smoker stabilize at 275°F with thin blue smoke before adding ribs.
Place the beef dino ribs on the smoker grates bone-side down. This positions the membrane-protected bone side toward the heat while the seasoned meat side faces up where it can develop bark. Close the smoker lid and maintain steady 275°F throughout the cook. Check every hour to add wood as needed for continuous smoke.
Cook undisturbed for the first 2 hours. Don’t open the smoker frequently or you’ll lose heat and extend cooking time. After 2 hours, you can spritz with apple cider vinegar or water if desired, though it’s optional. The ribs will gradually develop dark mahogany bark on the meat side as the rub caramelizes.
After approximately 4-5 hours, start checking internal temperature. Insert a probe into the thickest part of the meat between bones. You’re looking for 175°F. Exact timing varies based on rack size, smoker efficiency, and outside temperature. When the thickest part reaches 175°F, the ribs are ready for saucing. The bark should be well-set and deeply colored.
Step 4: Make Chile Honey Butter Sauce
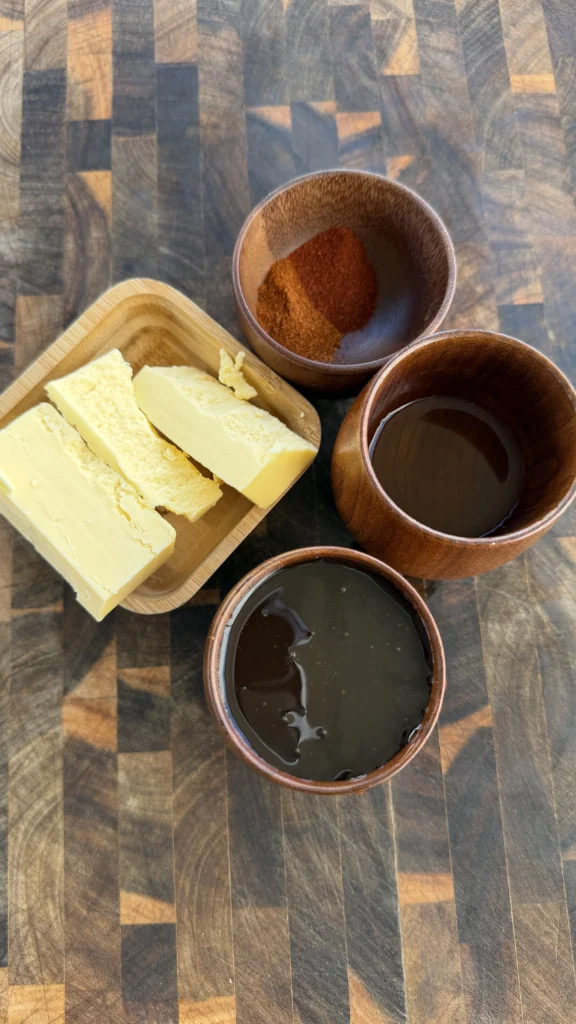
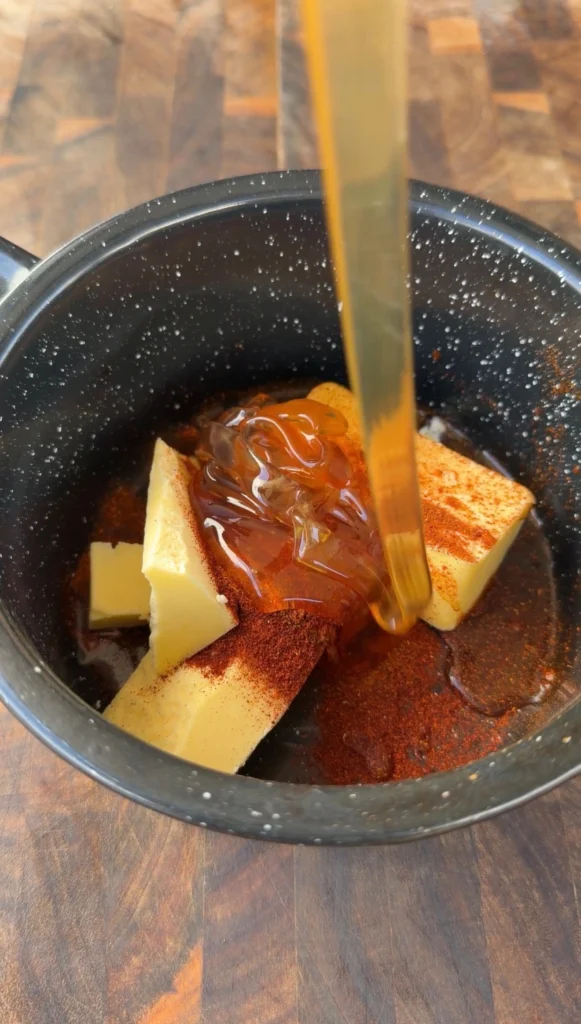
While the ribs smoke toward 175°F, make the chile honey butter sauce. In a small saucepan over low heat, combine 1/2 cup honey, 3 tablespoons unsalted butter, 1 tablespoon apple cider vinegar, 1 teaspoon chipotle powder, 1/2 teaspoon smoked paprika, and a pinch of salt.
Stir the mixture constantly as the butter melts. The honey and butter will combine into a smooth, glossy sauce. The chipotle powder adds smoky heat while the vinegar provides acidity that balances the honey’s sweetness. Continue heating gently until everything is fully melted and combined into uniform sauce.
Bring the sauce to a gentle simmer and cook for 2-3 minutes, stirring occasionally. This allows the flavors to meld and the sauce to thicken slightly. Don’t let it boil hard or the butter may separate. The sauce should be pourable but slightly thickened compared to when you started. Remove from heat and set aside.
Keep the sauce warm but not hot until the ribs reach 175°F. If it thickens too much as it sits, reheat gently and add a tablespoon of water to thin. The sauce should pour easily over the ribs when it’s time to apply it.
Step 5: Sauce and Finish to 203°F
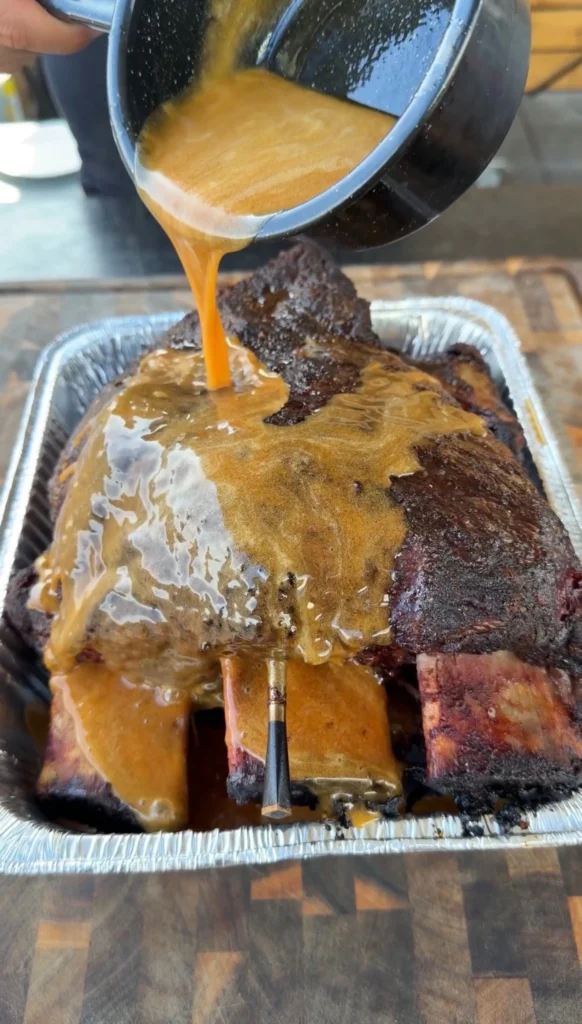
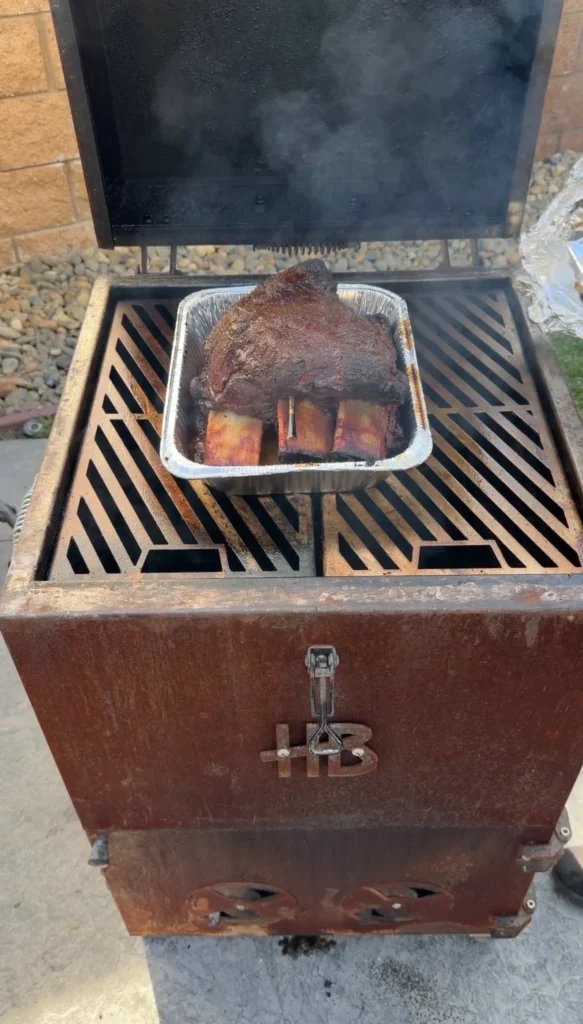
When the ribs reach 175°F internal temperature, carefully remove them from the smoker. Place them in a large disposable aluminum foil tray, bone-side down. The tray should be big enough that the ribs fit comfortably with some room around the edges for sauce to pool.
Pour all of the chile honey butter sauce evenly over the ribs. Use a brush or spoon to spread it across the entire surface, ensuring even coverage. The sauce should coat the top and run down the sides, pooling slightly in the bottom of the tray. Don’t worry about using all the sauce – it’s meant to finish cooking with the ribs.
Return the tray with sauced ribs to the smoker at 275°F. The ribs are now in the tray rather than directly on the grates. Leave the smoker lid closed and continue cooking. The sauce will caramelize on the ribs while also keeping them moist during the final cooking phase. The tray catches rendering fat and juices that mix with the sauce.
Continue cooking until the ribs reach 203°F internal temperature and are probe tender. This final phase takes approximately 2-2.5 hours. Start checking at 2 hours. Insert a probe or skewer into the thickest meat – it should slide in and out with minimal resistance like probing soft butter. When this happens and the temperature reads 203°F, the ribs are done.
Step 6: Rest and Slice
Remove the tray from the smoker carefully using heavy gloves – it will be very hot and full of liquid. Place on a heat-safe surface. Tent the ribs loosely with aluminum foil and let rest for 15-20 minutes. Don’t skip this rest. The juices need time to redistribute throughout the meat. The temperature will stay hot enough that the ribs remain warm during this period.
During rest, the juices that were driven to the center during cooking flow back toward the edges. The connective tissue that melted into gelatin firms up slightly, making the meat easier to slice without falling apart. Cutting immediately would cause significant juice loss and make slicing messier.
After resting, transfer the ribs to a large cutting board. Reserve the sauce and juices from the tray for serving. Using a very sharp chef’s knife or cleaver, slice the entire rack on a bias (at approximately 45-degree angle). Cut through both meat and bone, creating slices about 1/2 to 3/4 inch thick. Each slice should include cross-sections of bone with surrounding meat.
Don’t separate the ribs into individual bones. The thin bias slices create better presentation and tenderness. Arrange the sliced ribs on a serving platter. Drizzle some of the reserved sauce from the tray over the top. The slices should show beautiful cross-sections of bark, smoke ring, tender pink meat, and bone. Serve immediately while hot.
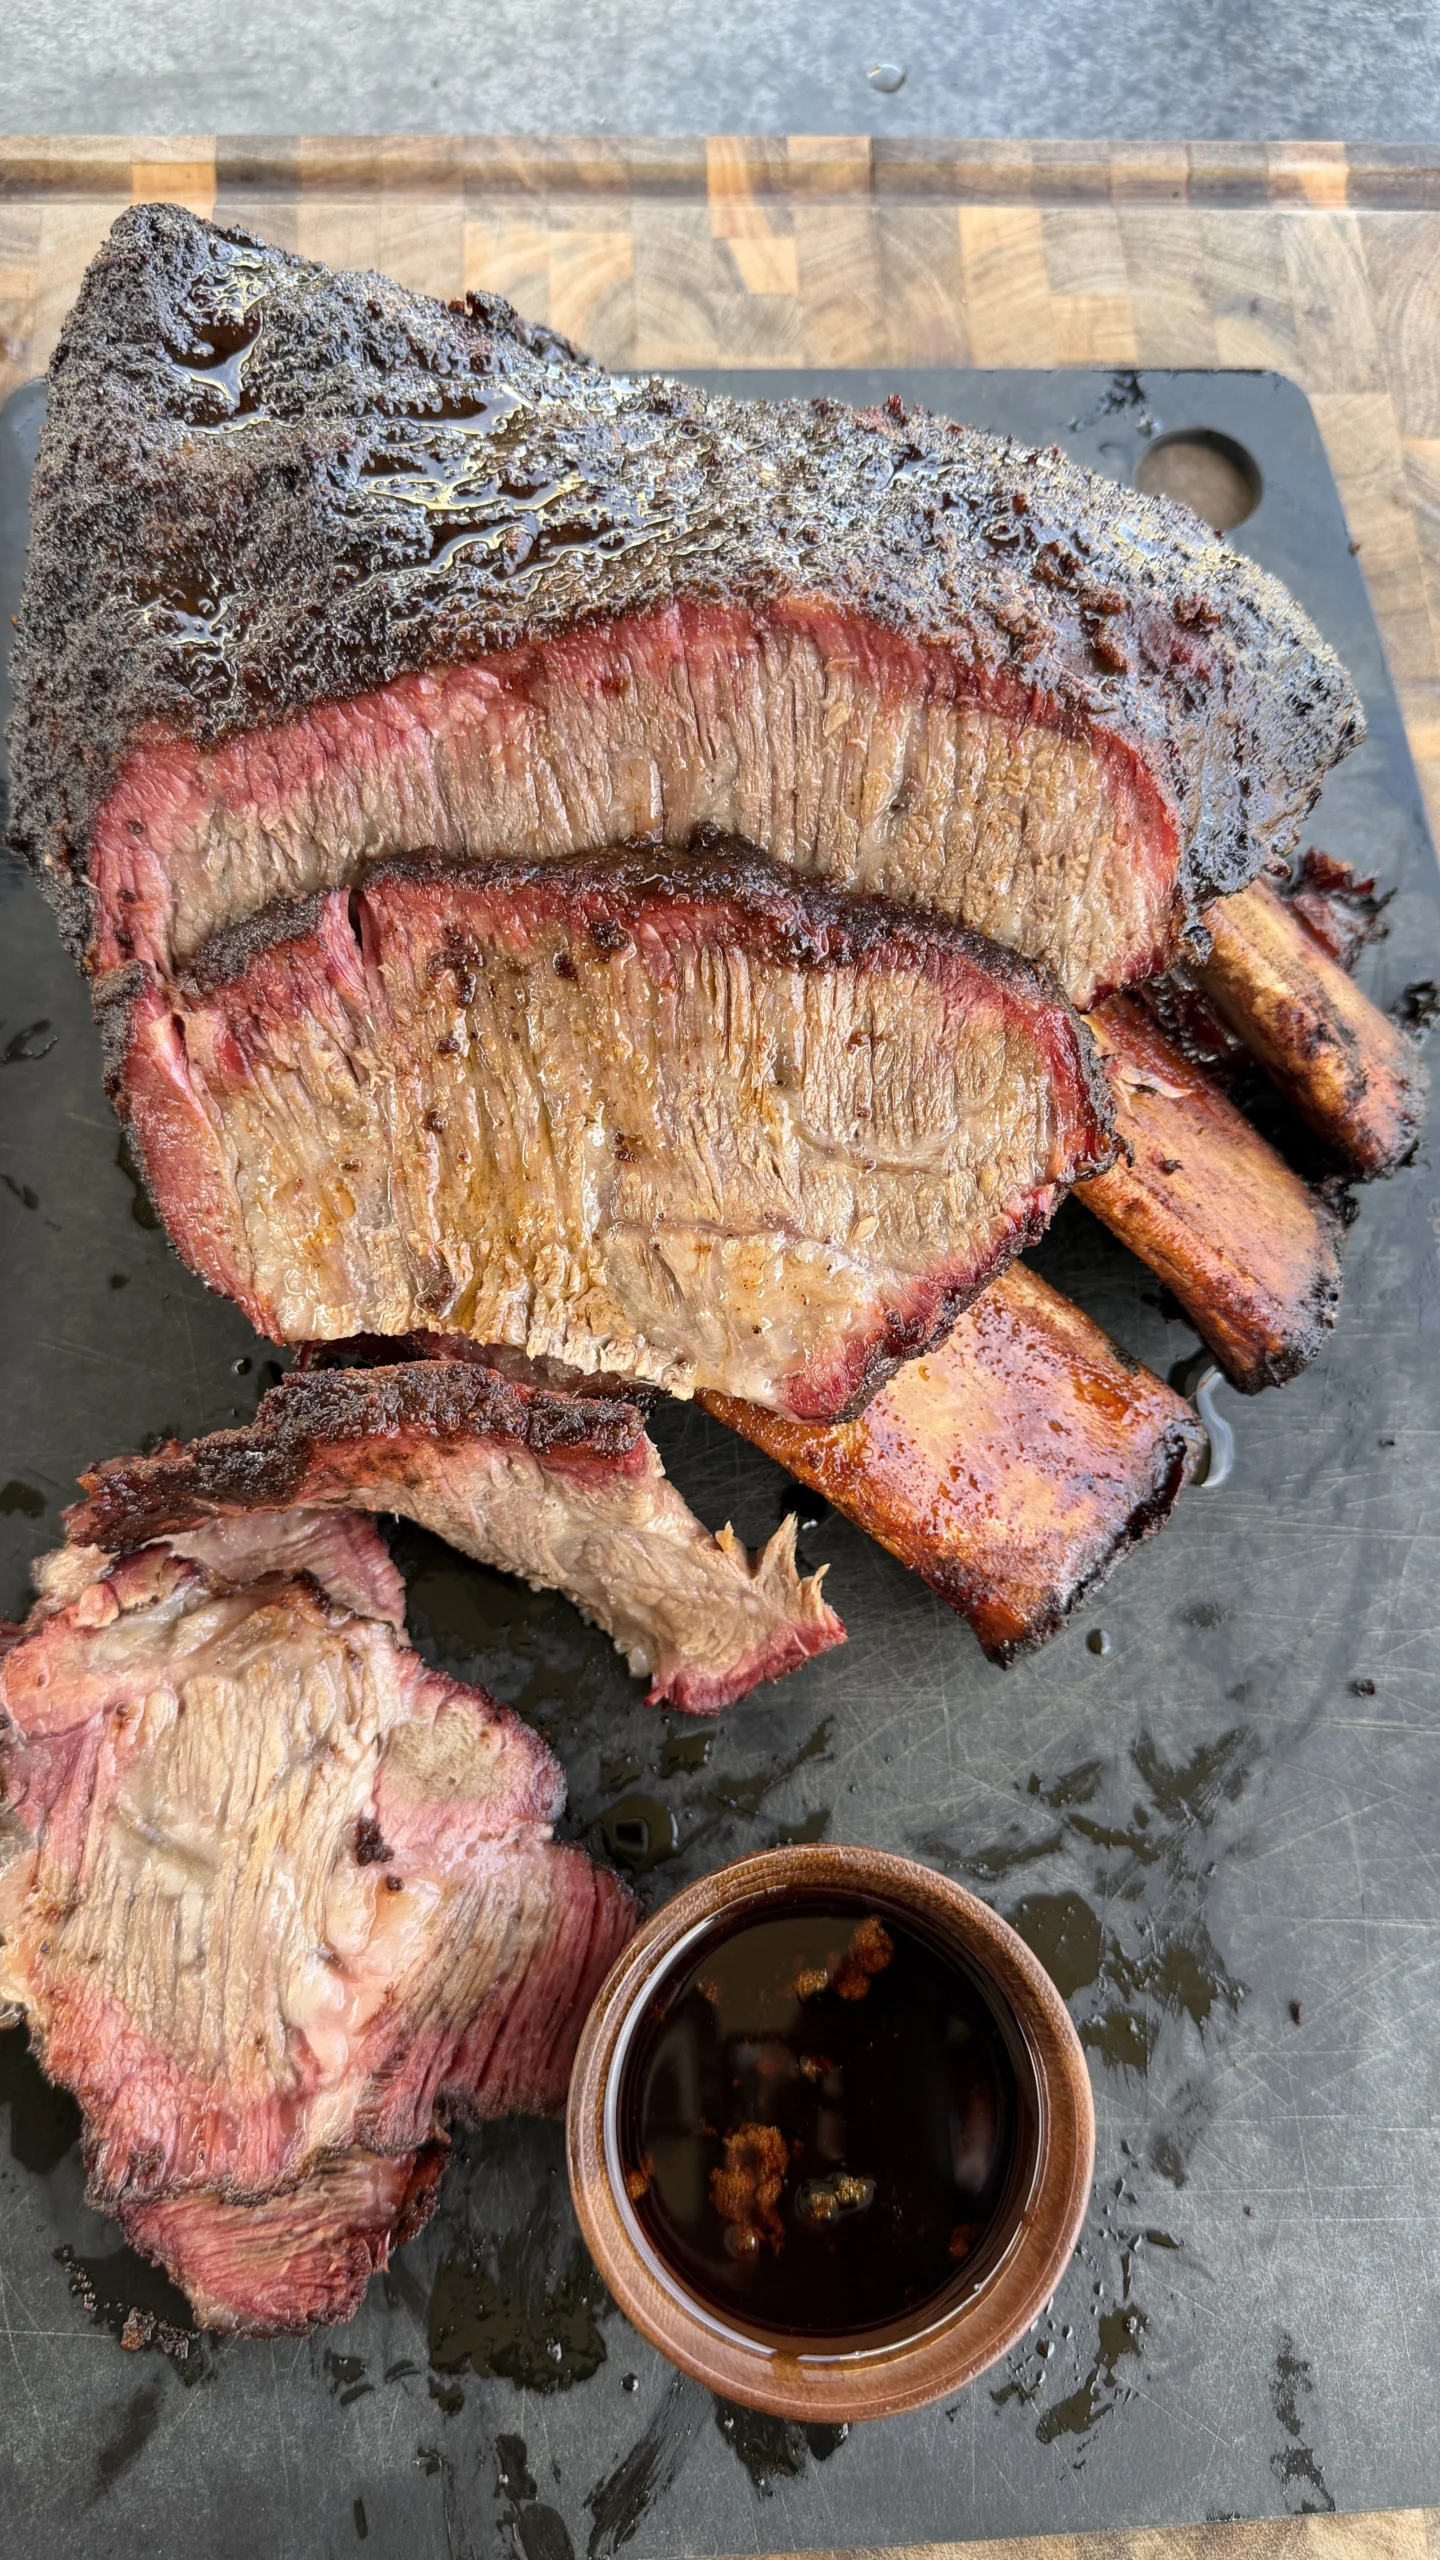
Chile Honey Glazed Beef Dino Ribs
Ingredients
Method
- Leave membrane intact on bone side of ribs. Remove silver skin from meat side only to expose meat. Trim hard fat deposits but leave marbling.
- Optional: Lightly coat ribs with neutral oil or yellow mustard as binder. Mix chile rub ingredients and season ribs generously on all sides, pressing firmly. Let rest at room temperature while smoker preheats.
- Preheat smoker to 275°F with oak or hickory. Place ribs bone-side down on grates. Smoke until internal temperature reaches 175°F, approximately 4-5 hours.
- While ribs smoke, make sauce by combining honey, butter, apple cider vinegar, chipotle powder, smoked paprika, and salt in saucepan over low heat. Simmer 2-3 minutes until smooth and glossy.
- At 175°F, transfer ribs to foil tray. Pour all chile honey butter sauce over ribs. Return to smoker at 275°F. Continue cooking until ribs reach 203°F internal and are probe tender, approximately 2-2.5 hours more.
- Remove from smoker and rest 15-20 minutes tented with foil. Slice thin on the bone on a bias without separating individual bones. Drizzle with reserved sauce from tray and serve immediately.
Notes
Tried this recipe?
Let us know how it was!Frequently Asked Questions
Can I cook these on a gas grill instead of a smoker?
Yes, use a gas grill with indirect heat setup. Turn on burners on one side only to maintain 275°F. Place ribs on the cool side away from direct heat. Add a smoker box filled with wood chips to the hot side for smoke. The technique remains identical – cook to 175°F, sauce in foil tray, finish to 203°F.
Gas grills require more attention to maintain steady temperature compared to dedicated smokers. Monitor closely and adjust burners as needed. Add wood chips periodically for continuous smoke. The results will be very good though not quite as smoky as dedicated smokers.
What if I don’t have ancho chile powder?
Regular chili powder works as a substitute for ancho chile powder. Ancho has milder, sweeter flavor with fruity notes, while regular chili powder is often blended with cumin and oregano. You can also use paprika in place of ancho for mild flavor, or use more chipotle powder for smokier heat.
The rub is flexible. The key components are salt, pepper, and something with sweetness (brown sugar). The chile powders add flavor dimension but the ribs will still be excellent with adjusted spices based on what you have available.
How do I know when ribs are probe tender?
Insert a thermometer probe, toothpick, or thin skewer into the thickest part of the meat between bones. It should slide in and out smoothly with very little resistance, similar to probing room-temperature butter. If you feel significant resistance or the probe sticks, the ribs need more time even if they’ve reached 203°F.
Probe tenderness is as important as temperature. Some racks reach probe tenderness at 200°F while others need 205°F. Use temperature as a guide but probe tenderness as the final test. The combination of both tells you the ribs are perfectly done.
Can I make these without the sauce?
Yes, beef dino ribs are excellent dry-rubbed without sauce. Simply smoke to 203°F probe tender without the saucing step. This creates traditional Texas-style beef ribs with heavy bark and pure smoke flavor. The chile rub provides plenty of flavor on its own.
The sauce adds sweet-spicy dimension and helps keep ribs moist during the final cooking hours. But purists often prefer dry beef ribs to appreciate the smoke and beef flavor without sweetness. Both approaches are valid depending on preference.
How far ahead can I cook these?
Beef dino ribs are best served fresh but can be cooked 1 day ahead. Let them cool completely, wrap tightly in foil, and refrigerate. Reheat in a 275°F oven or smoker in the foil until warmed through, about 45-60 minutes. The texture won’t be quite as good as fresh but still very good.
For best results, cook the day of serving. If timing is tight, you can hold finished ribs wrapped in foil in a cooler (empty cooler, no ice) for up to 2 hours. They’ll stay hot and continue tenderizing slightly. This lets you smoke them earlier in the day and serve at dinner time.
Ready to Take Your Cooking to the Next Level?
This is where I keep all my most-used products, gear, and favorite cooking tools — check it out:
🔥 View My Cooking Gear & ToolsRecipe Categories
If you loved this recipe, you’ll find more to savor across our diverse categories. From beef to pork, chicken to turkey, seafood to appetizers, there’s a wealth of flavors waiting for you. Explore them all at CWFeats.