
Grilled Tomahawk Steak & Chimichurri Frites
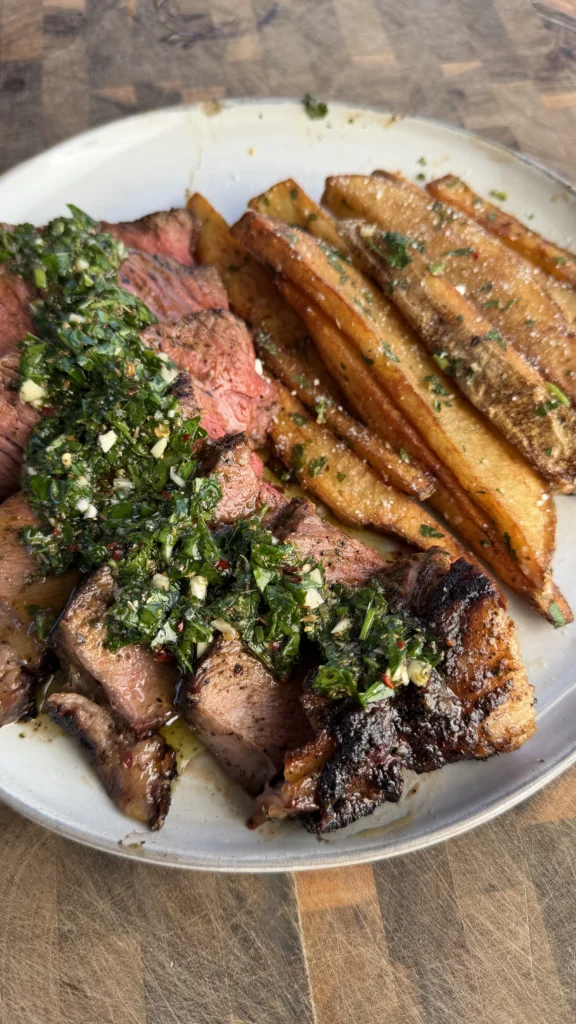
Grilled tomahawk steak with chimichurri frites is a 2-pound tomahawk ribeye seasoned with kosher salt, black pepper, and garlic powder, then seared over high direct heat until a deep crust forms on both sides before moving to indirect heat to finish cooking to 130°F internal temperature. After pulling from the grill, you top the steak with 2 to 3 tablespoons of butter and rest it for 10 to 15 minutes. During the rest, you flash fry hand-cut russet potato fries at 350°F until golden and crispy, then toss them immediately with melted butter, fresh chimichurri sauce, grated Parmesan cheese, and salt. The chimichurri is made from finely chopped fresh parsley and oregano combined with minced garlic, red pepper flakes, red wine vinegar, and olive oil.
The entire process takes about 1 hour from start to finish. This includes 15 minutes to make the chimichurri and let it rest while you prep. You spend 10 minutes seasoning the steak and cutting the potatoes. The steak grills for 15 to 20 minutes total between searing and indirect cooking. Another 10 to 15 minutes of resting happens while you fry the potatoes. The frying itself takes only 5 to 7 minutes. Everything finishes simultaneously for perfect timing.
This tomahawk steak recipe delivers restaurant-quality presentation with the impressive bone-in ribeye as the centerpiece. The chimichurri provides bright, herbaceous contrast to the rich, fatty steak. The garlic and vinegar cut through the beef’s richness. The fresh herbs add complexity beyond what traditional steak sauce provides. The chimichurri fries tie the plate together. They get double flavor treatment from both the herb sauce and Parmesan. The combination creates a cohesive dish where every component complements the others.
Jump to RecipeWhat Makes Tomahawk Steaks Different from Regular Ribeyes
The Extended Bone and Presentation Impact
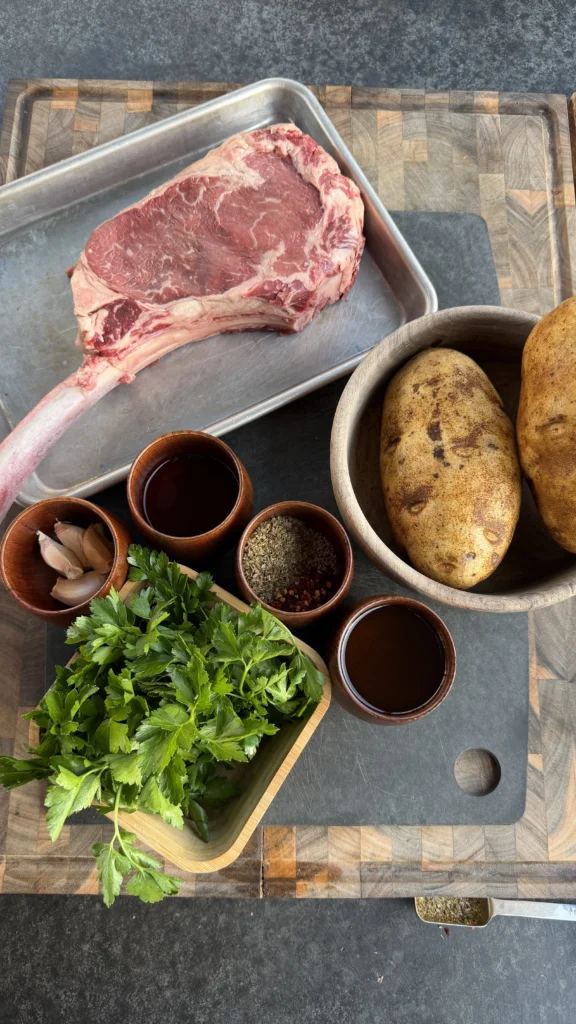
A tomahawk steak is a ribeye with 5 to 8 inches of rib bone left attached. The bone is “frenched,” meaning all the meat and fat are scraped away to expose clean, white bone. This creates the signature tomahawk axe appearance. A regular ribeye has the bone completely removed or cut very short.
The extended bone serves primarily as presentation. It makes the steak look dramatic and impressive on the plate. The bone handle also makes it easier to flip during grilling. You can grab the bone with tongs without tearing the meat. For serving, the bone provides a natural marker for slicing. You cut parallel to the bone to portion the meat.
The bone does not add significant flavor during cooking. This is a common misconception. Bone marrow flavor doesn’t penetrate the dense muscle tissue during the brief cooking time. The marrow stays inside the bone. What you’re paying for with a tomahawk is the visual impact and the eating experience of a bone-in steak.
Weight Distribution and Cooking Considerations
Tomahawk steaks typically weigh 2 to 3 pounds. But much of that weight is bone. The actual meat portion is similar to a standard ribeye. Maybe 1.5 to 2 pounds of edible steak. You’re paying premium prices for bone that you won’t eat. This is important to understand when budgeting.
The thick cut creates different cooking dynamics than thinner ribeyes. Most tomahawk steaks are cut 2 to 2.5 inches thick. This thickness requires the two-zone grilling method. You can’t cook them the same way you’d cook a 1-inch ribeye. The extended cooking time means more surface area exposure. This allows for better crust development without overcooking the interior.
The thickness also means more even cooking from edge to edge. Thin steaks have a larger proportion of well-done exterior relative to the medium-rare center. Thick steaks like tomahawks have less gradient. More of the steak stays pink. You get a better ratio of crust to perfectly cooked interior.
Marbling and Meat Quality
Tomahawk steaks come from the same primal cut as regular ribeyes. They have the same marbling, the same spinalis cap, the same fat distribution. The quality of the meat is identical. You’re not getting better beef by choosing tomahawk over boneless ribeye from the same grade.
The difference is purely in presentation and cooking method. If you’re grilling for a special occasion where visual impact matters, tomahawk delivers. For everyday grilling where you just want great-tasting steak, a boneless ribeye saves money while providing the same flavor and texture.
Some butchers try to justify tomahawk pricing by claiming the bone adds flavor. This is marketing. The bone does protect the meat slightly during cooking. It acts as an insulator on one edge. But this effect is minimal. The flavor comes from the beef quality, the marbling, the seasoning, and the cooking technique. Not from the bone.
Market Pricing and Value Assessment
Tomahawk steaks often cost $40 to $60 per pound at retail. Boneless ribeye might be $20 to $30 per pound for the same grade. You’re paying double for the bone and the butchering labor to french it. When you factor in that 30 to 40% of the tomahawk’s weight is inedible bone, the actual cost per pound of meat is even higher.
For special occasions, celebrations, or when presentation matters, the premium can be justified. The wow factor when you present a tomahawk steak is real. Guests remember it. Photos look impressive. If you’re grilling for a proposal, anniversary, or milestone birthday, the extra cost might be worth it.
For regular weeknight dinners, a standard ribeye makes more financial sense. You get the same flavor and quality for half the price. Save the tomahawk for times when the presentation premium adds value to the occasion.
How to Set Up Two-Zone Grilling for Thick Steaks
Creating Direct and Indirect Heat Zones
Two-zone grilling means having one area of intense direct heat and one area with no direct heat underneath. On a charcoal grill, you pile all the coals on one half of the grill. The coal side is your direct heat zone. The empty side is your indirect zone. The heat circulates but there’s no direct flame or coal below the indirect side.
On a gas grill, turn burners on one side to high. Leave burners on the other side completely off. Don’t set them to low. Turn them off. The heat from the hot side radiates over but you avoid direct flame contact on the cool side.
This setup gives you complete control over thick steak cooking.
Temperature Management Across Zones
The direct zone should be 500°F or hotter at grate level. This is hot enough to create rapid Maillard reactions. You want aggressive browning and crust formation. At lower temperatures, the steak steams more than it sears. The surface stays gray instead of developing deep brown color.
The indirect zone should maintain 300 to 350°F ambient temperature. This is warm enough to continue cooking the interior. But gentle enough that you won’t burn the already-seared exterior. The residual heat from the direct zone creates this temperature naturally. You don’t need to adjust anything. The physics of the grill create the gradient automatically.
For charcoal grills, the amount of coals determines the direct zone temperature. More coals create higher heat. For thick steaks, use a full chimney of coals. Spread them in an even layer on one half of the grill. This creates consistent high heat across the entire direct zone.
Airflow and Venting Strategy
Proper airflow maintains temperature stability in both zones. For charcoal grills, open the bottom vents fully under the coal side. This provides oxygen to keep coals burning hot. The top vent should be positioned over the indirect side, opened about halfway. This creates a convection current. Heat flows from the direct side across to the indirect side and exits through the top vent.
This airflow pattern ensures the indirect zone stays warm enough for finishing. If you positioned the top vent over the direct side, you’d pull heat straight up. The indirect side would be too cool. The steak would take forever to finish after searing.
For gas grills, ventilation is less critical. The burners maintain consistent temperature regardless of airflow. But you still want to keep the lid closed as much as possible. Every time you lift the lid, heat escapes. The temperature drops. Recovery time wastes grilling time.
Grill Grate Positioning
On some grills, you can adjust grate height. For thick steaks, you want the grate as close to the coals or burners as possible in the direct zone. This maximizes heat intensity for searing. The indirect zone grate height matters less. It should be at standard position.
If your grill has a warming rack, don’t use it for finishing thick steaks. The warming rack is too far from the heat source. The steak will take too long to finish. It might cool down instead of cooking. Keep the steak on the main grate even in the indirect zone.
How Long Each Zone Gets Used
For a 2-inch thick tomahawk steak, the direct searing phase lasts 3 to 4 minutes per side. This creates deep brown crust on both major surfaces. You might also quickly sear the edges by standing the steak up. This takes another minute total.
After searing, the steak moves to the indirect zone for 8 to 12 minutes depending on starting temperature and desired doneness. At 130°F target, this brings a room-temperature steak from seared exterior to perfect medium-rare throughout. Check temperature at 8 minutes. Then every 2 minutes until you hit target.
The key is not rushing the indirect phase. Let the gentle heat work. Don’t be tempted to move it back to direct to speed things up. That defeats the purpose of two-zone cooking. Patience during the indirect phase is what creates edge-to-edge pink interior.
Should You Rest Steak with Butter or Without
How Butter Affects Moisture Retention
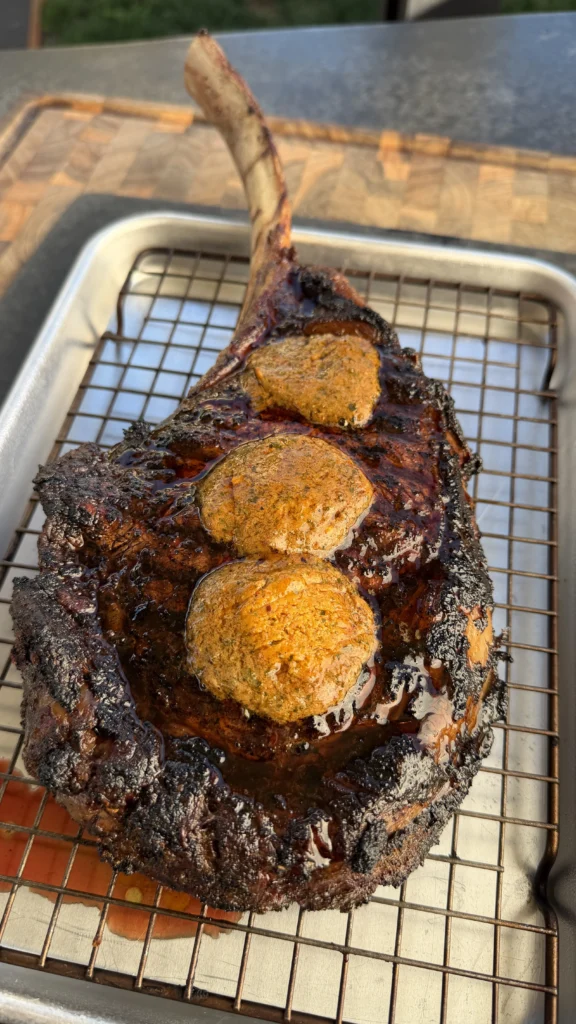
Placing butter on steak during the rest period creates a layer of fat on the surface. As the butter melts, it forms a seal. This seal slows moisture evaporation from the hot meat. Steak resting without butter loses more surface moisture to evaporation. The exterior can dry out slightly.
The butter also adds richness and flavor. As it melts, it combines with the steak’s juices. This creates a buttery jus that pools around the steak. You can spoon this mixture back over the meat when slicing. It adds luxury to each bite.
Butter doesn’t penetrate into the steak’s interior. The muscle fibers are too dense. The butter stays on the surface. But this surface coating matters for the eating experience. The first thing your palate experiences when you bite steak is the exterior. Butter-enriched exterior tastes more indulgent than plain meat.
Temperature Effects During Rest
Butter starts melting around 90°F. A steak pulled at 130°F internal temperature will quickly melt butter placed on top. The melting process absorbs some heat energy. This slightly cools the steak’s surface. This cooling can help prevent overcooking from carryover heat.
Without butter, the steak’s surface stays hotter for longer. More carryover cooking occurs. The internal temperature might climb an additional 5 degrees. With butter, the climb might be only 3 to 4 degrees. This gives you tighter control over final doneness.
The butter also moderates temperature variation across the steak. The melted fat distributes heat more evenly. Parts of the steak that are slightly hotter transfer heat to cooler areas through the butter medium. You get more uniform final temperature.
Flavor Development Through Fat Integration
Butter contains milk solids and water in addition to pure butterfat. When you place compound butter or herb butter on resting steak, these flavors infuse into the surface. Plain butter adds richness. Garlic butter adds savory depth. Herb butter adds aromatic complexity.
The steak’s residual heat warms the butter enough to release aromatic compounds. These volatiles combine with the meat’s own Maillard reaction flavors. You get layers of taste. Beefy + buttery + whatever seasonings are in the butter.
Without butter, you only taste the steak’s own flavors. This isn’t necessarily worse. Sometimes you want pure beef flavor without modification. High-quality, well-marbled steaks might not need butter. The beef’s own fat is sufficient. But for leaner cuts or when you want extra richness, butter during rest enhances the eating experience.
Presentation and Service Considerations
Butter on a resting steak looks luxurious. When you bring the steak to the table with a pat of melting butter on top, it signals indulgence. The butter glistens. It creates visual appeal. This matters for special occasion meals where presentation counts.
The melted butter and jus mixture also helps keep the steak moist during carving and plating. As you slice, you expose fresh interior surfaces. Brushing these with the buttery juices prevents them from drying out. Each slice stays moist until it’s eaten.
For casual meals where presentation matters less, resting without butter saves calories and cost. The steak still tastes excellent. The butter is an enhancement, not a requirement. Make the choice based on your priorities for that specific meal.
What Makes Chimichurri Better Than Traditional Steak Sauce
Fresh Herb Brightness vs Cooked Sauce Depth
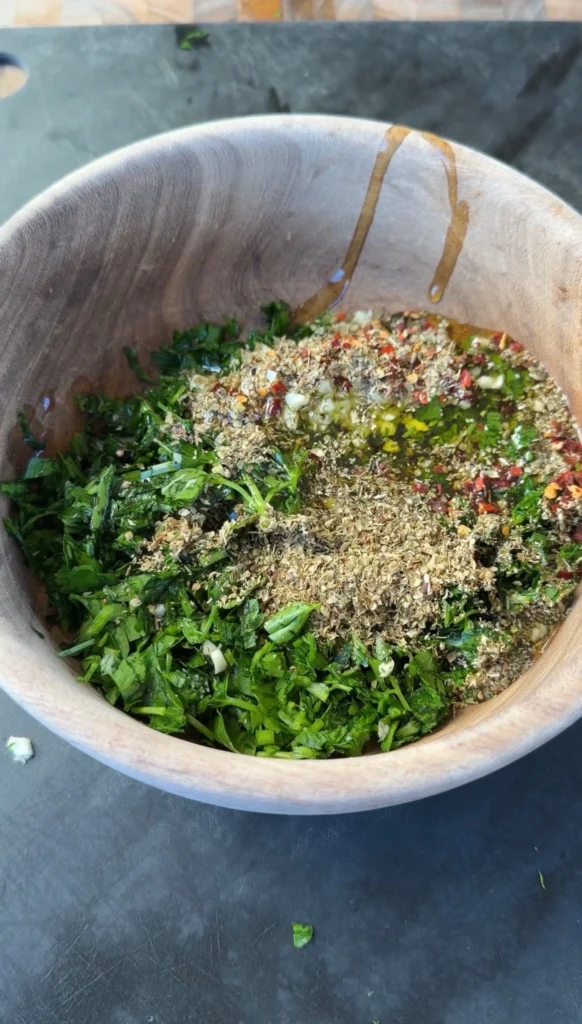
Chimichurri uses raw fresh herbs. Parsley and oregano stay uncooked. This preserves their bright, grassy, vegetal flavors. The herbs taste alive and vibrant. Traditional steak sauces like A1 or Heinz 57 are cooked and processed. They have deep, concentrated flavors. But they lack freshness.
The raw garlic in chimichurri also provides sharp, pungent bite. This wakes up your palate. Cooked garlic in bottled sauces is mellow and sweet. It doesn’t have the same impact. The raw garlic cuts through the richness of fatty steak. It resets your taste buds between bites.
Fresh chimichurri has a different texture than bottled sauces. It’s chunky and irregular. You get bits of herbs, visible garlic pieces, suspended in oil. This textural variety makes eating more interesting. Bottled sauces are smooth and uniform. Every bite tastes and feels the same.
Acid Balance and Fat Cutting
Chimichurri contains red wine vinegar. This provides acidity that cuts through beef fat. When you eat rich, marbled steak, fat coats your mouth. The vinegar in chimichurri breaks through this coating. It cleanses your palate. You can taste the next bite fully instead of experiencing fat buildup.
Traditional steak sauces also contain vinegar or tomato-based acid. But they balance this with sugar. The sweetness rounds out the acidity. Chimichurri has no sugar. The acid is more pronounced. This works better with naturally fatty cuts like ribeye. The aggressive acid is needed to balance the aggressive fat.
The oil in chimichurri also plays a role. Olive oil creates an emulsion with the vinegar when you stir. This emulsion coats the steak while also providing acid. You get richness and brightness simultaneously. Bottled sauces are either rich or bright. Rarely both.
Customization and Freshness Control
Making chimichurri from scratch lets you adjust every component. Want more heat? Add extra red pepper flakes or fresh chili. Prefer more garlic? Add another clove. Like it more acidic? Increase the vinegar. You control the final flavor.
Bottled sauces are what they are. You can’t modify them. If A1 is too sweet for your taste, you’re stuck with it. If Heinz 57 isn’t acidic enough, there’s no fix. With chimichurri, you’re the manufacturer. You set the specifications.
Fresh chimichurri also tastes better than store-bought versions. Pre-made chimichurri in jars sits on shelves for months. The herbs oxidize. They turn brown and lose flavor. The garlic mellows. By making it fresh, you get maximum impact. The flavors are at their peak. Nothing has degraded.
Cultural Authenticity and Culinary Sophistication
Chimichurri originates from Argentina, where steak is a national obsession. Argentinian grill masters have spent generations perfecting this sauce. It’s specifically designed to complement beef. The flavor profile developed over decades of refinement. Traditional American steak sauces were created in factories to be shelf-stable and broadly appealing. They weren’t optimized for steak specifically.
Serving chimichurri with steak shows culinary awareness. It demonstrates that you know about global steak traditions. It elevates the meal beyond standard American steakhouse fare. This matters for impressing guests or creating special occasion meals.
The act of making chimichurri also shows effort. Buying a bottle requires no skill. Making fresh sauce from chopped herbs demonstrates that you care enough to put in time. This perceived effort adds value to the meal even before anyone tastes it.
How to Get Perfectly Crispy Fries Without Double Frying
The Cold Water Soak Method
Soaking cut potatoes in cold water removes excess surface starch. Starch on the exterior of fries creates gumminess during frying. It prevents proper crisping. The potatoes can stick together. They can steam instead of frying. By soaking, you wash away this problematic starch.
The soak should last at least 30 minutes. For best results, soak for 1 to 2 hours. Change the water once or twice during long soaks. The water becomes cloudy with starch. Fresh water pulls more starch out.
After soaking, drain the fries thoroughly. Pat them completely dry with clean kitchen towels. Moisture is the enemy of crispy fries. Any water on the surface will cause violent bubbling when the fries hit hot oil. The moisture also prevents browning. You get pale, soft fries instead of golden crispy ones.
Single Fry Temperature Optimization
Most double-fry methods use 325°F for the first fry and 375°F for the second. This creates perfect texture but requires twice the work. For single frying, you need a compromise temperature. At 350°F, you get both proper cooking and adequate crisping in one step.
Below 350°F, fries take too long to crisp. They absorb excess oil while slowly cooking. They become greasy. Above 350°F, the exterior browns too fast. The interior might still be raw when the outside is already dark.
At 350°F, the fries cook through in 5 to 7 minutes. The exterior develops golden color. The interior becomes fluffy. The timing works perfectly. Use a thermometer to verify oil temperature. Don’t guess. The difference between 340°F and 360°F significantly affects results.
Potato Variety and Moisture Content
Russet potatoes work best for frying. They have high starch content and low moisture. This combination creates fluffy interiors and crispy exteriors. Waxy potatoes like red or Yukon gold have too much moisture. They fry up soggy.
Older russets often have lower moisture than fresh ones. As potatoes age, they lose water. This makes them better for frying. If possible, buy russets and let them sit at room temperature for a week before using. The natural dehydration improves fry quality.
The size of your fries also matters. Thin shoestring fries (1/4 inch) crisp easily. Thick steak fries (1/2 inch) are harder to crisp through. For single-fry success, aim for 3/8 inch thickness. This is the sweet spot. Thin enough to crisp completely. Thick enough to have substantial fluffy interior.
Immediate Seasoning and Fat Coating
The moment you pull fries from the fryer, they’re at peak crispness. This is when you season. Salt sticks best to hot, oil-coated surfaces. If you let fries cool before seasoning, the salt won’t adhere as well. You’ll end up with unseasoned fries and a pile of salt at the bottom of the bowl.
For these chimichurri fries, the immediate toss with butter, chimichurri, and Parmesan locks in moisture and flavor. The hot fries partially melt the butter and cheese. These fats coat every surface. The herbs and garlic from the chimichurri stick to the fat coating.
This technique prevents the fries from getting soggy. The additional fat layer from butter creates a moisture barrier. It seals the crispy exterior. The fries stay crunchy for 5 to 10 minutes instead of getting limp immediately.
Tomahawk Steak & Chimichurri Frites
Two-zone grilled steak, fresh herb sauce, crispy fries
Ingredients
Tomahawk Steak
- 1 tomahawk steak (about 2 lbs)
- Kosher salt, to taste
- Fresh cracked black pepper, to taste
- Garlic powder, to taste
- 2-3 tablespoons butter (for resting)
Chimichurri Sauce
- 1 cup fresh parsley, finely chopped
- 3-4 garlic cloves, minced
- 2 tablespoons fresh oregano (or 2 tsp dried oregano)
- ½ teaspoon red pepper flakes (adjust to taste)
- ½ teaspoon kosher salt
- ¼ teaspoon black pepper
- 2 tablespoons red wine vinegar
- ½ cup olive oil
Chimichurri Fries
- 2 russet potatoes
- Cold water (for soaking)
- Oil for frying (peanut or vegetable oil)
- 2 tablespoons melted butter
- 2-3 tablespoons chimichurri sauce
- 1 tablespoon finely grated Parmesan cheese
- Salt, to taste
Let the steak rest at room temperature for 30 to 45 minutes before grilling. Cold steak from the fridge cooks unevenly. The exterior overcooks before the center warms up. Room temperature steak cooks more uniformly from edge to center.
Step-by-Step Instructions
Step 1: Make the Chimichurri Sauce
Finely chop 1 cup of fresh parsley. Use a sharp knife and cutting board. Don’t use a food processor. The processor bruises the herbs and creates mushy texture. Hand-chopped herbs have better texture and fresher flavor.
If using fresh oregano, finely chop 2 tablespoons. If using dried oregano, measure 2 teaspoons. Dried oregano is more concentrated than fresh. You need less.
Mince 3 to 4 garlic cloves very finely. Use a sharp knife or a garlic press. The finer the garlic, the better it distributes through the sauce. Large garlic chunks create bites that are too intensely garlicky.
In a medium bowl, combine the chopped parsley, oregano, minced garlic, ½ teaspoon red pepper flakes, ½ teaspoon kosher salt, and ¼ teaspoon black pepper. Mix well.
Add 2 tablespoons of red wine vinegar. Stir to combine. The vinegar will darken the herbs slightly. This is normal.
Slowly pour in ½ cup of olive oil while stirring continuously. The oil and vinegar won’t fully emulsify. But stirring distributes the oil throughout the herb mixture. The chimichurri should look like chunky herb sauce suspended in oil.
Cover and refrigerate for at least 30 minutes before using. This resting time allows flavors to meld. The garlic mellows slightly. The herbs infuse into the oil. The longer it sits, the better it tastes. You can make it up to 2 days ahead.
Step 2: Prep and Season the Tomahawk Steak
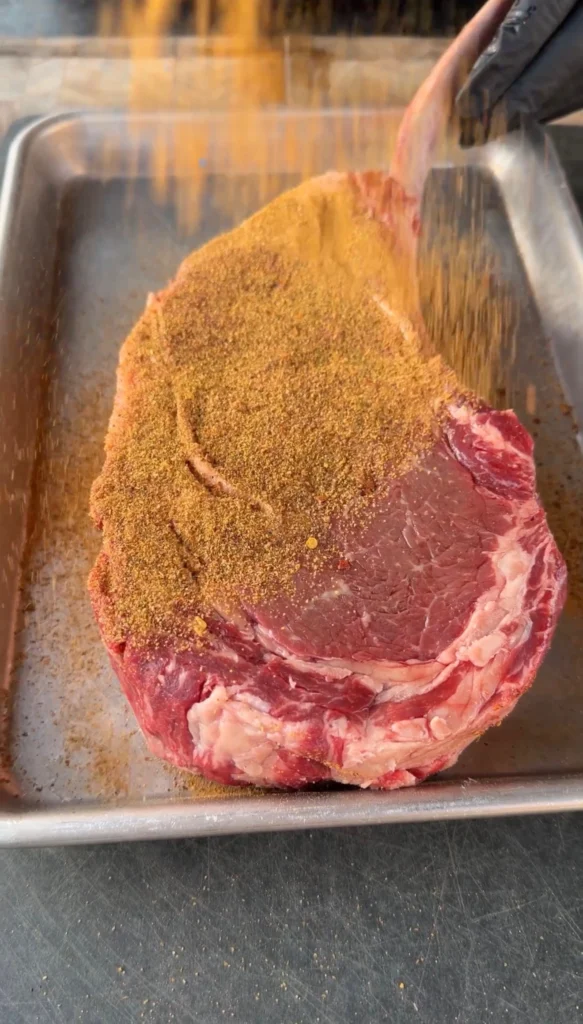
Remove the tomahawk steak from the refrigerator 30 to 45 minutes before grilling. Let it sit at room temperature. Pat the steak completely dry with paper towels. Moisture prevents proper searing.
Season the steak generously on all sides with kosher salt. Use more than you think you need. A 2-pound steak needs significant seasoning. Don’t be shy. The salt should be visible on the surface.
Add fresh cracked black pepper to all sides. Again, be generous. The pepper adds flavor and helps form the crust during searing.
Sprinkle garlic powder over all surfaces. Or use your favorite steak seasoning blend. Make sure the bone portion gets seasoned too. People sometimes gnaw on the bone. It should taste good.
Let the seasoned steak sit while you prepare the fries and preheat the grill. The salt will start drawing moisture to the surface. This surface moisture mixes with salt and seasonings. It creates a paste that adheres well during grilling.
Step 3: Prep the Fries
Peel 2 large russet potatoes. Cut them into fries about 3/8 inch thick. Try to keep them uniform so they cook evenly. Irregularly sized fries means some burn while others stay raw.
Place the cut fries in a large bowl. Cover completely with cold water. Let them soak for at least 30 minutes. Longer is better if you have time. This removes surface starch that prevents crisping.
After soaking, drain the fries in a colander. Rinse them under cold running water. You should see the water run cloudy at first, then clear. Keep rinsing until the water is no longer cloudy.
Spread the fries on clean kitchen towels. Pat them completely dry. Use multiple towels if needed. Every bit of surface moisture must be removed. Wet fries cause violent oil spattering when they hit hot oil. They also won’t crisp properly.
Step 4: Set Up Two-Zone Grill
For charcoal grills, light a full chimney of charcoal. When the coals are covered with white ash, dump them all on one half of the grill. Spread them in an even layer. Leave the other half completely empty. This creates your direct and indirect zones.
For gas grills, turn all burners on one side to high. Leave all burners on the other side completely off. Don’t set them to low. Turn them off entirely.
Close the grill lid. Let it preheat for 10 to 15 minutes. The direct zone should reach 500°F or higher. The indirect zone should settle around 300 to 350°F.
Clean the grates with a grill brush. Oil them lightly by dipping a paper towel in neutral oil and wiping across the hot grates with tongs.
Step 5: Sear the Tomahawk Steak
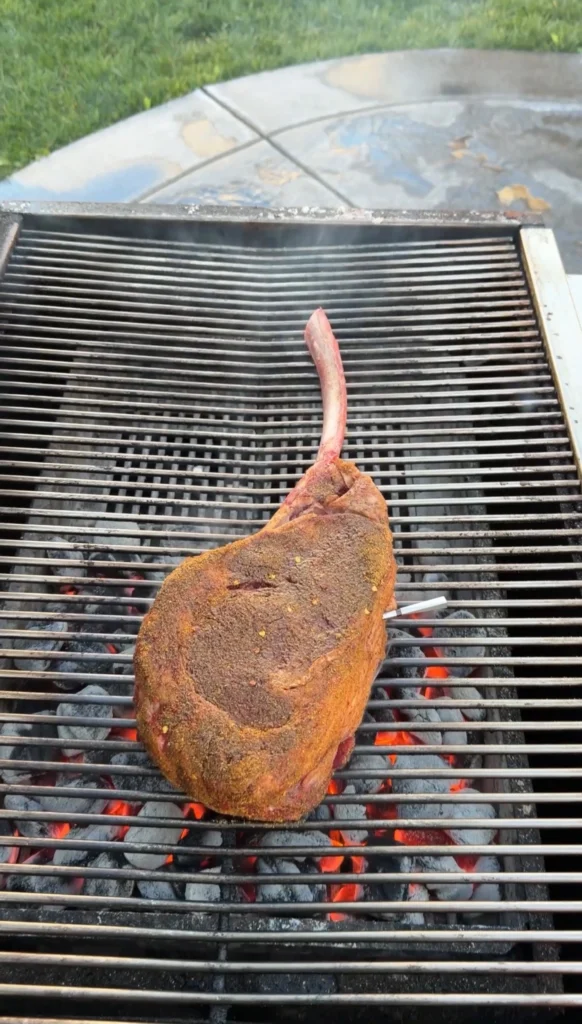
Place the seasoned steak directly over the hot coals or burners. Close the lid. Sear for 3 to 4 minutes without moving it. Don’t flip early. Let the crust develop.
After 3 to 4 minutes, lift the steak with tongs to check the underside. It should be deeply browned with visible grill marks. If it’s still gray or pale, give it another minute.
Once the first side is seared, flip the steak. Sear the second side for another 3 to 4 minutes. Again, close the lid and don’t disturb it.
After both major surfaces are seared, you can optionally sear the edges. Use tongs to stand the steak on its edge. Hold it or lean it against something for 20 to 30 seconds per edge. This creates crust all the way around.
Step 6: Finish on Indirect Heat
Move the seared steak to the indirect side of the grill. Position it as far from the direct heat as possible. Close the lid.
Cook for 8 to 12 minutes, flipping once halfway through. The exact time depends on the steak’s thickness and how cold it was when you started.
After 8 minutes, insert an instant-read thermometer into the thickest part of the steak. Avoid hitting the bone. The bone conducts heat differently and gives false readings. You want the meat temperature.
When the steak reaches 125 to 128°F, pull it immediately. It will climb to 130 to 132°F during rest. This is perfect medium-rare. If you want medium, pull at 133 to 135°F. It will reach 138 to 140°F after resting.
Step 7: Rest the Steak with Butter
Transfer the steak to a cutting board or platter. Immediately place 2 to 3 tablespoons of butter on top. The butter will start melting instantly from the steak’s heat.
Let the steak rest for 10 to 15 minutes. Don’t cover it with foil. The steam softens the crust you worked hard to develop. Rest it uncovered so the crust stays crispy.
During the rest, the internal temperature will continue rising from carryover heat. The muscle fibers will relax. Juices will redistribute from the center back toward the edges. When you slice, the steak will release less juice. More juice stays in the meat where you want it.
Use this rest time to fry the potatoes.
Step 8: Fry the Chimichurri Frites
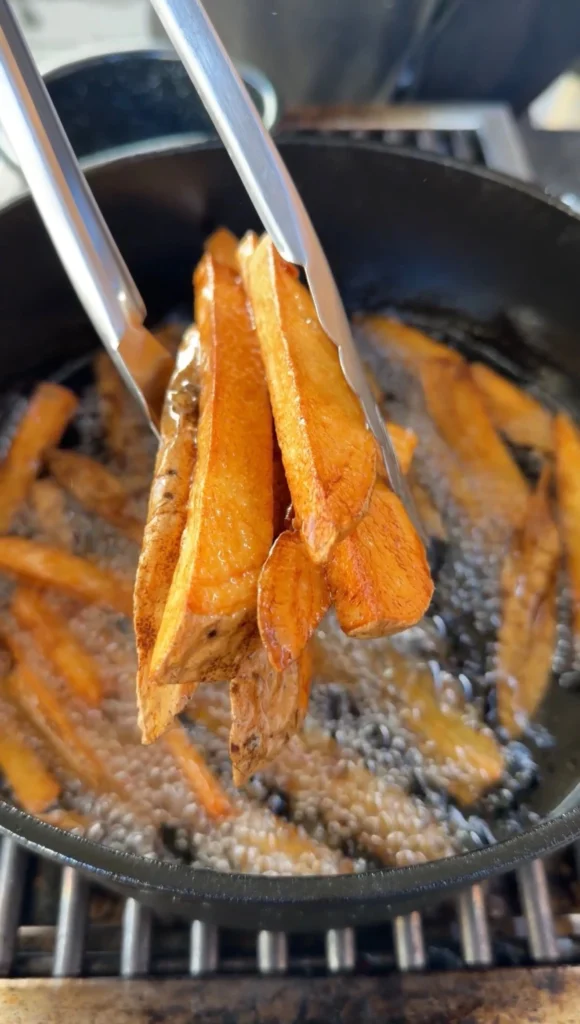
In a large, heavy pot or deep fryer, heat frying oil to 350°F. Use enough oil that the fries can float freely. At least 3 to 4 inches deep. Use a thermometer to verify temperature. Don’t guess.
Working in batches if necessary, carefully add the dried fries to the hot oil. Don’t crowd the pot. Overcrowding drops the oil temperature too much. The fries steam instead of frying.
Fry for 5 to 7 minutes, stirring occasionally with a spider strainer or slotted spoon. The fries should turn golden brown. They should sound crispy when you tap them against the side of the pot.
Remove fries with the strainer. Let excess oil drip back into the pot. Transfer to a large bowl.
Immediately while the fries are still steaming hot, add 2 tablespoons of melted butter, 2 to 3 tablespoons of chimichurri sauce, and 1 tablespoon of grated Parmesan cheese. Toss vigorously to coat every fry.
Taste and add salt if needed. The Parmesan provides saltiness but you might want more. Toss again after adding salt.
Step 9: Slice and Serve
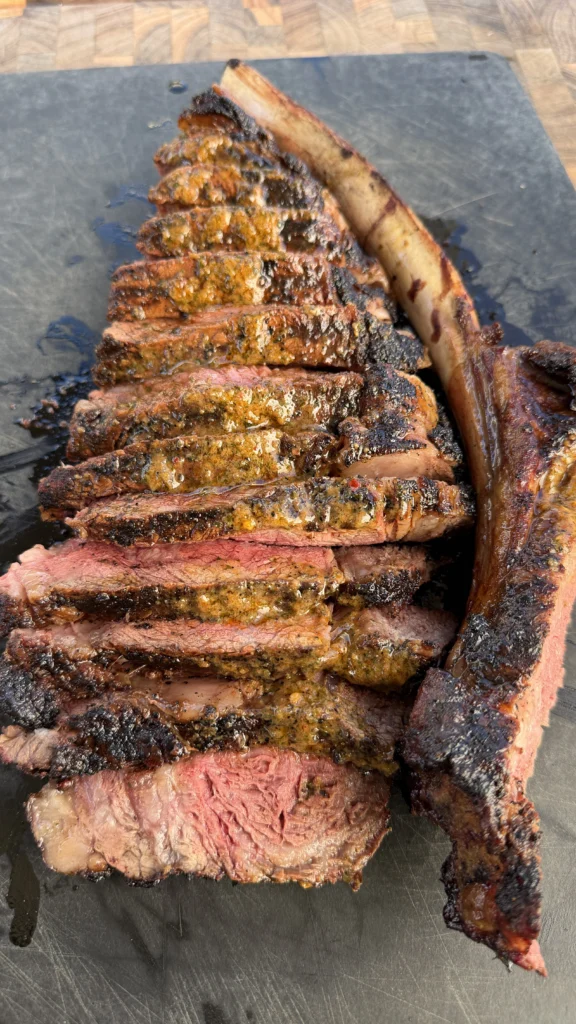
After the steak has rested 10 to 15 minutes, it’s ready to slice. Run your knife along the bone to separate the meat. Set the bone aside. Some people like to gnaw on it.
Slice the boneless portion against the grain into ½-inch thick slices. Cutting against the grain shortens the muscle fibers. This makes the steak more tender to chew.
Arrange the sliced steak on serving plates. Spoon any accumulated butter and juices from the cutting board over the meat.
Serve the chimichurri frites alongside the steak. Drizzle extra chimichurri sauce over the steak if desired. Or serve it on the side for dipping.
Serve immediately while everything is hot. The steak is at perfect temperature. The fries are at peak crispness. Timing is critical for optimal eating.
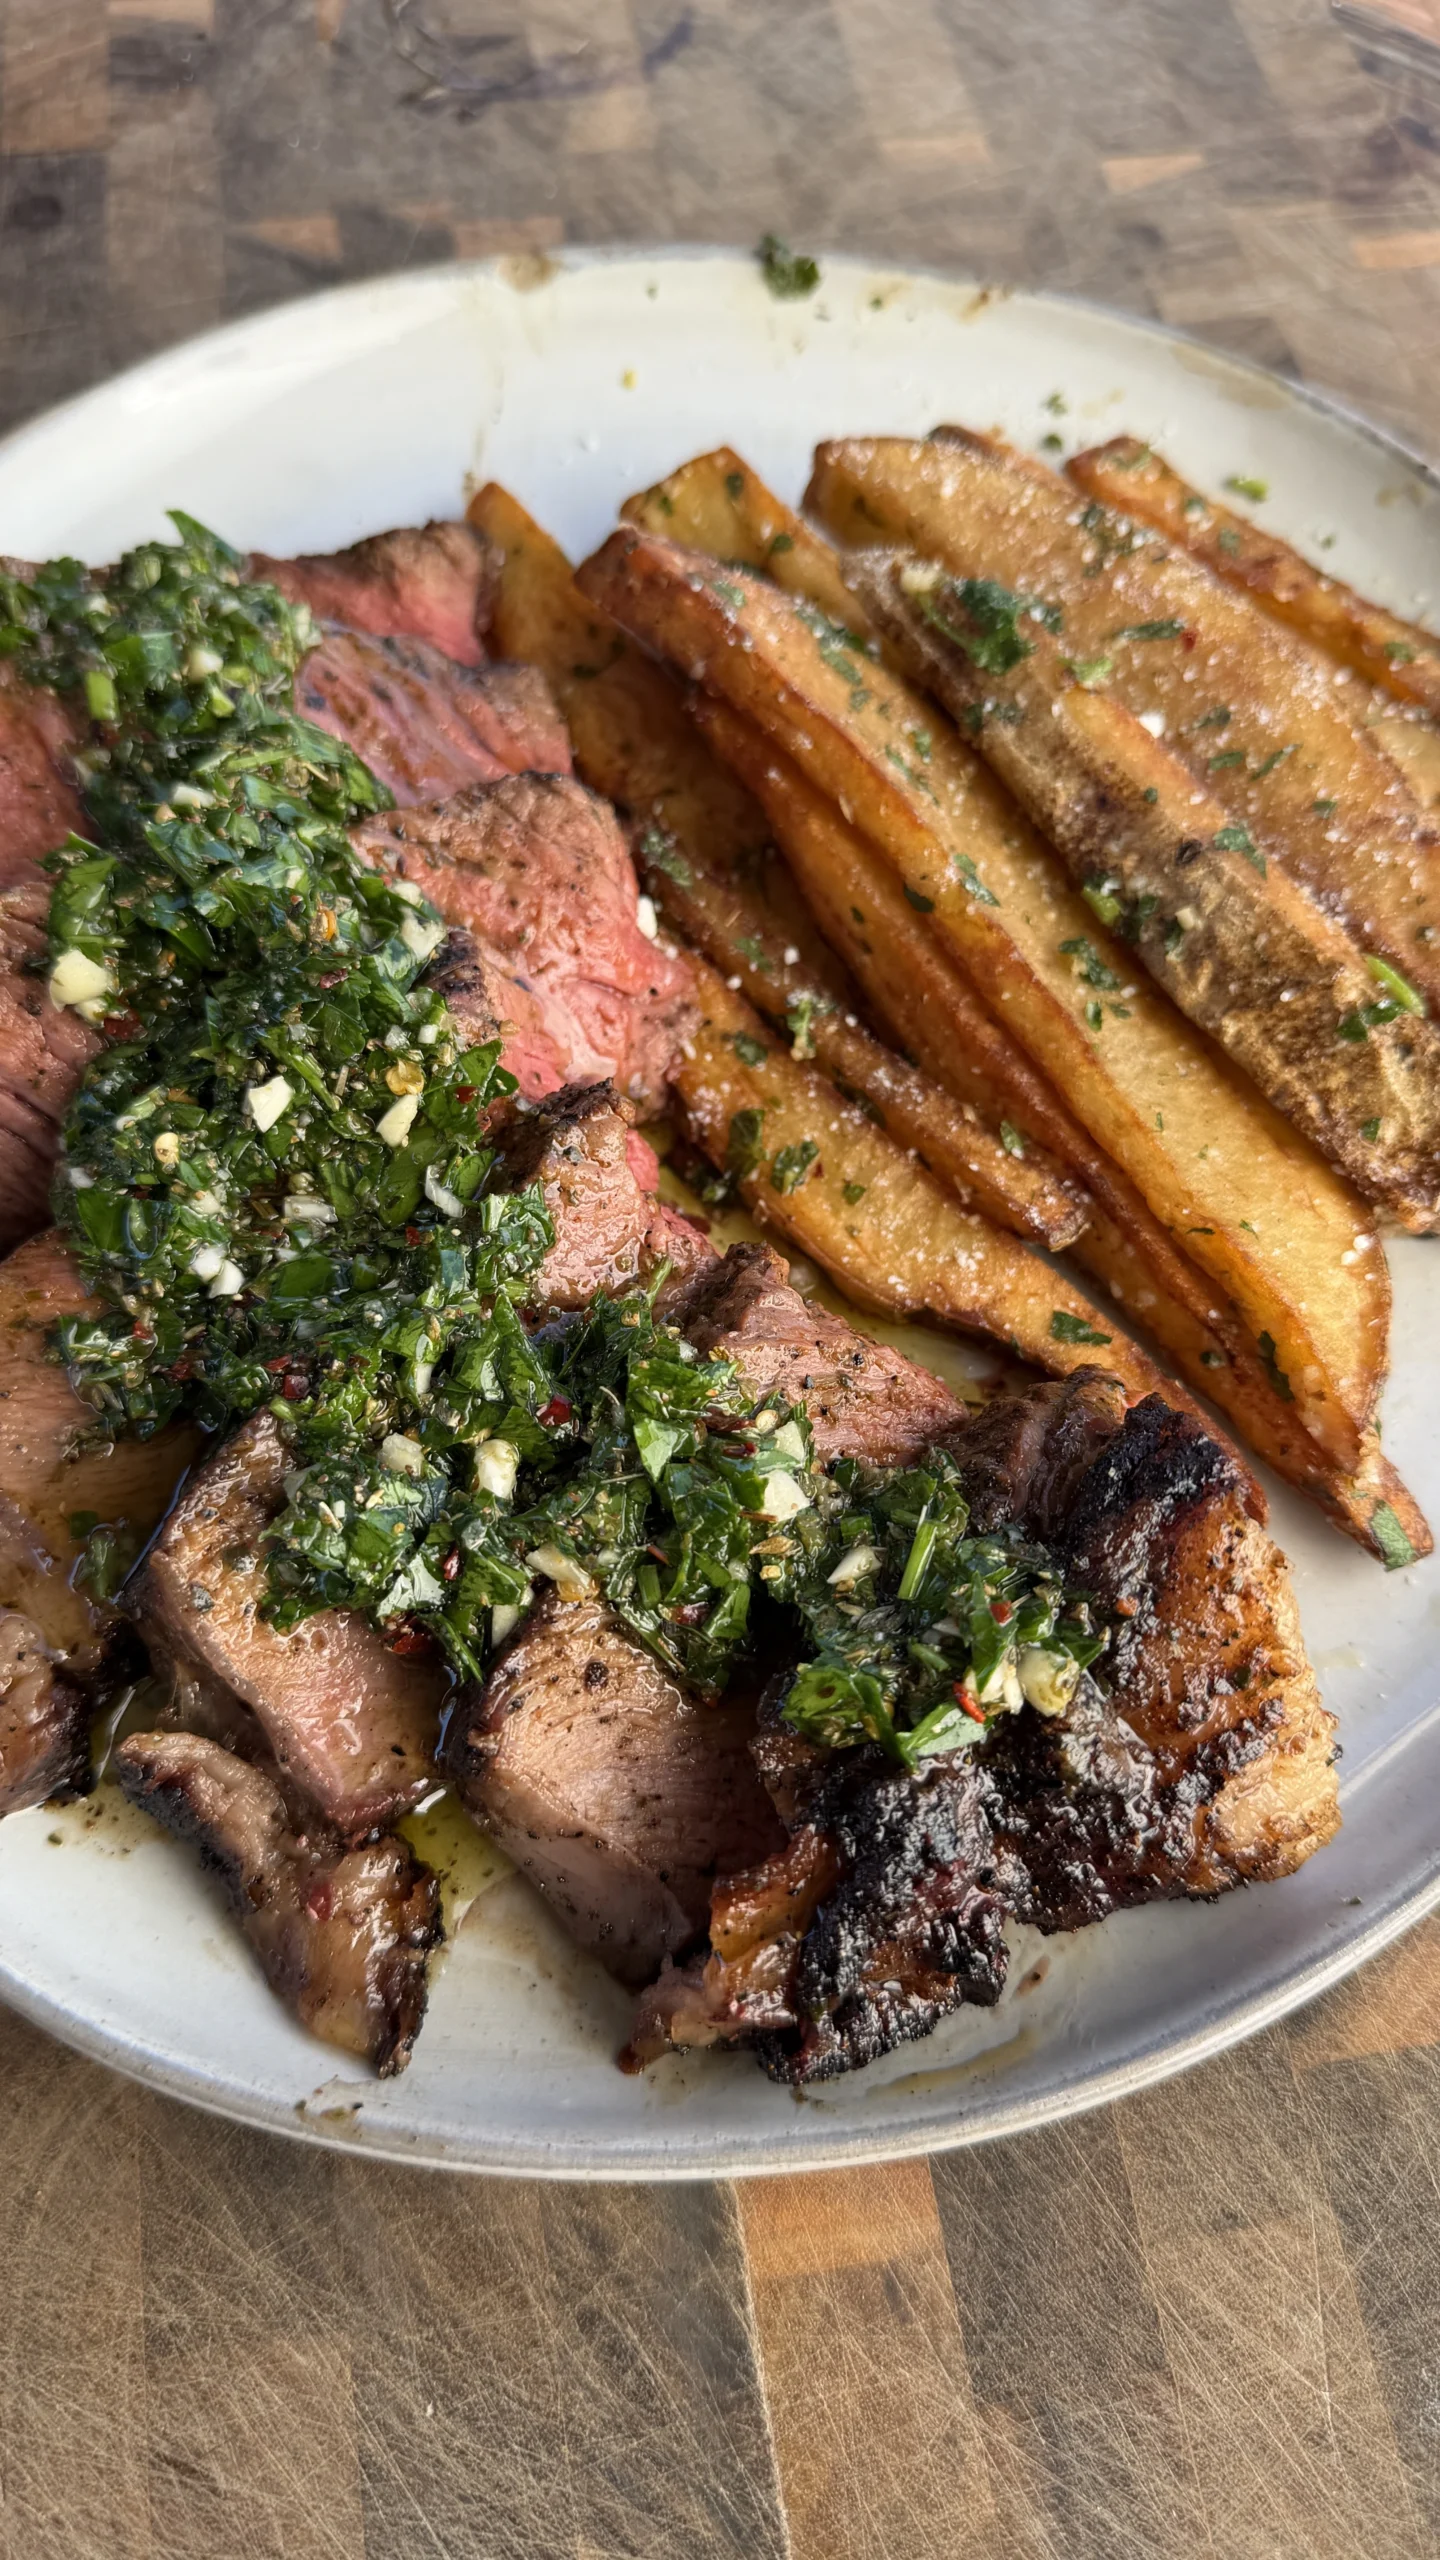
Grilled Tomahawk Steak with Chimichurri Frites
Ingredients
Equipment
Method
- Make chimichurri by finely chopping parsley and oregano. Combine with minced garlic, red pepper flakes, salt, and black pepper. Stir in red wine vinegar, then slowly mix in olive oil. Refrigerate for at least 30 minutes.
- Remove steak from refrigerator 30 to 45 minutes before grilling. Pat dry and season generously with kosher salt, black pepper, and garlic powder on all sides.
- Cut potatoes into 3/8-inch fries. Soak in cold water for at least 30 minutes. Drain, rinse, and dry completely.
- Set up grill for two-zone cooking with direct high heat on one side and indirect heat on the other. Preheat to 500°F in the direct zone.
- Sear steak over direct heat for 3 to 4 minutes per side until deeply browned. Move to indirect side. Close lid and cook 8 to 12 minutes, flipping once, until internal temperature reaches 125 to 128°F for medium-rare.
- Remove steak from grill. Top with butter and rest for 10 to 15 minutes uncovered.
- While steak rests, heat frying oil to 350°F. Fry dried potatoes for 5 to 7 minutes until golden and crispy. Drain well.
- Immediately toss hot fries with melted butter, chimichurri sauce, and Parmesan. Season with salt to taste.
- Slice rested steak against the grain. Serve with chimichurri fries and extra chimichurri sauce.
Nutrition
Notes
Tried this recipe?
Let us know how it was!Frequently Asked Questions
Can You Use a Regular Ribeye Instead of a Tomahawk?
You can absolutely use a regular boneless or bone-in ribeye. The cooking method is identical. The only difference is the presentation. A tomahawk has the extended frenched bone. A regular ribeye has no bone or a short bone.
For two-zone grilling, choose a thick-cut ribeye. At least 1.5 to 2 inches thick. Thin ribeyes don’t benefit from the two-zone method. They cook too quickly. You can sear them entirely over direct heat without moving to indirect.
The chimichurri and fries work with any cut of steak. Ribeye, strip steak, sirloin, or even flank steak all pair well with chimichurri. Choose the cut that fits your budget and preference. Don’t feel obligated to buy an expensive tomahawk if a regular ribeye tastes just as good.
If using boneless ribeye, you won’t have the bone handle to help with flipping. Use sturdy tongs. Grip the meat firmly without tearing it. The cooking times will be slightly shorter without the bone mass. Check temperature at 10 minutes on the indirect side instead of 12.
How Do You Know When Steak Is Done Without a Thermometer?
The touch method works but requires practice. Press the meaty part of your palm below your thumb with your other index finger. That firmness matches rare steak. Touch your thumb to your index finger and press the same palm area. That firmness matches medium-rare. Each subsequent finger (middle, ring, pinky) represents increasing doneness.
This method is imprecise. Hand sizes vary. Steak densities vary. An instant-read thermometer costs $15 to $30. It removes all guesswork. For thick expensive steaks like tomahawks, the thermometer investment is worth it to avoid overcooking.
Visual cues can help. Cut into the steak near the bone if you’re uncertain. Medium-rare should be pink throughout with a warm red center. Medium has a narrower band of pink with more brown. Well-done has no pink remaining. But cutting before resting releases juices. You lose moisture you want to keep.
The most reliable method combines temperature with time. After searing, a 2-inch tomahawk needs 10 to 14 minutes on indirect heat to reach 130°F from room temperature starting point. If you don’t have a thermometer, start checking visually at 10 minutes. Slice near the bone. Judge by color. Pull when it looks how you want.
Can You Make Chimichurri in a Food Processor?
You can make chimichurri in a food processor. But the texture won’t be as good as hand-chopped. Food processors pulverize herbs. They release too much moisture. The chimichurri becomes more sauce-like than chunky herb mixture.
Traditional Argentinian chimichurri is hand-chopped with a knife. The herbs stay in distinct pieces. You see individual parsley and oregano leaves suspended in oil. This texture is part of the appeal. Each bite has variation. Some bites have more garlic. Others have more herbs.
If you must use a food processor for time savings, pulse instead of running continuously. Add the herbs and garlic in stages. Pulse 3 to 5 times to chop coarsely. Don’t process to a paste. You want chunks, not puree. Stop when the herbs are chopped to about 1/4-inch pieces.
For best results, hand-chop the parsley and oregano. Use the food processor just for mincing the garlic if you want to save time there. Then combine everything by hand with the oil and vinegar. This gives you the proper texture with minimal effort.
How Spicy Is This Chimichurri?
With ½ teaspoon of red pepper flakes in ½ cup of chimichurri sauce, the heat is mild to moderate. The garlic provides more intensity than the pepper flakes. Most people find it pleasantly spicy. It adds warmth without burning.
The olive oil and fresh herbs dilute the heat significantly. The red wine vinegar also tempers the spice with acidity. You get complexity instead of straight heat. The chimichurri tastes herbaceous and garlicky first. The spice comes through in the finish.
For completely mild chimichurri, omit the red pepper flakes entirely. The sauce still tastes excellent. The garlic and herbs provide plenty of flavor. For spicier versions, increase red pepper flakes to 1 teaspoon or more. Or add fresh minced jalapeño or serrano peppers.
The beauty of making chimichurri yourself is control. You can adjust heat to your preference. Start with the recipe amount. Taste it after it rests. If you want more heat, stir in additional pepper flakes. Let it sit another 15 minutes for the flavors to integrate.
What Oil Is Best for Frying the Potatoes?
Peanut oil is ideal for frying. It has a high smoke point around 450°F. It can handle the 350°F frying temperature easily without breaking down or smoking. Peanut oil also has neutral flavor. It doesn’t interfere with the potato or chimichurri taste.
Vegetable oil or canola oil work as budget-friendly alternatives. Both have smoke points above 400°F. They’re neutral in flavor. The fries taste identical to peanut oil fried versions. The only concern is if someone has peanut allergies. In that case, vegetable or canola is mandatory.
Avoid olive oil for deep frying. Extra virgin olive oil has a smoke point around 375°F. It barely handles 350°F frying. It also has strong flavor that competes with the chimichurri. The fries end up tasting olive-oil-forward instead of potato-forward.
Never use butter for deep frying. Butter burns at frying temperatures. The milk solids char and create bitter, burnt flavor. Butter is excellent for finishing the fries after frying. But pure fat like peanut or vegetable oil is required for the actual frying step.
Conclusion
This grilled tomahawk steak with chimichurri frites demonstrates how two-zone grilling creates perfect thick steaks. The direct sear develops deep crust and char flavor. The indirect finish gently brings the interior to precise medium-rare without burning the exterior. This method works for any thick steak, not just tomahawks.
The chimichurri sauce provides bright, herbaceous contrast to rich ribeye. The raw garlic and fresh herbs cut through the fat. The red wine vinegar provides acidity that cleanses the palate between bites. This is why chimichurri is Argentina’s traditional steak sauce. It’s specifically designed to complement beef.
The chimichurri fries tie the plate together. They bridge the steak and the sauce. The potatoes get flavored by the herb mixture. The Parmesan adds saltiness and umami. The butter enriches them. Every component works together instead of competing.
Ready to Level Up?
Take your backyard cooking from good to legendary.
This is where I keep all my most-used smokers, knives, and favorite cooking tools.
Shop My Gear CollectionExplore More Recipes
Find more diverse flavors at CWFeats.com