
Sweet Heat Glazed Fried Chicken Recipe
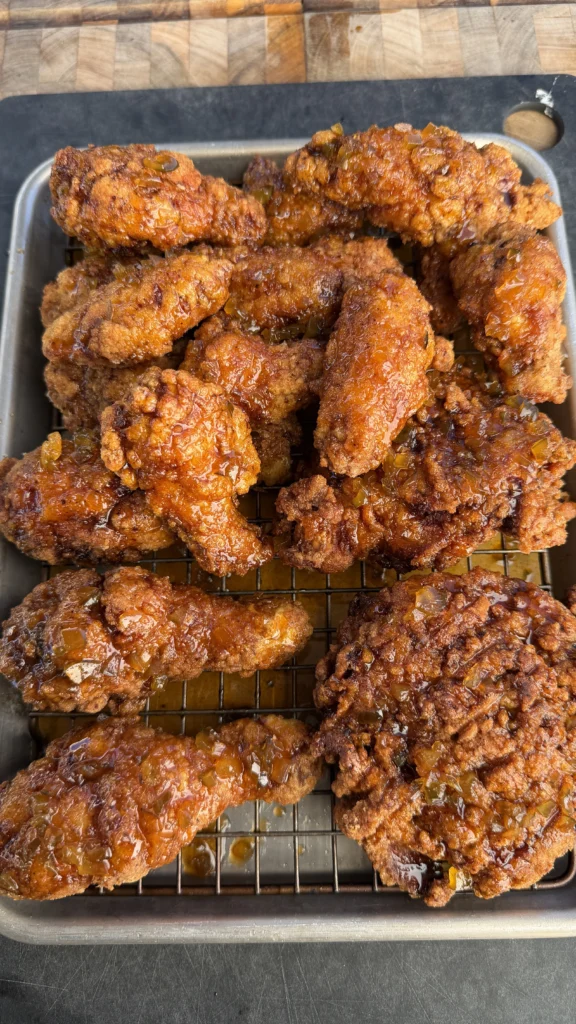
Sweet heat glazed fried chicken recipe uses 8-10 pieces of bone-in chicken marinated for 2 hours minimum (or overnight) in buttermilk, eggs, and hot sauce, then coated heavily in seasoned potato starch mixed with salt, black pepper, paprika, garlic powder, onion powder, and optional cayenne. Rest the coated chicken for 10-15 minutes before frying at 325-350°F for 12-15 minutes until golden brown and 165°F internal temperature. Toss or brush with pickle sweet-heat glaze made from honey, hot sauce, pickle juice, chopped pickles, brown sugar, butter, and garlic powder simmered until sticky. The potato starch creates extra-crispy, glass-like coating that stays crunchy even after glazing. This glazed fried chicken delivers Nashville hot chicken vibes with sweet-spicy-tangy complexity from the pickle juice that cuts through richness while adding distinctive flavor you can’t get from regular hot honey alone.
The whole process takes about 3 hours including marinating time. Spend 10 minutes mixing the marinade and coating chicken pieces. Marinate for 2 hours minimum or up to 24 hours for deeper flavor. Coat in potato starch mixture and rest for 10-15 minutes. Fry for 12-15 minutes per batch. Make the glaze while chicken fries, taking just 5 minutes. The pickle juice in the glaze is the secret weapon, providing acidity that balances the honey sweetness and hot sauce heat while adding that distinctive tangy pickle flavor. The result is fried chicken that rivals any Nashville hot chicken joint with a unique twist that makes it memorable.
Why Use Potato Starch Instead of Flour for Fried Chicken?
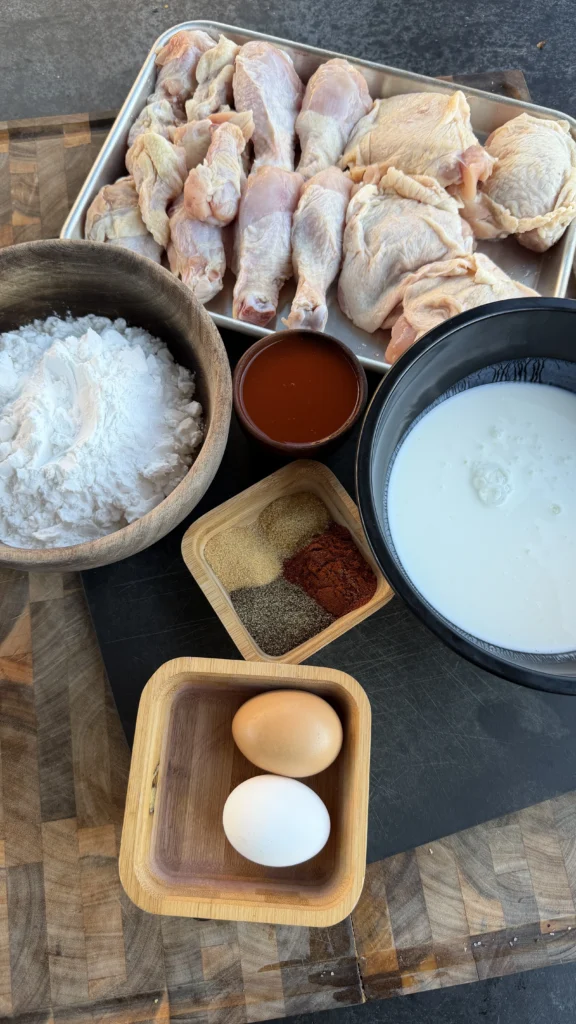
Potato starch creates a lighter, crispier, more glass-like coating than wheat flour. The starch granules gelatinize differently during frying, forming a delicate shell that shatters when you bite rather than creating the heavier, breadier crust of flour-based coatings. Potato starch absorbs less oil than flour, so the chicken tastes less greasy while maintaining maximum crunch. The coating also stays crispy longer after frying compared to flour which can become soggy.
Potato starch is naturally gluten-free, which affects texture significantly. Gluten develops in flour-based coatings, creating chewy texture. Potato starch has no gluten, so the coating remains purely crispy without any chew. This makes the texture more delicate and refined. The coating audibly cracks when you bite it, creating that ASMR-worthy crunch that viral fried chicken videos capture. Flour coatings can’t achieve this same texture.
The neutral flavor of potato starch allows the chicken and seasoning flavors to shine. Flour has its own wheaty taste that can muddy the flavor profile. Potato starch is virtually flavorless, acting as a pure textural component that carries your seasonings without adding competing flavors. When you glaze the chicken, you taste the sweet-heat-pickle combination clearly without flour undertones.
Potato starch also creates better “craggy” texture with more nooks and crannies for glaze to cling to. When you coat the chicken heavily and press the starch in, it creates an irregular surface with peaks and valleys. These catch and hold the sticky glaze better than smooth flour coatings. The result is more dramatic, more flavorful glazed chicken with better visual appeal and more intense flavor in every bite.
What Temperature Should You Fry Chicken?
Fry chicken at 325-350°F for the perfect balance of crispy exterior and juicy interior. This moderate temperature range allows the chicken to cook through to 165°F internal temperature while developing golden-brown, crispy coating. Lower temperatures (under 320°F) take too long, drying out the meat before the coating crisps. Higher temperatures (over 360°F) brown the coating too fast, leaving raw or undercooked meat inside.
The 325-350°F range is specifically ideal for potato starch coating. Potato starch crisps at slightly lower temperatures than flour, so you don’t need as much heat. Too high heat can actually make potato starch coating burn or become too dark before the chicken cooks through. The moderate temperature allows the starch to gelatinize properly, forming that glass-like shell while the chicken renders its fat and cooks completely.
Use a deep-fry thermometer or infrared thermometer to monitor oil temperature accurately. The temperature will drop 25-50 degrees when you add cold chicken. This is normal and expected. Don’t crank the heat to compensate immediately. Let it naturally recover over 1-2 minutes. If you increase heat too aggressively, the temperature will spike too high once the oil recovers, burning your next batch.
Fry in small batches to maintain temperature stability. Overloading the pot with too many pieces drops the temperature dramatically and prevents proper crisping. Work with 3-4 pieces at a time for most home frying setups. Keep finished chicken warm in a 200°F oven on a wire rack while you fry remaining batches. This batch approach takes longer but produces consistently crispy results across all pieces.
Should You Rest Coated Chicken Before Frying?
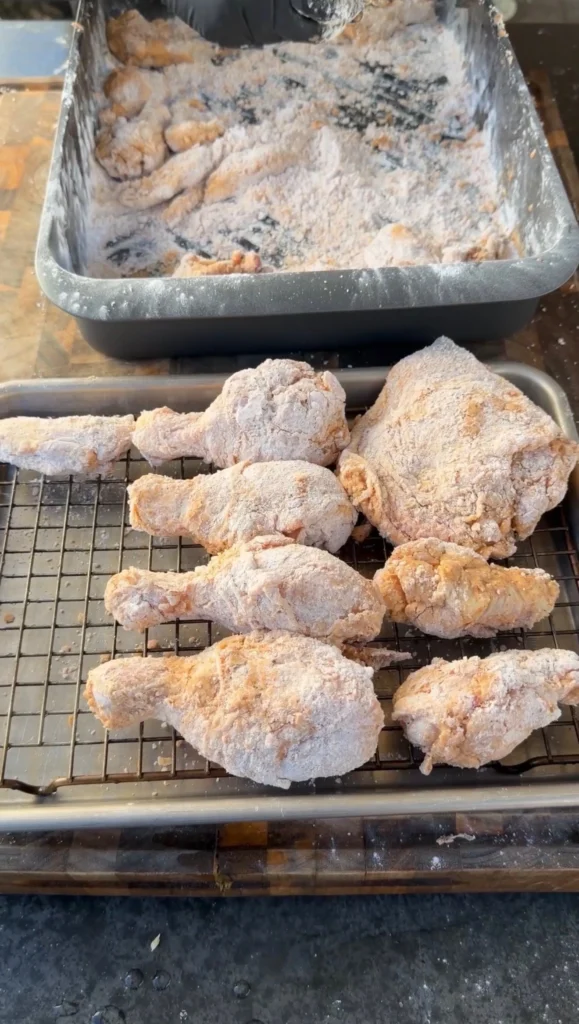
Resting coated chicken for 10-15 minutes before frying allows the potato starch coating to hydrate and set firmly on the chicken. When you first coat the chicken, the starch mixture is loose and powdery. The moisture from the buttermilk marinade begins hydrating the starch during the rest period. This hydration creates a tacky, paste-like layer that adheres much better during frying. Without resting, the coating can slough off or develop bare spots.
The rest also allows the coating to firm up slightly, creating better texture development during frying. The hydrated starch layer forms a stronger bond with the chicken skin and meat. When hot oil hits this set coating, it immediately begins crisping from a firm base rather than a loose powder. The result is more even, more complete coating coverage with better crispiness across the entire surface.
Resting on a wire rack (not a plate) is crucial. The rack allows air circulation underneath, preventing the bottom from becoming soggy. A plate traps moisture underneath, creating wet spots that won’t crisp properly. The rack also prevents the coating from sticking to surfaces. Some recipes skip this rest period, but those often produce chicken with inconsistent coating and bare spots where the starch fell off during frying.
Use this resting time to heat your frying oil to proper temperature and make the glaze. The timing works perfectly since the oil needs 10-15 minutes to reach 325-350°F and the glaze takes about 5 minutes. By the time the chicken has rested and the coating is set, everything else is ready. This workflow efficiency ensures you’re frying at peak oil temperature with fresh glaze ready to apply immediately.
How Does Pickle Juice Change Fried Chicken Flavor?
Pickle juice adds tangy, salty, slightly sweet flavor that cuts through the richness of fried chicken while adding complexity you can’t achieve with just honey and hot sauce. The vinegar-based acidity brightens the overall flavor profile, preventing the glaze from tasting one-dimensionally sweet or heavy. The dill and spice notes from the pickle brine create herbaceous, aromatic background flavors that make the glaze more interesting.
The acidity in pickle juice also helps the glaze cling better to the crispy coating. Acidic liquids create a tacky texture when combined with honey and butter. This tackiness helps the glaze adhere to the craggy potato starch coating rather than sliding off. The pickle juice essentially acts as a flavor-adding binder that improves glaze adherence while contributing its own distinctive taste.
Pickle juice contains salt which enhances all the other flavors in the glaze. The salt amplifies the sweetness of honey, the heat of hot sauce, and the savory notes from garlic powder. It creates balance that prevents any single element from dominating. Without pickle juice, the glaze would taste like hot honey which is good but lacks the complexity and balance that makes this sweet heat glazed fried chicken special.
The chopped pickles added at the end provide textural interest and pockets of concentrated pickle flavor. When you bite into a piece of glazed chicken, occasionally you get a burst of crunchy pickle that contrasts with the crispy coating and tender meat. This textural variety keeps each bite interesting. The pickle pieces also add visual appeal, showing clearly that this isn’t standard hot honey chicken.
Should You Brush or Toss Fried Chicken in Glaze?
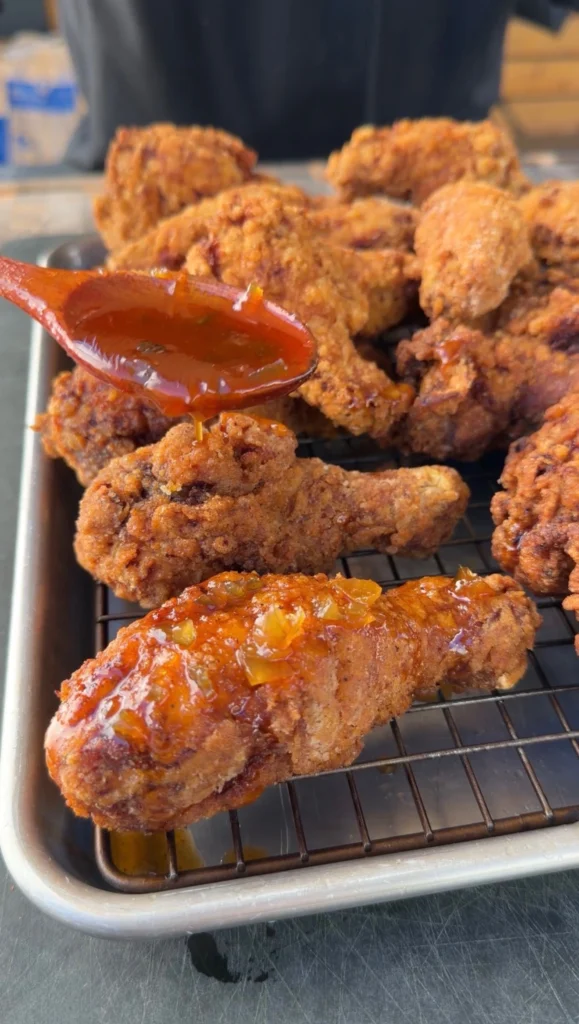
Tossing fried chicken in glaze creates more complete, more dramatic coating compared to brushing. When you toss chicken pieces in a large bowl with glaze, every surface gets coated including the crevices between coating peaks that brushing might miss. Tossing also creates that signature sticky, drippy appearance where glaze visibly clings to the chicken. This method works best when you want maximum glaze coverage and don’t mind the coating softening slightly from the moisture.
Brushing glaze creates lighter, more controlled application that keeps the coating crispier longer. Use a silicone brush to paint glaze over each piece, focusing on tops and sides. This method uses less glaze overall and allows you to control exactly where it goes. Brushing is ideal if you want to maintain the crispiest possible coating since less moisture contacts the fried surface. The chicken stays crunchier for longer after glazing.
For sweet heat glazed fried chicken, tossing is generally superior because the dramatic glaze coverage is part of the appeal. The sticky, glossy appearance with visible glaze dripping off creates the visual impact that makes people excited to eat it. The coating will soften slightly but remains substantially crispy if you toss immediately after frying while the coating is at peak crispiness. Eat within 15-20 minutes for best texture.
If serving later or wanting maximum crispiness retention, brush half the glaze on immediately after frying, then serve the remaining glaze on the side for dipping. This hybrid approach gives you flavor and visual appeal from the brushed coating while letting guests add more glaze to their preference. The un-glazed portions stay crispier longer, while dipping provides the sticky glaze experience for those who want it.
Sweet Heat Glazed Fried Chicken
Potato starch coating with pickle sweet-heat glaze
Ingredients
Chicken
- 8-10 pieces bone-in chicken (thighs, drumsticks, breasts)
- Oil for frying (peanut or vegetable)
Wet Mix (Marinade)
- 2 cups buttermilk
- 2 eggs
- 1 tablespoon hot sauce
Dry Mix (Coating)
- 2 cups potato starch
- 1 tablespoon salt
- 1 tablespoon black pepper
- 1 tablespoon paprika
- 2 teaspoons garlic powder
- 2 teaspoons onion powder
- 1 teaspoon cayenne (optional)
Pickle Sweet-Heat Glaze
- 1/2 cup honey
- 1/2 cup hot sauce
- 1/2 cup pickle juice
- 1/4 cup finely chopped pickles
- 1 tablespoon brown sugar
- 1 tablespoon butter
- 1/2 teaspoon garlic powder
Let the coated chicken rest on a wire rack for 10-15 minutes before frying. This sets the potato starch coating, preventing it from falling off during frying and creating the ultra-crispy, shatteringly crunchy texture that makes this chicken special.
Step-by-Step Instructions
Step 1: Marinate the Chicken
In a large bowl, whisk together 2 cups buttermilk, 2 eggs, and 1 tablespoon hot sauce until completely combined. The eggs should be fully incorporated with no streaks. The hot sauce adds mild heat and acidity that begins tenderizing the chicken. Add 8-10 pieces of bone-in chicken to the buttermilk mixture. Use a combination of thighs, drumsticks, and breasts for variety.
Make sure every piece is submerged in the buttermilk marinade. Press them down and turn to coat completely. Cover the bowl with plastic wrap or transfer everything to a zip-top bag. Refrigerate for minimum 2 hours. Overnight marinating (12-24 hours) produces more tender, more flavorful results. The buttermilk’s lactic acid breaks down proteins, creating tender meat while adding tangy flavor.
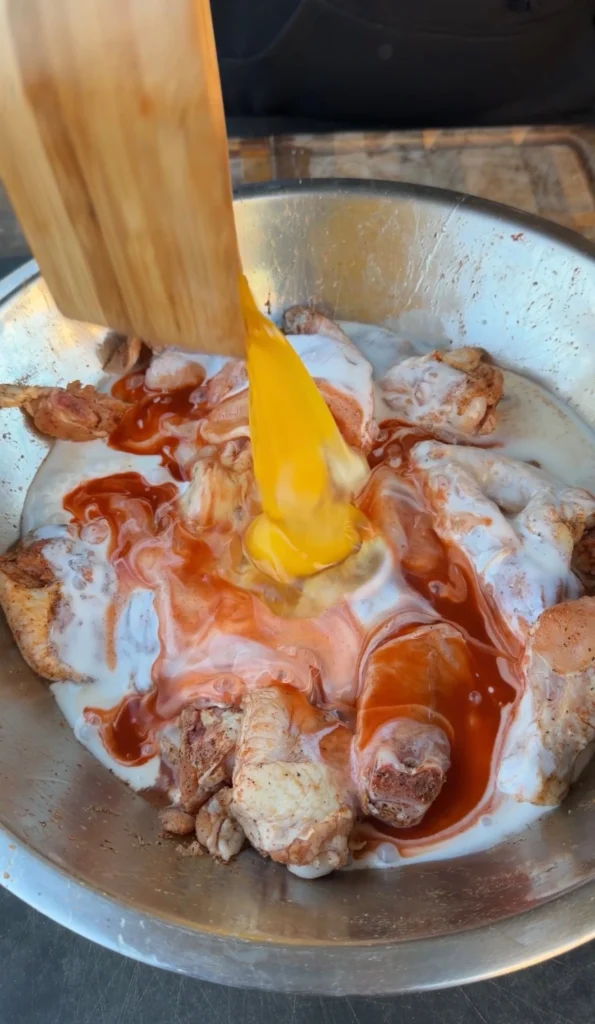
The buttermilk marinade also helps the potato starch coating adhere better. The thick, creamy liquid clings to the chicken surface, providing moisture that activates the starch. Wet chicken without marinade would work but wouldn’t create the same depth of flavor or coating adhesion. Don’t skip the marinating step even if you’re short on time. Even 2 hours makes significant difference.
Step 2: Prepare the Dry Coating
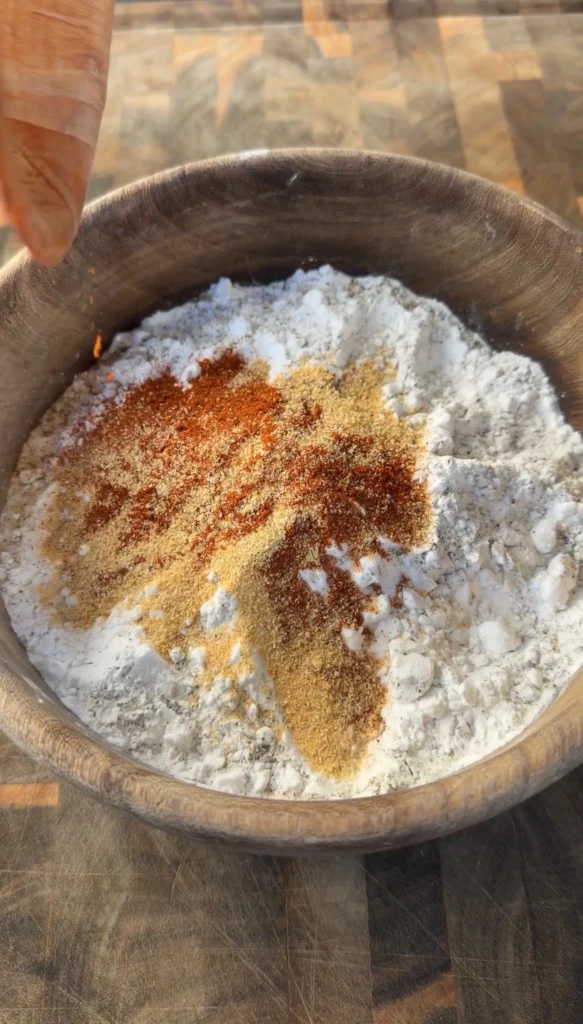
In a large shallow bowl or dish, combine 2 cups potato starch, 1 tablespoon salt, 1 tablespoon black pepper, 1 tablespoon paprika, 2 teaspoons garlic powder, 2 teaspoons onion powder, and 1 teaspoon cayenne if using. Whisk everything together thoroughly until the seasonings are evenly distributed throughout the potato starch. The mixture should be uniform in color with no clumps.
The seasoning amounts create moderately spiced coating. Adjust cayenne up to 2 teaspoons for spicier chicken or omit completely for mild. The paprika adds color and subtle sweetness. The garlic and onion powders create savory depth. The salt is essential for proper seasoning since the glaze adds sweetness but not much salt. Don’t reduce salt even though the pickle juice in the glaze is salty.
Set up your coating station efficiently. Place the bowl of marinated chicken, the bowl of dry coating, and a wire rack over a baking sheet in a line. This workflow allows you to move pieces smoothly from marinade to coating to resting without making a mess. Having everything organized before you start prevents confusion and contamination.
Step 3: Coat the Chicken
Remove one piece of chicken from the buttermilk marinade, letting excess drip back into the bowl. Don’t shake off too much marinade since you want enough moisture to activate the potato starch. Place the chicken piece in the dry coating mixture. Use your other hand (keep one hand dry for handling coated chicken) to scoop starch over the chicken, covering it completely.
Press the starch firmly into the chicken, really packing it on. The goal is heavy coating with visible peaks and valleys that create cragginess. Flip and repeat on all sides. The chicken should look heavily coated, almost excessively so. This thick coating creates the ultra-crispy texture and provides texture for glaze adhesion. Thin coating doesn’t achieve the same dramatic crunch.
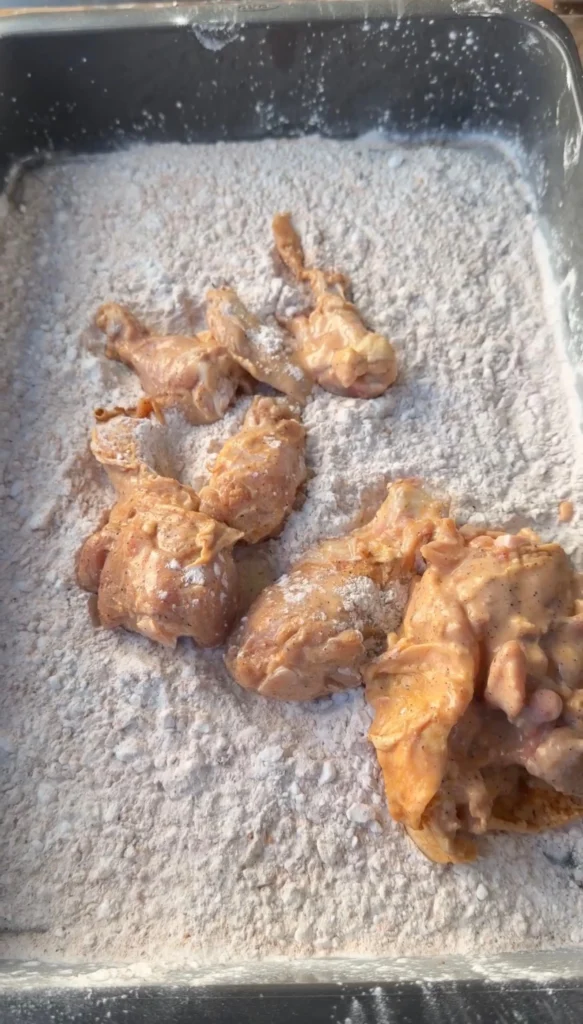
Transfer the coated chicken piece to the wire rack. Repeat with all remaining pieces, working one at a time. Don’t rush this coating process. Taking time to press the starch in firmly makes big difference in final coating quality. Once all pieces are coated and on the rack, let them rest for 10-15 minutes before frying. Don’t skip this rest period.
Step 4: Rest Coated Chicken
Place the wire rack with coated chicken in a cool, dry place for 10-15 minutes. Don’t refrigerate during this rest since you want the chicken at room temperature for even frying. The coating will transform from powdery to slightly tacky as the potato starch hydrates from the buttermilk moisture. This hydration is what creates strong adhesion during frying.
While the chicken rests, heat your frying oil to 325-350°F. Use a large, heavy pot or Dutch oven filled with 2-3 inches of peanut or vegetable oil. Peanut oil is ideal because of its high smoke point and neutral flavor. Use a thermometer to monitor temperature accurately. The oil needs 10-15 minutes to reach proper temperature, which perfectly times with the chicken resting period.
During this rest, you can also make the pickle sweet-heat glaze. The timing works out so everything is ready simultaneously. The rest period is not wasted time but rather crucial setup that ensures success. The set coating won’t fall off during frying, the room-temperature chicken will cook evenly, and the hot oil will be at perfect temperature.
Step 5: Fry the Chicken
When oil reaches 325-350°F, carefully lower 3-4 pieces of chicken into the hot oil using tongs or a spider skimmer. Don’t overcrowd the pot. The temperature will drop 25-50 degrees when you add cold chicken. This is expected. The oil will recover to proper temperature within 1-2 minutes. Don’t adjust heat unless temperature drops below 300°F or rises above 360°F.
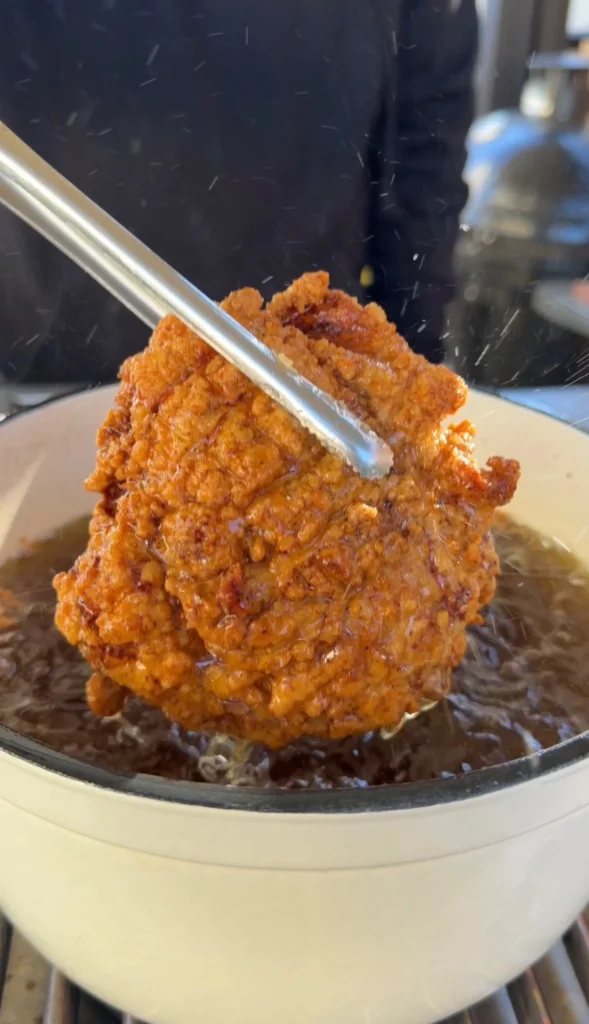
Fry for 12-15 minutes, turning pieces occasionally for even browning. The exact time depends on chicken size. Drumsticks and thighs take 12-13 minutes. Large breasts may need 15 minutes. The coating should be deep golden brown, almost mahogany in color. More importantly, the internal temperature must reach 165°F in the thickest part. Use an instant-read thermometer to verify doneness.
Listen for the frying sounds. At first, the oil will be very loud with aggressive bubbling as moisture escapes the coating. After 8-10 minutes, the bubbling becomes quieter and less vigorous. This sound change indicates the coating is nearly done crisping and the chicken is approaching doneness. When bubbling is very gentle and the chicken is deep golden, check the internal temperature.
Remove finished chicken to a clean wire rack set over a baking sheet. Don’t drain on paper towels which trap steam underneath and soften the coating. The wire rack allows air circulation, keeping the bottom crispy. Let the oil temperature recover for 2-3 minutes before adding the next batch. Repeat frying in batches until all chicken is cooked.
Step 6: Make the Pickle Sweet-Heat Glaze
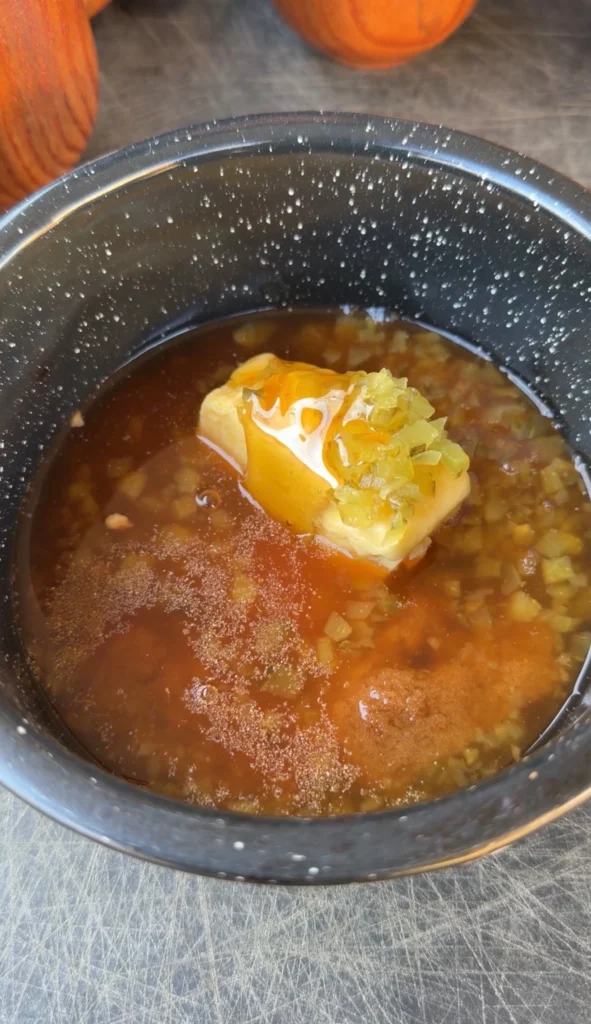
While the last batch of chicken fries, make the glaze. In a medium saucepan over medium heat, combine 1/2 cup honey, 1/2 cup hot sauce, 1/2 cup pickle juice, 1 tablespoon brown sugar, and 1/2 teaspoon garlic powder. Whisk everything together until the brown sugar dissolves completely. The mixture will be thin and liquid at first.
Bring to a gentle simmer and cook for 3-4 minutes, stirring occasionally. The liquid will reduce slightly and thicken to syrupy consistency. Don’t boil aggressively or the honey can burn. Gentle simmer concentrates flavors while thickening the glaze enough to cling to chicken. The glaze should coat the back of a spoon and flow slowly when you tilt the pan.
Remove from heat immediately when it reaches syrupy consistency. Add 1 tablespoon butter and whisk until melted and incorporated. The butter adds richness and glossy shine to the glaze. Stir in 1/4 cup finely chopped pickles. The pickle pieces add texture and concentrated flavor. The glaze should be sticky, glossy, and smell incredible with honey sweetness, vinegar tang, and hot sauce heat all balanced.
Keep the glaze warm until ready to use. If it thickens too much as it sits, thin with 1-2 tablespoons of water or additional pickle juice. The glaze should be pourable but thick enough to coat and cling. If too thin, it runs off. If too thick, it doesn’t distribute evenly.
Step 7: Glaze the Fried Chicken
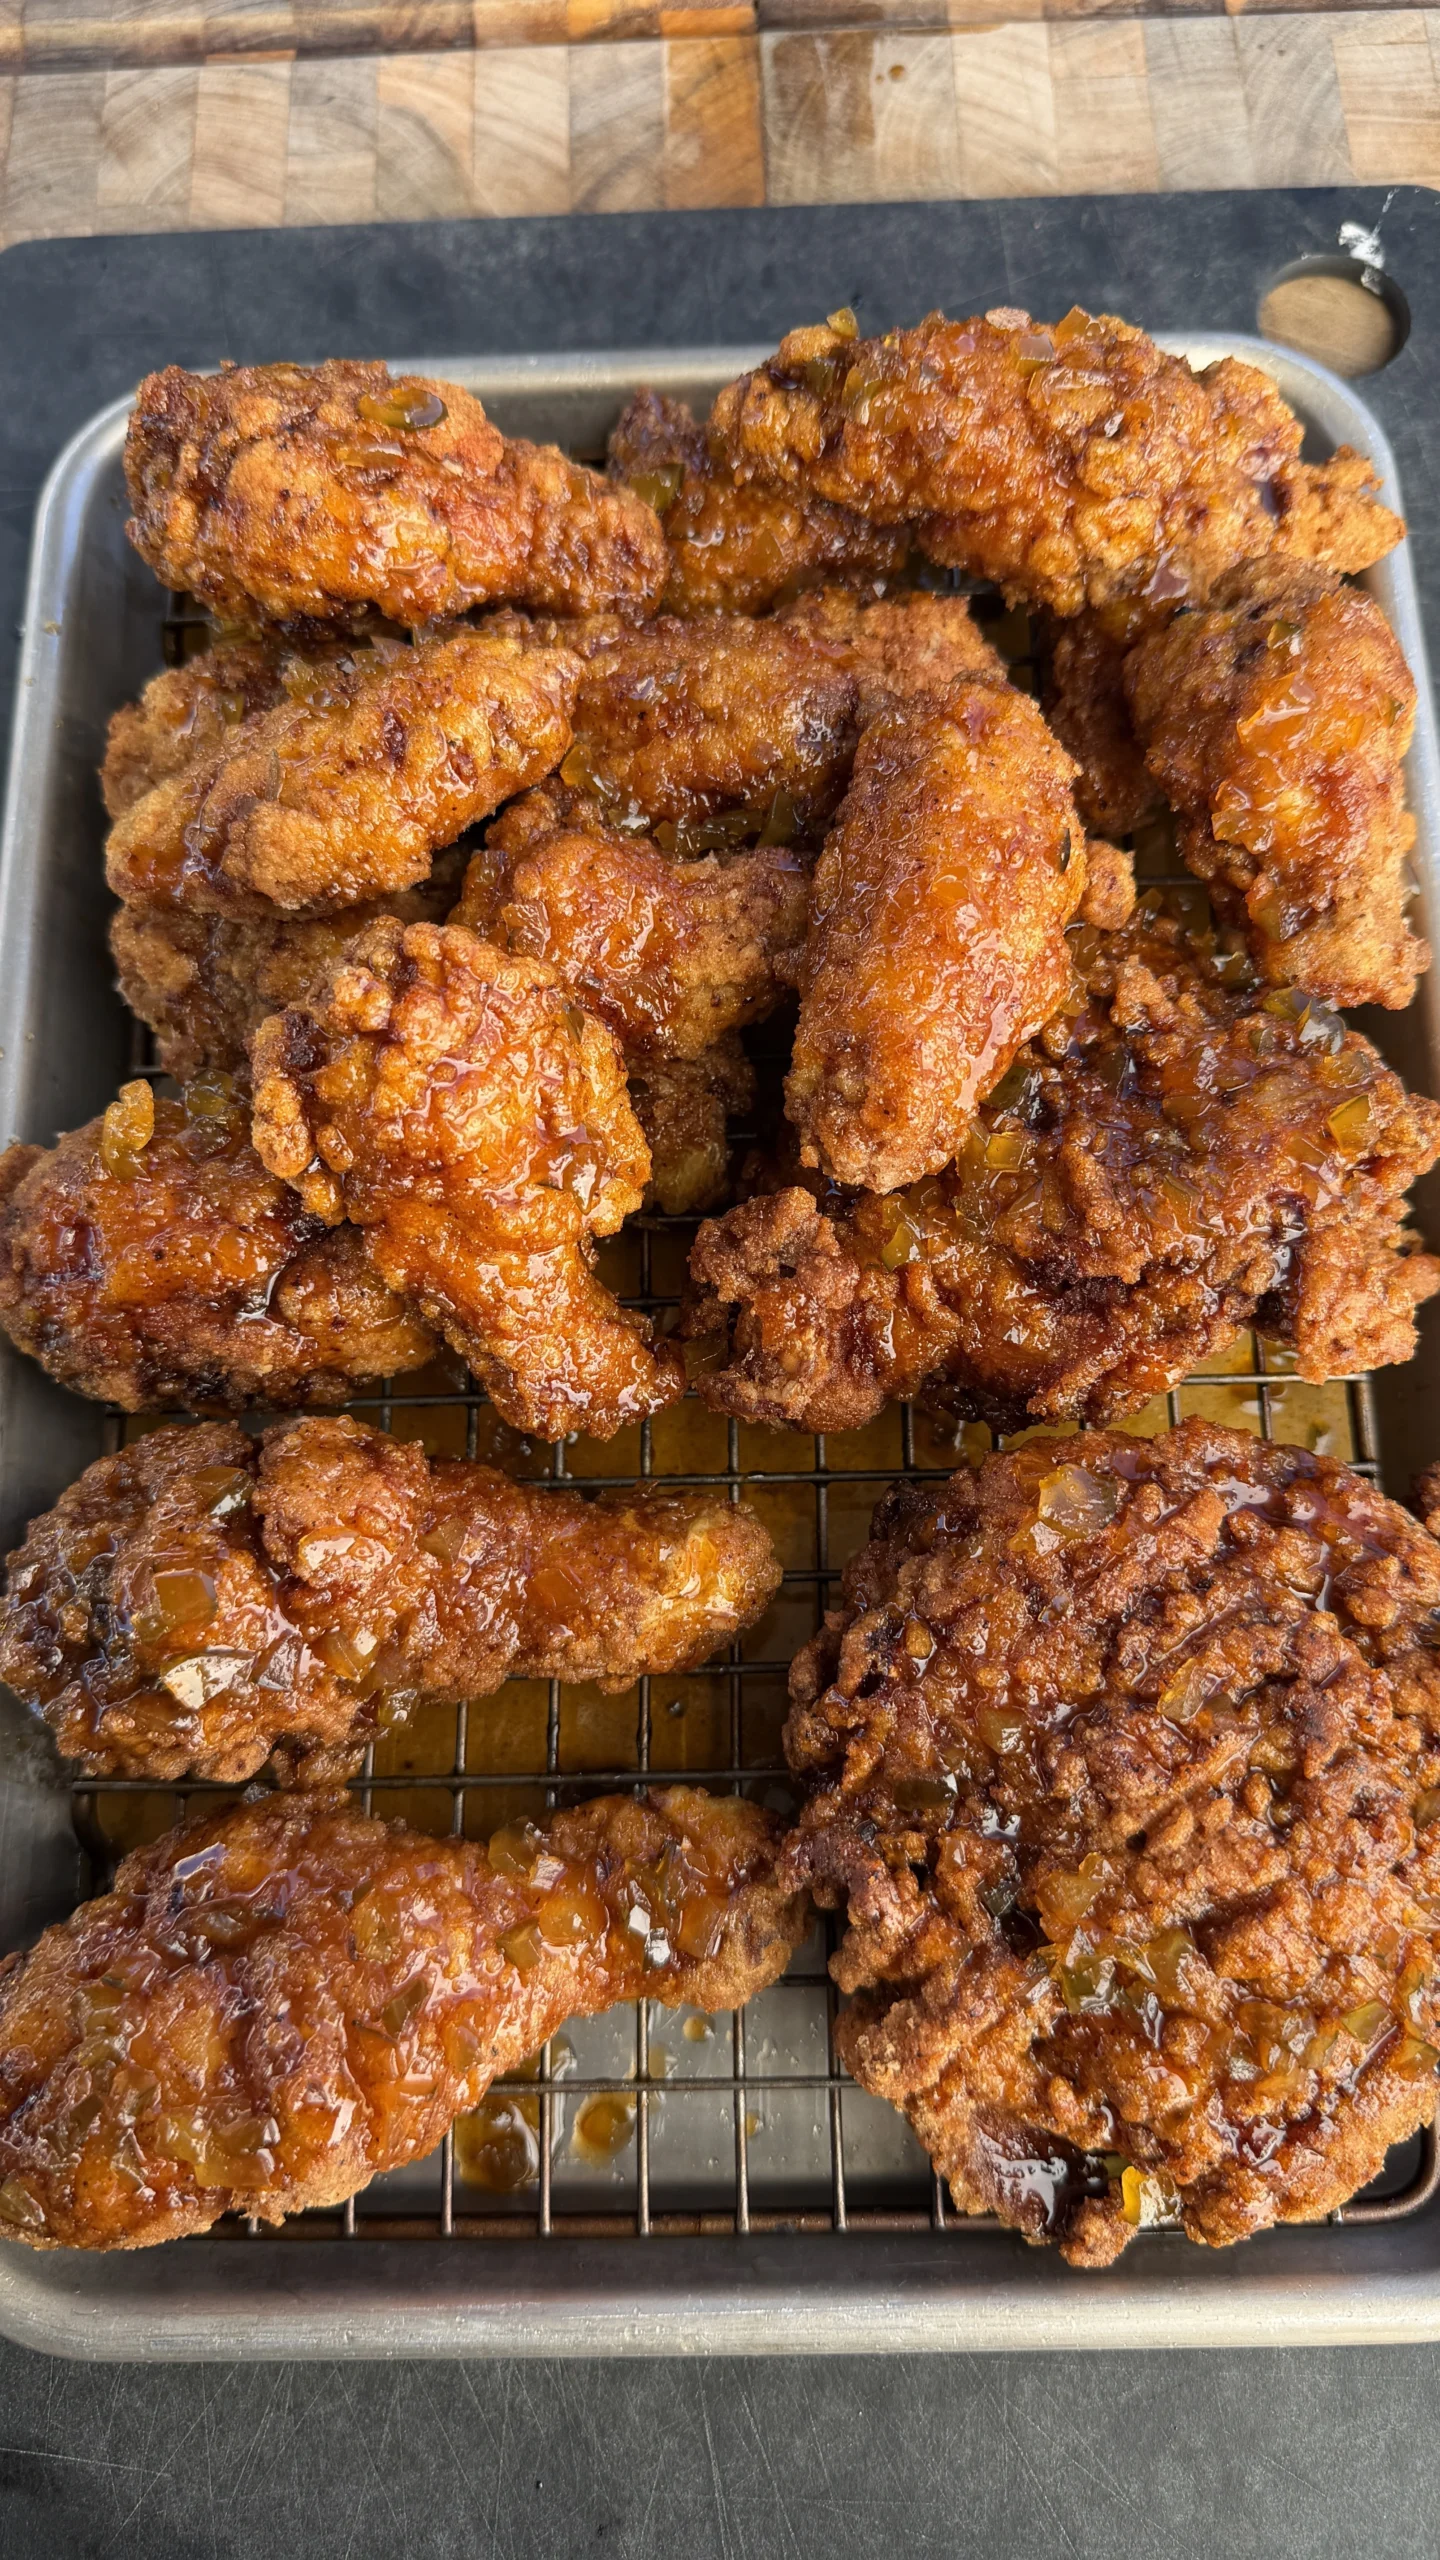
For maximum glaze coverage, place all the fried chicken pieces in a large bowl immediately after the last batch finishes frying. Pour the warm pickle sweet-heat glaze over the chicken. Using tongs, toss the chicken pieces to coat completely. Every surface should be glossy with visible glaze dripping. Work quickly while the chicken is still very hot since the coating is at maximum crispiness now.
The glaze will sizzle slightly when it hits the hot chicken, creating aromatic steam. Continue tossing until every piece is evenly coated. Some glaze will pool in the bottom of the bowl. Spoon this excess over the chicken to ensure complete coverage. The sweet heat glazed fried chicken should look sticky, glossy, and dramatic with obvious glaze coating.
Transfer the glazed chicken back to a wire rack for serving. The rack prevents the bottom from becoming soggy as excess glaze drips off. Some dripping is normal and creates the appealing sticky appearance. The chicken is best served immediately while the coating is still crispy despite the glaze. The coating will soften slightly but remains substantially crunchy for 15-20 minutes after glazing.
Alternatively, brush the glaze on using a silicone brush for lighter application that maintains crispier coating longer. This method is less dramatic visually but keeps the chicken crunchier. Or serve glaze on the side for dipping, allowing guests to control their own glaze amount. All three methods work; choose based on preference for visual drama versus maximum crispiness retention.
Sweet Heat Glazed Fried Chicken
Ingredients
Method
- Whisk buttermilk, eggs, and hot sauce in large bowl. Add chicken and marinate refrigerated for minimum 2 hours or overnight.
- Mix potato starch, salt, pepper, paprika, garlic powder, onion powder, and cayenne in shallow bowl.
- Remove chicken from marinade, letting excess drip. Coat heavily in starch mixture, pressing firmly to build thick coating. Place on wire rack.
- Rest coated chicken on rack for 10-15 minutes to set coating.
- Heat frying oil to 325-350°F. Fry chicken in batches of 3-4 pieces for 12-15 minutes until golden brown and internal temperature reaches 165°F. Transfer to wire rack.
- Make glaze by combining honey, hot sauce, pickle juice, brown sugar, and garlic powder in saucepan. Simmer 3-4 minutes until syrupy. Remove from heat, whisk in butter, then stir in chopped pickles.
- Toss fried chicken in warm glaze to coat completely, or brush glaze on for lighter application. Serve immediately.
Notes
Tried this recipe?
Let us know how it was!Frequently Asked Questions
Can I use regular flour instead of potato starch?
Regular all-purpose flour works but produces heavier, less crispy coating. The texture will be more like traditional Southern fried chicken rather than the ultra-crispy, glass-like coating potato starch creates. If you must use flour, add 1/4 cup cornstarch to 1.75 cups flour to improve crispiness. The cornstarch helps approximate potato starch’s lighter texture though it won’t be identical.
For closest results to this recipe, potato starch is worth seeking out. It’s available in most grocery stores in the baking or international foods aisle, often near Asian ingredients. The texture difference is dramatic enough to justify the small effort to find it. If you use flour, expect good fried chicken with different texture rather than the specific ultra-crispy coating this sweet heat glazed fried chicken recipe delivers.
How do I keep fried chicken crispy after glazing?
Glaze immediately before serving for crispiest results. The coating is at peak crispiness right after frying and gradually softens as it sits. Glazing while very hot gives you 15-20 minutes of good crispiness before moisture from glaze softens the coating significantly. Serve immediately for best texture experience with maximum contrast between crispy exterior and tender meat.
For longer crispiness, brush glaze on lightly instead of tossing. This applies less moisture to the coating, extending the crispy window to 30-40 minutes. Or serve glaze on the side for dipping, keeping the fried coating completely dry until the moment of eating. This method provides maximum crispiness but less dramatic presentation. Choose your approach based on whether visual appeal or texture longevity matters more for your situation.
Can I make this in an air fryer?
Air fryer works but produces different texture than deep frying. Spray coated chicken heavily with oil spray, then air fry at 375°F for 20-25 minutes, flipping halfway through. The coating will be crispy but not as glass-like as deep-fried version. Air frying doesn’t gelatinize potato starch quite the same way hot oil does. The chicken will be good but noticeably different from traditional fried texture.
The glaze works identically regardless of cooking method. Make it the same way and toss or brush the air-fried chicken. The sweet-heat-pickle flavor profile is just as delicious. Air frying reduces calories and fat significantly since you’re not submerging in oil. This makes it healthier option for regular consumption while deep frying is special occasion indulgence food.
What pickles should I use for the glaze?
Dill pickles are ideal for this glaze. Use the juice from standard dill pickle jars (Claussen, Vlasic, etc). The dill flavor and vinegar brine create the classic pickle taste that defines the glaze. Bread and butter pickles are too sweet and don’t have enough vinegar tang. Sweet pickle relish doesn’t work since you need actual pickle juice liquid, not the thickened relish.
For the chopped pickles stirred into the glaze at the end, use the same dill pickles you took the juice from. Chop them finely into small pieces about the size of rice grains. They should be visible but not so large they overpower bites. Kosher dill pickles or half-sour pickles also work excellently, providing slightly different flavor profiles but maintaining the essential pickle character.
Can I prep components ahead for easier cooking day?
Yes, the marinade and dry coating can be prepped ahead. Mix the buttermilk marinade and marinate chicken up to 24 hours before frying. Mix the dry coating ingredients up to 1 week ahead and store in an airtight container. The glaze can be made 2-3 days ahead and refrigerated, reheating gently before use.
However, you must fry the chicken fresh. Fried chicken doesn’t reheat well while maintaining crispy coating. The coating becomes soggy if refrigerated then reheated. For meal prep, you can marinate and have everything ready, then fry fresh when ready to eat. The actual frying takes 15 minutes per batch, making it doable for weeknight dinners if prep work is complete. Glaze also must be applied fresh for best texture.
Ready to Take Your Cooking to the Next Level?
This is where I keep all my most-used products, gear, and favorite cooking tools — check it out:
🔥 View My Cooking Gear & ToolsRecipe Categories
If you loved this recipe, you’ll find more to savor across our diverse categories. From beef to pork, chicken to turkey, seafood to appetizers, there’s a wealth of flavors waiting for you. Explore them all at CWFeats.