
Grilled Porterhouse Steak Recipe
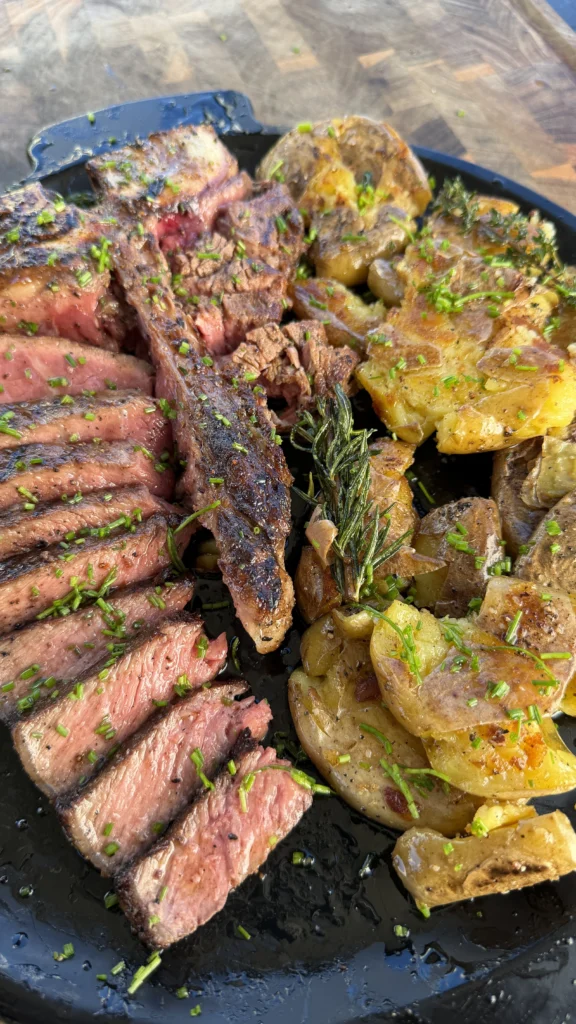
Porterhouse steak recipe uses two 1/2 inch thick porterhouse steaks seasoned with 2 teaspoons kosher salt, 1 teaspoon black pepper, and 1 teaspoon garlic powder per steak, rested at room temperature for 30 minutes, then grilled over high heat with flips every minute to build even crust until internal temperature reaches 120°F for medium-rare. Baste generously during the final 5 minutes with garlic herb butter made from 8 oz melted butter infused with smashed garlic, rosemary, and thyme using a homemade herb brush created by tying fresh herbs to a skewer. Rest for 5 minutes, slice, and serve with crispy smashed potatoes made by boiling 2 lbs petite gold potatoes until tender, cooling completely, smashing flat on a hot griddle, and crisping both sides while basting with the same garlic herb butter. Garnish everything with fresh chives. This grilled porterhouse steak delivers steakhouse quality at home with perfectly cooked beef that has both tender filet and flavorful strip in one cut, complemented by potatoes that are crispy outside and creamy inside.
The whole process takes about 1 hour total with 30 minutes of that being hands-off resting time for the steaks. Boil potatoes for 15-20 minutes, then let them cool while you make the garlic herb butter and season the steaks. The steaks rest at room temperature for 30 minutes which is essential for even cooking. Grill for 8-12 minutes depending on exact thickness and desired doneness, flipping every minute. Crisp the potatoes on the griddle for 10-15 minutes while the steaks rest. The frequent flipping technique ensures edge-to-edge even cooking without gray bands of overcooked meat. The herb butter ties everything together, providing rich flavor to both the beef and potatoes while the homemade herb brush adds aromatic dimension.
What Is the Difference Between Porterhouse and T-Bone Steak?
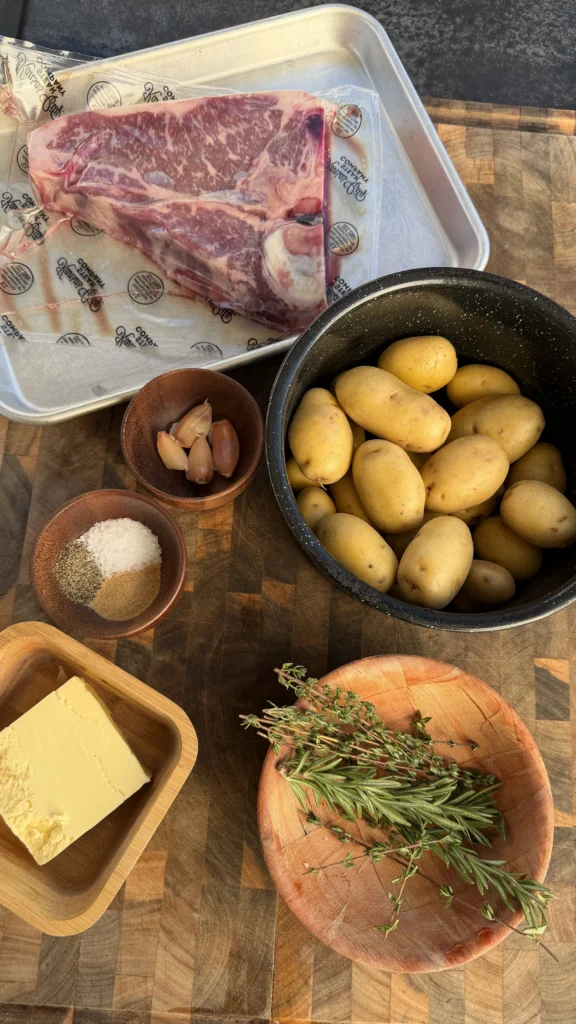
Porterhouse and T-bone are both cuts from the short loin that include a T-shaped bone separating two different muscles: the tenderloin (filet) on one side and the strip loin on the other. The key difference is the size of the tenderloin portion. A porterhouse must have a tenderloin section at least 1.25 inches wide at its widest point according to USDA standards. T-bone steaks have smaller tenderloin sections, usually less than 1 inch wide.
This size difference matters because you’re getting significantly more of the prized tenderloin in a porterhouse. The tenderloin is the most tender cut of beef, so a larger portion means more of that buttery, melt-in-your-mouth texture alongside the beefier, more flavorful strip. Porterhouses are cut from the rear of the short loin where the tenderloin is thicker, while T-bones come from further forward where the tenderloin tapers.
Porterhouses are essentially premium T-bones, which is why they cost more per pound. When you buy a porterhouse, you’re getting the best of both worlds in generous proportions: enough tenderloin to satisfy filet lovers and plenty of strip for those who prefer more robust beef flavor. For two people, one large porterhouse can be a complete meal when sliced and shared.
The cooking method for both cuts is identical since they have the same structure and bone. Both benefit from high-heat grilling and both should be cooked to medium-rare or medium to showcase the tenderloin’s tenderness. The bone acts as a heat conductor and adds flavor, though the meat closest to the bone may cook slightly slower than the edges.
Why Flip Steaks Every Minute Instead of Once?
Flipping steaks every minute creates more even cooking from edge to center compared to the traditional flip-once method. Each time you flip, heat penetration reverses direction. The side that was against the grill cools slightly while the other side heats. This constant alternation prevents one side from building up too much heat before the interior cooks, which is what creates thick gray bands of overcooked meat.
The frequent flipping also builds a better crust more evenly across both sides. With single flipping, one side gets significantly more heat exposure than the other, creating uneven browning. Multiple flips give both sides equal total time on the grill, resulting in uniform mahogany crust all over. The crust develops gradually with each exposure to high heat rather than trying to form all at once.
This technique is especially important for thinner steaks like the 1/2 inch porterhouses in this recipe. Thin steaks cook through quickly, so you need precise control to hit the target temperature without overshooting. Flipping every minute gives you 8-12 opportunities to check progress and pull at exactly 120°F. With one flip, you only get two chances and the window for perfect doneness is much narrower.
The method also reduces the risk of flare-ups burning your steak. When fat renders and drips onto hot coals or flames, moving the steak frequently prevents prolonged exposure to the resulting flames. The steak spends less continuous time over any one spot where a flare-up might occur. This creates cleaner browning without charred or bitter spots.
What Temperature Should Porterhouse Steak Reach?
Pull porterhouse steak from the grill at 120°F internal temperature for perfect medium-rare. During the 5-minute rest, carryover cooking will bring the final temperature to 125-130°F. At this temperature, the tenderloin side stays buttery and tender while the strip side remains juicy with a warm red center. Both muscles showcase their best qualities at medium-rare.
Use an instant-read thermometer inserted horizontally into the thickest part of the strip side, avoiding bone contact since bone conducts heat differently and gives false readings. The tenderloin typically runs a few degrees cooler than the strip, so checking the strip ensures both sides are properly cooked. When the strip hits 120°F, the tenderloin will be around 115-118°F, which rises to perfect medium-rare during rest.
For medium doneness, pull at 130°F for a final temperature of 135-140°F after resting. The steak will be mostly pink throughout with less intense red in the center. This is the maximum recommended doneness for porterhouse since the tenderloin becomes progressively drier and tougher above medium. The premium price you pay for porterhouse is wasted if you cook the tenderloin past medium.
Never cook porterhouse past 140°F pull temperature (145-150°F final). At this point, the tenderloin loses its signature tenderness and becomes just expensive, overcooked beef. If you prefer well-done steak, buy a different cut like ribeye or strip that has more marbling to maintain moisture at higher temperatures. Save porterhouse for those who appreciate proper medium-rare to medium doneness.
How Do You Make Smashed Potatoes Crispy?
The secret to crispy smashed potatoes is boiling them until completely tender, then cooling them completely before smashing and griddle-crisping. Fully cooked potatoes develop enough structure that they hold together when smashed flat. The complete cooling firms up the potato interiors, preventing them from turning to mush when you smash them. Potatoes that are undercooked or still warm will break apart into pieces instead of holding their shape.
Smash the cooled potatoes firmly but gently with the bottom of a glass or mason jar to create flat discs about 1/2 inch thick with irregular, craggy edges. These rough edges are crucial for crispiness since they create maximum surface area that contacts the hot griddle. Smooth surfaces won’t crisp as well. The goal is pressing them flat enough to create large flat areas for browning while maintaining enough thickness to stay creamy inside.
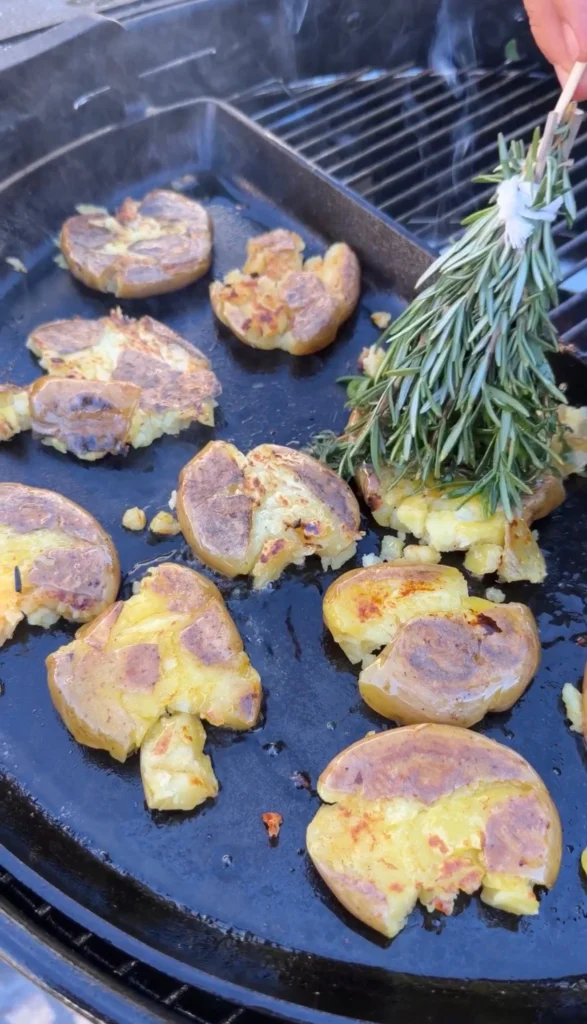
Cook on a preheated griddle or large cast-iron skillet over medium heat without moving them for at least 5 minutes per side. Resist the urge to flip early. The potatoes need uninterrupted contact with the hot surface to develop golden-brown crust. Too-high heat burns them before crisping; too-low heat steams them instead. Medium heat gives you time to develop crispness without burning.
Basting with garlic herb butter during cooking adds richness while promoting browning. The butter’s milk solids caramelize against the hot griddle, creating additional color and flavor. The butter also helps conduct heat to the potato surface, speeding up crisping. Baste 2-3 times during cooking, letting the butter sizzle before flipping to crisp the other side.
Porterhouse Steak Recipe
Garlic herb butter and crispy smashed potatoes
Ingredients
Porterhouse Steaks
- 2 porterhouse steaks (about 1/2 inch thick)
- 2 teaspoons kosher salt per steak
- 1 teaspoon black pepper per steak
- 1 teaspoon garlic powder per steak
Garlic Herb Butter
- 8 oz unsalted butter
- 6 garlic cloves, smashed
- 2 sprigs fresh rosemary
- 2 sprigs fresh thyme
Smashed Potatoes
- 2 lbs petite gold potatoes
- Salt for boiling
- Fresh chives, finely chopped
Create an herb basting brush by tying fresh rosemary and thyme sprigs onto a skewer. This brush allows you to baste the steaks and potatoes with garlic herb butter while simultaneously adding fresh herb aromatics directly to the meat. The herbs release essential oils when they contact the hot butter and steak, creating layers of flavor you can’t get from butter alone.
Step-by-Step Instructions
Step 1: Boil the Potatoes
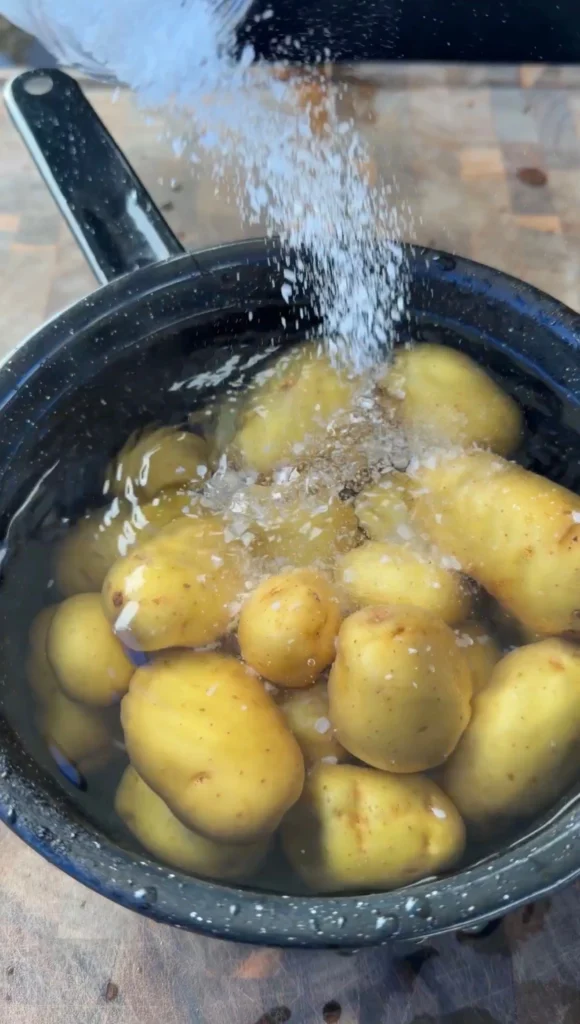
Place 2 lbs of petite gold potatoes in a large pot. Add enough cold water to cover them by about 2 inches. Add 1-2 tablespoons of salt to the water – it should taste like seawater. Salting the boiling water seasons the potatoes from the inside out as they cook. This is your only chance to season the interior since you can’t salt them after cooking.
Bring the water to a boil over high heat, then reduce to a simmer. Cook for 15-20 minutes depending on potato size. Start checking at 15 minutes by piercing a potato with a fork. The fork should slide in and out easily with no resistance when they’re done. The potatoes need to be completely tender all the way through, not just soft on the outside.
Drain the potatoes in a colander and spread them in a single layer on a baking sheet or large plate. Don’t pile them on top of each other or they’ll steam and stay moist. Let them cool completely at room temperature. This takes 20-30 minutes. Completely cool potatoes are essential for the smashing technique to work. If they’re still warm, they’ll fall apart instead of holding together.
While the potatoes cool, use this time to make the garlic herb butter and season your steaks. The timing works out perfectly so everything is ready to cook when the steaks have finished their room temperature rest.
Step 2: Make the Garlic Herb Butter
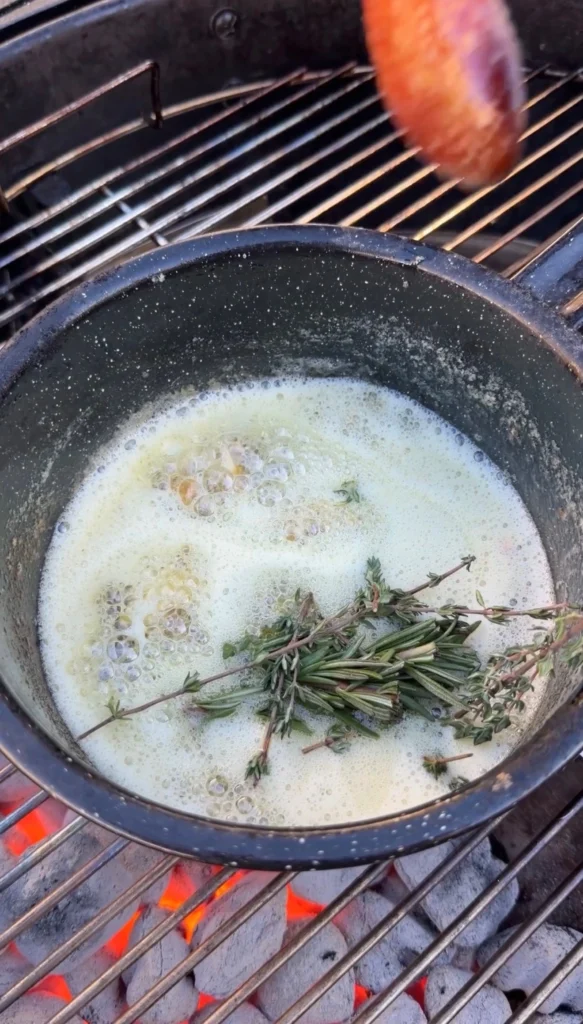
In a small saucepan over medium heat, add 8 oz (2 sticks) of unsalted butter. Let it melt completely, then continue heating until it begins to bubble gently. Add 6 smashed garlic cloves to the melted butter. Smash them first with the flat side of a knife to break them open and release the oils. Don’t mince them – you want large pieces that infuse flavor but can be strained out later if desired.
Cook the garlic in the butter for 2-3 minutes, stirring occasionally, until the garlic becomes fragrant and just starts to turn golden at the edges. Don’t let it brown too much or it will taste bitter. The garlic should smell sweet and aromatic. Add 2 sprigs of fresh rosemary and 2 sprigs of fresh thyme to the butter. Let them cook for about 1 minute, just long enough to release their essential oils into the butter.
Remove the pan from heat and set aside. The herbs and garlic will continue infusing the butter as it sits. The butter should smell intensely aromatic with garlic, rosemary, and thyme. This is your basting butter for both steaks and potatoes. Keep it warm but not over direct heat – it should stay liquid but not cook further.
Make your herb basting brush by gathering 2-3 additional sprigs each of fresh rosemary and thyme. Line up the stem ends and tie them tightly to a long metal skewer or wooden spoon handle using kitchen twine. Wrap the twine several times and knot securely. The herbs should form a brush-like bundle that won’t fall apart during use.
Step 3: Season the Steaks
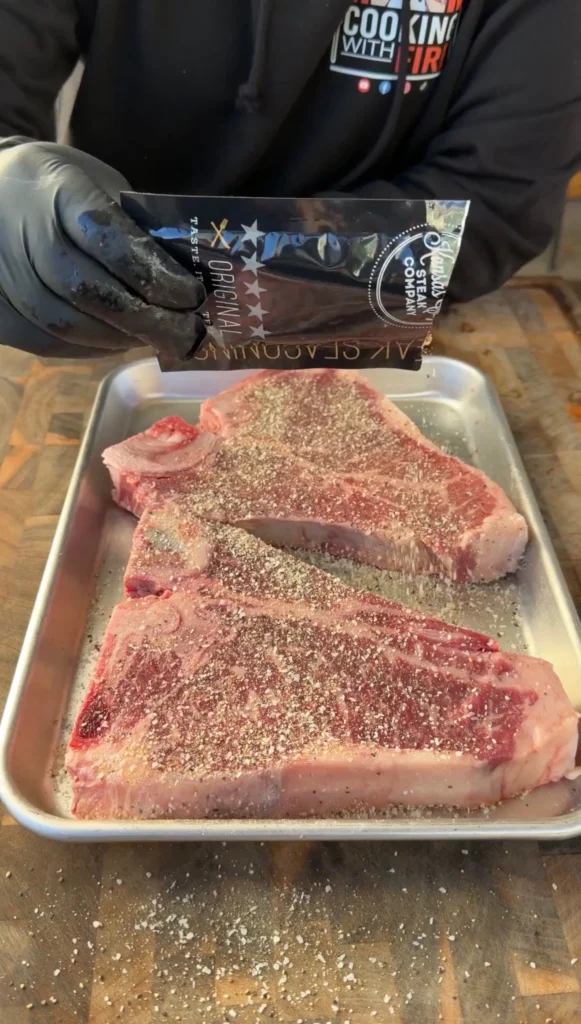
Remove the 2 porterhouse steaks from refrigeration and pat them completely dry with paper towels on both sides. Moisture prevents proper searing and creates steam instead of crust. The steaks should feel dry to the touch. Place them on a large plate or cutting board for seasoning.
Season each steak on both sides with exactly 2 teaspoons kosher salt, 1 teaspoon black pepper, and 1 teaspoon garlic powder per steak. This seems like a lot of seasoning, but porterhouse steaks are thick cuts that need generous seasoning. Press the seasonings into the meat with your hands to help them adhere. The seasoning should be visible as a coating across the entire surface.
Let the seasoned steaks sit at room temperature for 30 minutes. This rest period serves two purposes: it allows the seasoning to penetrate the surface, and it brings the internal temperature closer to room temperature for more even cooking. Cold steaks straight from the fridge cook unevenly with cold centers when the exterior reaches proper doneness.
Don’t skip or shorten this room temperature rest. The 30 minutes gives you time to finish other prep work and is essential for even cooking. Steaks that start at room temperature cook through more evenly with less temperature gradient from edge to center.
Step 4: Crisp the Smashed Potatoes
Heat a large griddle or cast-iron skillet over medium heat. You want the surface hot but not smoking – around 350-375°F. Test by sprinkling a few drops of water on the surface. They should sizzle and evaporate within a few seconds. Don’t add oil or butter yet – you’ll crisp the potatoes first, then baste with butter.
Place the completely cooled boiled potatoes on the hot griddle, spacing them about 2 inches apart. Using the bottom of a sturdy glass, mason jar, or burger press, firmly press down on each potato to smash it flat. Apply steady, even pressure until the potato is about 1/2 inch thick. The potato should flatten into a disc with craggy, irregular edges. Don’t worry if some edges crack or break off – those bits will get extra crispy.
Let the smashed potatoes cook undisturbed for 5-7 minutes. Don’t move them or flip them early. You’re developing a golden-brown crust on the bottom. The potatoes should smell toasty and you might see steam escaping, which is good. When you peek under one with a spatula, the bottom should be golden brown and crispy.
Flip each potato carefully with a spatula. The crispy bottom should release easily from the griddle. If it sticks, give it another minute. Cook the second side for another 5-7 minutes until equally golden and crispy. During the last few minutes of cooking, use the herb brush to baste the potatoes generously with garlic herb butter. The butter will sizzle and add richness while promoting additional browning.
Step 5: Grill the Porterhouse Steaks
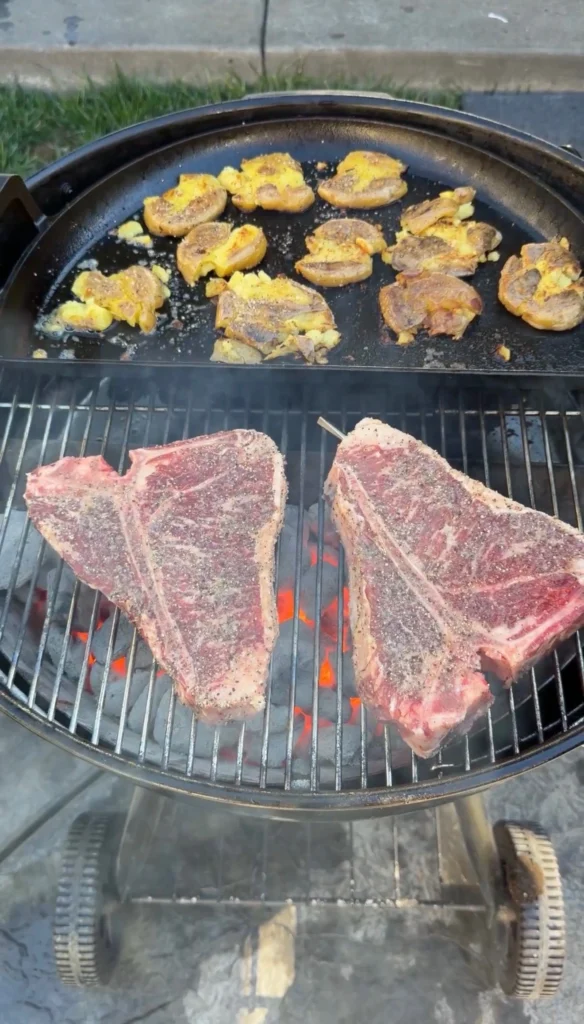
Preheat your grill to high heat, around 450-500°F. For gas grills, turn all burners to high and let it preheat for 10-15 minutes with the lid closed. For charcoal, you want hot coals with no black spots remaining. Hold your hand 6 inches above the grate – you should only be able to keep it there for 2-3 seconds. That’s high heat.
Place both seasoned porterhouse steaks on the hottest part of the grill. They should sizzle loudly on contact. Close the lid and set a timer for 1 minute. After 1 minute, open the lid and flip both steaks. Close the lid again and cook for another minute. Continue this pattern of flipping every minute.
After 4-5 flips (about 5 minutes total cooking time), start checking internal temperature with an instant-read thermometer. Insert it horizontally into the thickest part of the strip side, avoiding bone contact. You’re looking for 115-118°F to start. The temperature will rise quickly in the final minutes, so check after every flip once you’re close.
When the thermometer reads around 115°F, begin basting the steaks generously with the garlic herb butter using your homemade herb brush. Brush both sides each time you flip. The fresh herbs will sizzle against the hot steak, releasing aromatics. Continue flipping every minute and basting until the internal temperature reaches exactly 120°F. This usually takes 8-12 minutes total depending on exact thickness.
Step 6: Rest and Serve
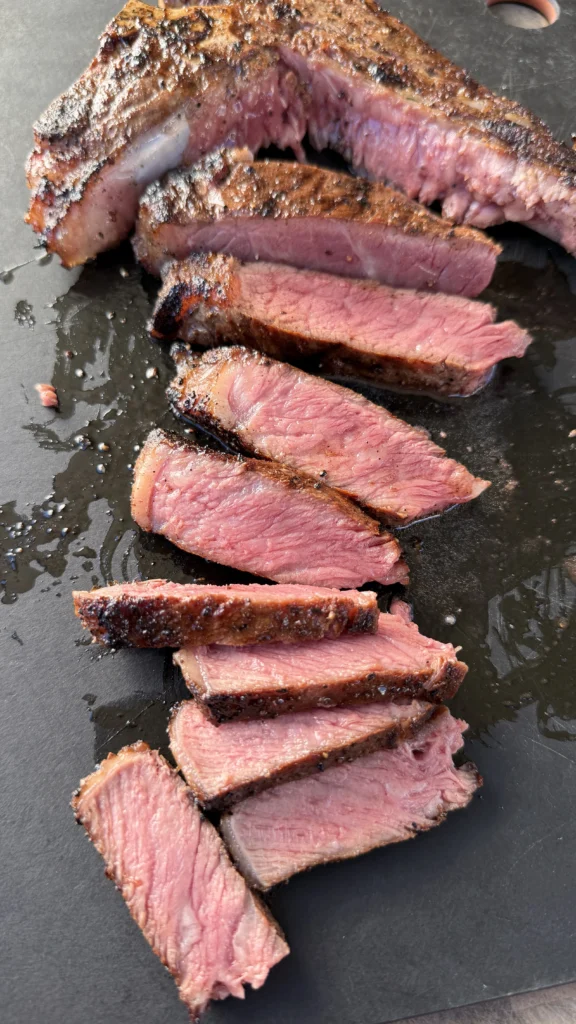
When the steaks hit 120°F internal temperature, immediately remove them from the grill to a cutting board or large plate. The temperature will continue rising during rest. Tent loosely with aluminum foil and let rest for 5 minutes. Don’t skip this rest – the juices need time to redistribute or they’ll run out onto the cutting board when you slice.
While the steaks rest, finish the smashed potatoes if they’re not done yet. They should be crispy and golden on both sides with creamy interiors. Transfer them to a serving platter and sprinkle generously with finely chopped fresh chives. The bright green chives add color and mild onion flavor.
After 5 minutes, slice the rested porterhouse steaks. First, cut along both sides of the T-bone to remove it, separating the tenderloin and strip sections. Slice each section against the grain into strips about 1/2 inch thick. Slicing against the grain is critical for tenderness – you want to cut perpendicular to the muscle fibers, not parallel to them.
Arrange the sliced steak on a serving platter. Spoon warm garlic herb butter generously over the top. The butter pools around the slices, creating a rich sauce for dipping. Garnish with additional chopped fresh chives. Serve immediately alongside the crispy smashed potatoes while everything is hot.
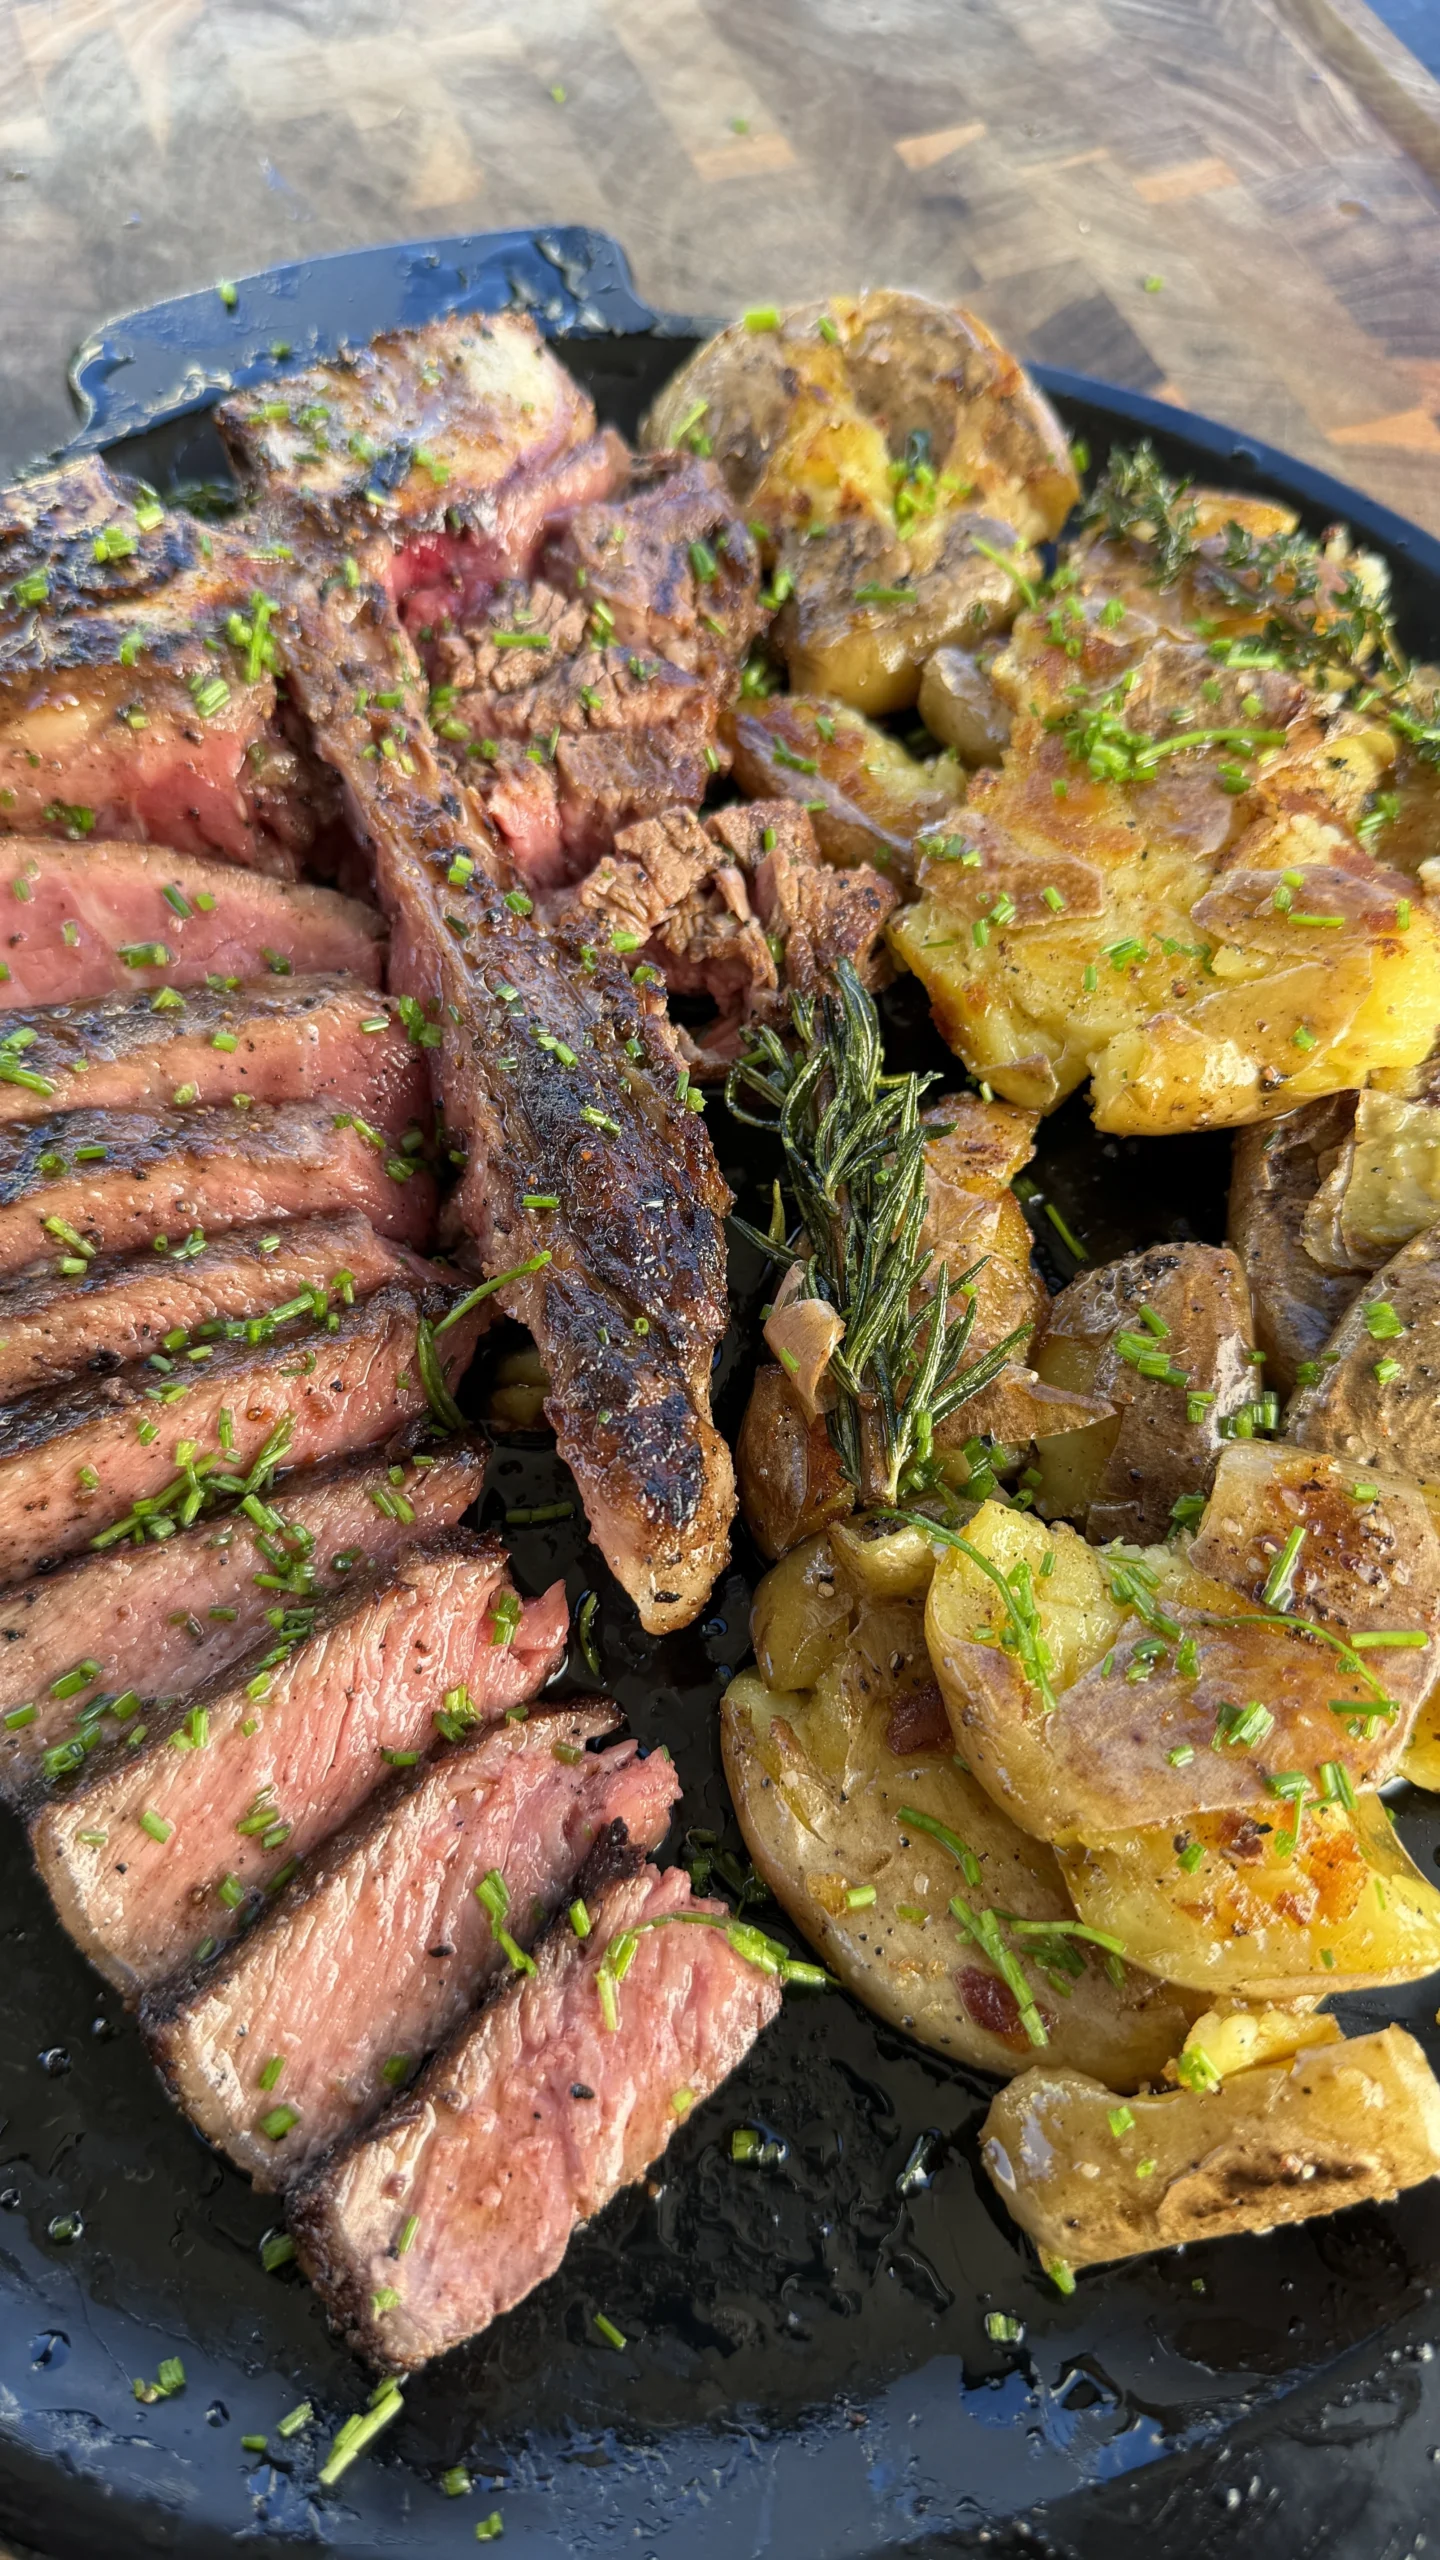
Grilled Porterhouse Steak with Garlic Herb Butter and Smashed Potatoes
Ingredients
Method
- Place potatoes in salted water, bring to boil, and cook 15-20 minutes until fork-tender. Drain and spread in single layer to cool completely.
- Melt butter over medium heat. Add smashed garlic and cook 2-3 minutes until fragrant. Add rosemary and thyme, cook 1 minute, then remove from heat. Tie additional herbs to a skewer to create basting brush.
- Pat steaks dry and season each with 2 tsp salt, 1 tsp pepper, and 1 tsp garlic powder per side. Rest at room temperature 30 minutes.
- Heat griddle over medium heat. Place cooled potatoes and smash flat with glass bottom. Cook 5-7 minutes per side until golden and crispy, basting with garlic herb butter in final minutes. Finish with chives.
- Preheat grill to high heat (450-500°F). Grill steaks, flipping every minute for even cooking. At 115°F internal temp, begin basting generously with herb butter using herb brush. Continue flipping and basting until internal temp reaches 120°F, about 8-12 minutes total.
- Rest steaks 5 minutes. Slice by removing bone, then cutting each section against the grain. Spoon warm garlic herb butter over sliced steak and garnish with chives. Serve immediately with smashed potatoes.
Notes
Tried this recipe?
Let us know how it was!Frequently Asked Questions
Can I use regular russet potatoes instead of petite gold potatoes?
Russet potatoes work but create different texture results. Russets are starchier and fluffier inside, which some people prefer. However, they’re more likely to fall apart when smashed since they’re less waxy than gold potatoes. If using russets, be extra careful when smashing and expect them to be more fragile. Gold or Yukon gold potatoes hold together better and create creamier interiors.
Cut larger russets into 2-inch pieces before boiling so they cook in the same time as whole petite potatoes. The technique remains identical otherwise. The crispy exterior and fluffy interior of smashed russets is delicious, just more delicate to handle.
How thick should porterhouse steaks be for this recipe?
The 1/2 inch thickness specified works perfectly for the every-minute flipping technique and the 8-12 minute cooking time. Thicker steaks (1-1.5 inches) need longer cooking times and different technique. For steaks thicker than 3/4 inch, consider reverse searing: cook on indirect heat first to bring internal temp up slowly, then finish with high-heat sear.
Thinner steaks (under 1/2 inch) cook too fast for accurate temperature control and are harder to pull at exactly 120°F. The cooking window is only a few minutes total, making it easy to overshoot. Stick close to 1/2 inch thickness for best results with this specific technique.
Can I make the garlic herb butter ahead of time?
Yes, make the garlic herb butter up to 3 days ahead and refrigerate in an airtight container. Reheat gently over low heat or in the microwave in short bursts until melted before using. The flavors actually improve after sitting since the garlic and herbs have more time to infuse.
Don’t make the herb brush more than a few hours ahead since fresh herbs wilt. Make it right before cooking for best aromatics. You can prep the butter and herbs separately, then assemble the brush and warm the butter when ready to cook.
What if I don’t have a meat thermometer?
A meat thermometer is essential for cooking steaks to precise doneness, especially thin ones that cook quickly. Without one, you’re guessing and will likely overcook or undercook. Instant-read thermometers cost $10-20 and are worth the investment for consistently perfect steaks.
If you absolutely can’t get a thermometer, use the touch test as backup. Medium-rare steak feels like the fleshy part of your palm below your thumb when you touch your thumb and middle finger together. It has resistance but still gives under pressure. This method is much less reliable than a thermometer.
Can I cook the steaks in a cast-iron pan instead of grilling?
Yes, use a large cast-iron skillet over high heat for stovetop cooking. Preheat the pan for 5 minutes until very hot. Cook the steaks using the same every-minute flipping technique. The total time may be 1-2 minutes shorter since cast iron retains heat more efficiently than grill grates. Use high-heat oil (avocado or vegetable) to prevent sticking.
You won’t get grill marks or smoky flavor, but the crust will be excellent and the every-minute flipping creates even cooking. Open windows or turn on ventilation since searing steaks indoors creates a lot of smoke. The herb butter basting works identically on the stovetop.
Ready to Take Your Cooking to the Next Level?
This is where I keep all my most-used products, gear, and favorite cooking tools — check it out:
🔥 View My Cooking Gear & ToolsRecipe Categories
If you loved this recipe, you’ll find more to savor across our diverse categories. From beef to pork, chicken to turkey, seafood to appetizers, there’s a wealth of flavors waiting for you. Explore them all at CWFeats.